Installing the System Power Supply
To install the System Power Supply, follow these steps:
1.Remove the existing 7350 components that need to be replaced. For more information, refer to Removing 7350 Components.
2.Attach the System Power Supply to the Power Supply mount and then secure with a locking screw.
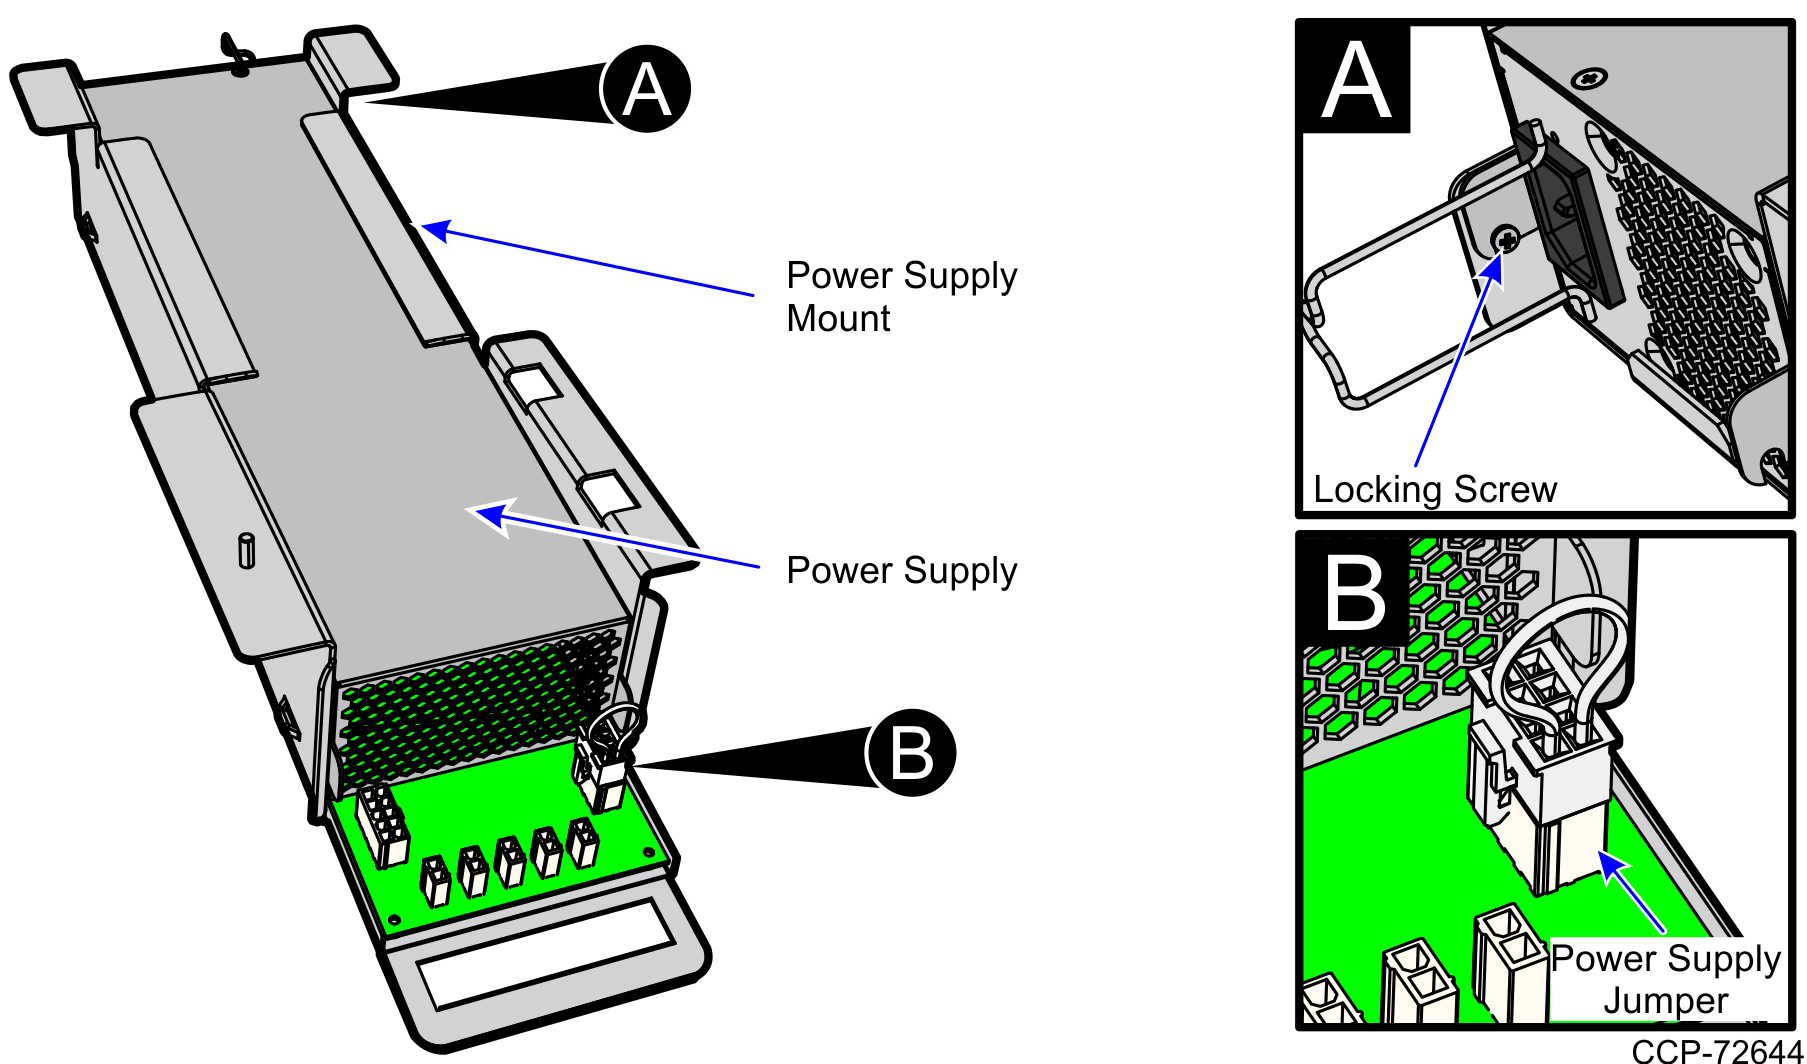
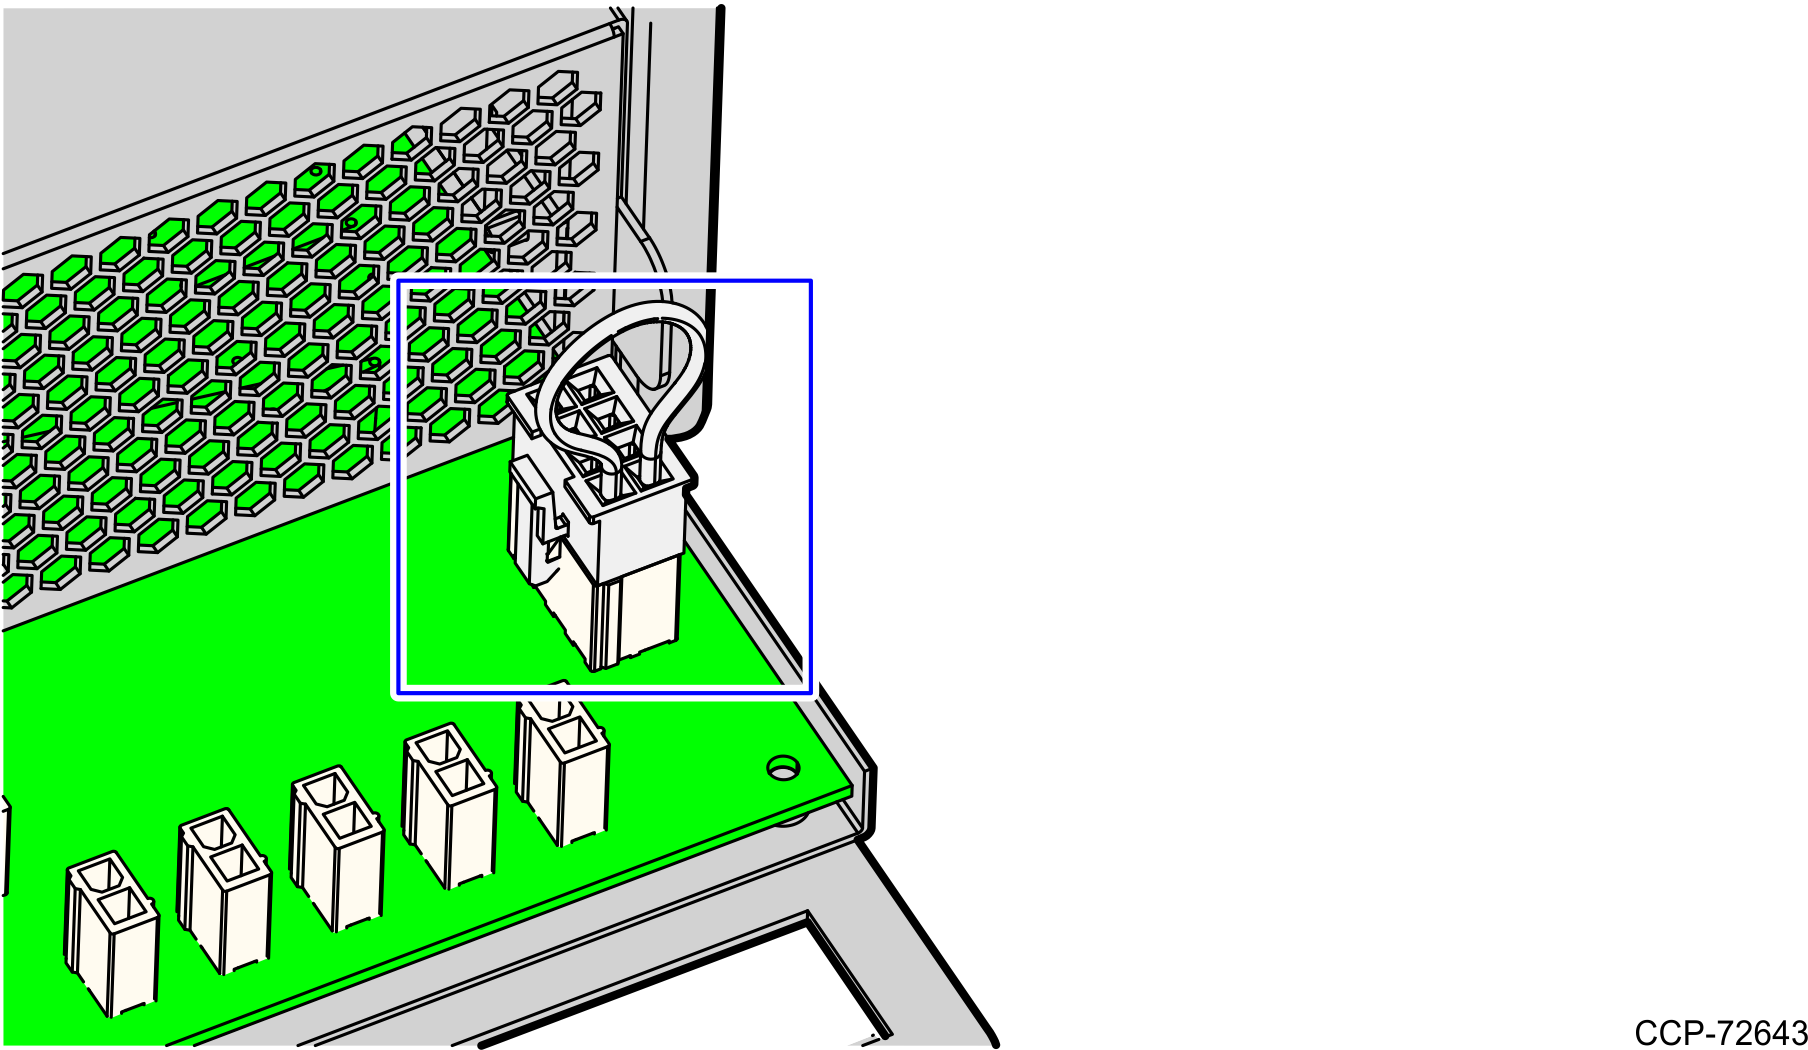
3.Connect the Jumper to the System Power Supply.
Note: When replacing the Power Supply, the Jumper can be removed and transferred to the new Power Supply.
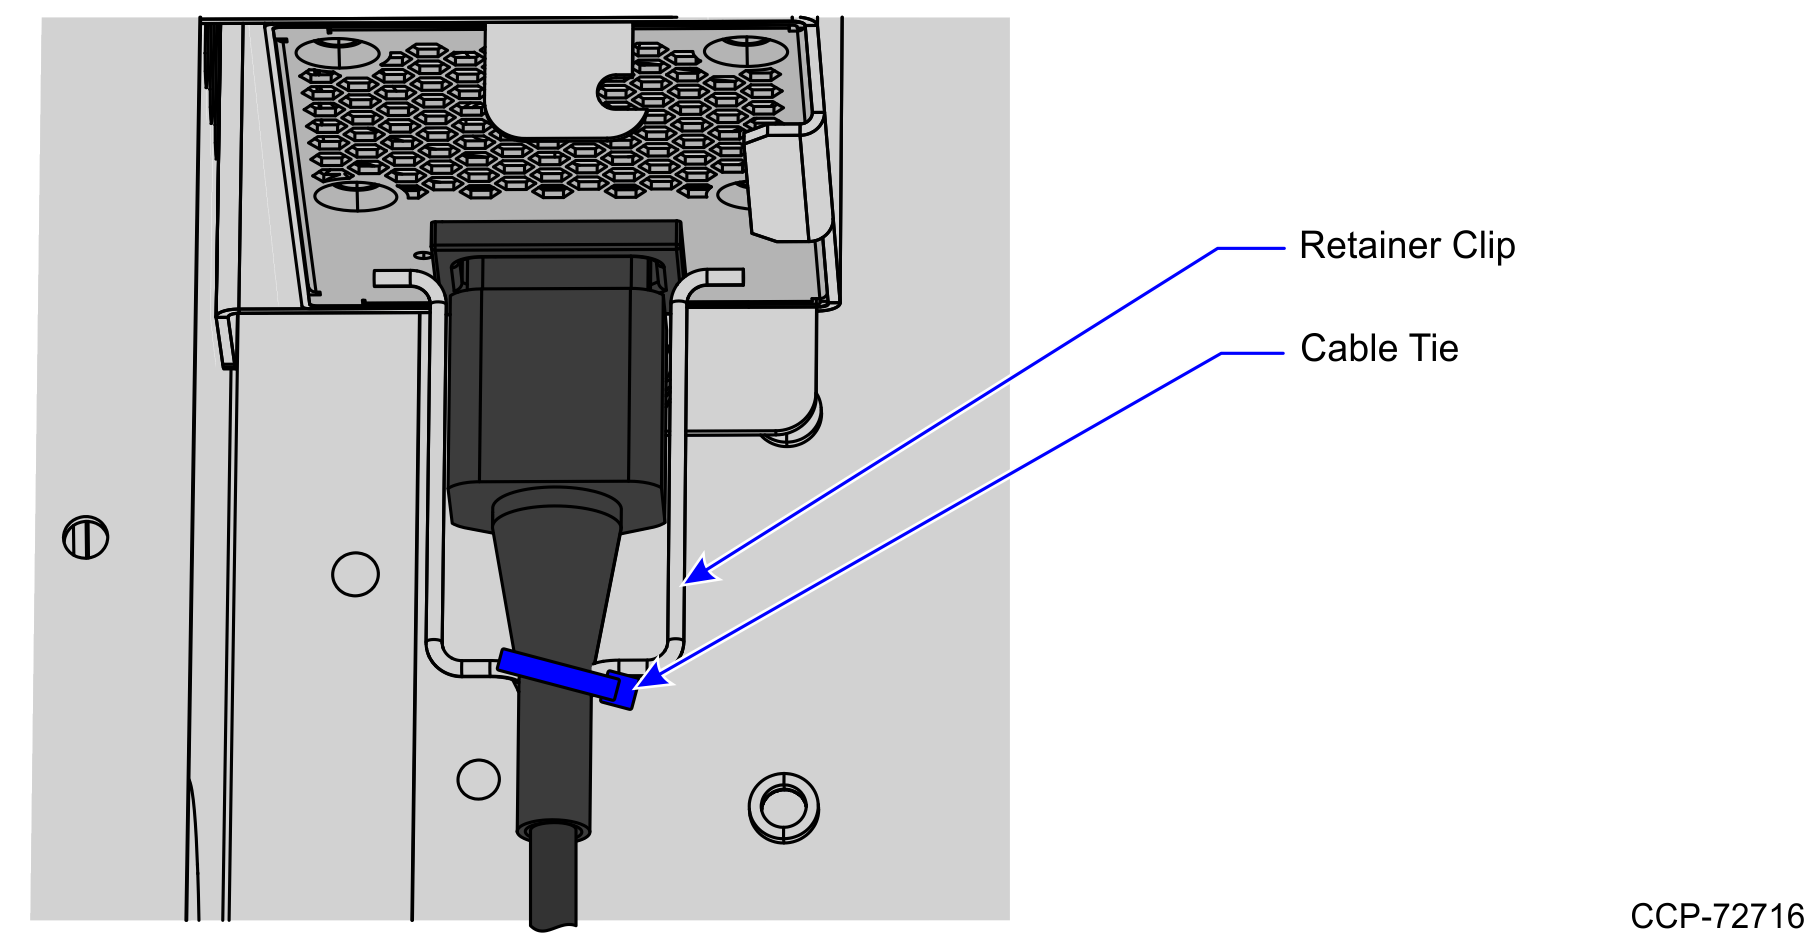
4.At the back of the System Power Supply, connect the power cable. Ensure the cable is secured to the Retainer Clip.
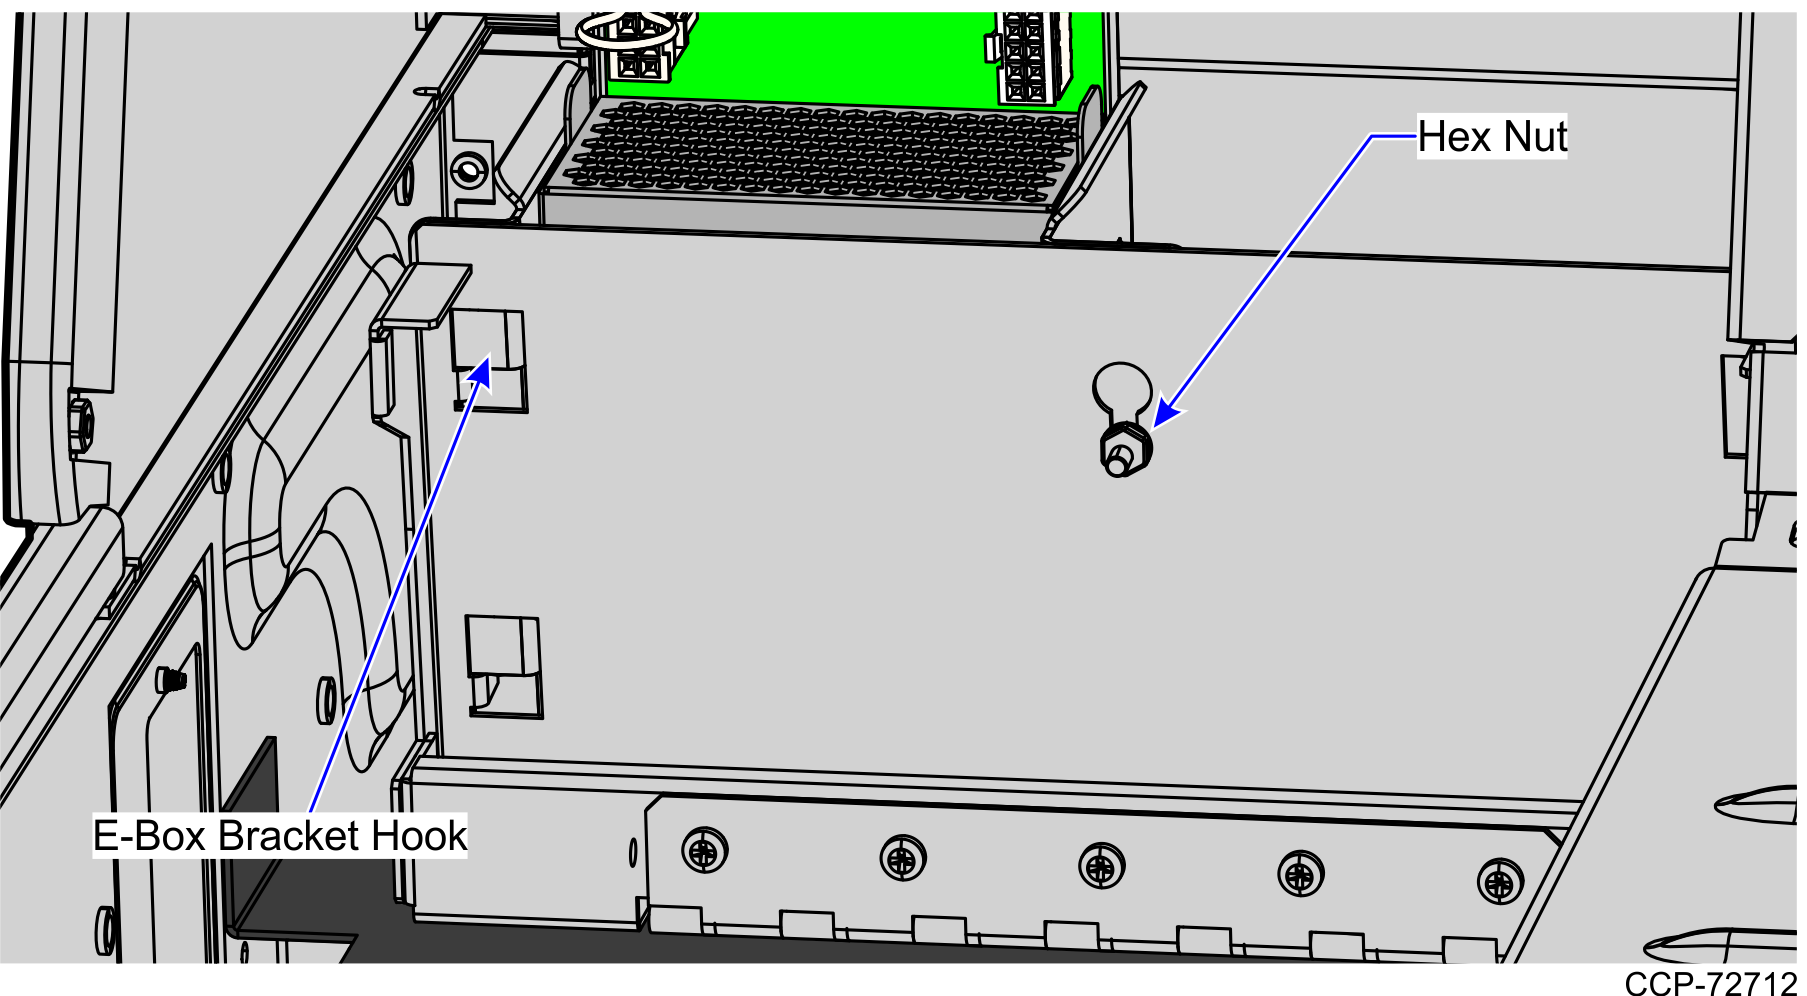
5.Slide the System Power Supply on the E-Box bracket and then secure with one nut.
Note: The System Power Supply chassis has hooks on the bottom that are used to hinge the device to the cabinet.
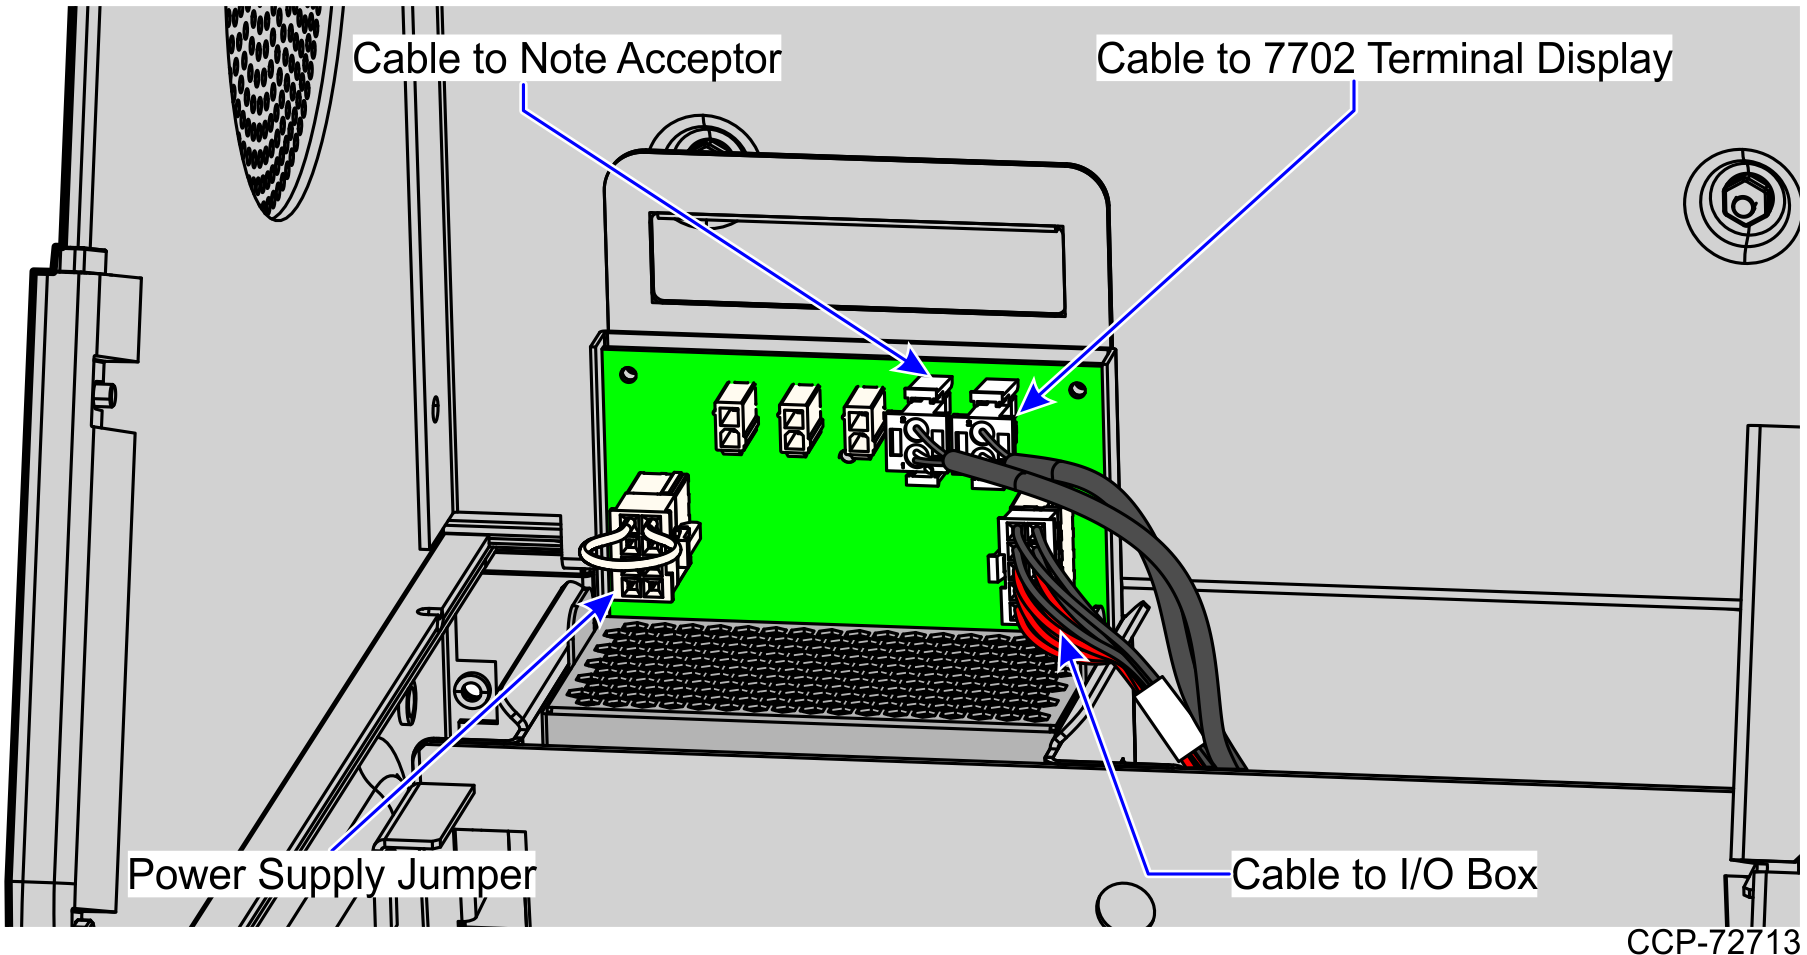
6.Connect the cables to the System Power Supply as shown below.
Note: For units with a Note Dispense/Note Accept/Coin Recycle configuration, the Note Acceptor power cable is connected to the System Power Supply, as shown in the image below.
7.Do any of the following:
•Install other R6 Lite components. For more information, refer to Installing R6 Lite Components.
•Route the System Power Supply cables. For more information, refer to Routing System Power Supply Cables.
Note: For more information about routing cables, refer to the SCO Release 6 Lite Cable Routing Instructions (497-0519586).