Replacing a Core Unit and Presenter
Installing F53 Note Dispenser
If the Note (Bill) Dispenser is a three cassette unit, the existing Core Unit and Presenter will need to be removed from the Add-on Pick Module. The Add-on Pick Module will then need to be attached to the new Core Unit and Presenter.
To install the F53 Note Dispenser (Fujitsu), follow these steps:
Note: Ensure that the Core Unit and Presenter and the Add-on Pick Module are assembled before proceeding with this procedure. For more information on installing the Core Unit and Presentor to the Add-on Pick Module, refer to Replacing the Add-On Pick Module.
1.If unit is a “three-high” unit, remove the Add-on Pick Module and install it on the new Core Unit with Presenter. See section “Replacing the Add-on Pick Module” for instructions.
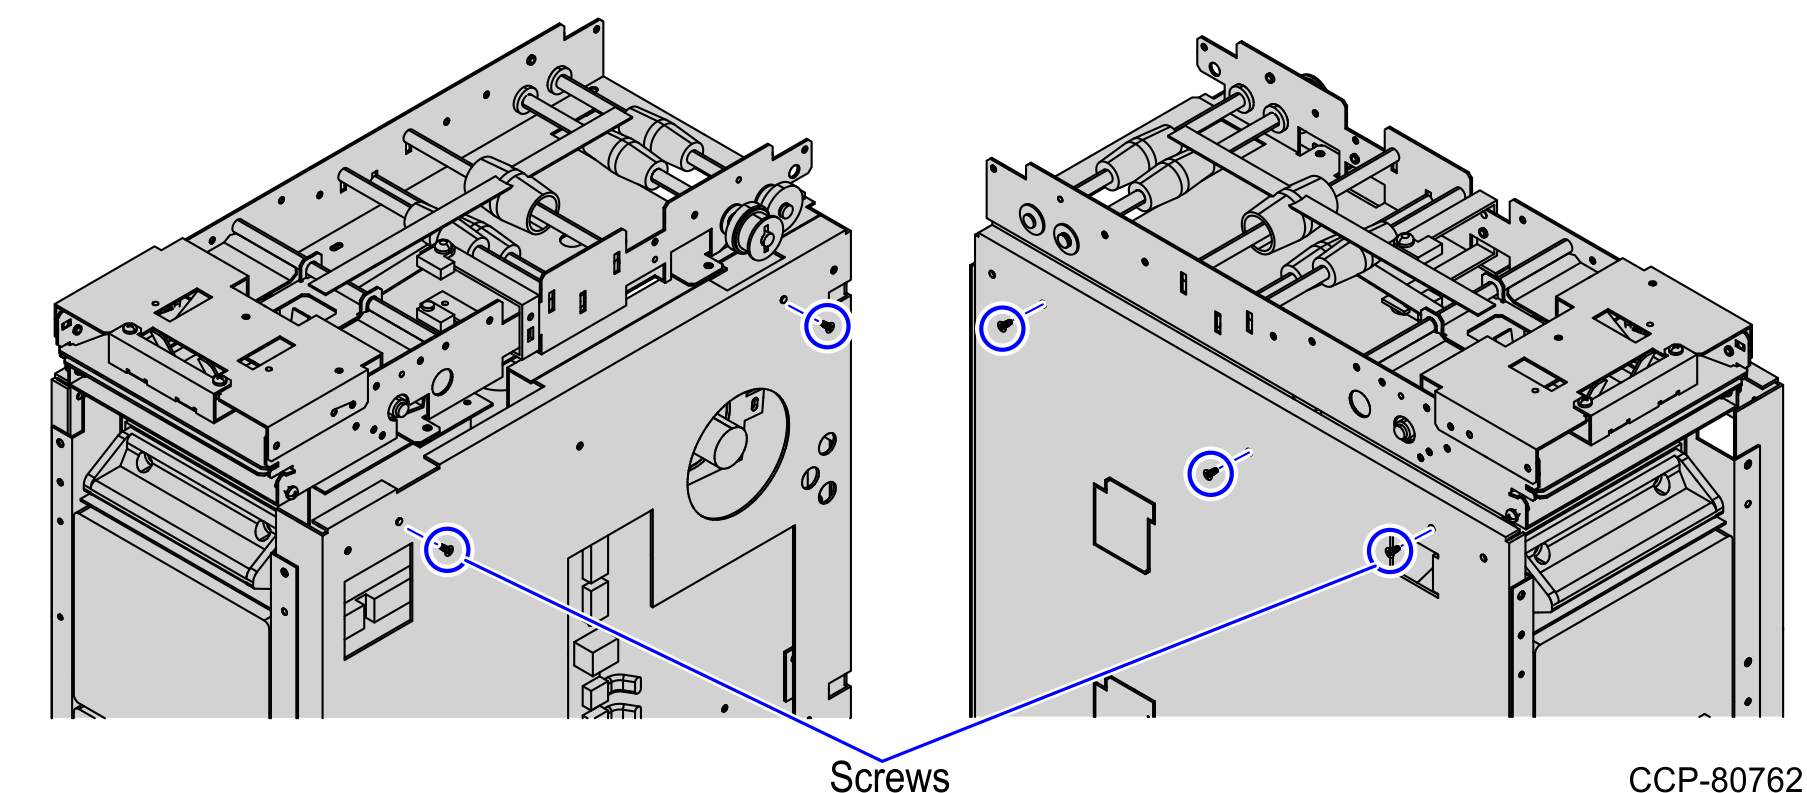
2.Insert the five (5) screws that were set aside into the sides of the F53 Note Dispenser (Fujitsu), as shown in the image below.
3.Align and mount the screws on the F53 Note Dispenser (Fujitsu) to the slots of the mounting bracket.
4. Pull the F53 Note Dispenser (Fujitsu) forward to engage the screws to the mounting bracket.
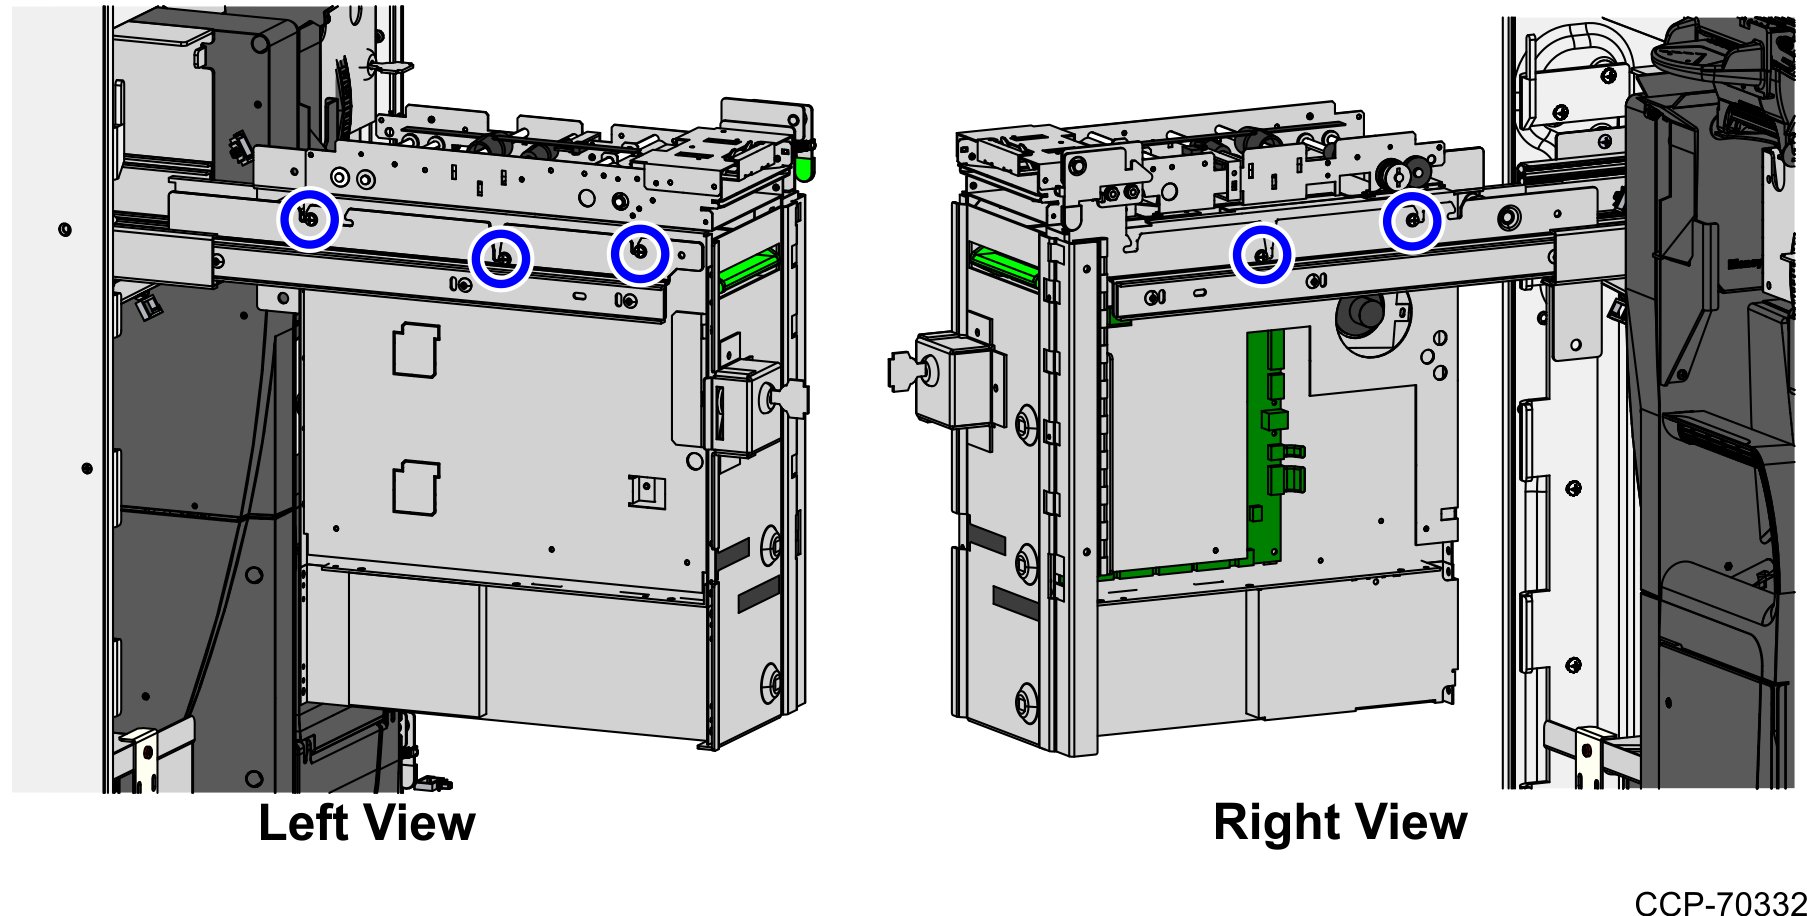
5.Tighten all screws (three [3] on one side and two [2] on other) to secure the F53 Note Dispenser.
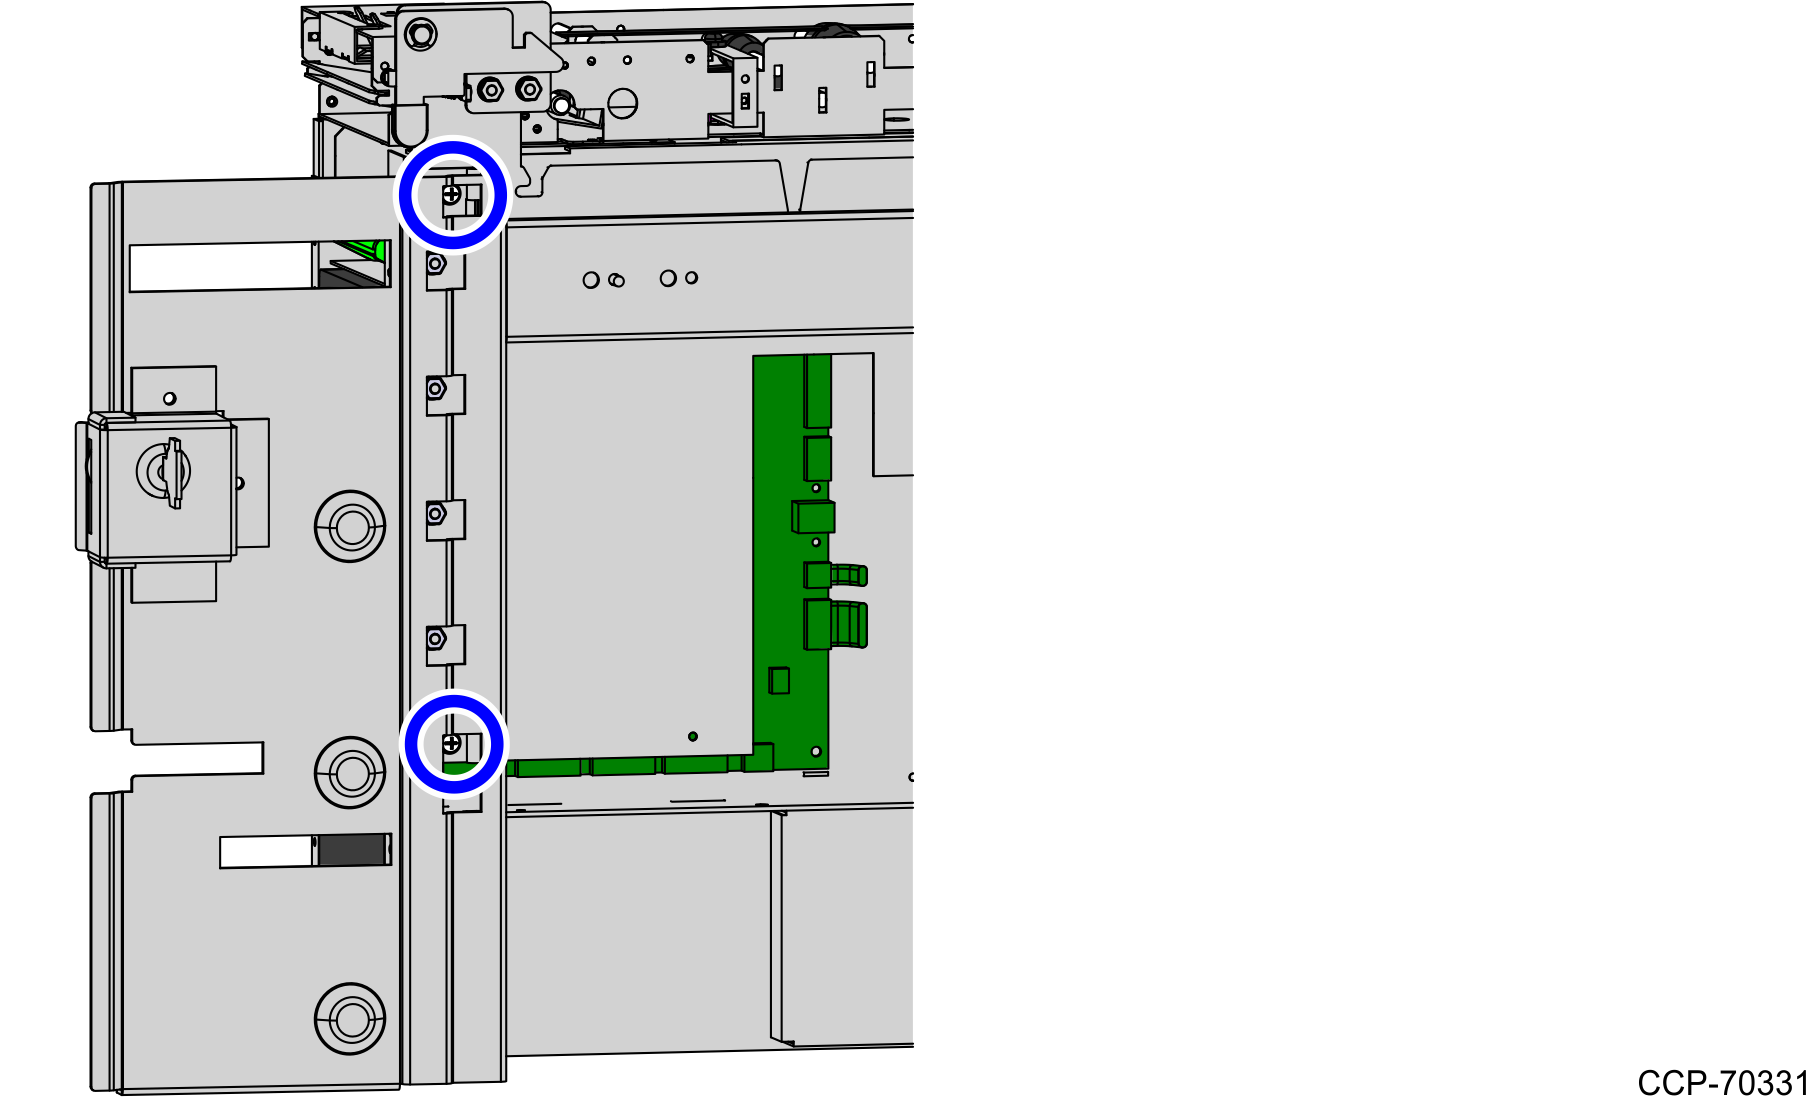
6.Attach two (2) screws along the hinge of the F53 Note Dispenser (Fujitsu) Security Door.
7.
8.Push the Note Dispenser into the SelfServ Checkout unit.
9.Insert note cassettes into the Note Dispenser.
10.Install the Add-On Pick Module. For more information, refer to Replacing the Add-On Pick Module.
11.Close and lock the F53 Note Dispenser (Fujitsu) Security Door.