Routing Cables
To route the F53 Note Dispenser (Fujitsu) cable, follow these steps:
Note: The F53 Note Dispenser (Fujitsu) uses a Y-cable for USB communication and power connection.
1.Connect the USB Power cable to the USB K of the E-Box.
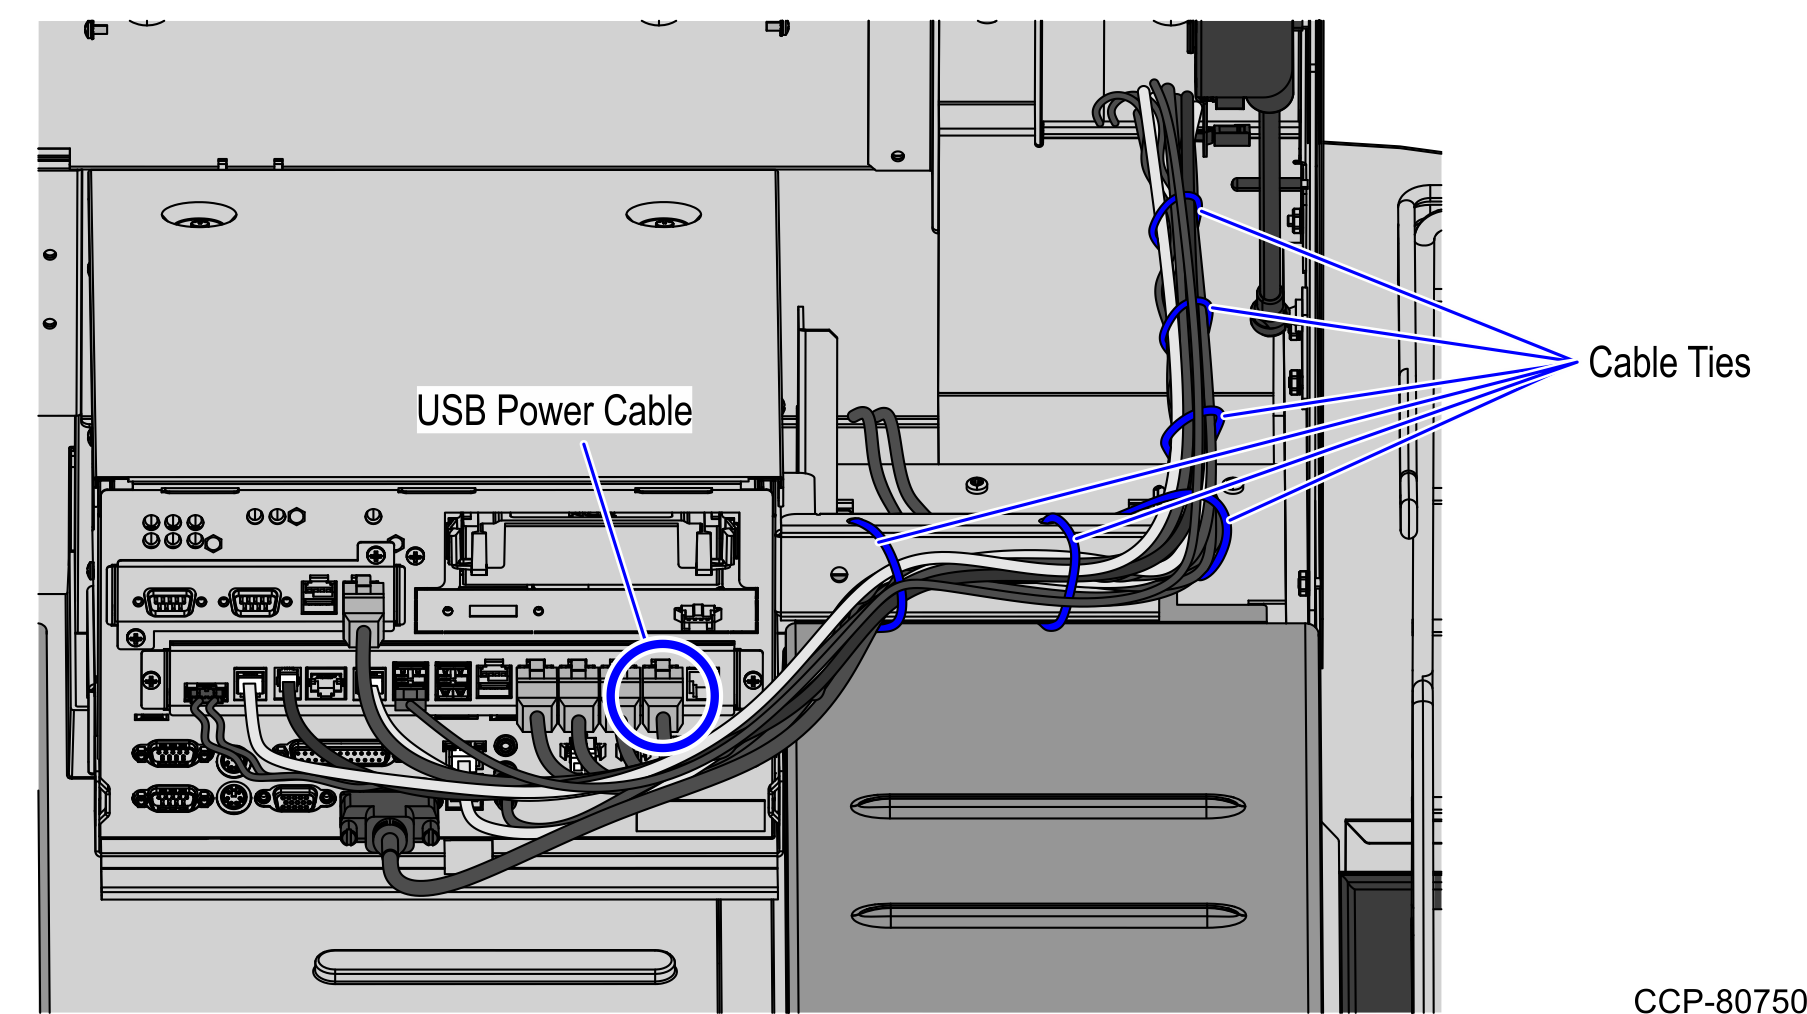
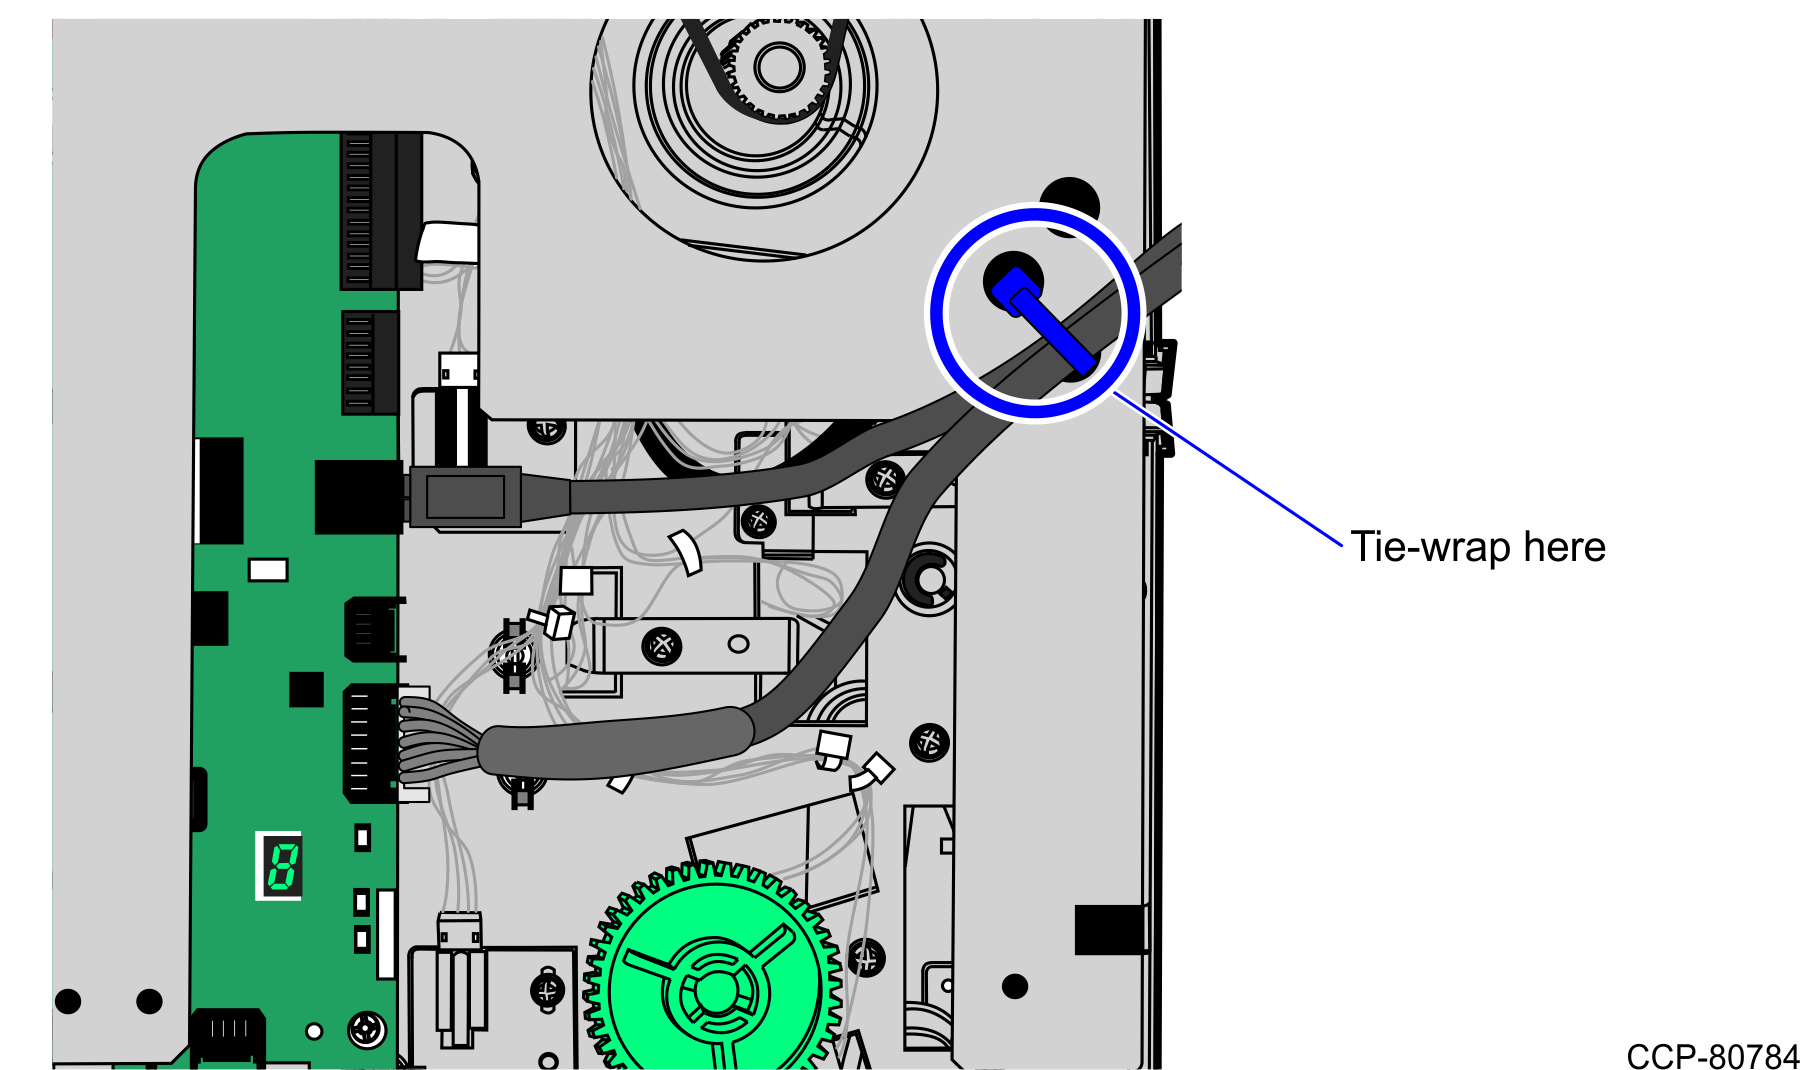
2.Secure the cables to the main cable bundle.
Note: Ensure that the cables do not get caught by the rotation of the E-Box.
3.Push down all cable slack to the rear part of the core unit.
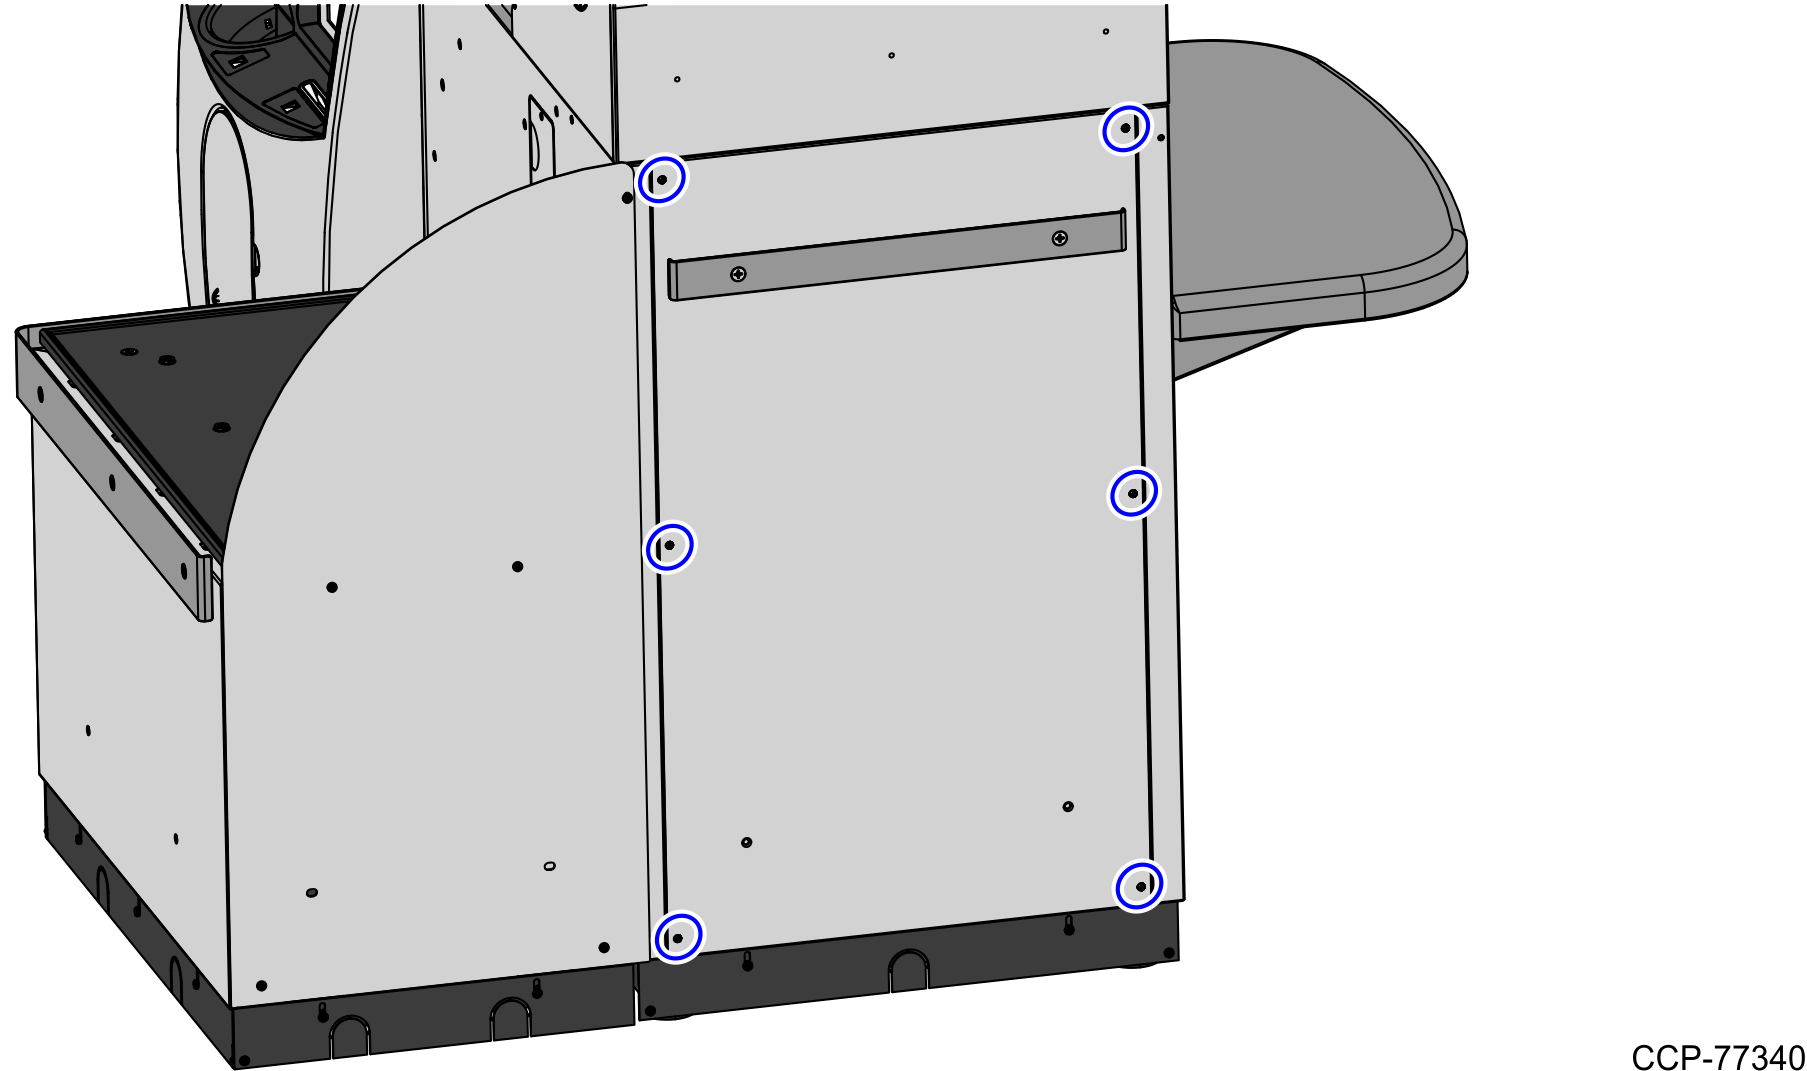
4.Detach the rear Core panel by removing six (6) screws to access the main cable bundle.
Note: For the purpose of illustration only, the image below shows a 1-Bag Bagwell Configuration.
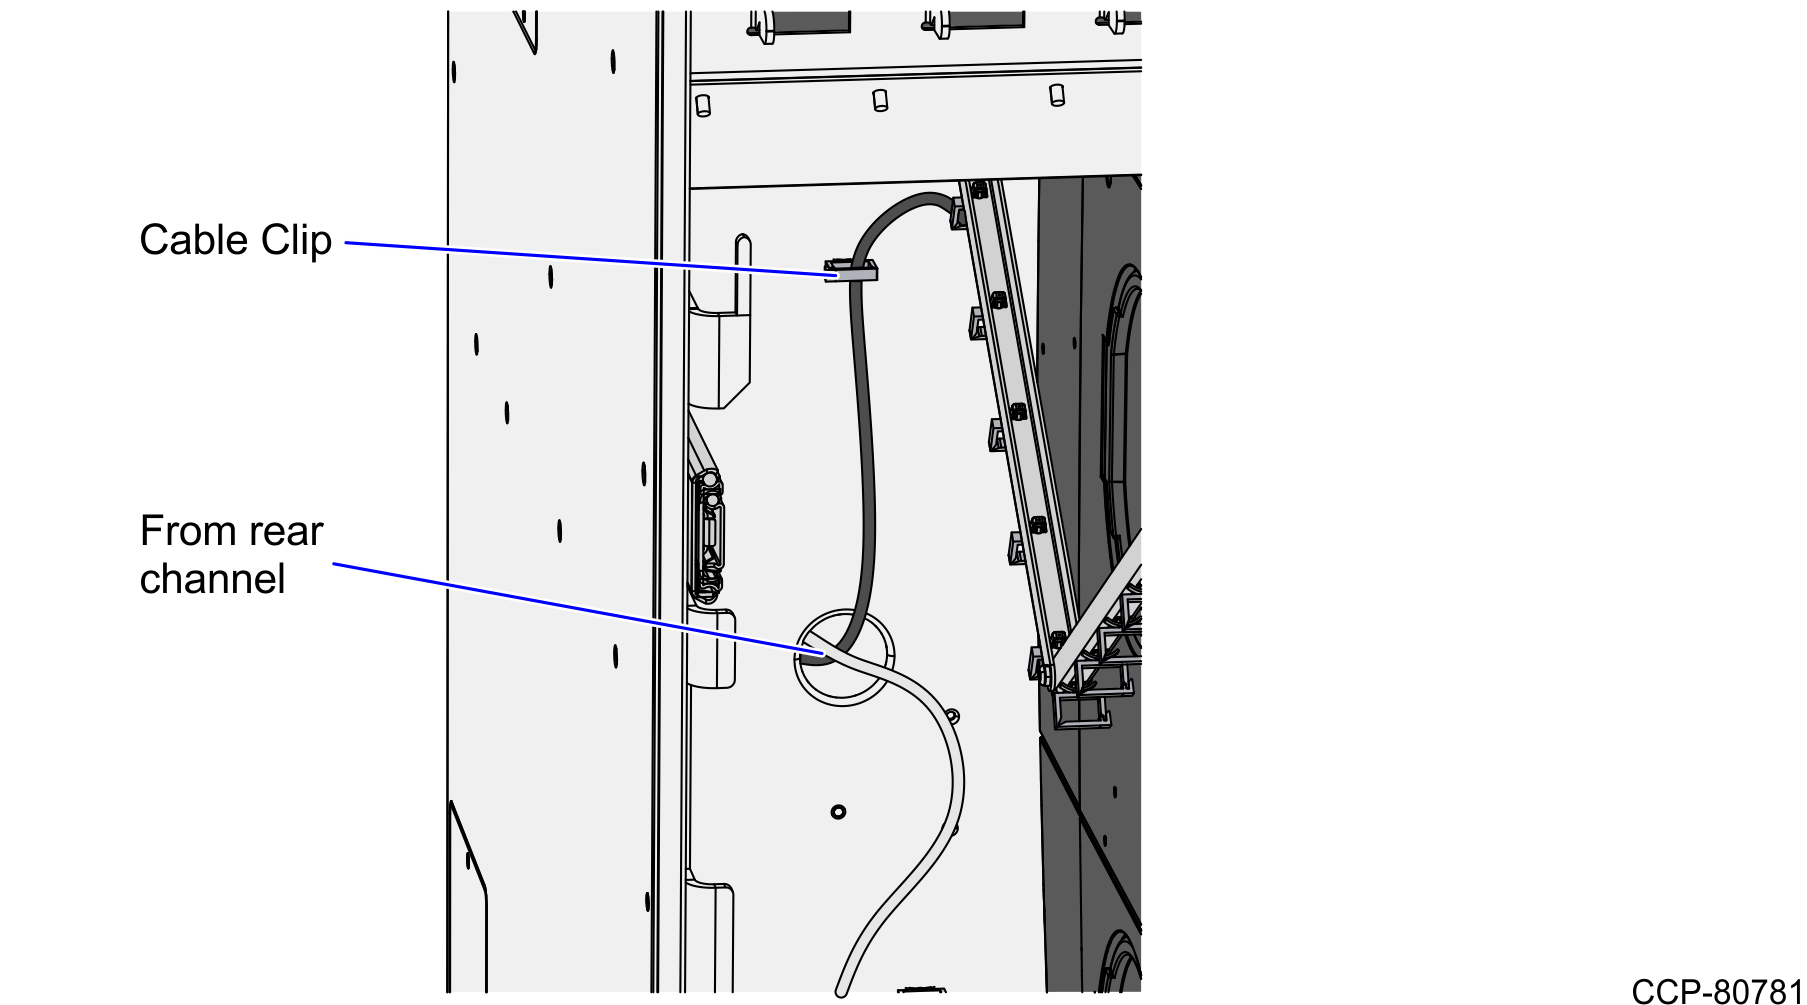
5.Continue routing the cables down to the rear channel and then through the hole on the back of the Core Cabinet.
6.Secure the cable to the core wall using the cable clip, as shown in the image below.
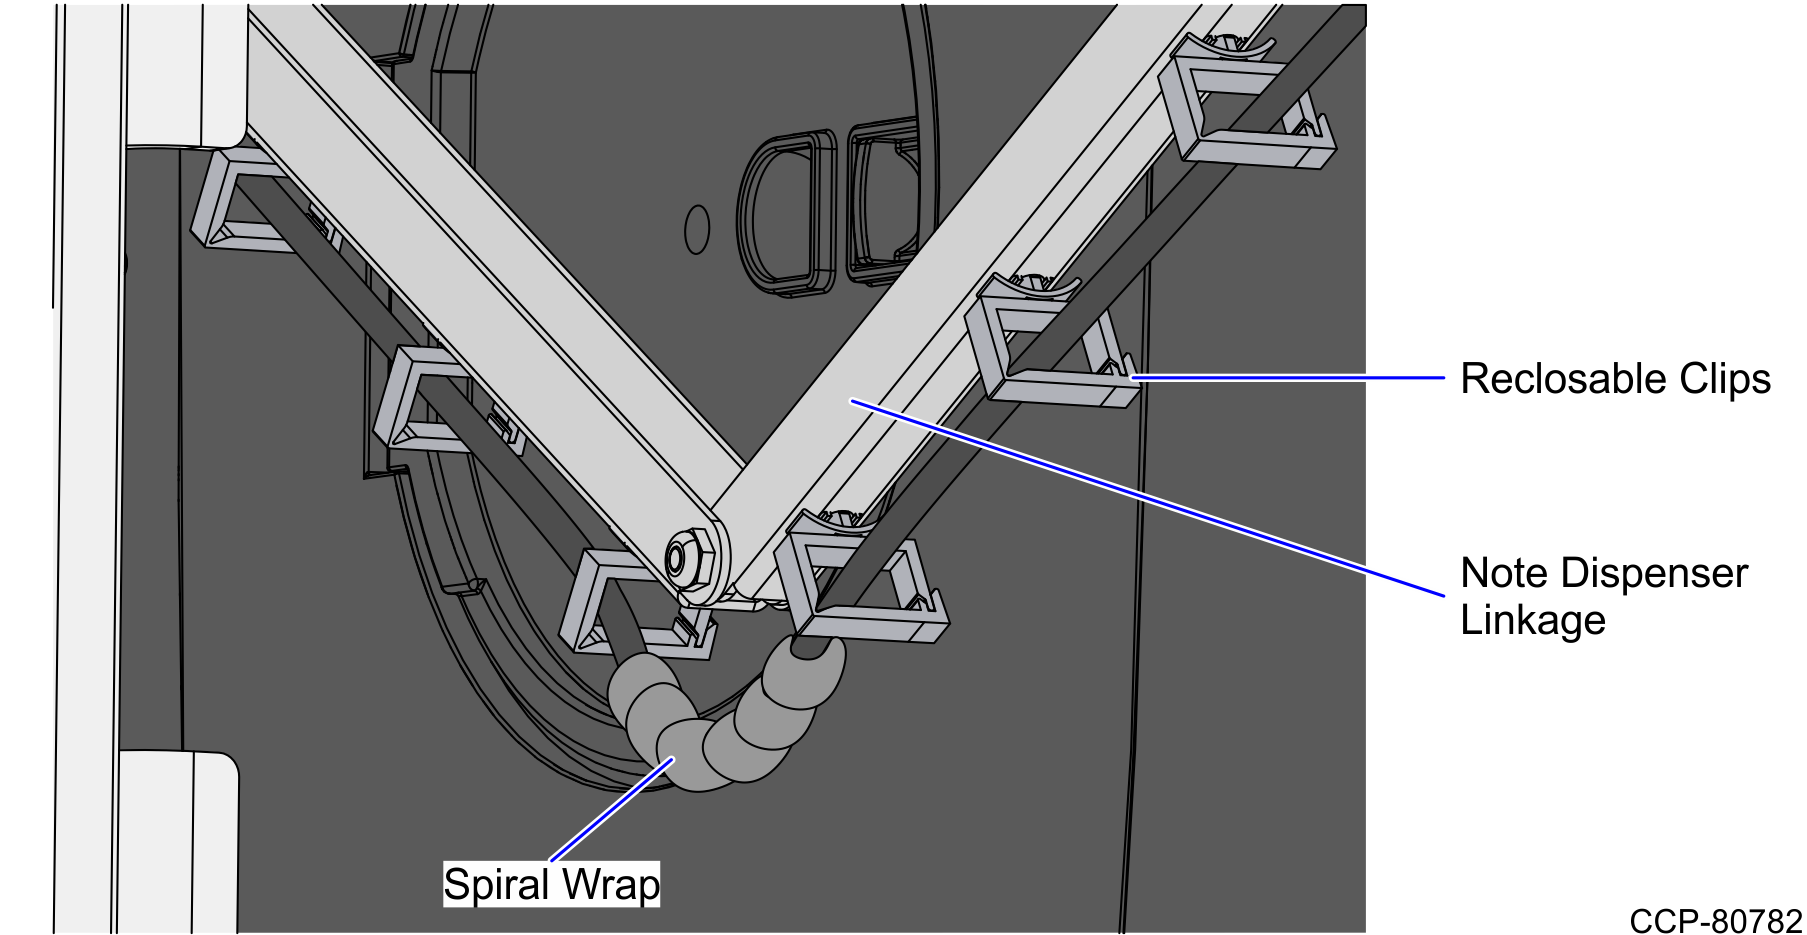
7.Secure the cable on the reclosable clips under the F53 Note Dispenser (Fujitsu) linkage.
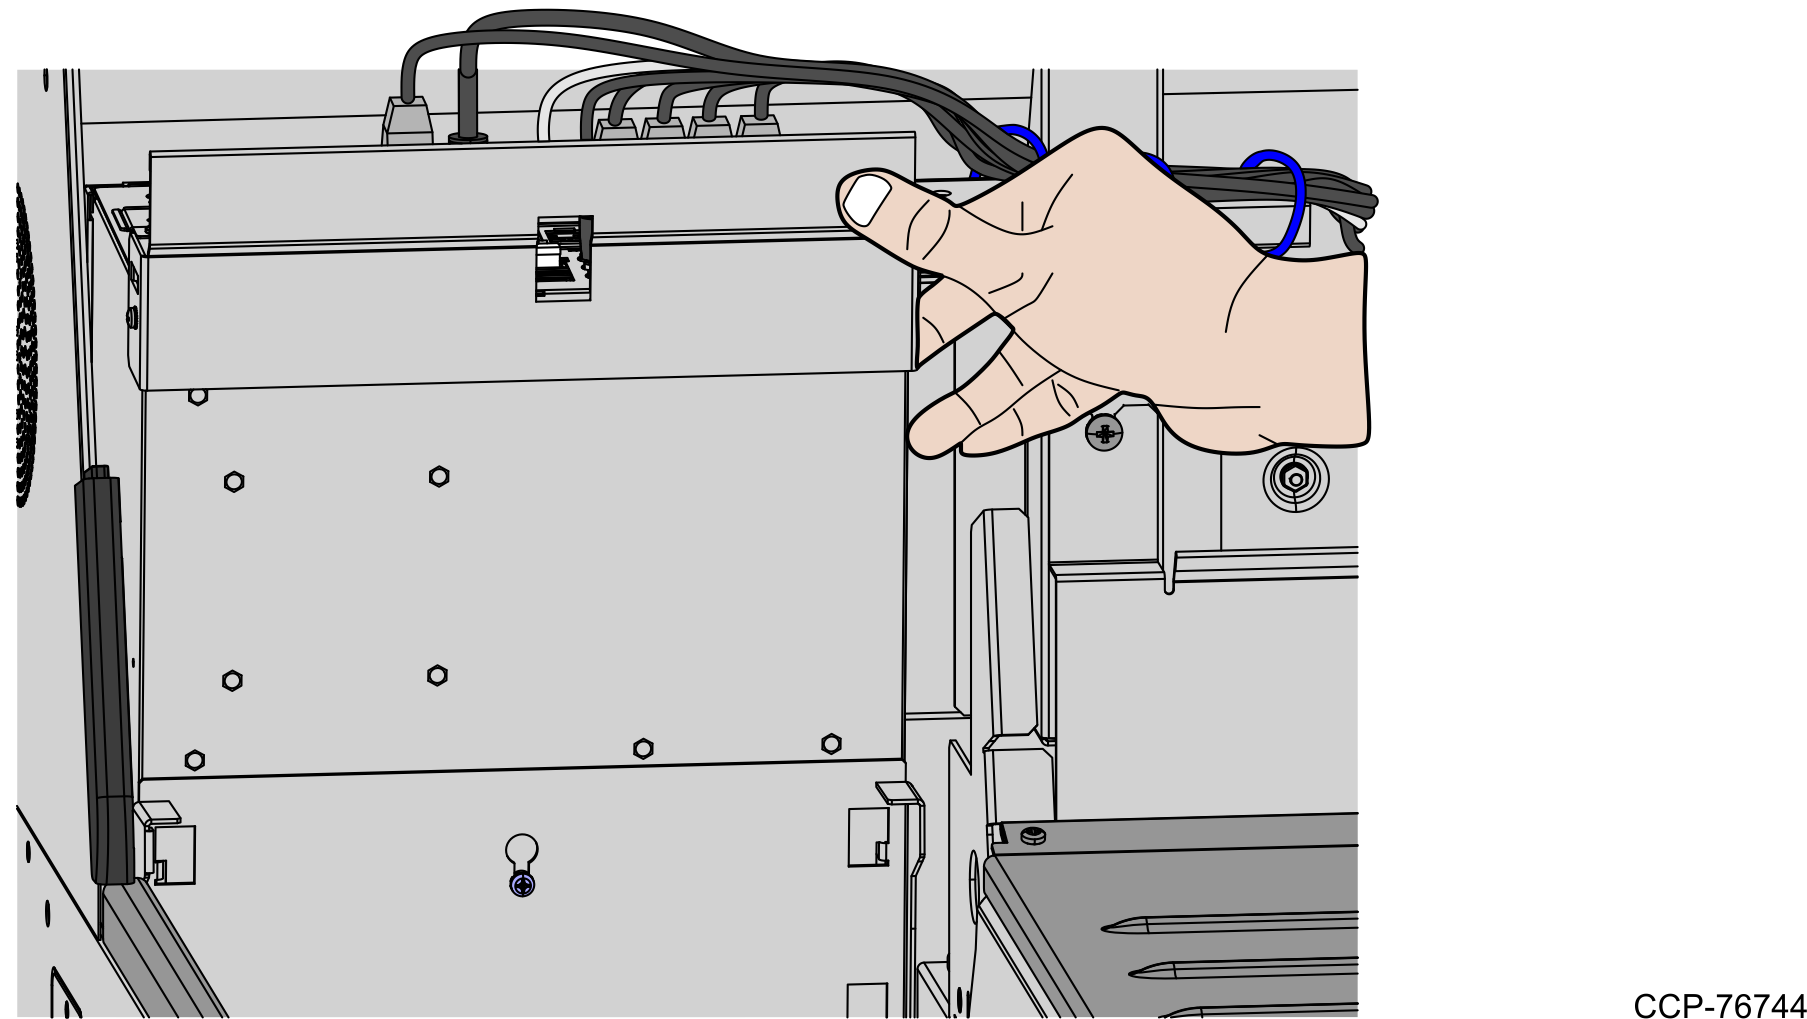
8.Tightly wind a spiral wrap around the cable (4 inches length) between the two (2) reclosable clips near the linkage hinge point, as shown in the image below.
9.Continue routing until the cable reaches the end of the linkage, as shown in the image below.
Note: Do not fasten with a zip tie the area highlighted below.

10.Connect the cable connectors to the F53 Note Dispenser (Fujitsu), and then tie the cables together with a zip tie, as shown in the image below.
11.Attach the side cover of the F53 Note Dispenser (Fujitsu) unit.
12.Attach the rear Core panel by using (6) screws.
Note: For the purpose of illustration only, the image below shows a 1-Bag Bagwell Configuration.
13.Raise and push the E-Box back to the closed position.
Note: Ensure that the cables are not caught by the rotation of the E-Box.
14.Install the Scanner/Scale. For more information, refer to Installing Scanner/Scale.
15.Close the Upper Cabinet Door. For more information, refer to Closing Upper Cabinet Door.