Replacing the Add-On Pick Module
Installing Add-on Pick Module
To install the the Core Unit and Presenter onto the Add-on Pick Module, follow these steps:
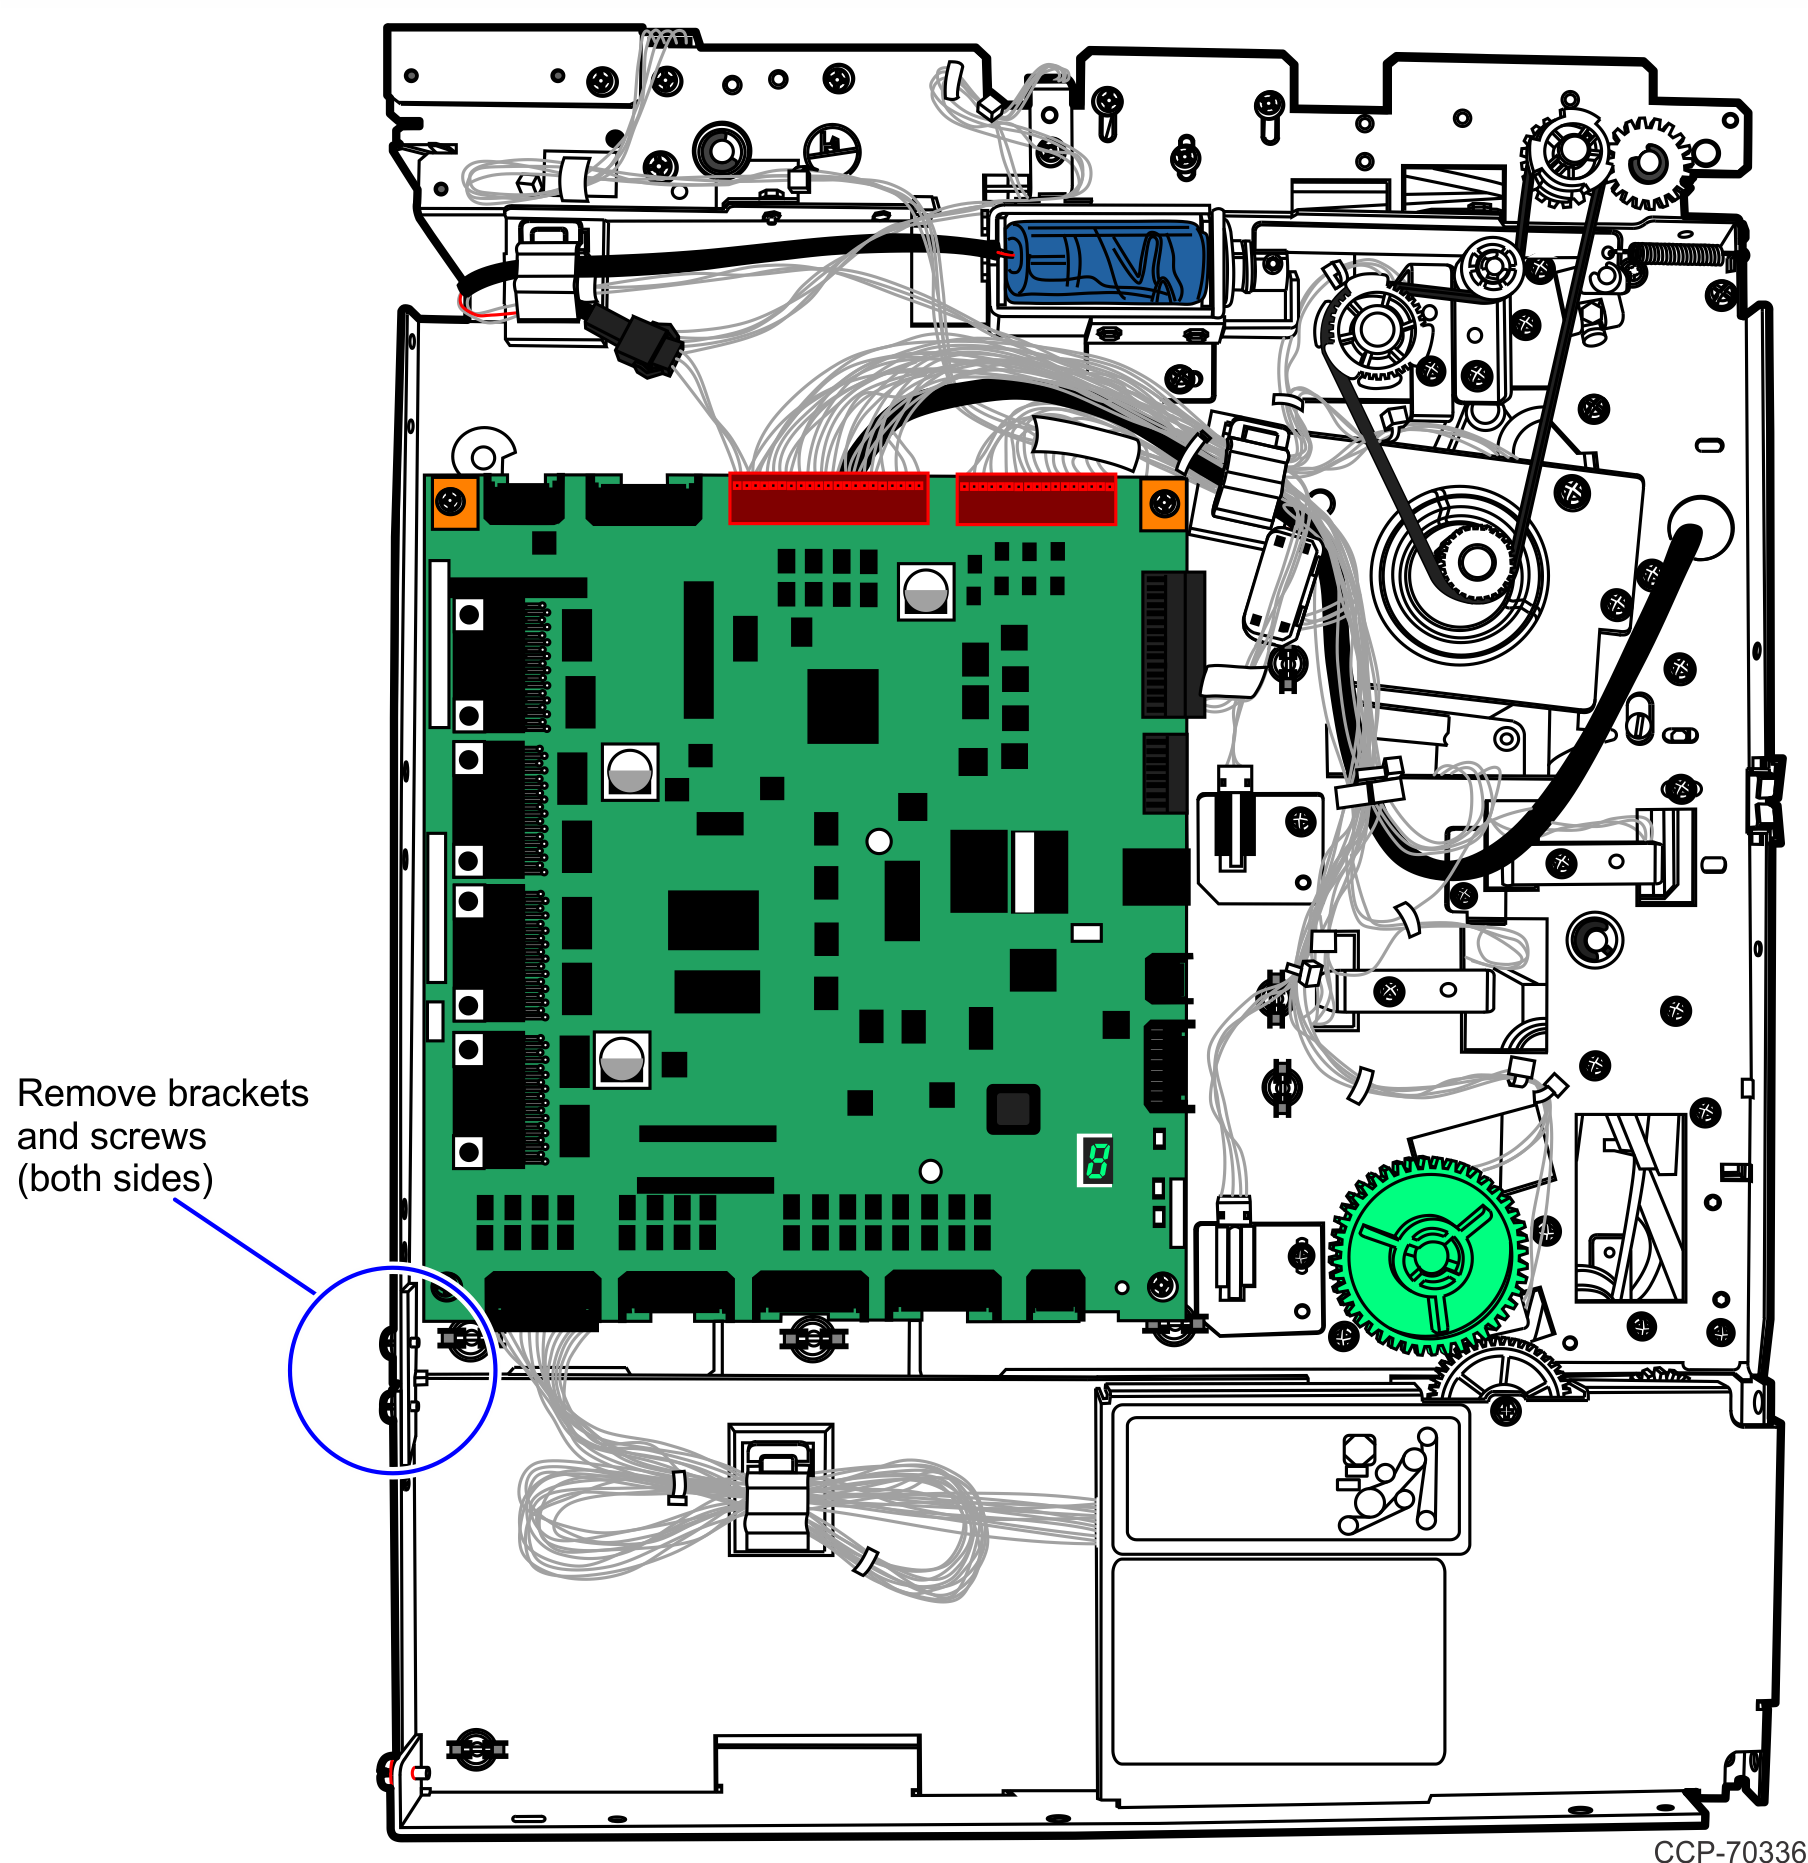
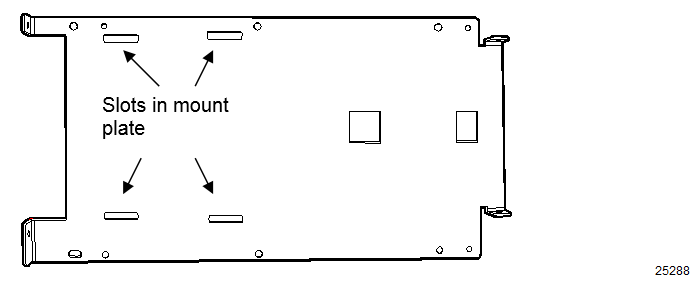
The Core Unit and Add-on Pick Module are secured together by four (4) brackets and eight (8) screws. Dowels on each side of the bracket fit into slots of the Note Dispenser Mount Plate. The Note Dispenser is attached to the Mount Plate by four (4) screws.
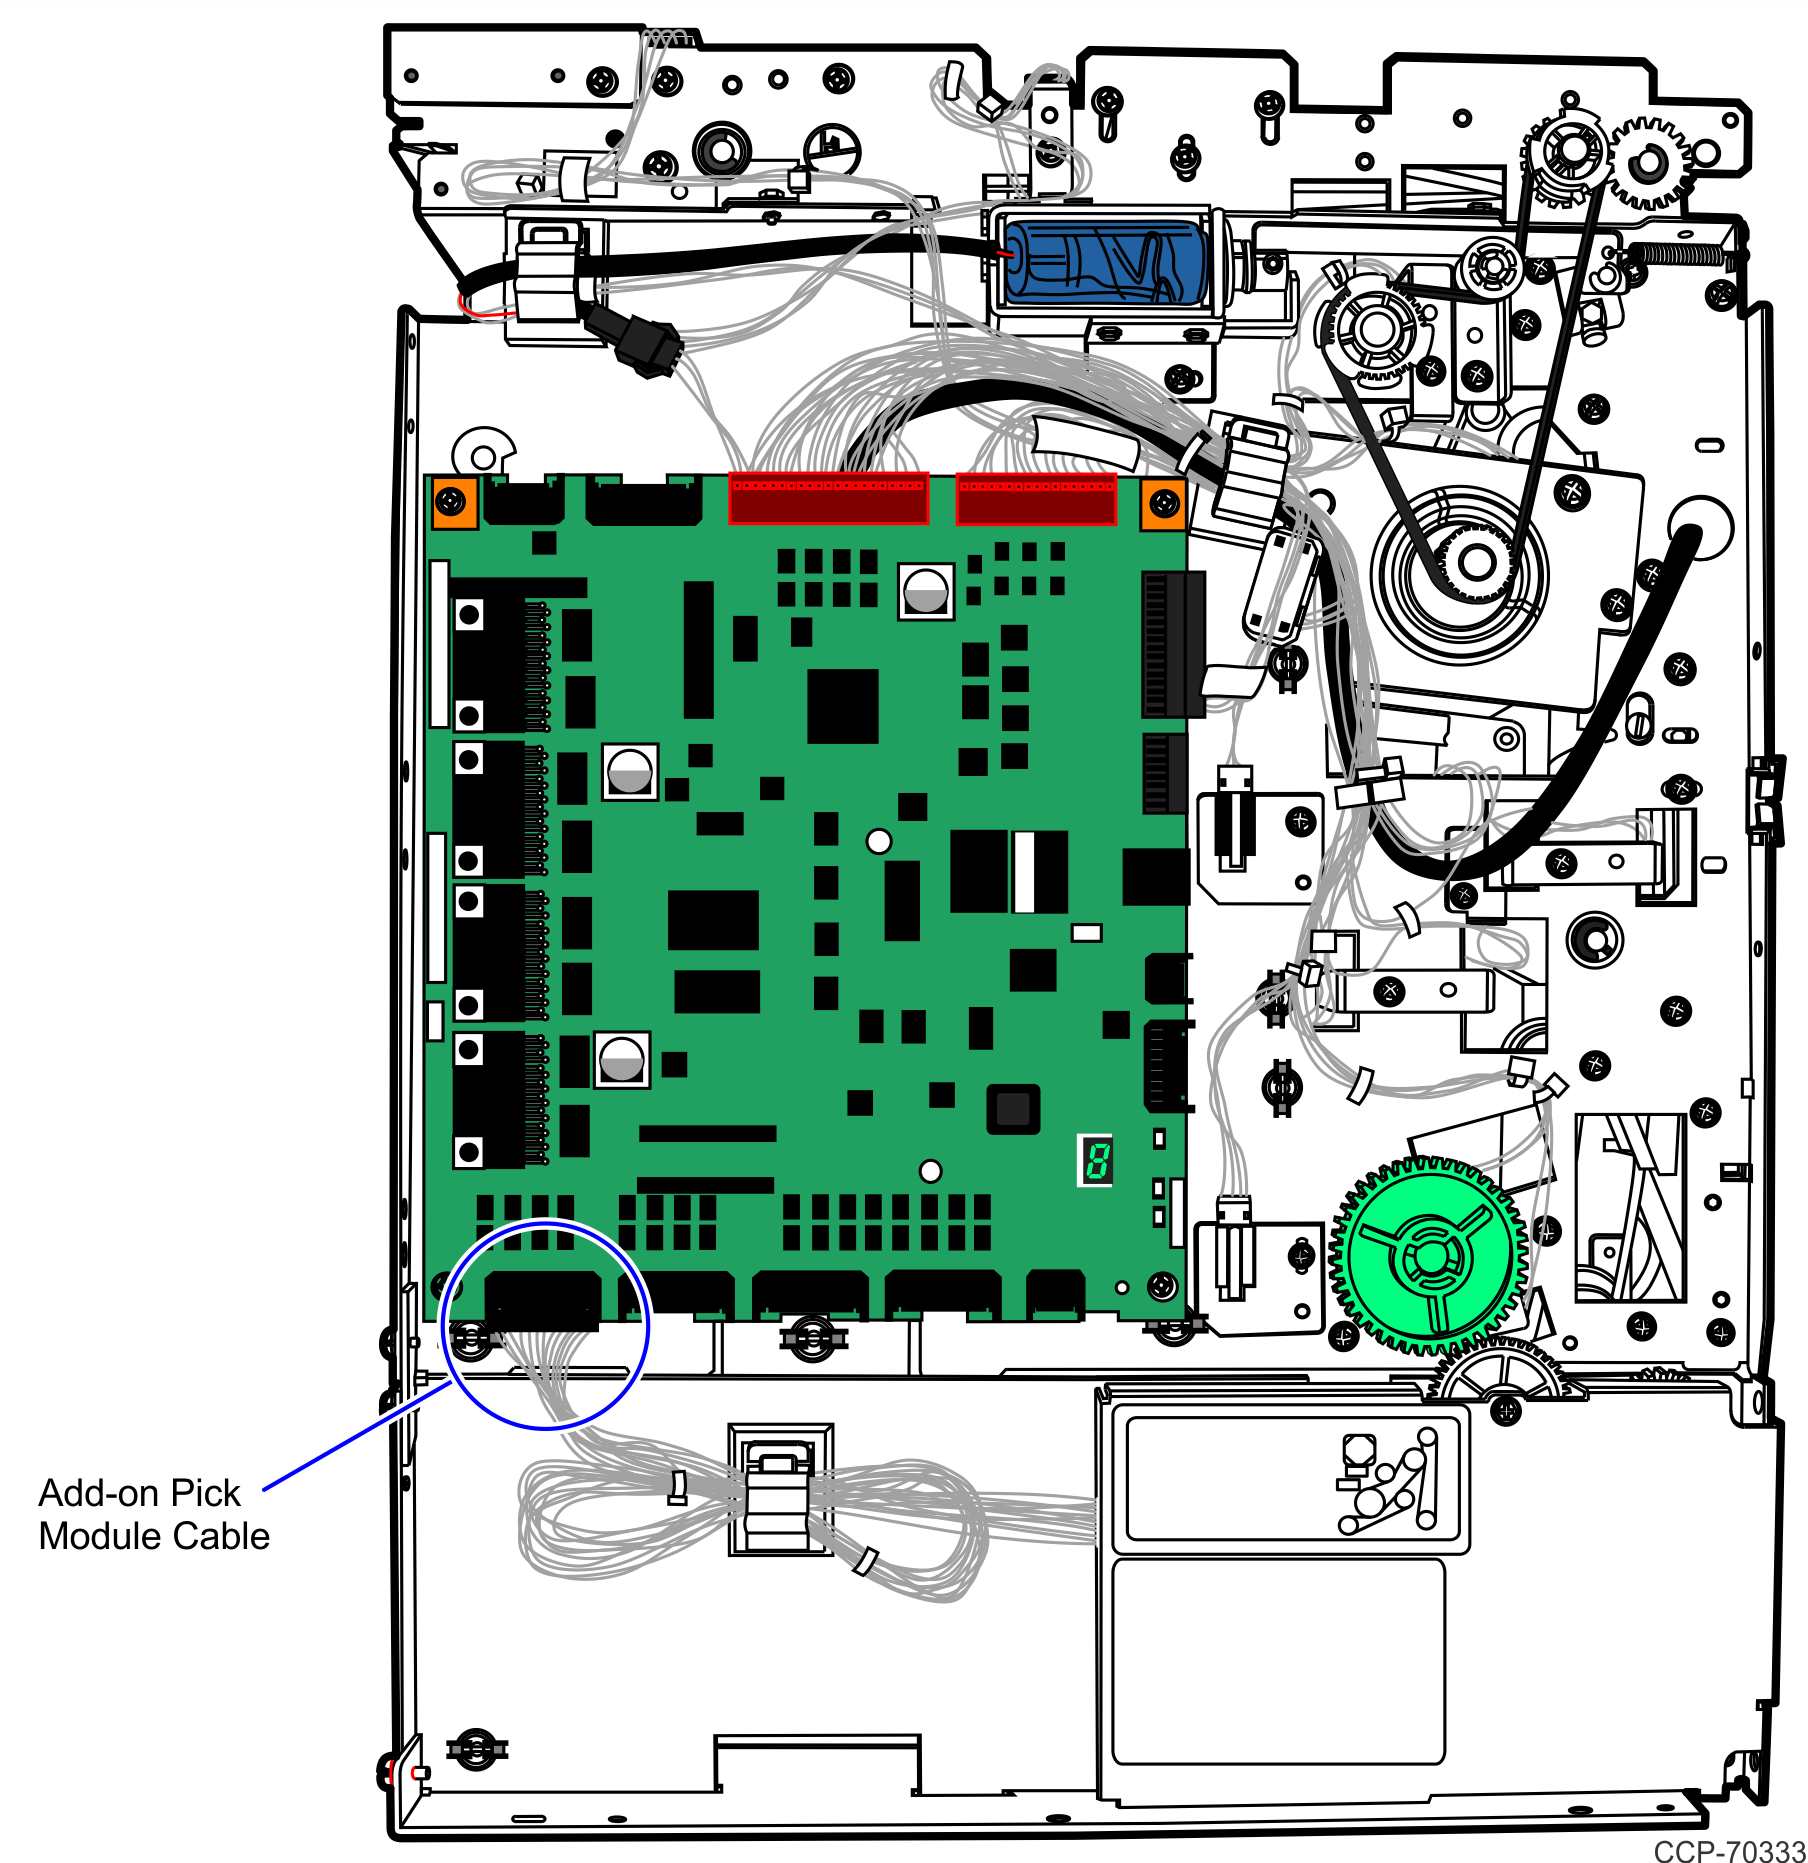
The Add-on Pick Module is connected to the Control Board on the Core Unit by a cable.
1.Remove Note (Bill) Dispenser from NCR SelfServ Checkout.
2.Remove the pinch prevention bracket near the green gear wheel.
3.Remove side cover from F53 Note Dispenser (Fujitsu).
4.Disconnect the Add-on Pick Module cable from the Control Board.
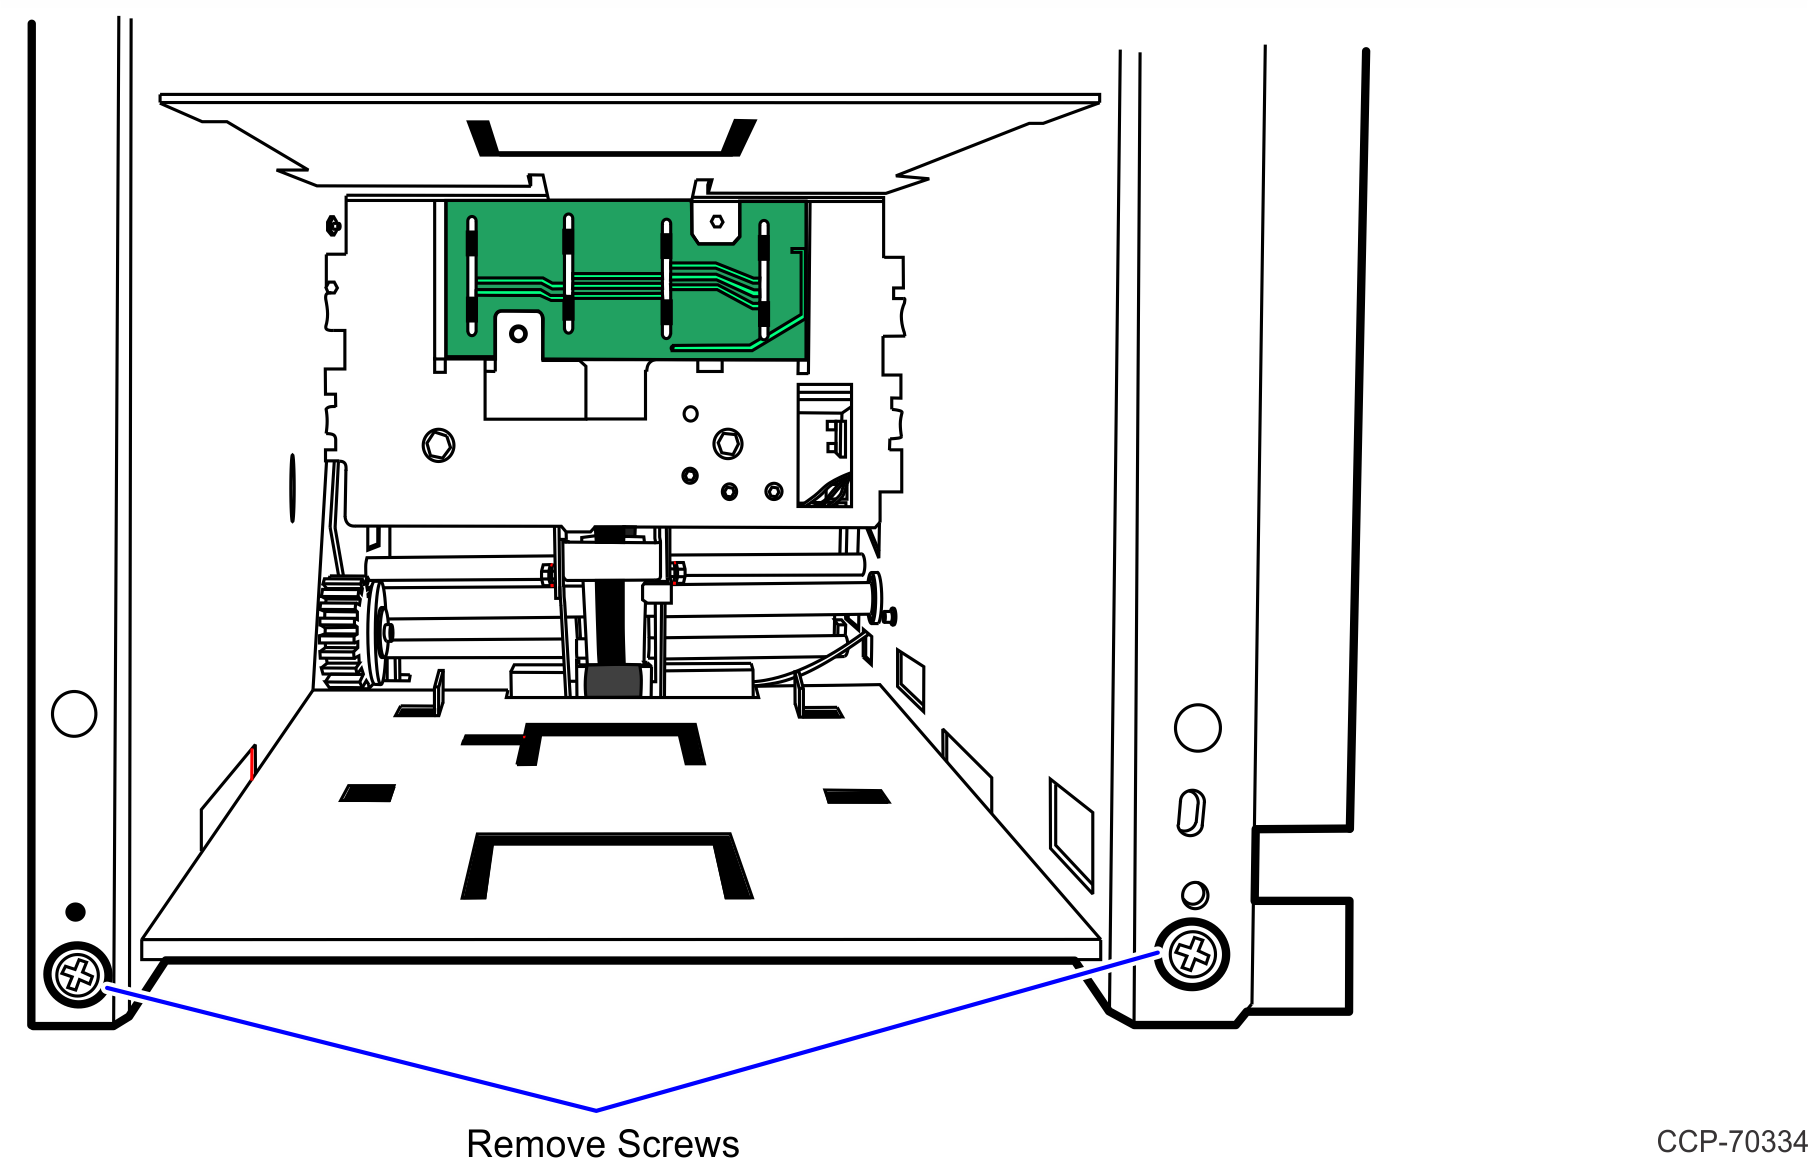
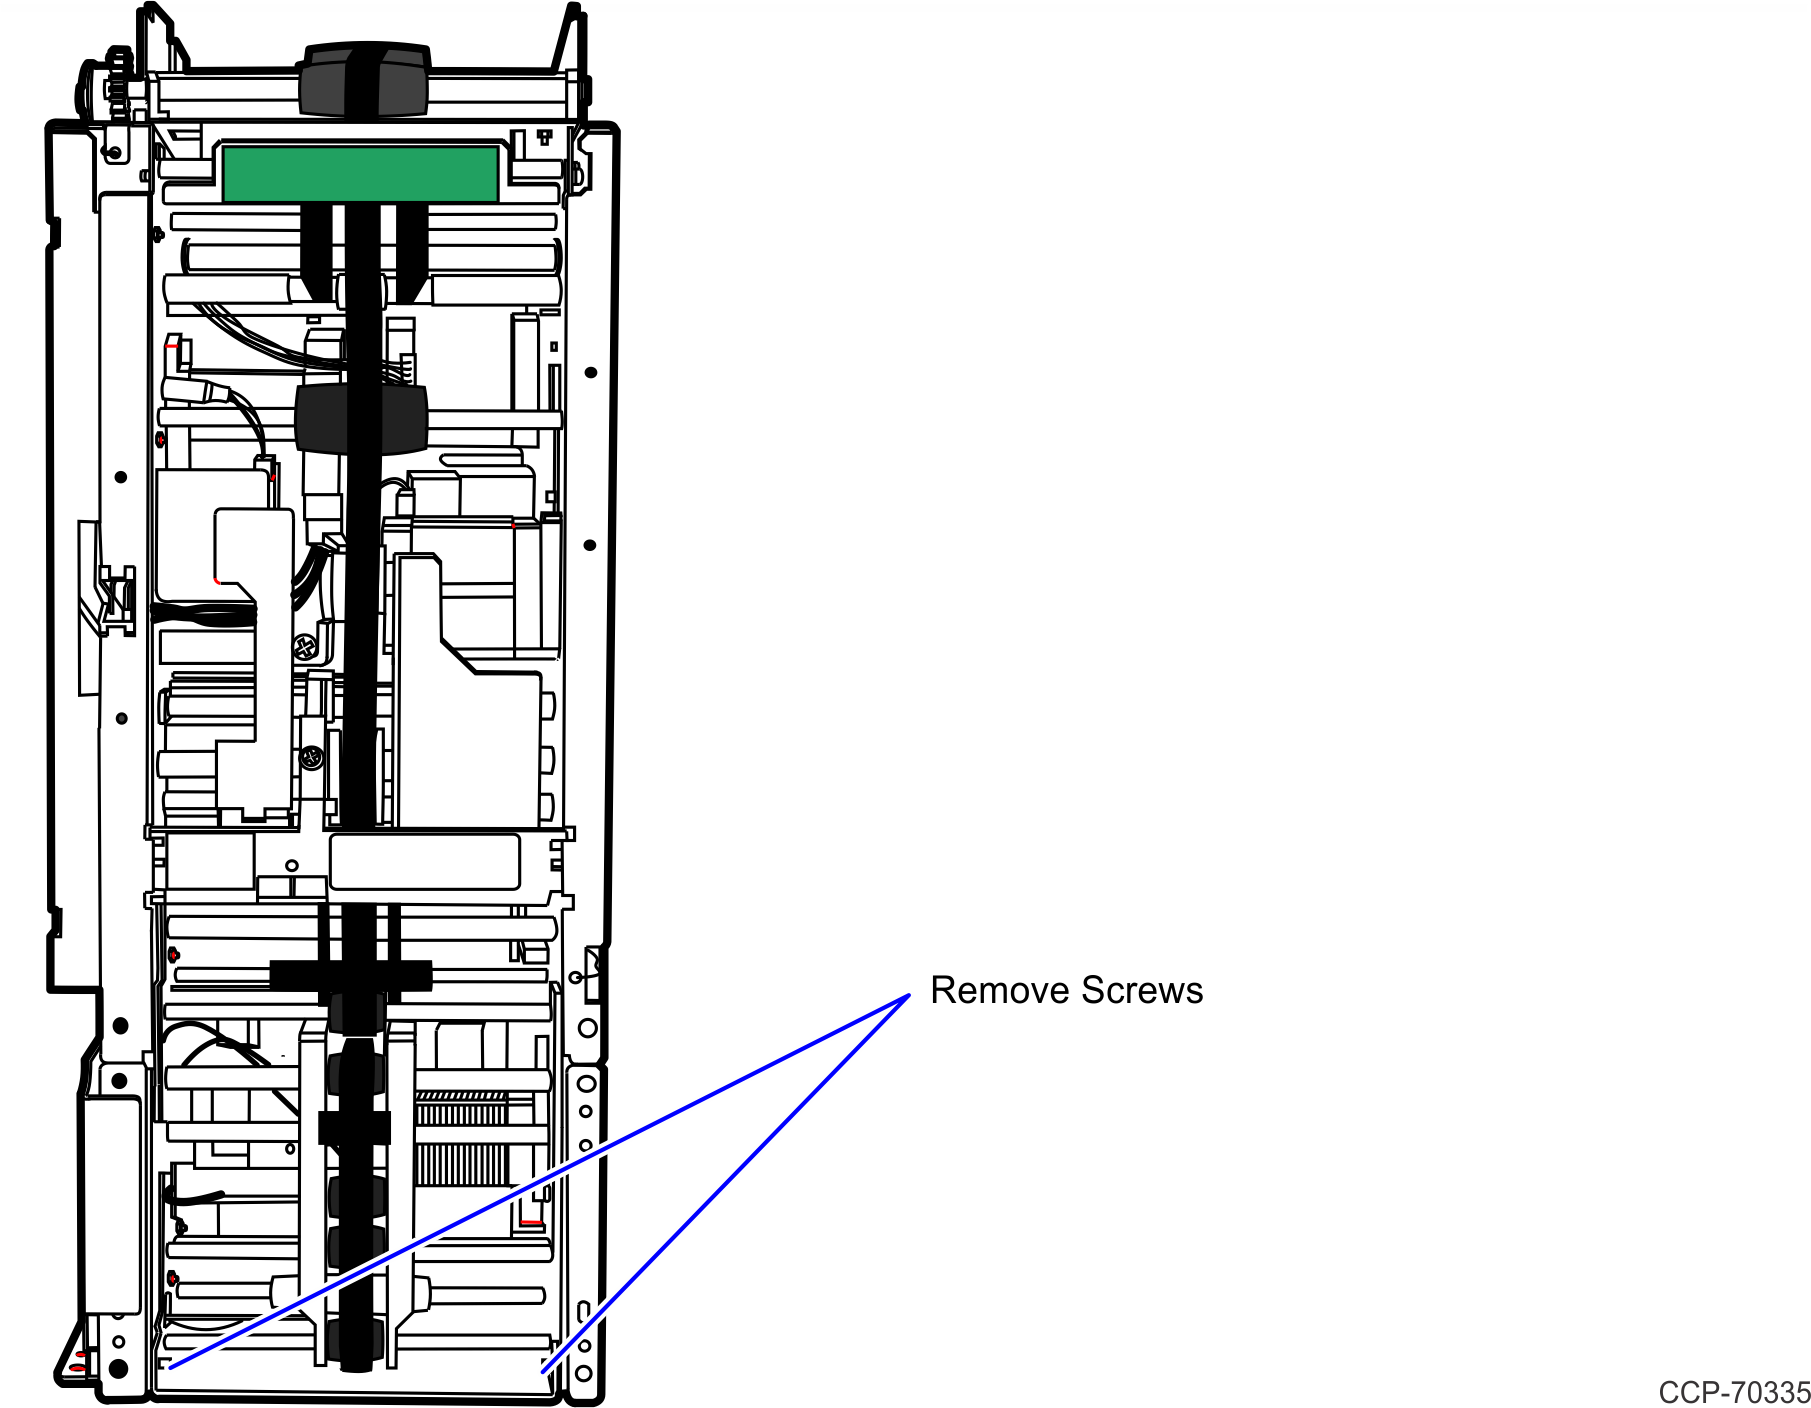
5.Remove the four screws securing Note Dispense to the Mount Plate and remove Mount Plate. (Two screws are located in the front and two in back.)
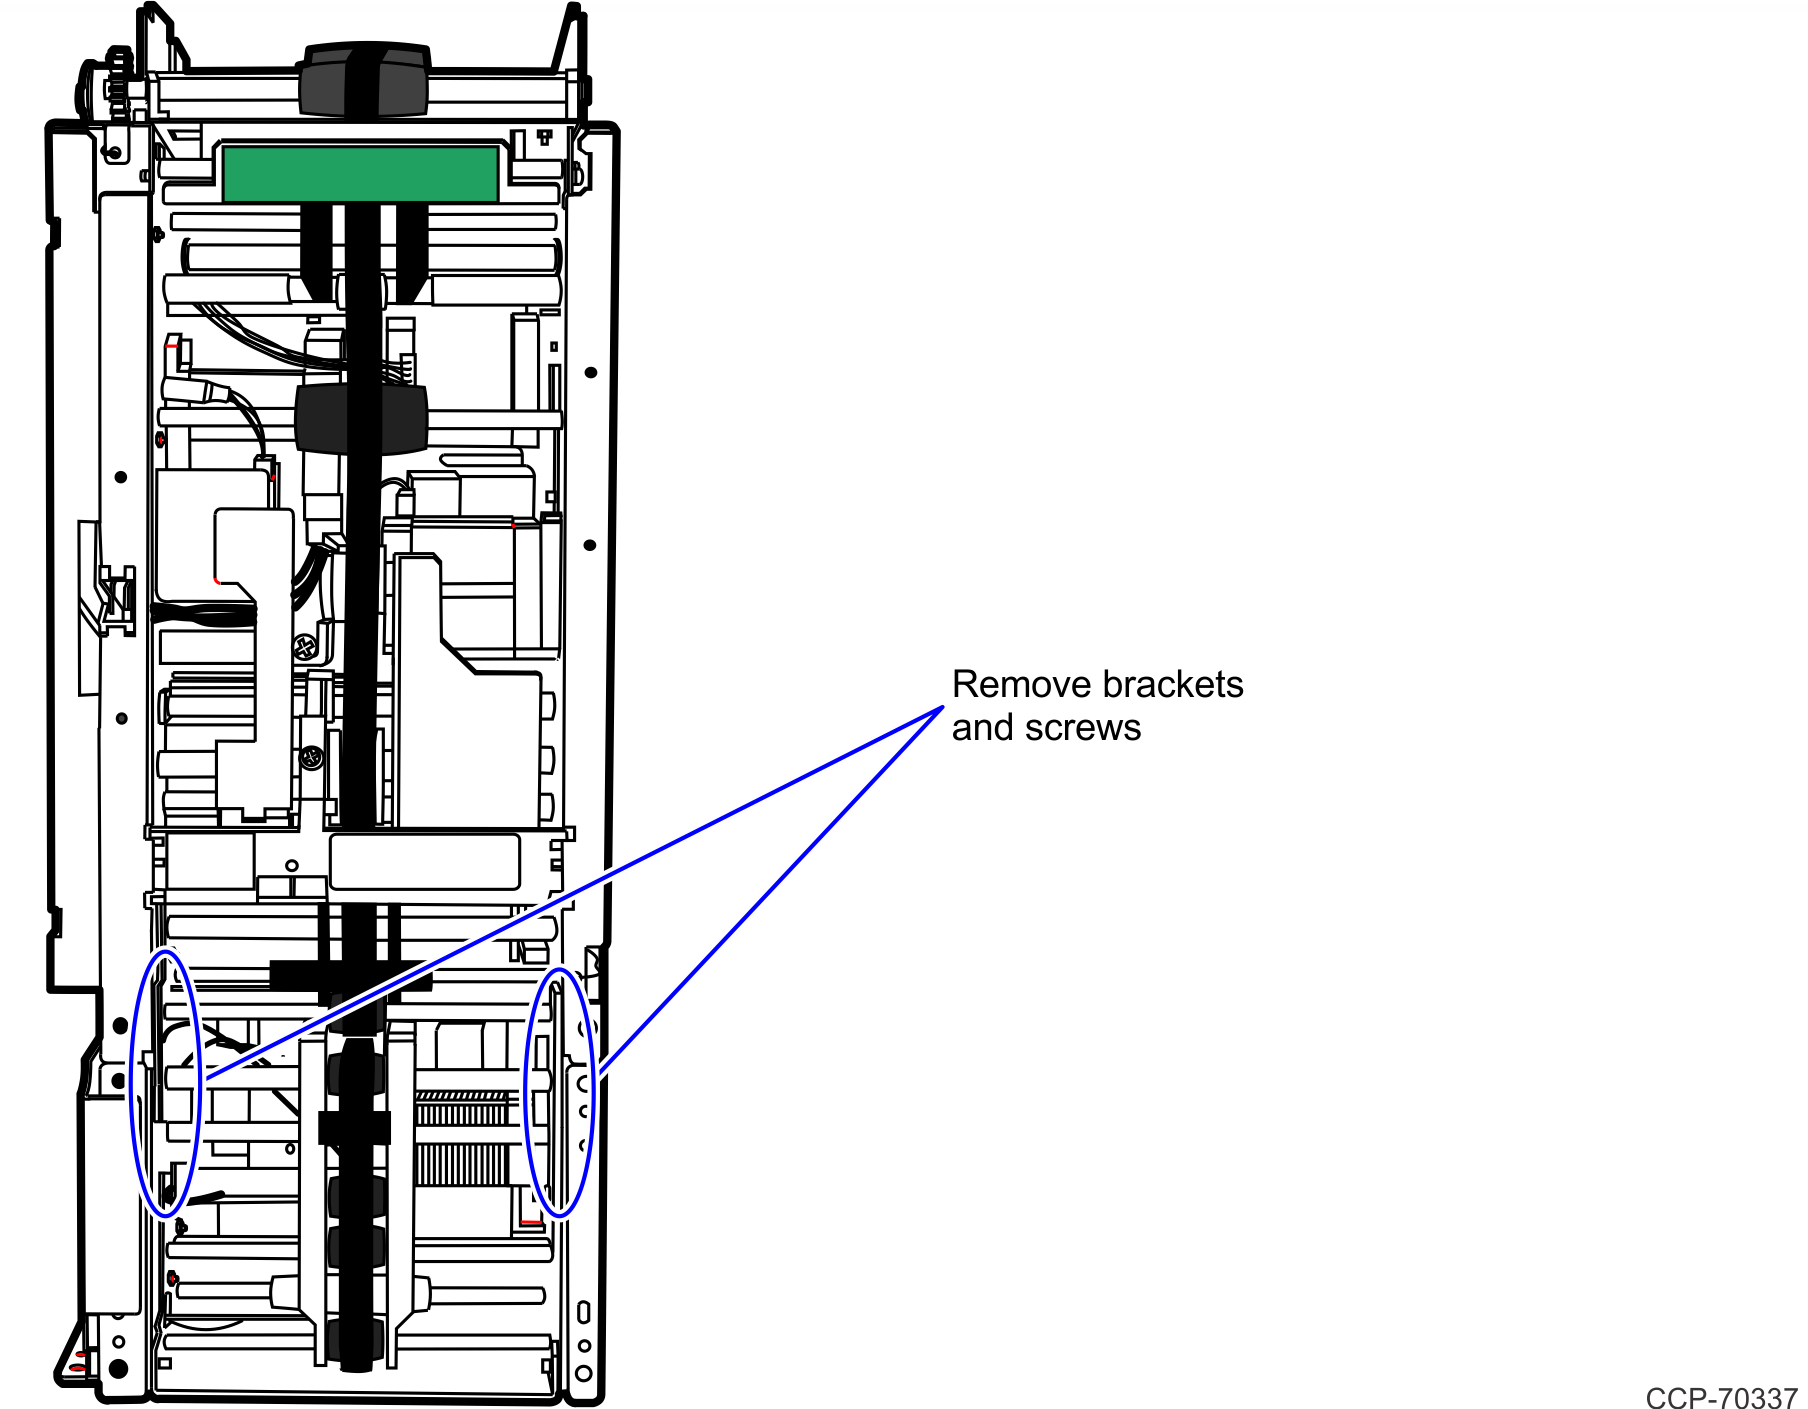
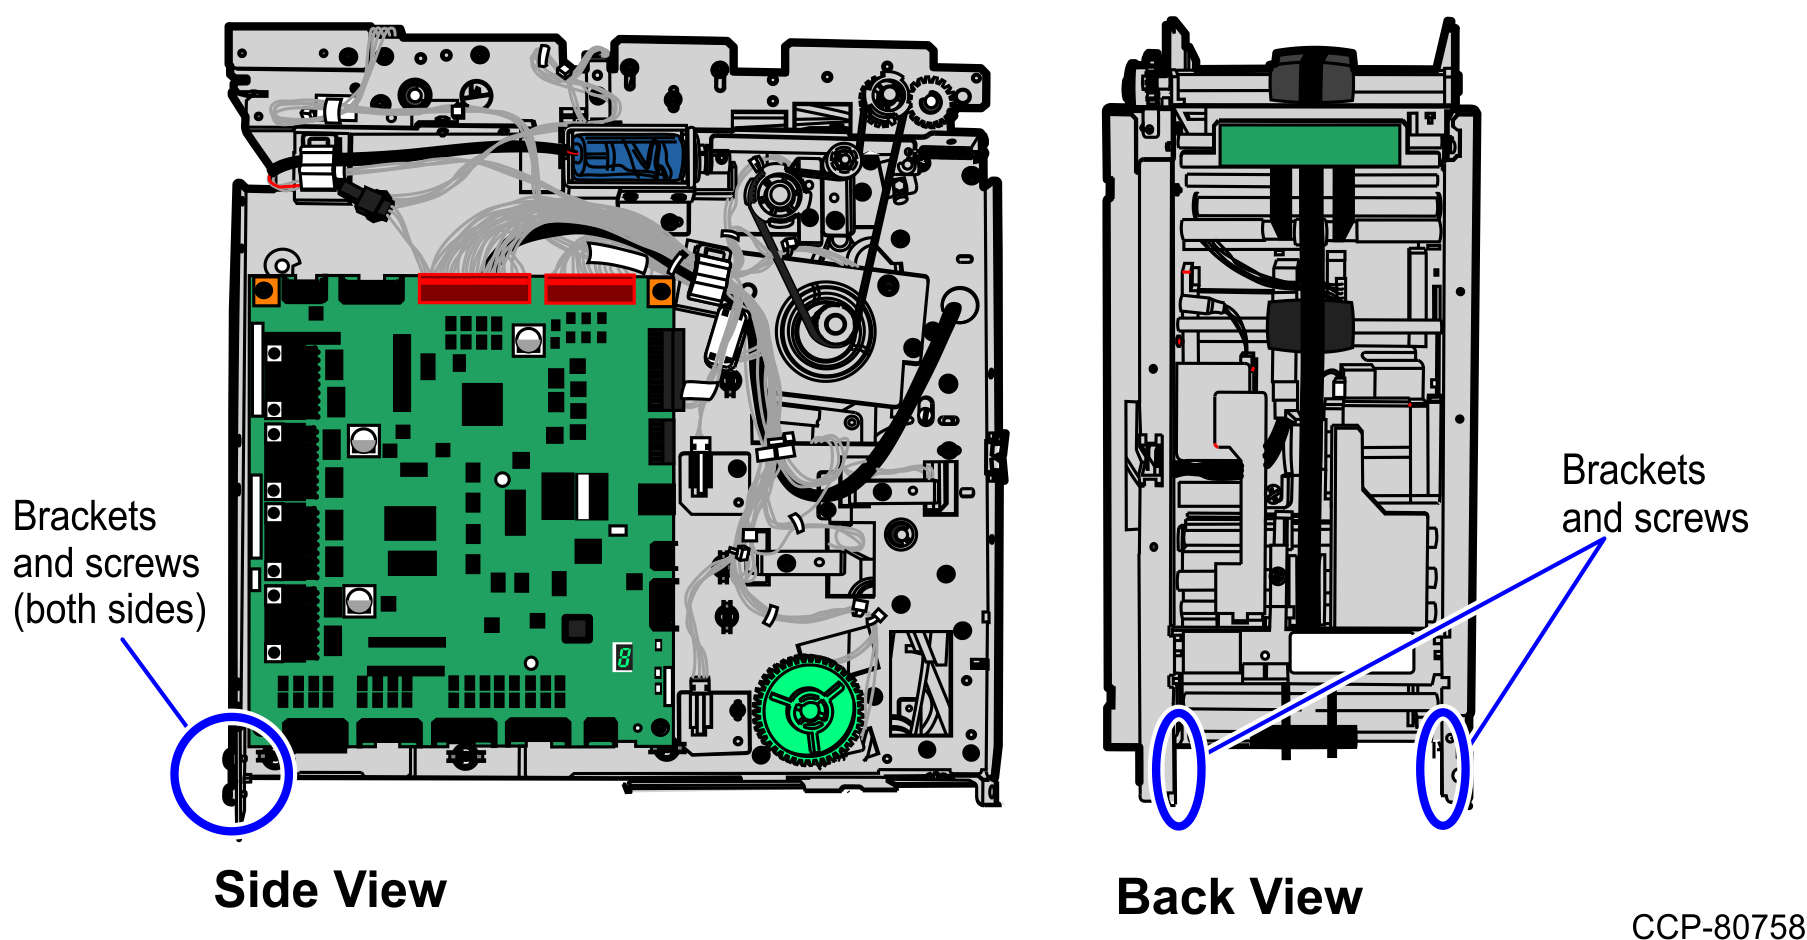
6.Remove the four brackets and eight screws securing the Core Unit to the Add-on Pick Module. Two brackets are located toward the front of the unit and two are located in the back of the unit.
7.Lift Core Unit off Add-on Pick Module.
8.Align and secure the Core Unit to the Add-on Pick Module using the four (4) brackets and eight (8) screws, as shown in the image below.
9.Align the F53 Note Dispenser (Fujitsu) over the mount plate inserting the dowels located along base of unit into slots on Mount Plate.
10.Secure mount plate to F53 Note Dispenser (Fujitsu) using four (4) screws.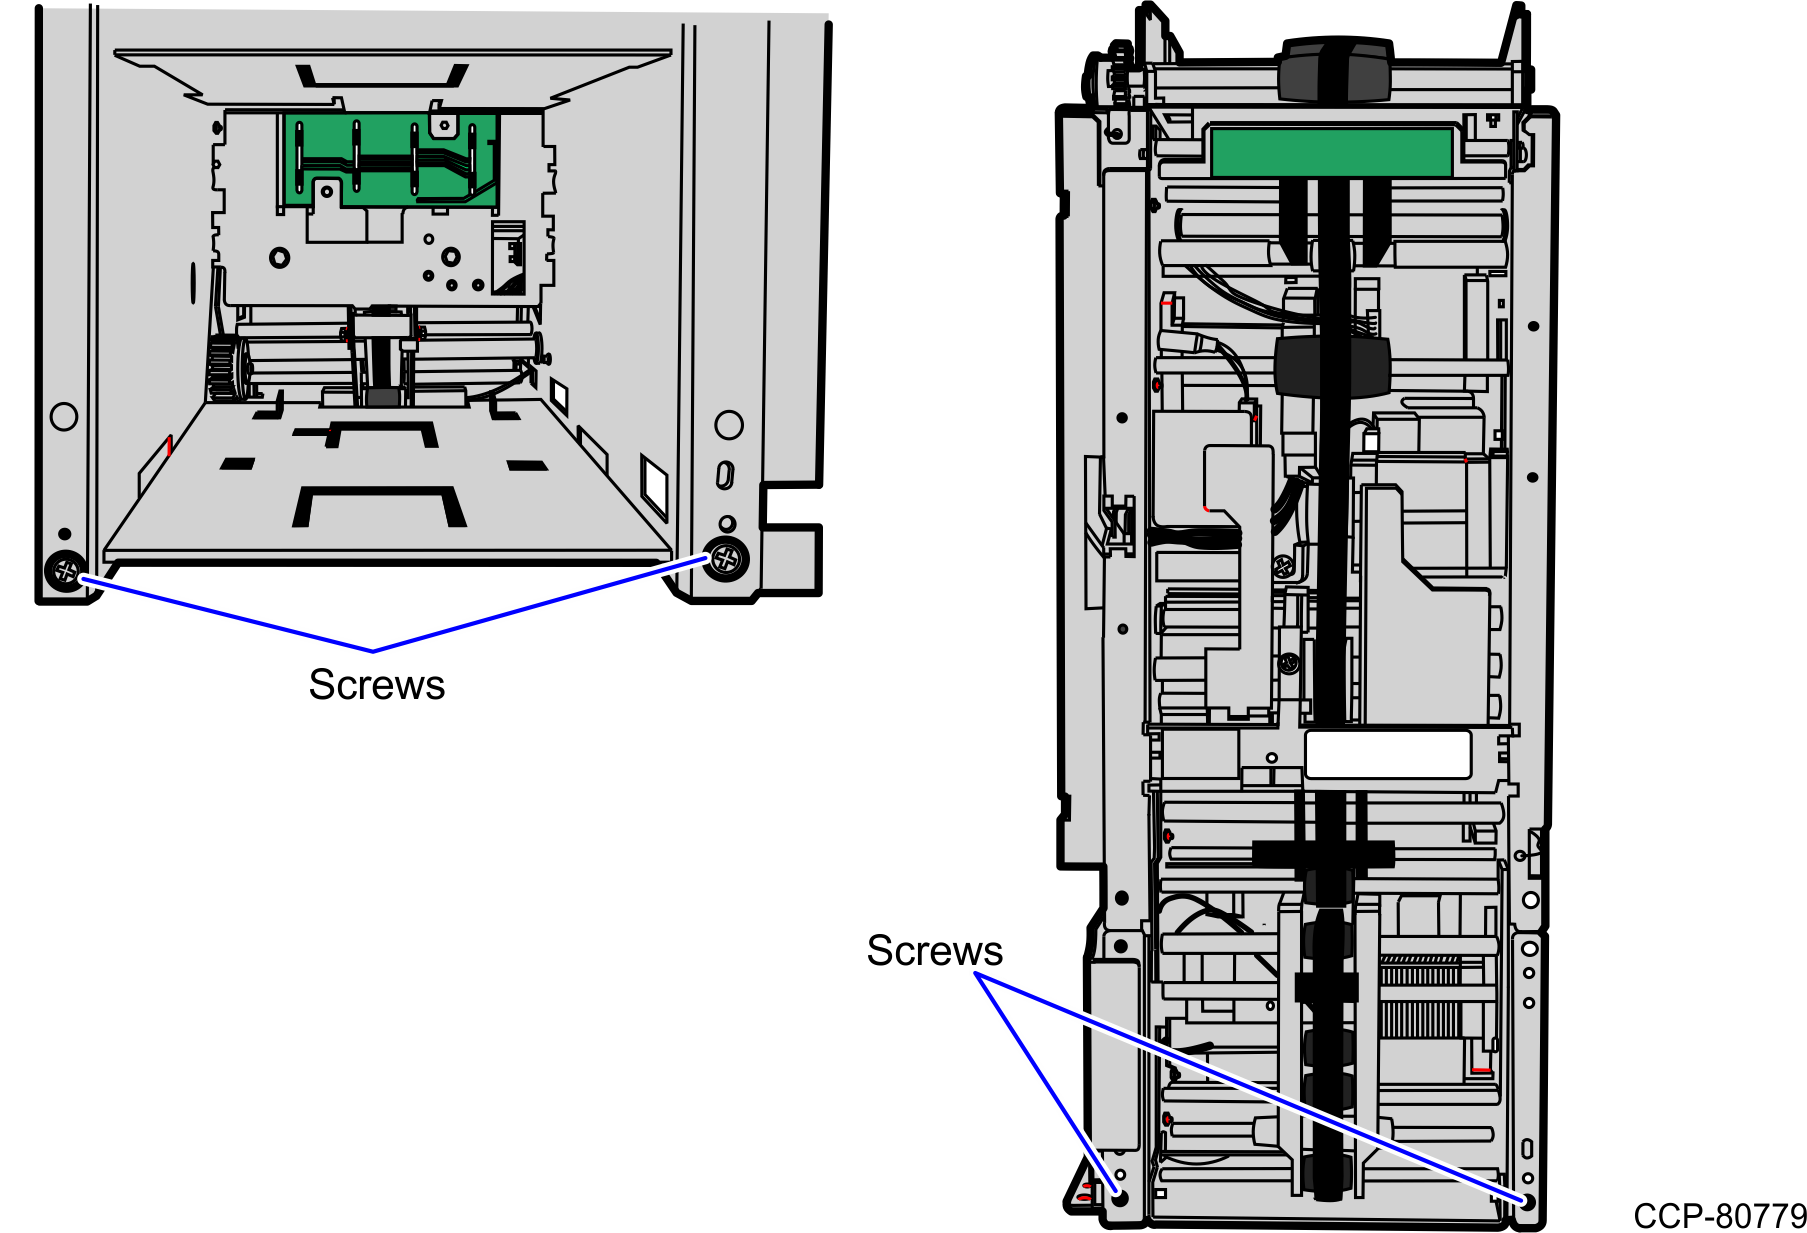
11.Connect the Add-on Pick Module cable to Control Board on the Core unit.
12. Attach pinch prevention plate below green gear.

13.Attach cover to unit and insert screws part way into sides of Note (Bill) Dispenser. (Three on left side, two on right side.).
14.Align screws on Note (Bill) Dispenser over slots in mount. Pull Note (Bill) Dispenser forward so that screws are holding Note (Bill) Dispenser to mount plates.
15.Tighten screws to secure Note (Bill) Dispenser to mounting brackets.
16.Insert screws on right side at top and bottom of security door. Tighten screws.
17.Attach cables to Control Board.
18.Push Note (Bill) Dispenser back into NCR SelfServ Checkout unit.
19.Close and lock the Note (Bill) Dispenser security door.
20.Close and lock the NCR SelfServ Checkout door.