Installing the Tri-Light/Lane Light Pole and Initial Cable Routing
To Install the Tri-Light/Lane Light Pole to the NCR Voyix Self-Checkout (7360) R6-C unit, follow these steps:
For more information on the 7360 Tri-Light/Lane Light Pole refer to 7360 Kit Repository.
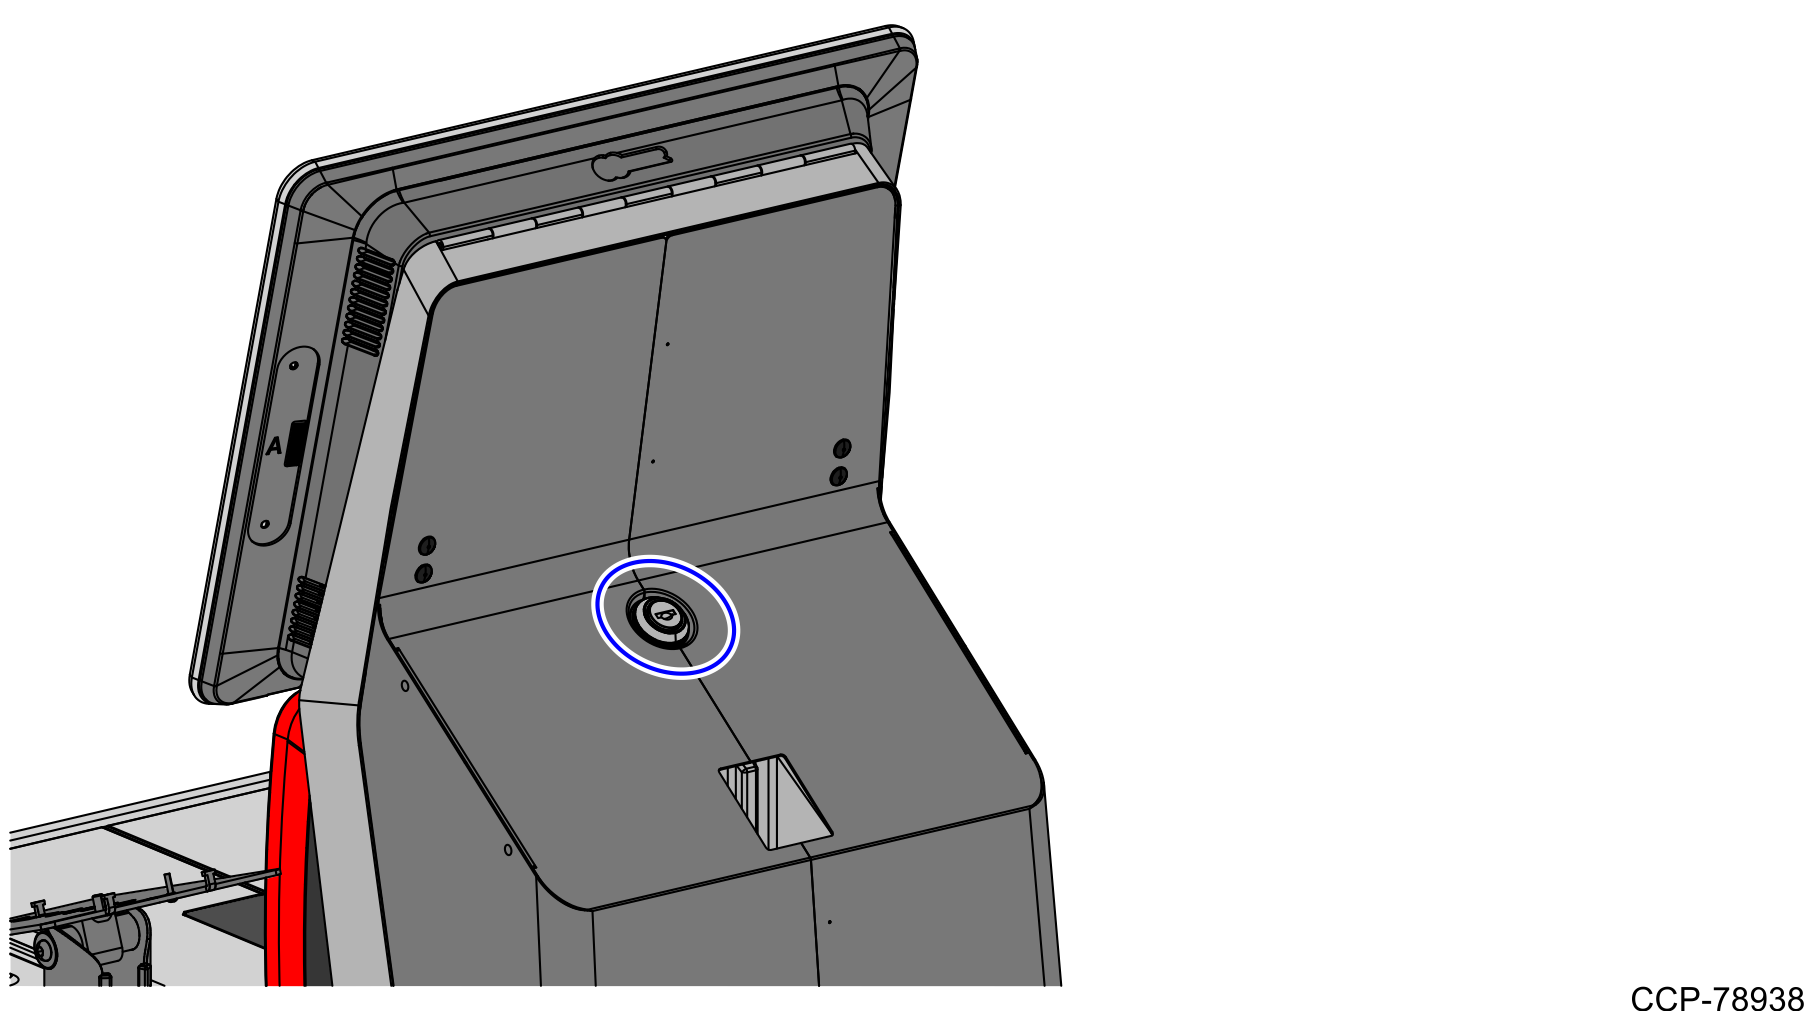
- Insert the key in the lock on the back of the tower and then turn counterclockwise to unlock the terminal.
- Lift up the Terminal Display.

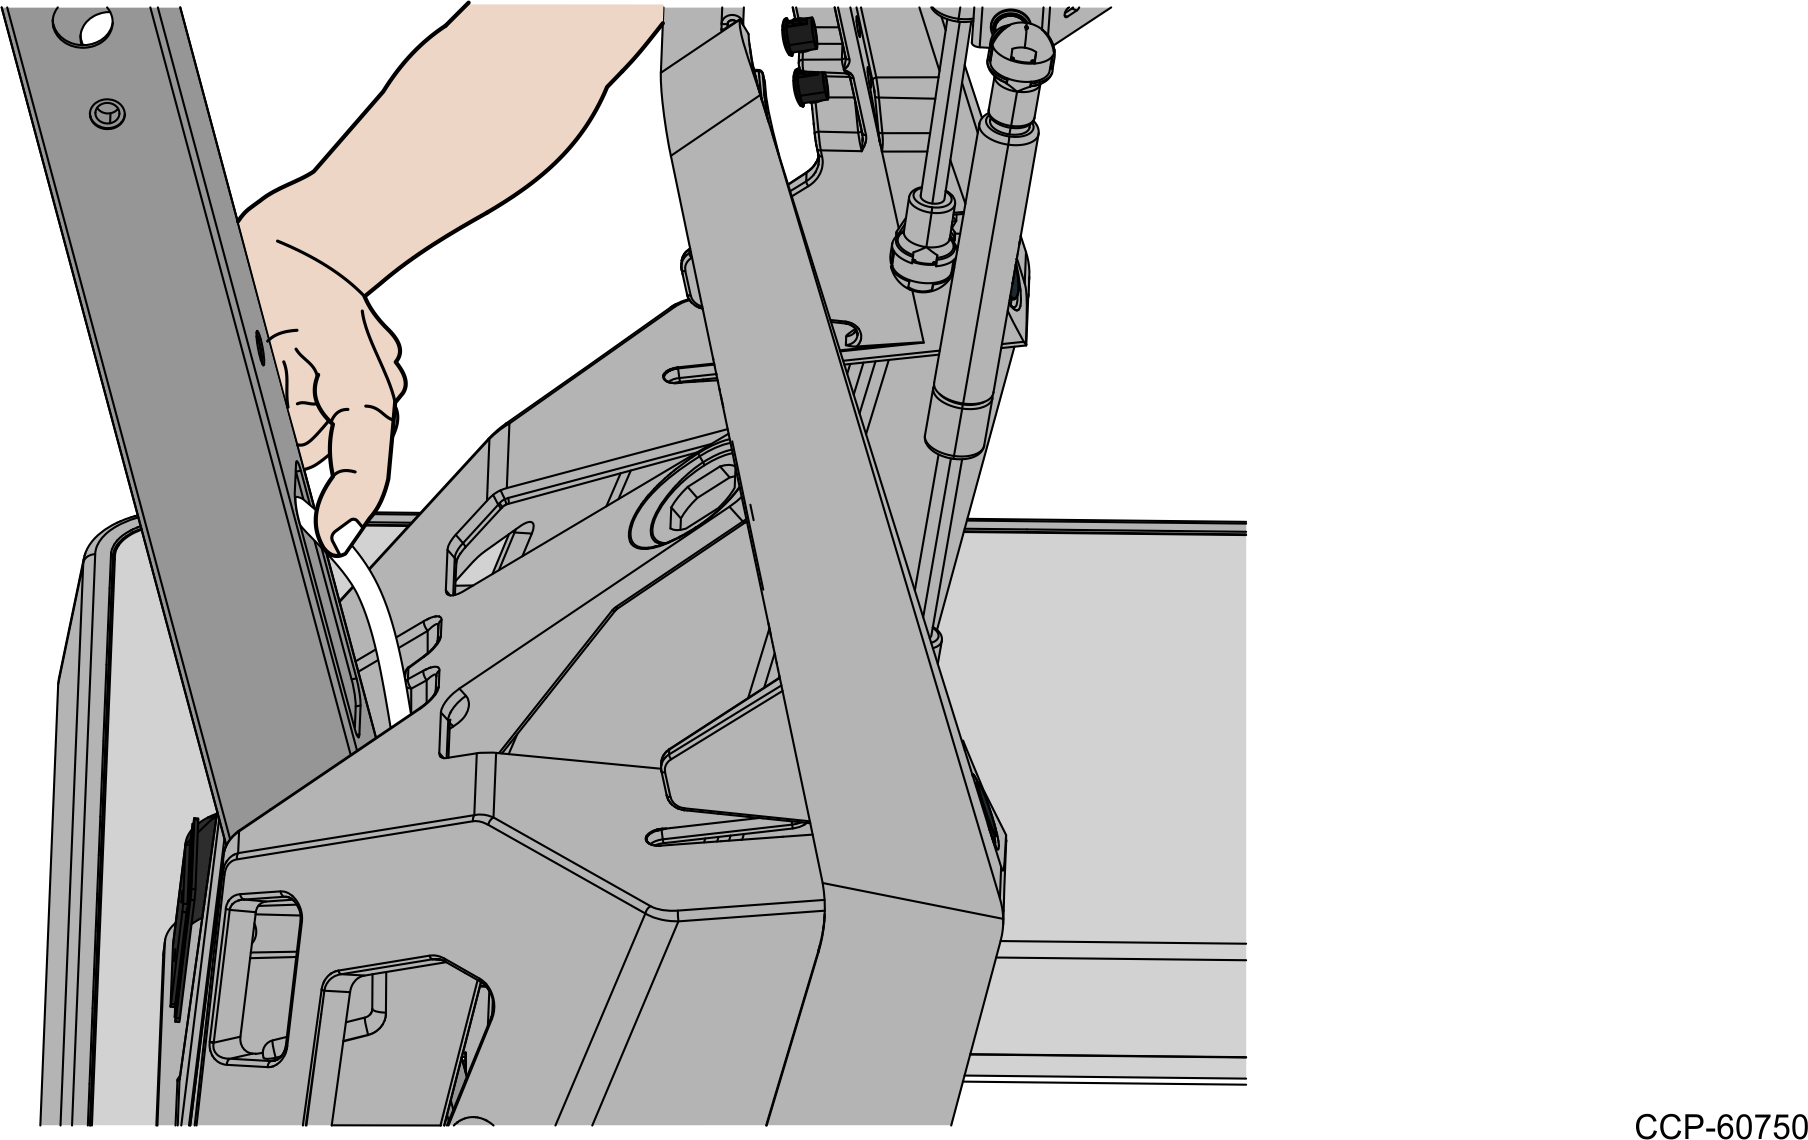
- Remove the Scanner/Scale.
- Loosen the star-shaped washer around the keylock assembly.
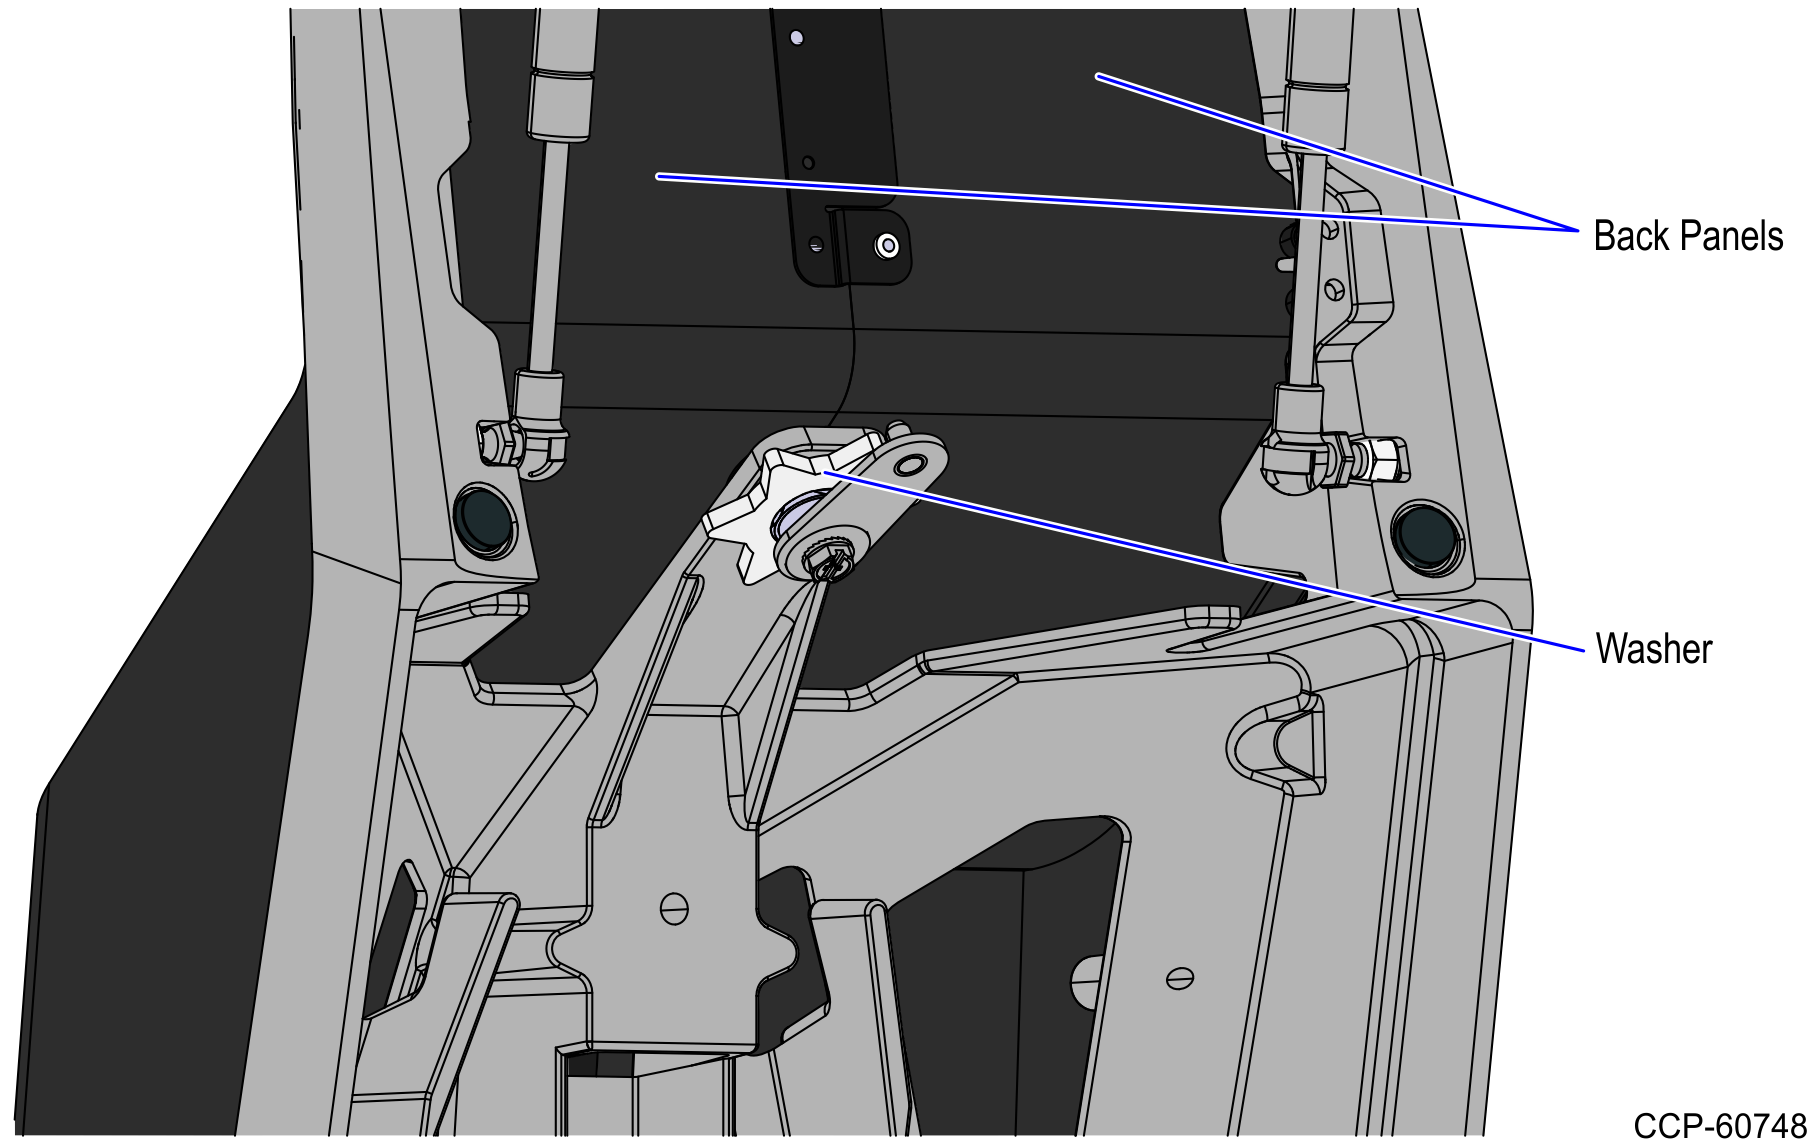
- Remove the two (2) back panels from the Tower Assembly. `
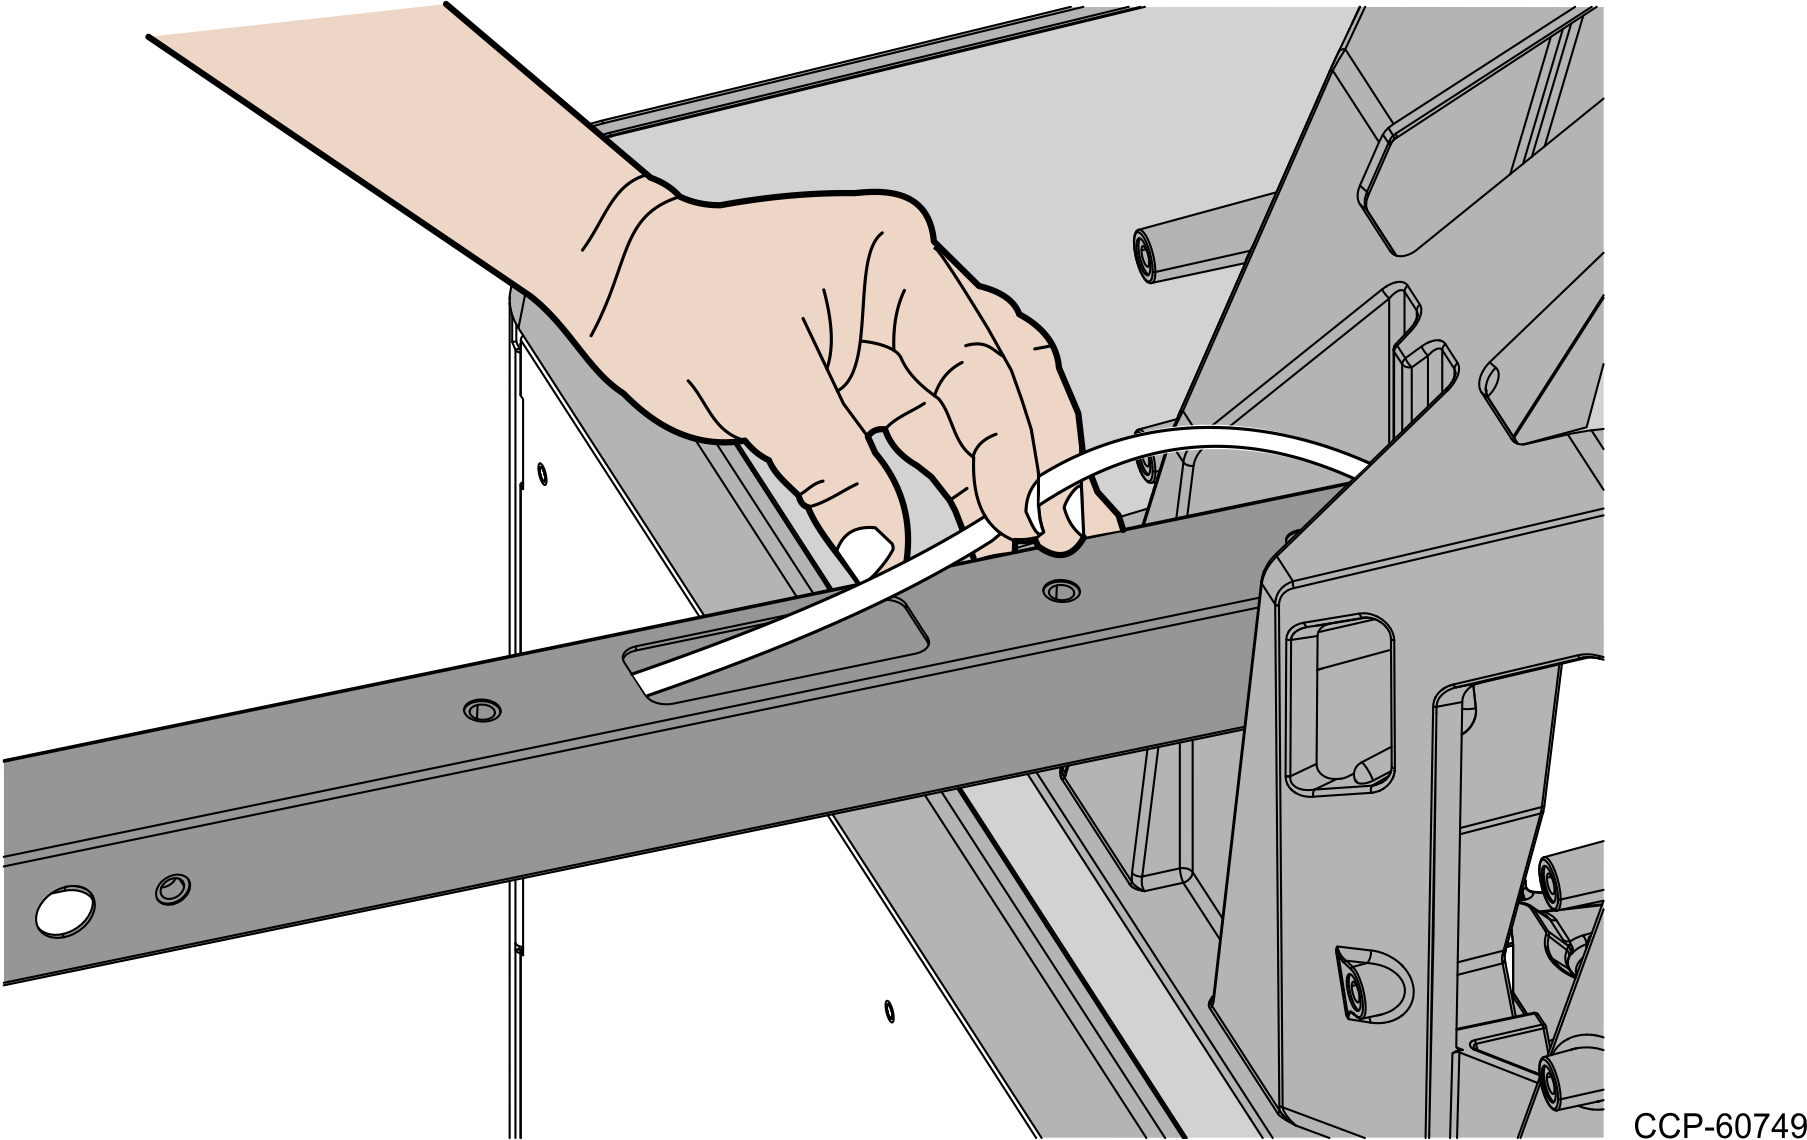
- Insert the Interactive Status Light Cable through the opening in the side of the Tri-Light/Lane Light Pole and route it out the top of the pole. Tip
To make routing of the Interactive Status Light Cable through the pole easier, first attach a weight (for example, a large bolt) to a long piece of string and drop the weighted end of the string through the Tri-Light/Lane Light Pole. Once the string is threaded through the pole, tie the non-weighted end of the string around the cable connector and then pull the cable extender through the pole.
NoteMake sure to temporarily leave the cable on the host side loose for the final cable routing. For more information, refer to Routing the cables
NoteThe Interactive Status Light Cable may be loose or not within the SelfServ Checkout unit.
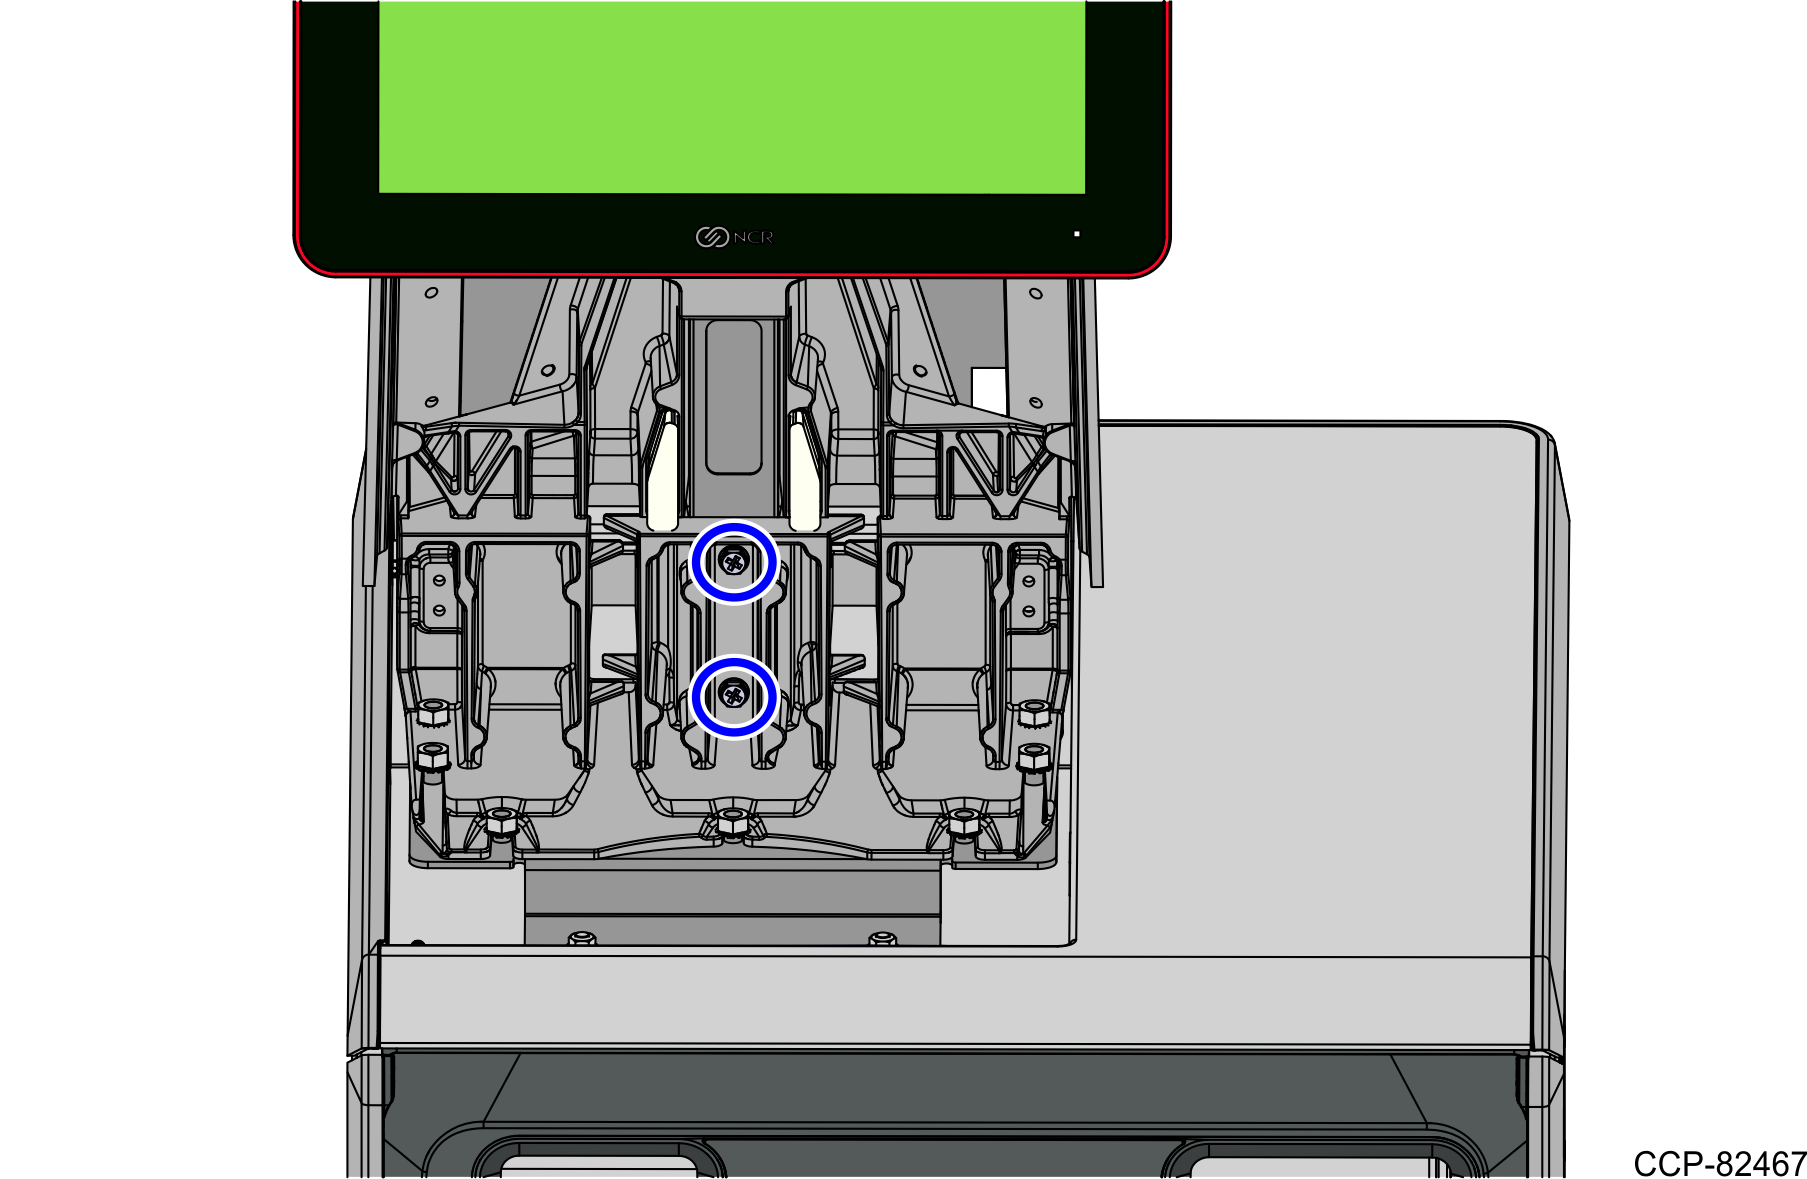
- Route the cables coming out of the unit so they align with the grooves and carefully insert the pole into the tower.
- Secure the pole to the tower with two (2) screws.Note
Insert the excess cables into the opening on the Tri-Light/Lane Light Pole so that cables will not interfere with any outer items.