Assembling Custom Bag Rack
To assemble the Custom Bag Rack, follow these steps:
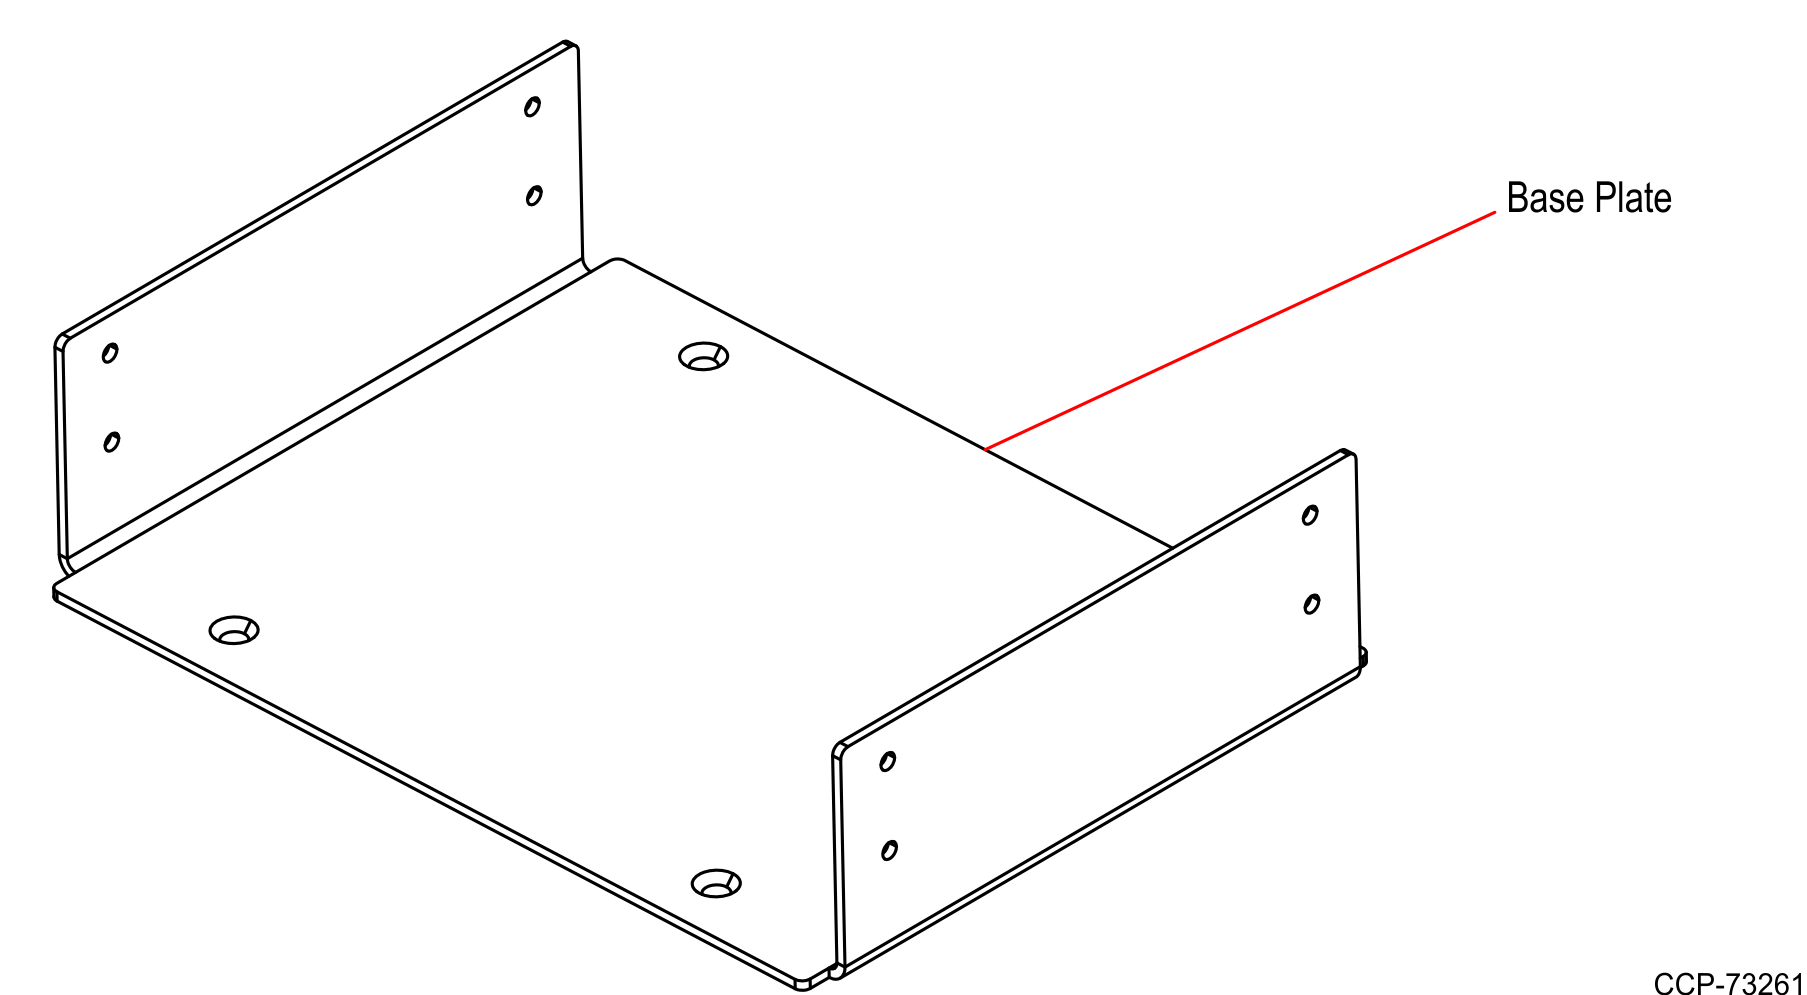
- Position the Base plate, as shown in the image below.
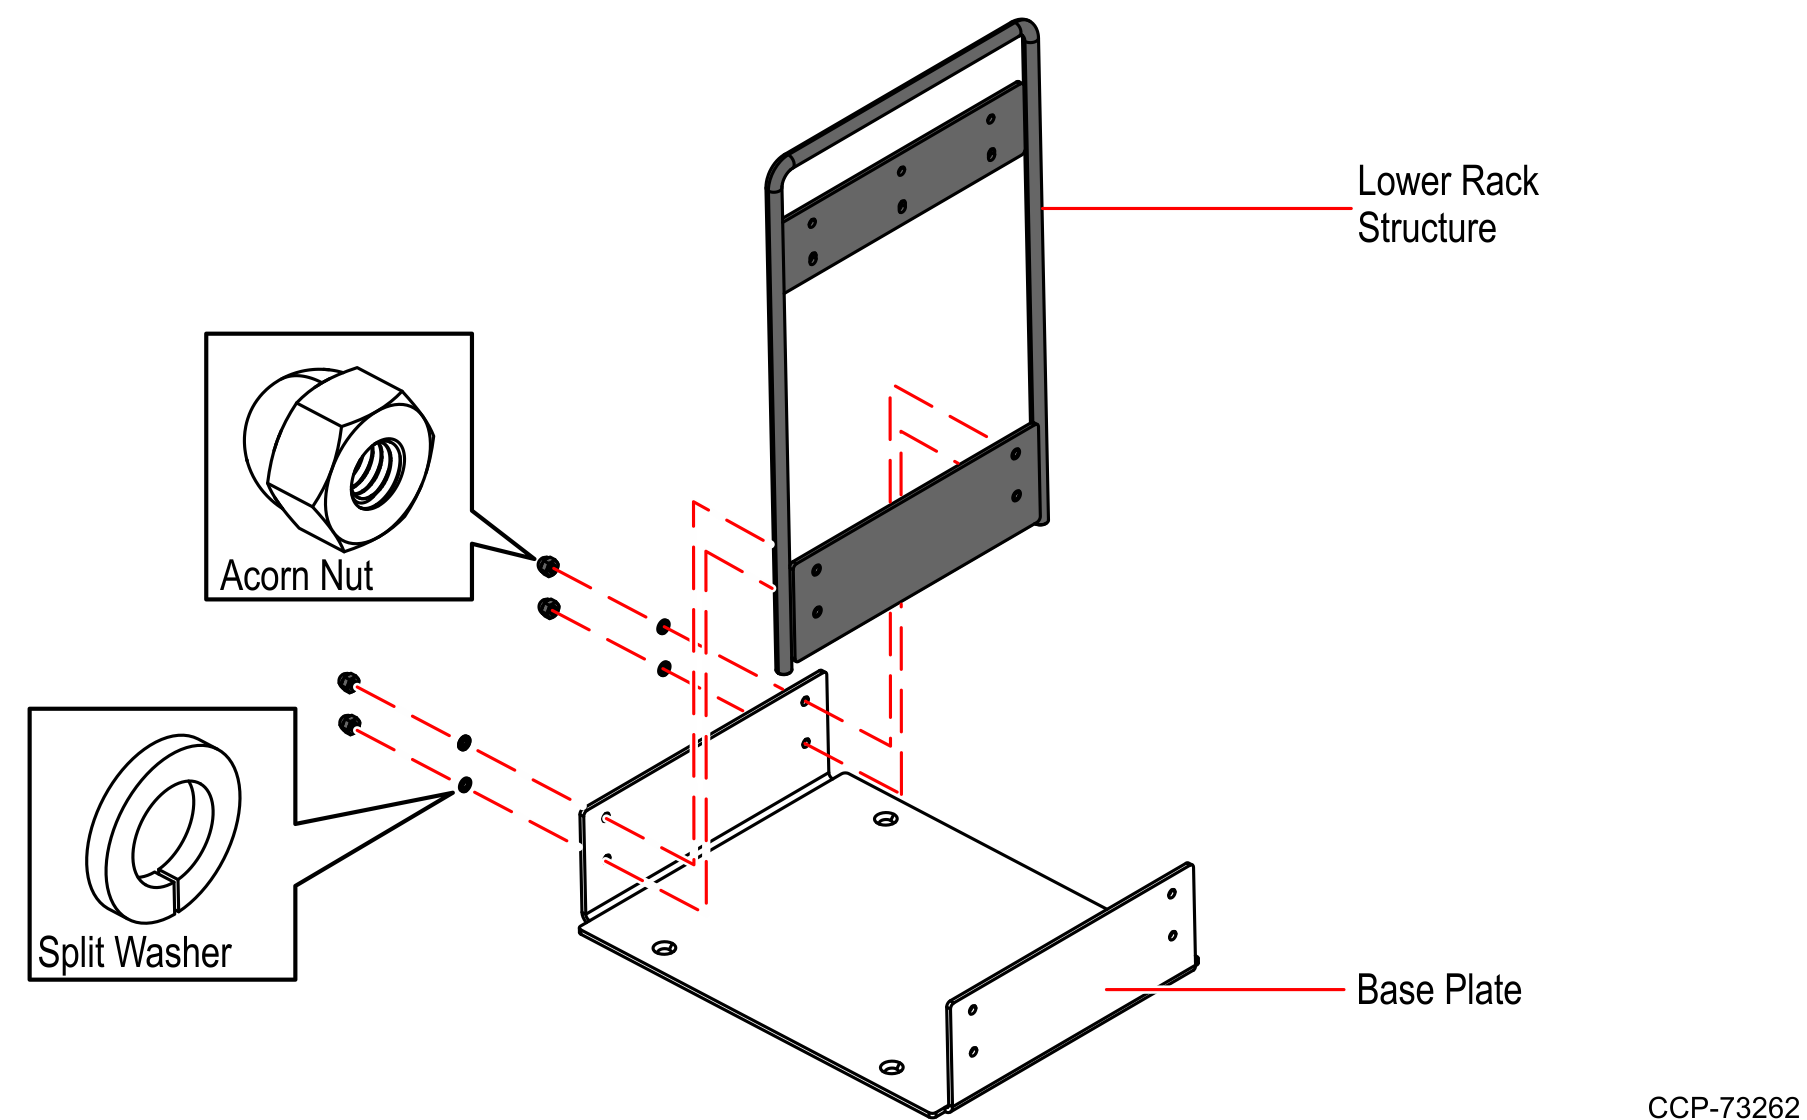
- Attach the Lower Rack structure on one side of the Base plate using four (4) Acorn nuts. Each nut has a split washer.Note
Set the nut driver torque limiter to 26 in–lbs.
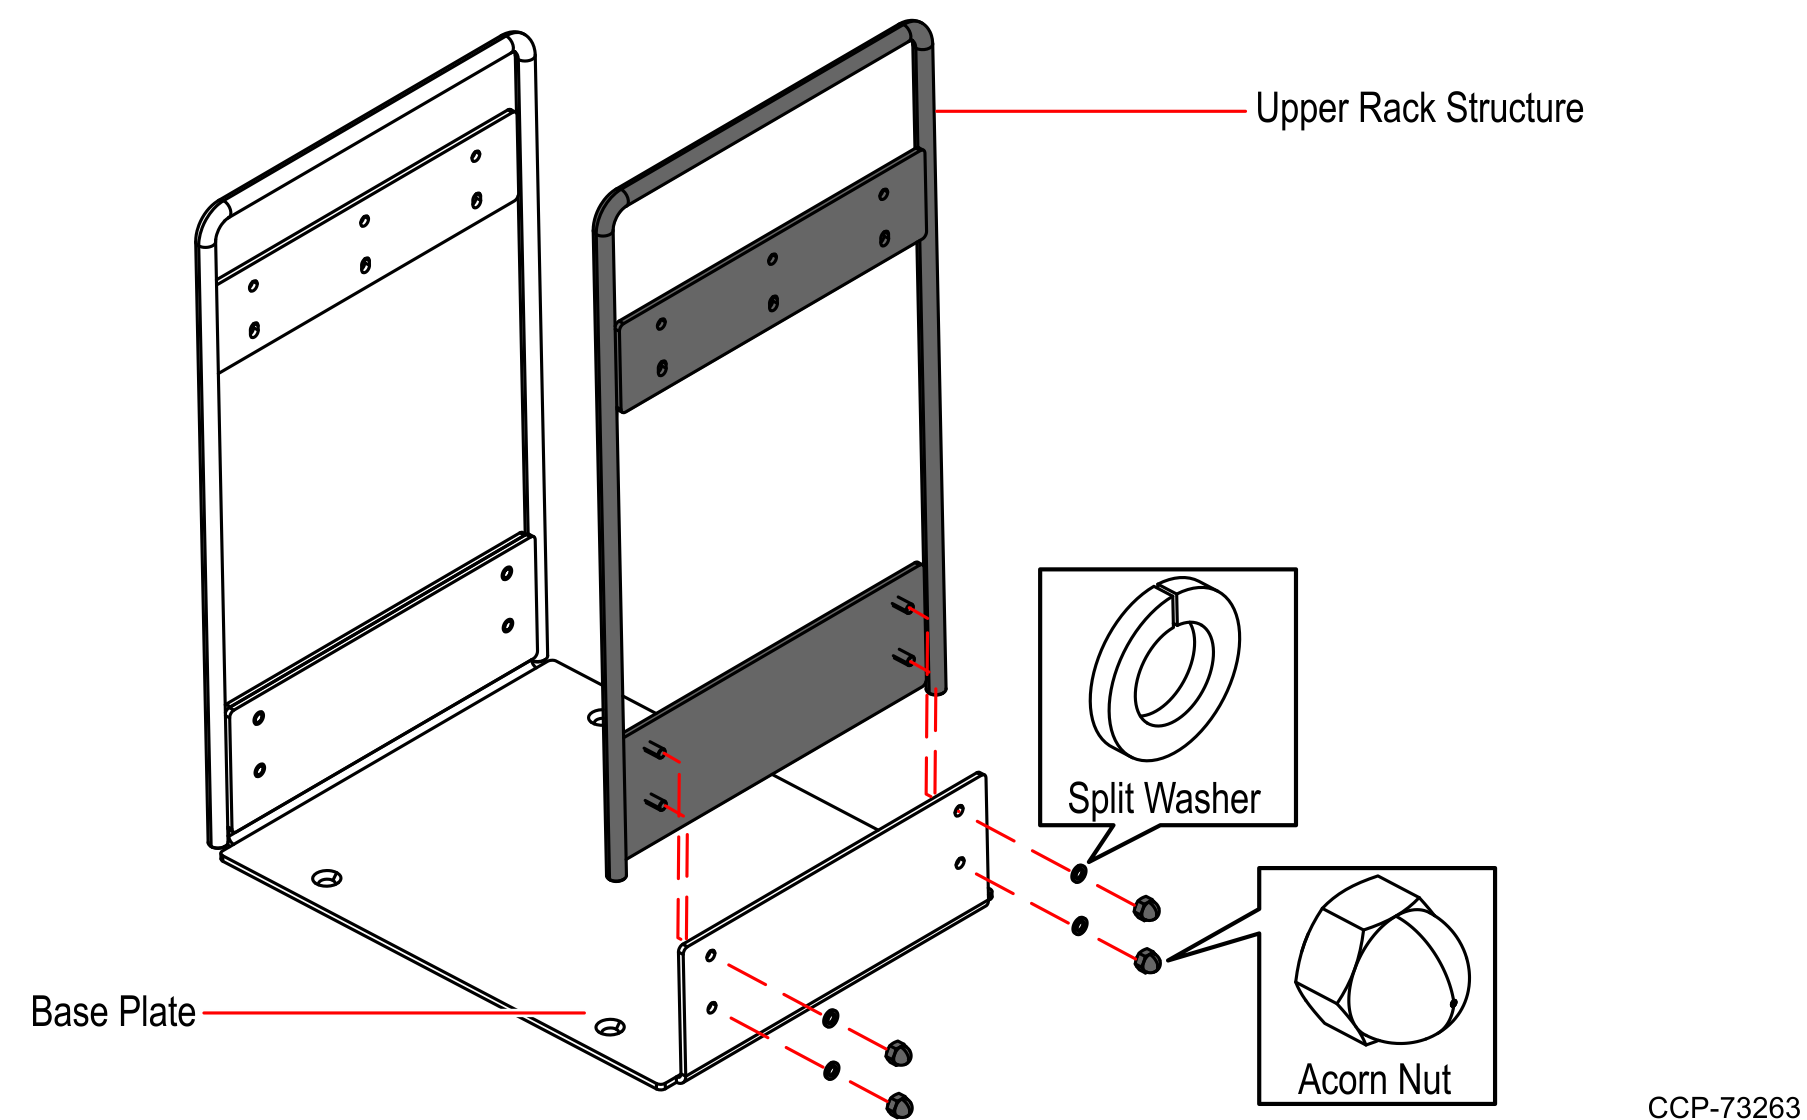
- Attach the Upper Rack structure on the other side of the Base plate using four (4) Acorn nuts. Each nut has a split washer.Note
Set the nut driver torque limiter to 26 in–lbs.
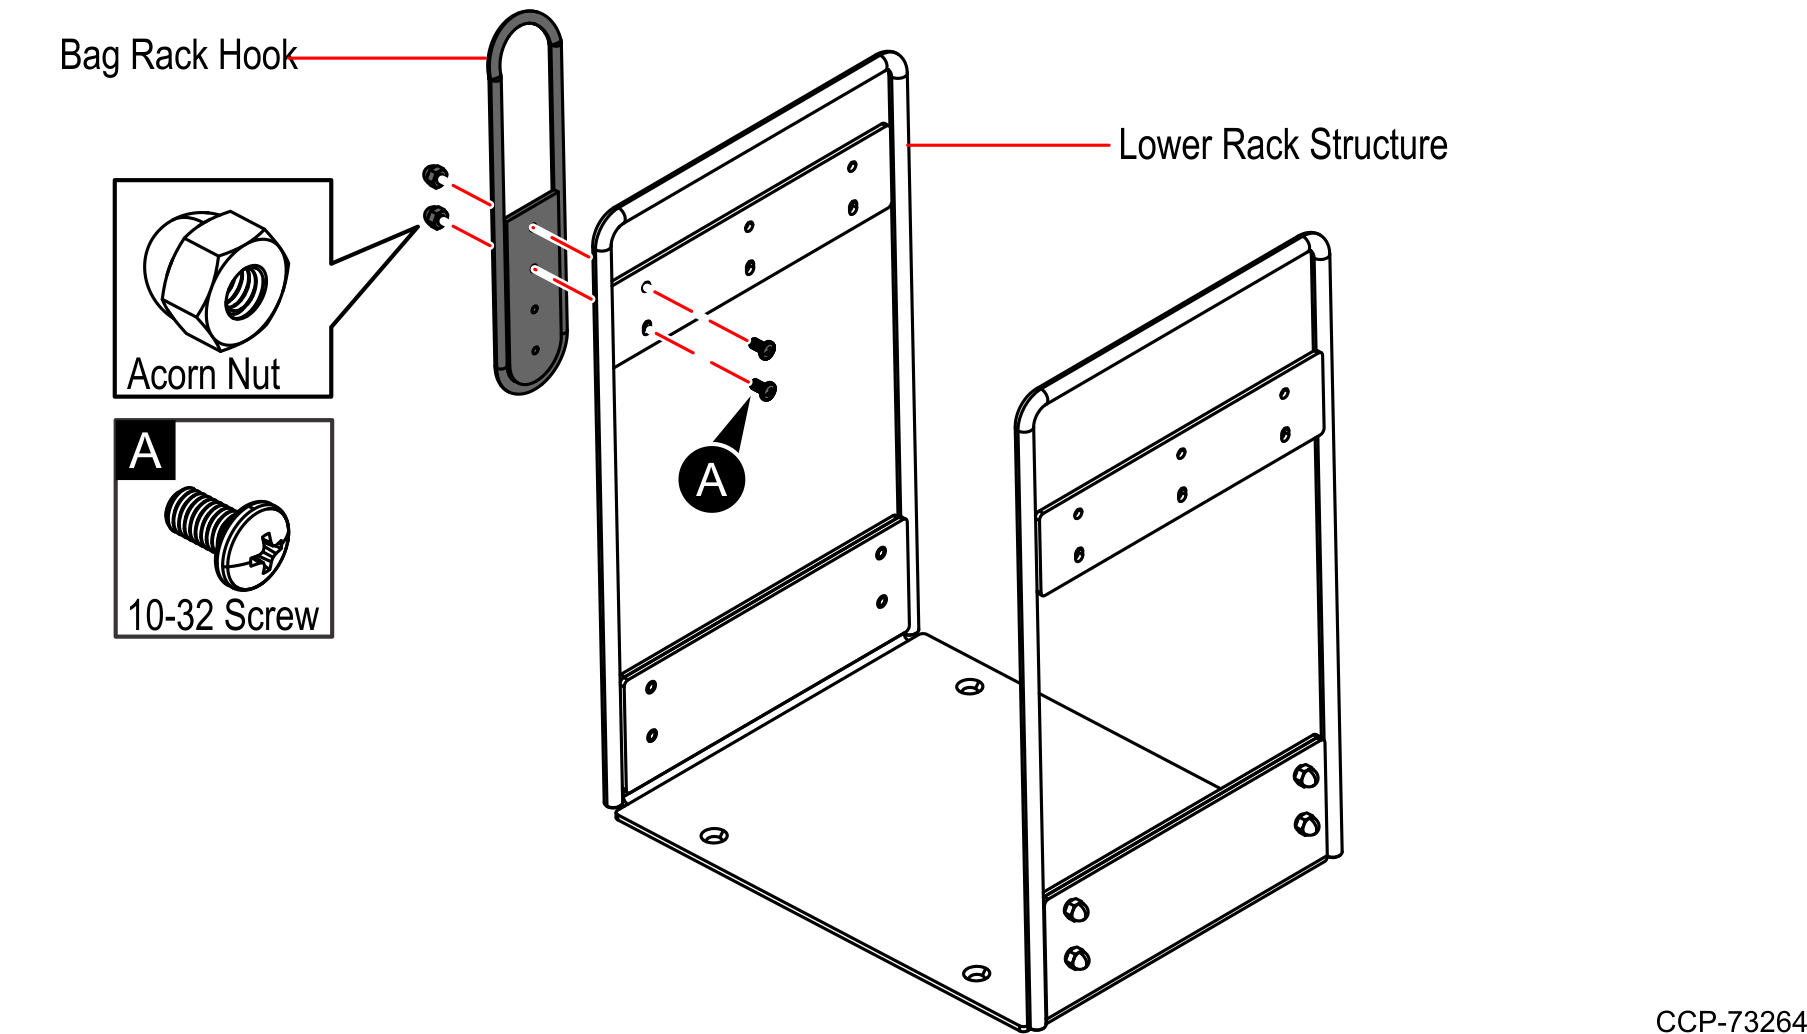
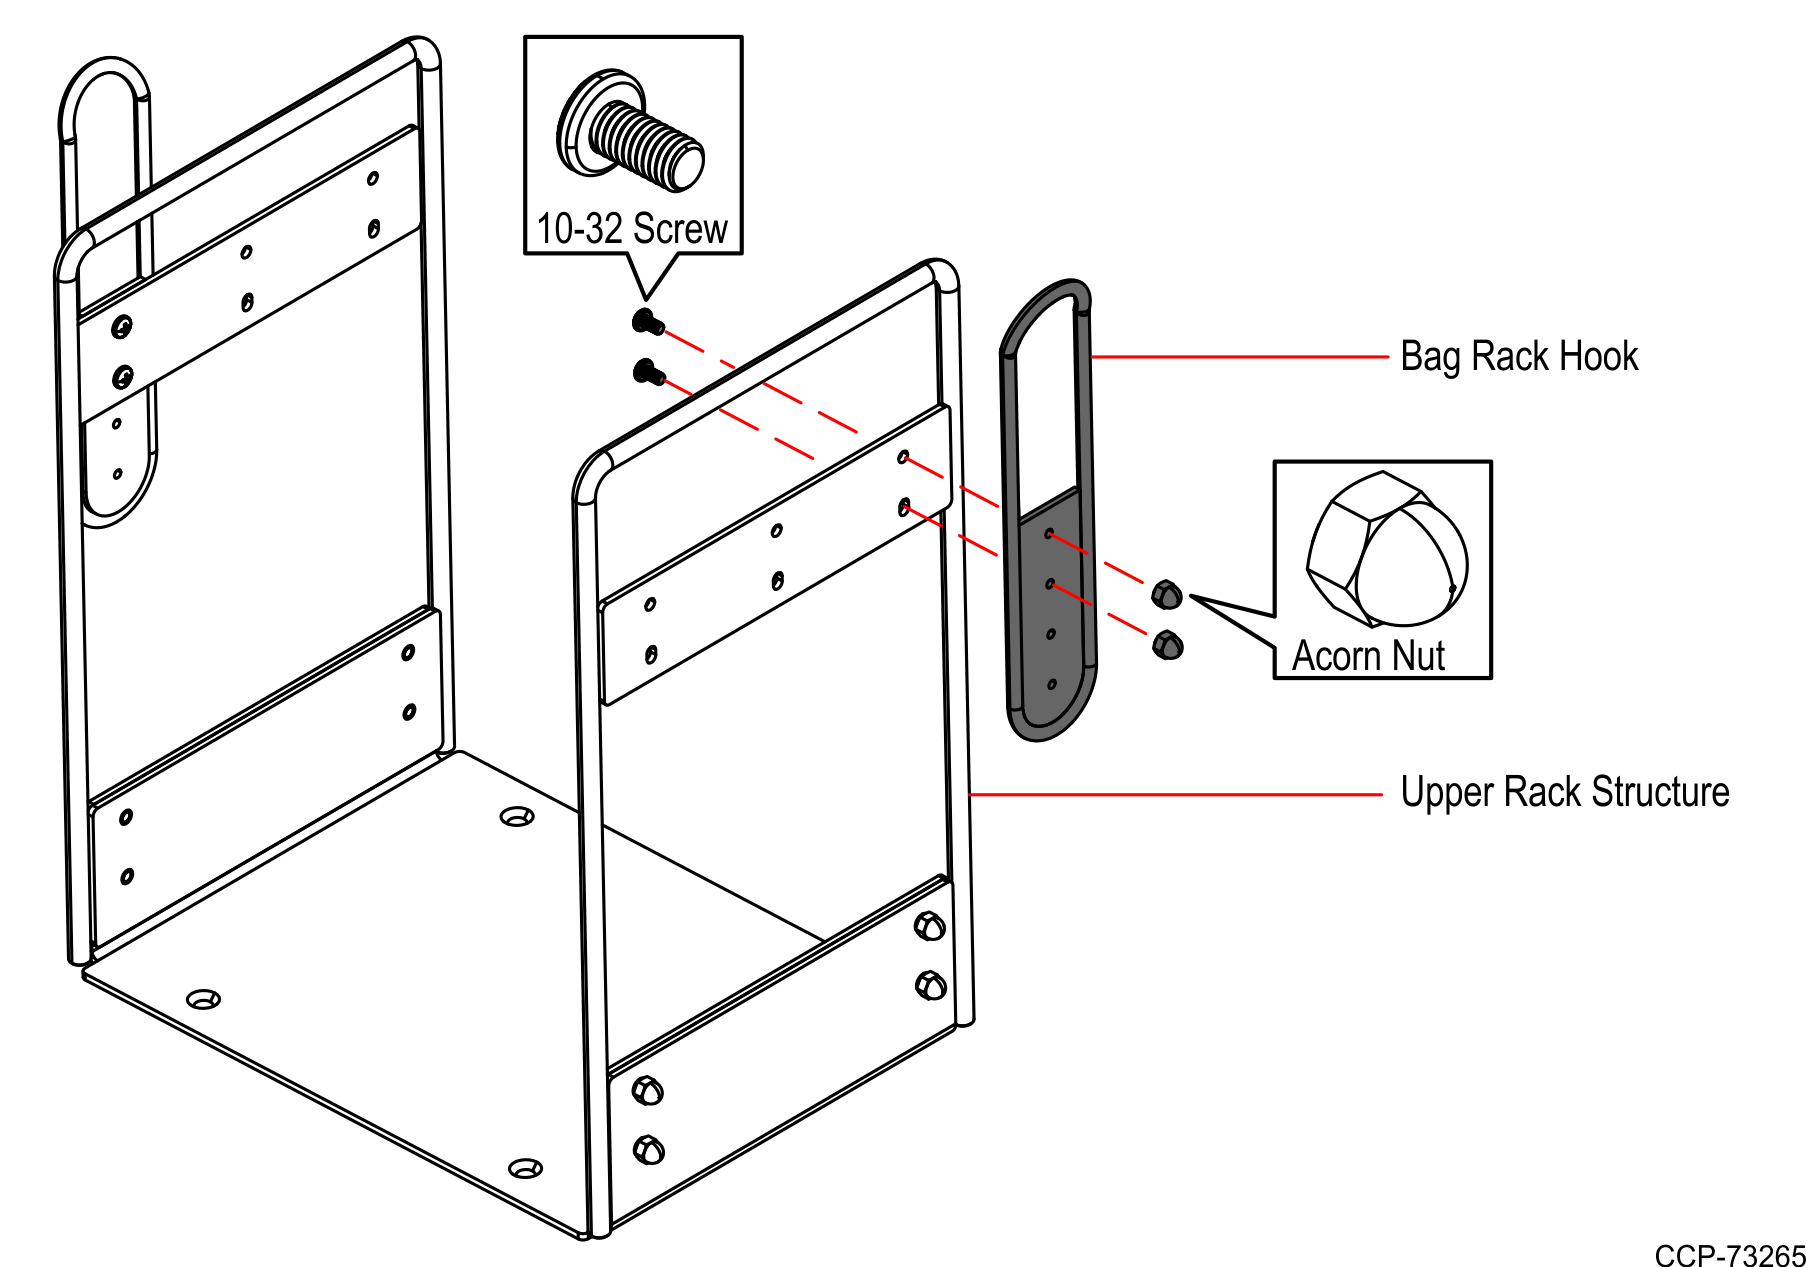
- Install two (2) Bag Rack Hooks, by doing the following:
- Determine the position of each Bag Rack Hook according to their usage.
- Attach one Bag Rack Hook to the Lower Rack structure using two (2) 10–32 screws and two (2) Acorn nuts, as shown in the image below.Note
Set the screw driver torque limiter to 20 in–lbs.
- Attach the other Bag Rack Hook to the Upper Rack structure using two (2) 10–32 screws and two (2) Acorn nuts, as shown in the image below.Note
Set the screw driver torque limiter to 20 in–lbs.
- Install the Custom Bag Rack on the Scale Tray. For more information refer to Installing Custom Bag Rack on Scale Tray.