Installing the (7879e) Scanner/Scale
The 7350-K979 kit is only designed for use on the NCR SelfServ™ Checkout (7350) Narrow Core (R5N) configuration with the following scanner models:
•7879e Mid-size 15.7" Scanner only model (7879-4501-9090) and Mid-size 15.7" top plate.
•7879e Mid-size 15.7" Scanner/Scale model (7879-5501-9090) and Mid-size 15.7" top plate.
To purchase an NCR RealScan 79e (7879e), contact an NCR Customer Representative.
To install the (7879e) Scanner/Scale, follow these steps:
1.Remove the existing Scanner/Scale. For more information, refer to Removing the Scanner/Scale.
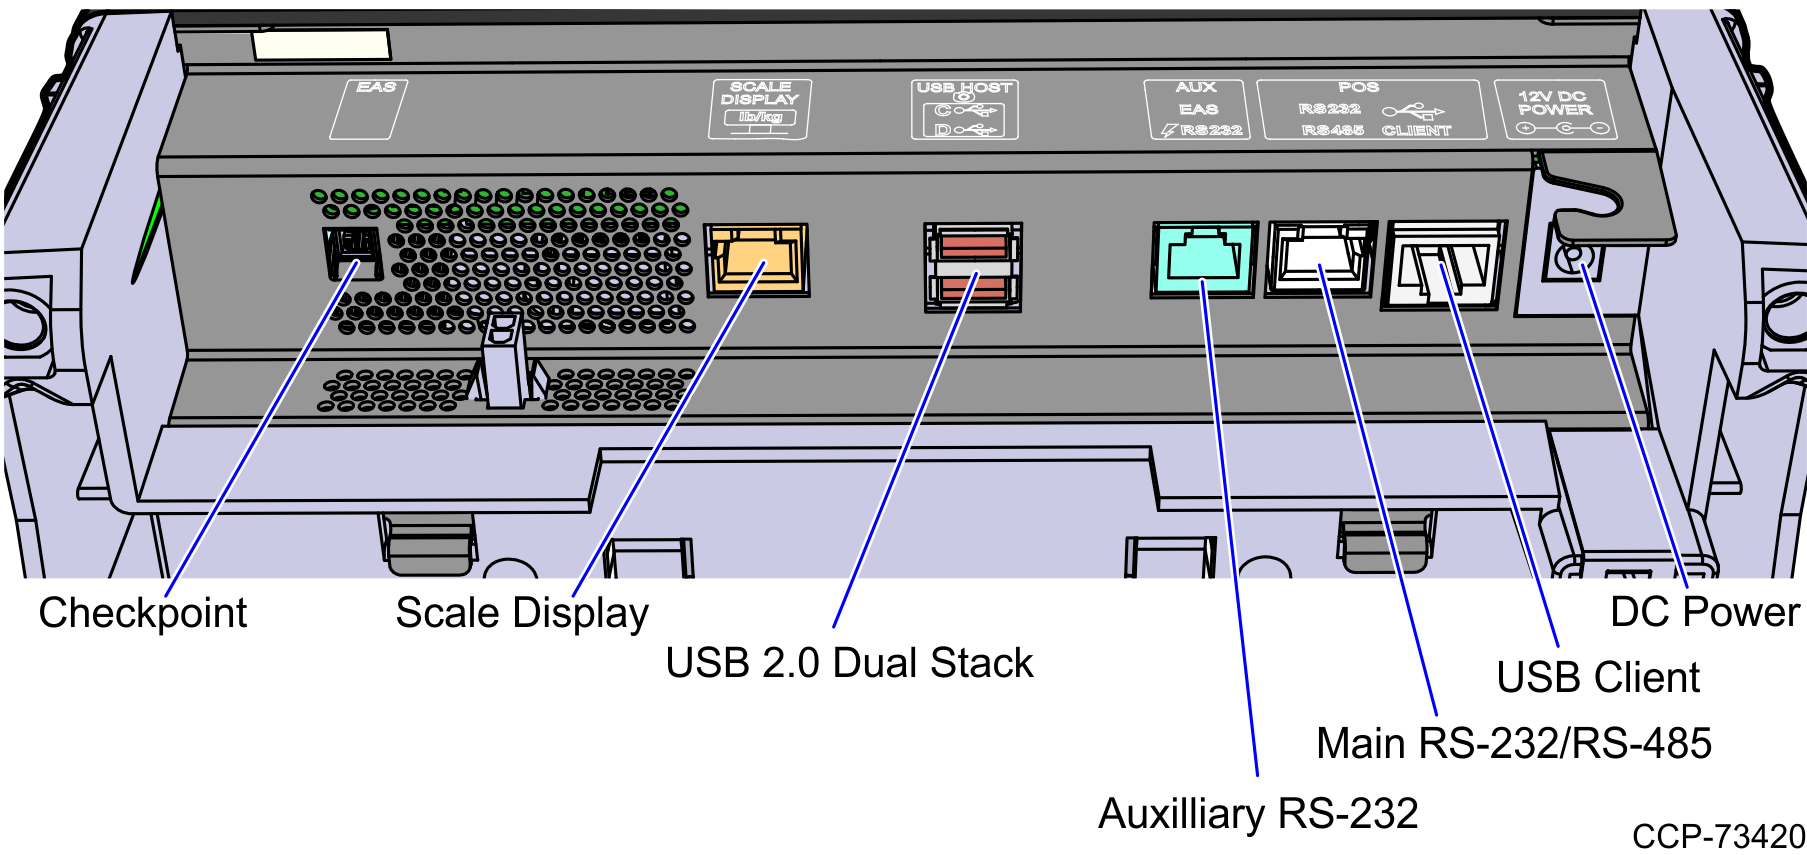
2.Connect the scanner cable to the USB Client port on RealScan 79e.
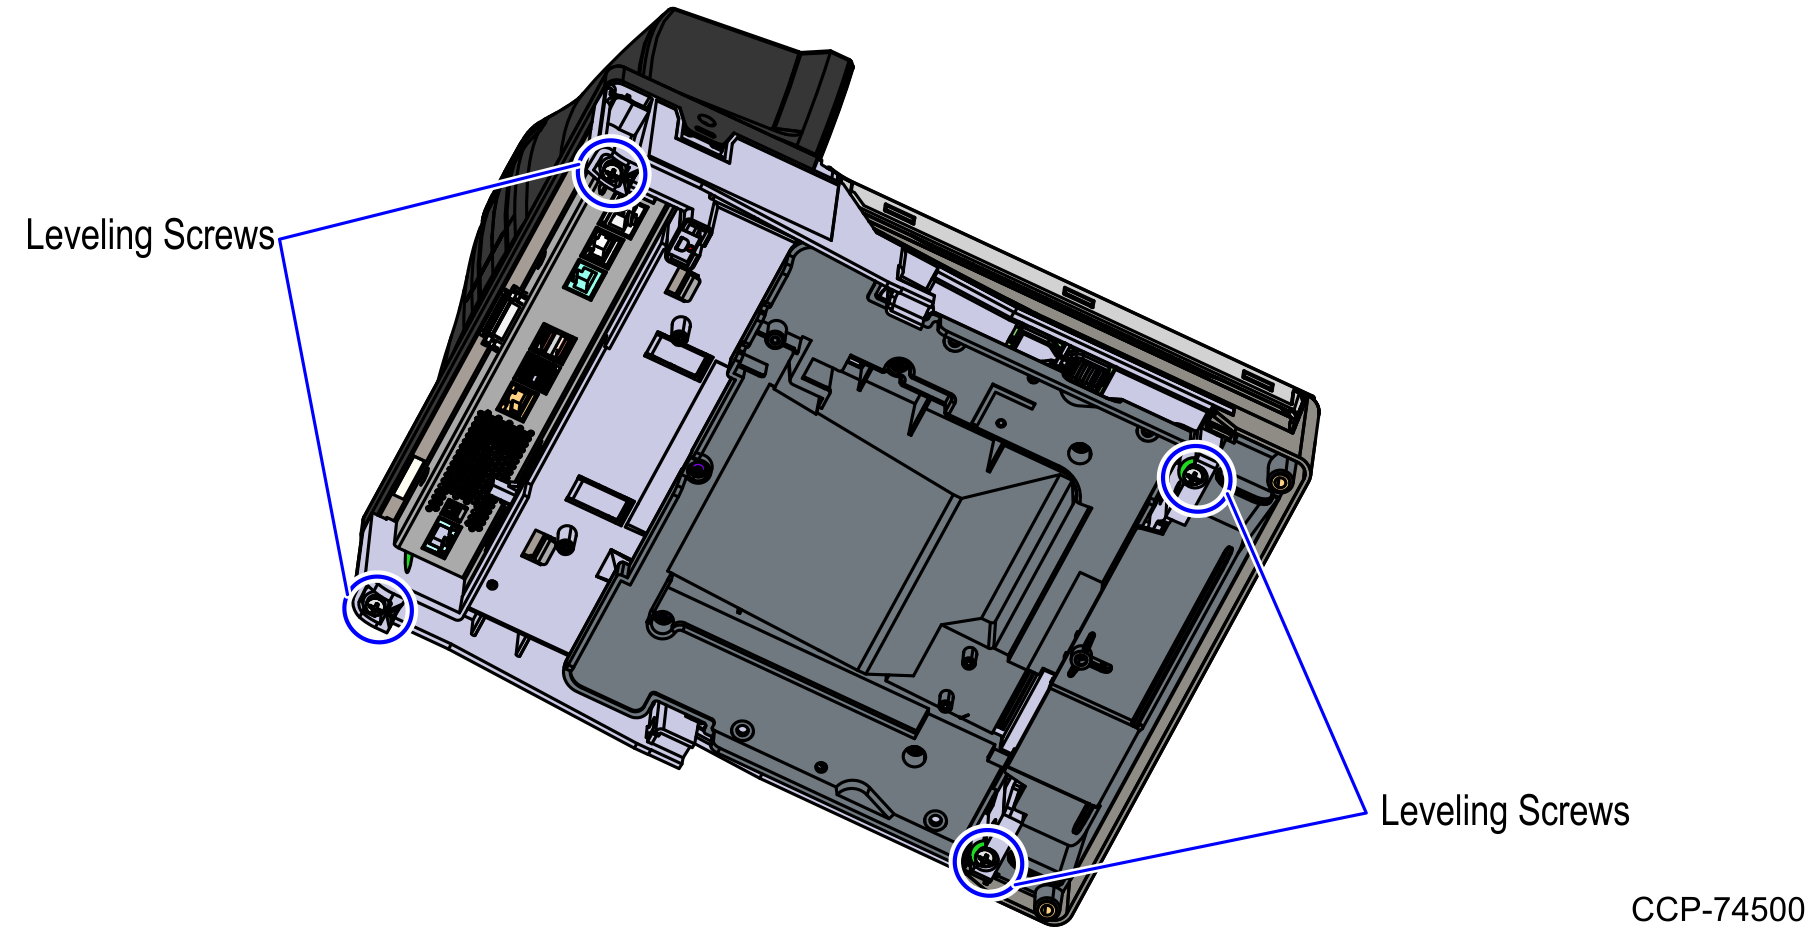
3.Ensure that the Scanner/Scale is leveled by adjusting four leveling screws located on the bottom of the unit.
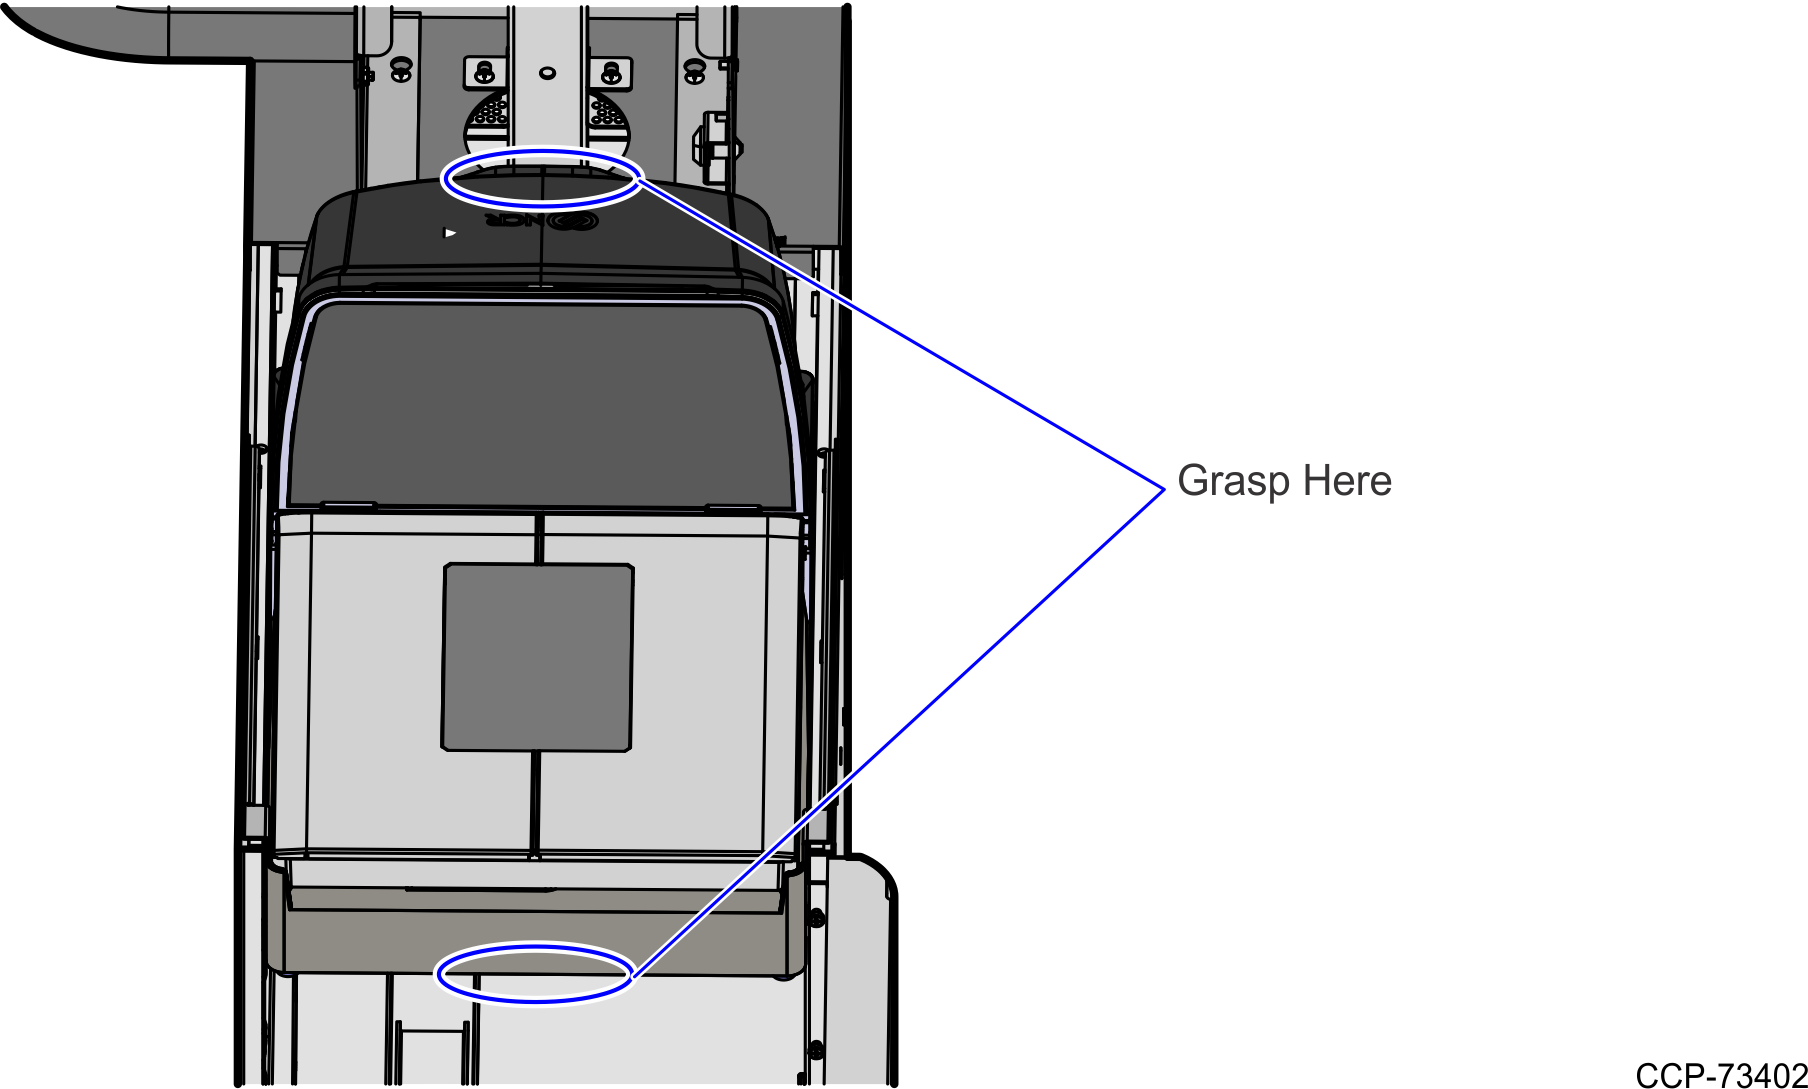
4.Place the Scanner/Scale on the scanner bucket.
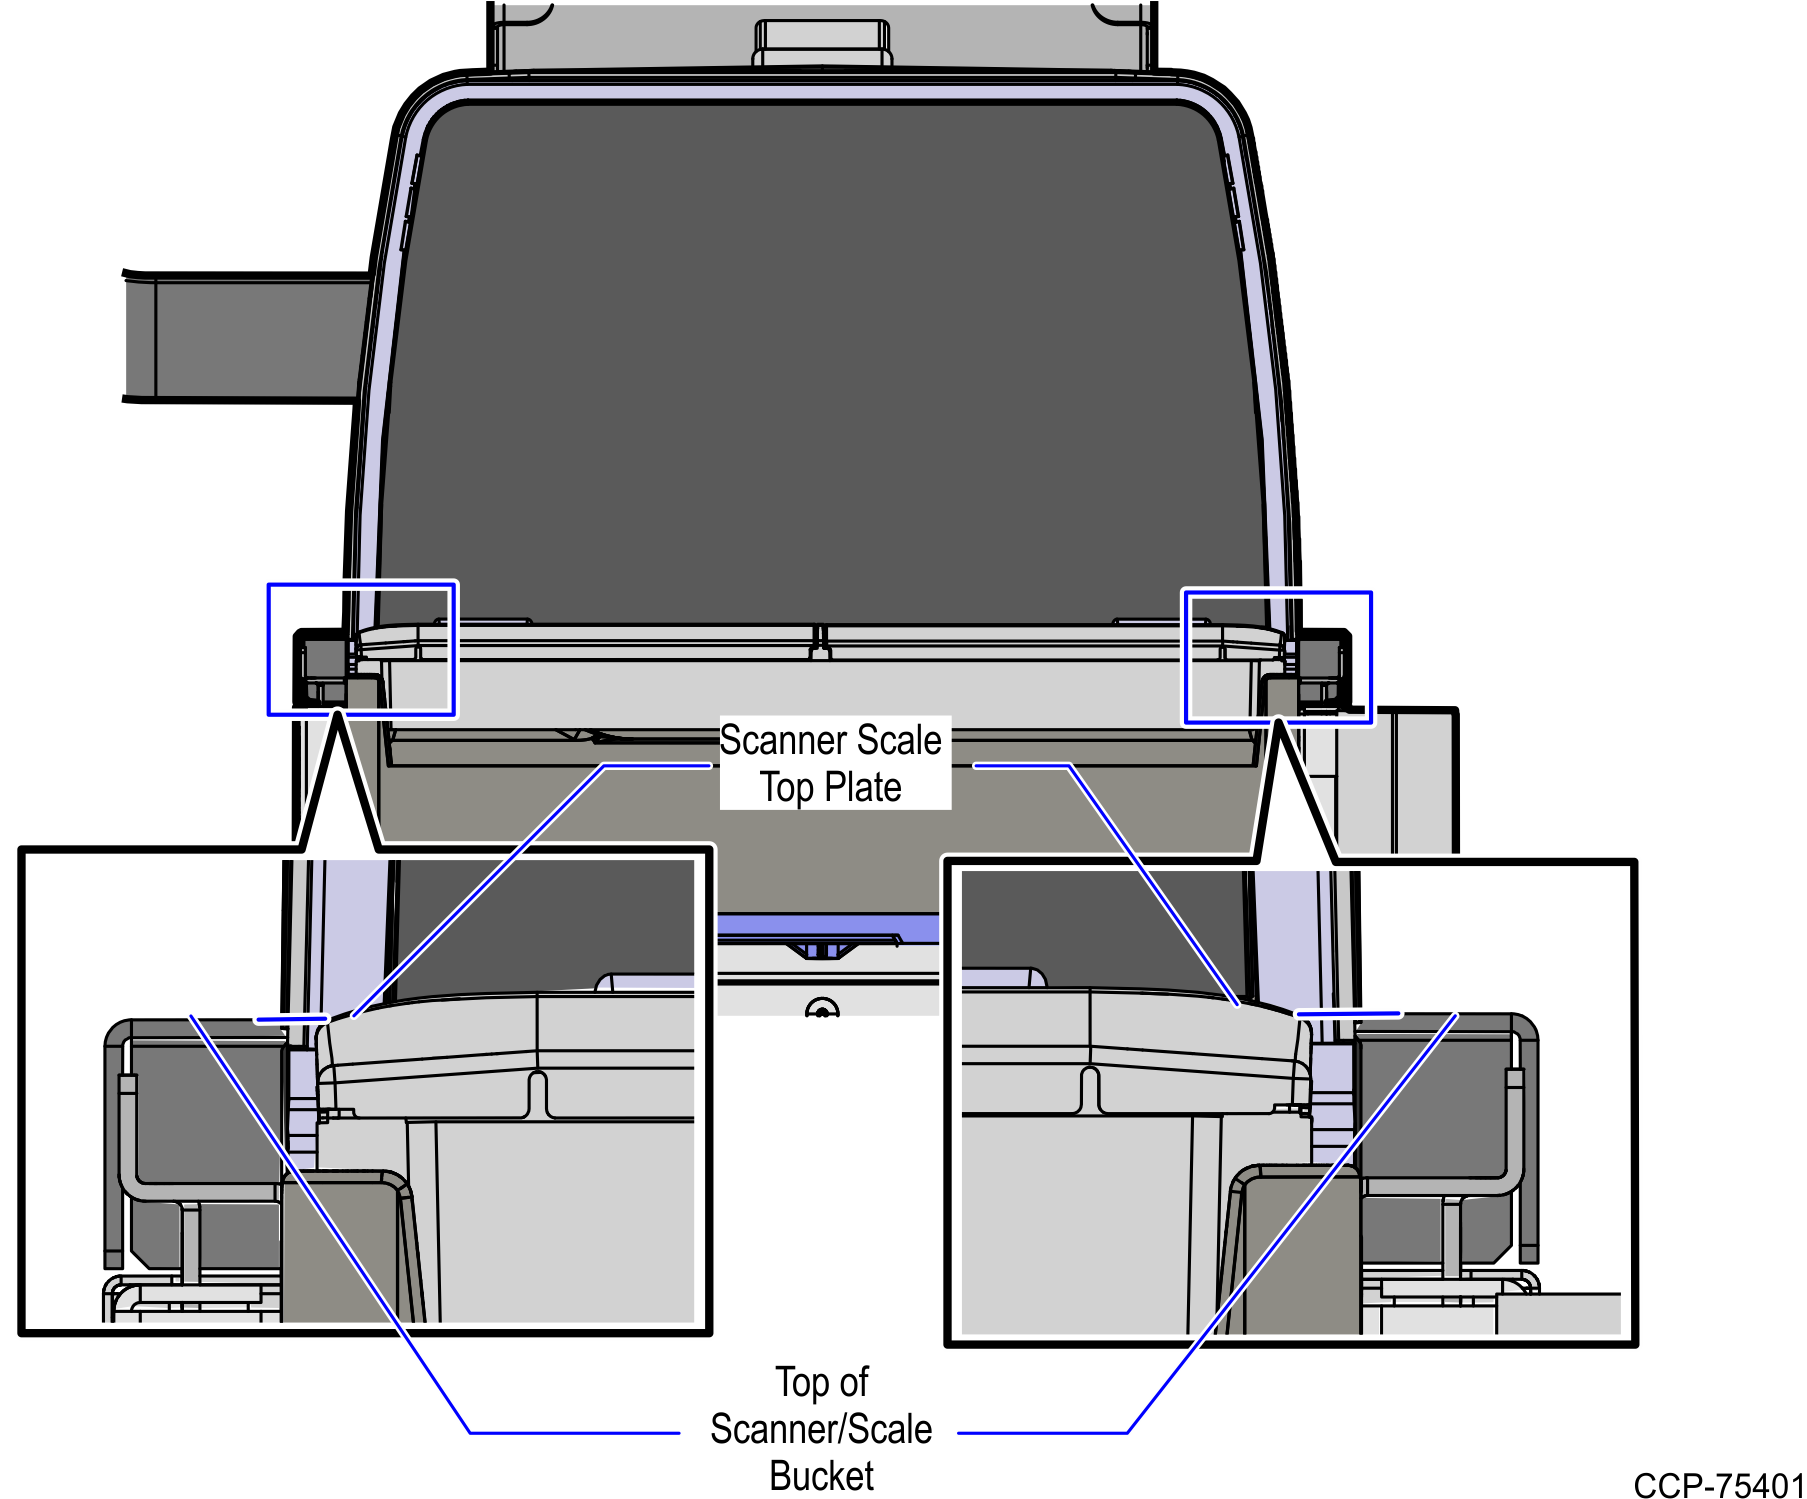
5.Verify that the Scanner/Scale Top Plate is correctly aligned with the top of the Scanner/Scale bucket. The sides of the Top Plate must not be higher than the top surface of the Selfserv Checkout unit.
Note: If neccessary, remove the Scanner/Scale from the unit and adjust the leveling feet.
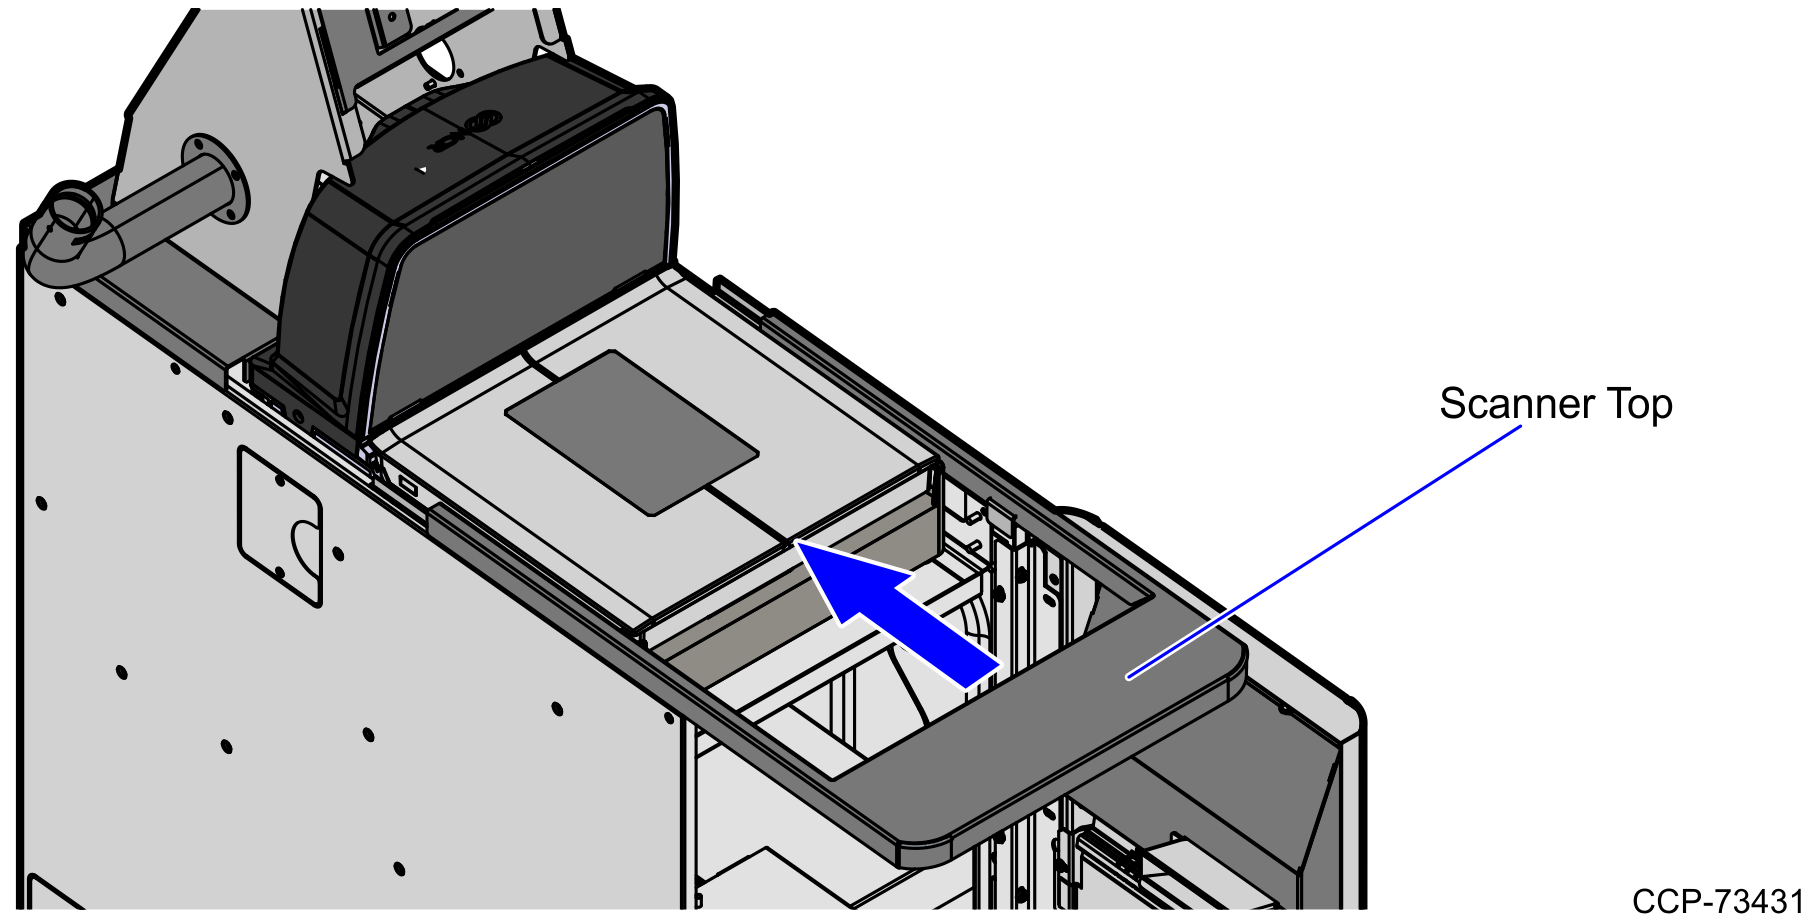
6.Slide the Scanner top towards the scanner.
Note: The Scanner/Scale must be calibrated before the system goes live.
7.Route the cables. For more information, refer to the 7350-K978 R6L Upgrade, Narrow Core.
8.Close the Core Door.