Installation Procedure
To upgrade the Tri-Light/Lane Light in an existing NCR SelfServ™ Checkout (7350) unit to an R6 Tri-Light/Lane Light using the 7350 R6 Tri-Light/Lane Light Adapter Assembly follow these steps:
Note: This kit requires 7350-K971 R6 Tri-Light/Lane Light Upgrade Kit. To purchase the R6 Tri-Light/Lane Light, contact an NCR Customer Representative.
1.Open the Upper Cabinet Door.
2.Remove the Scanner/Scale and disconnect the cable from the E-Box.
3.Set the Scanner/Scale aside.
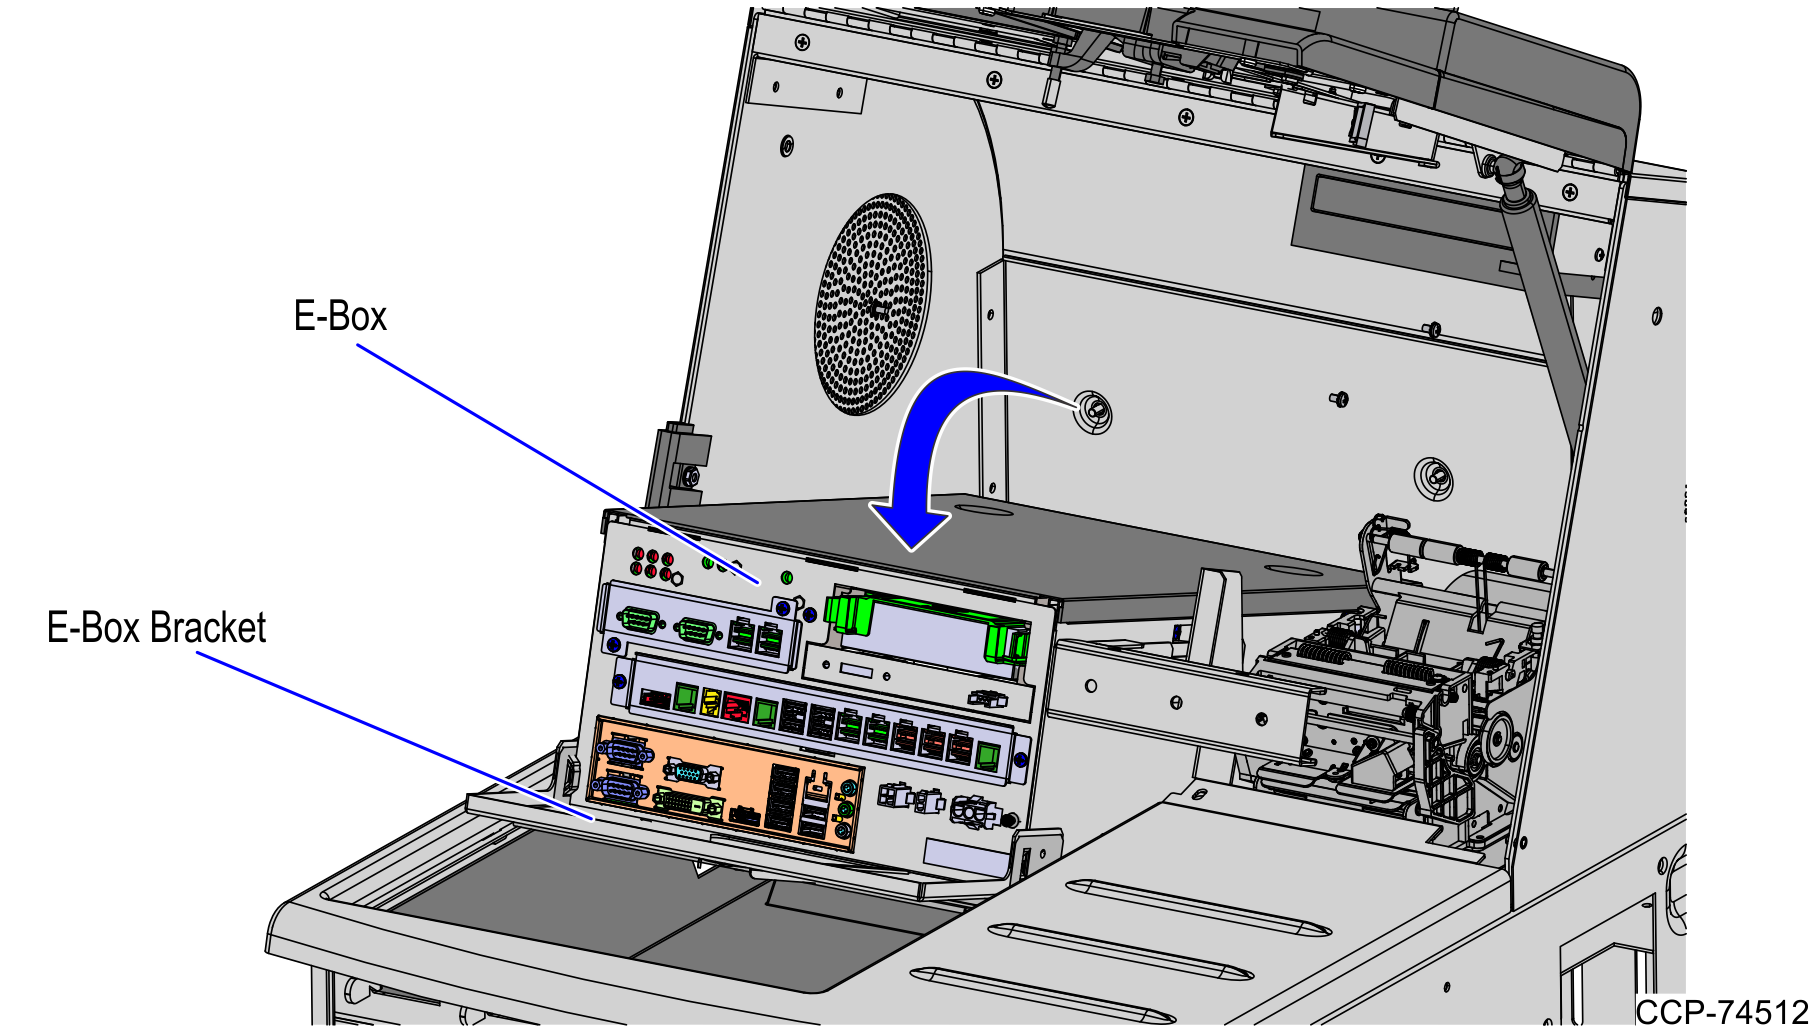
4.Tilt the E-box Bracket forward to easily access the core hood.
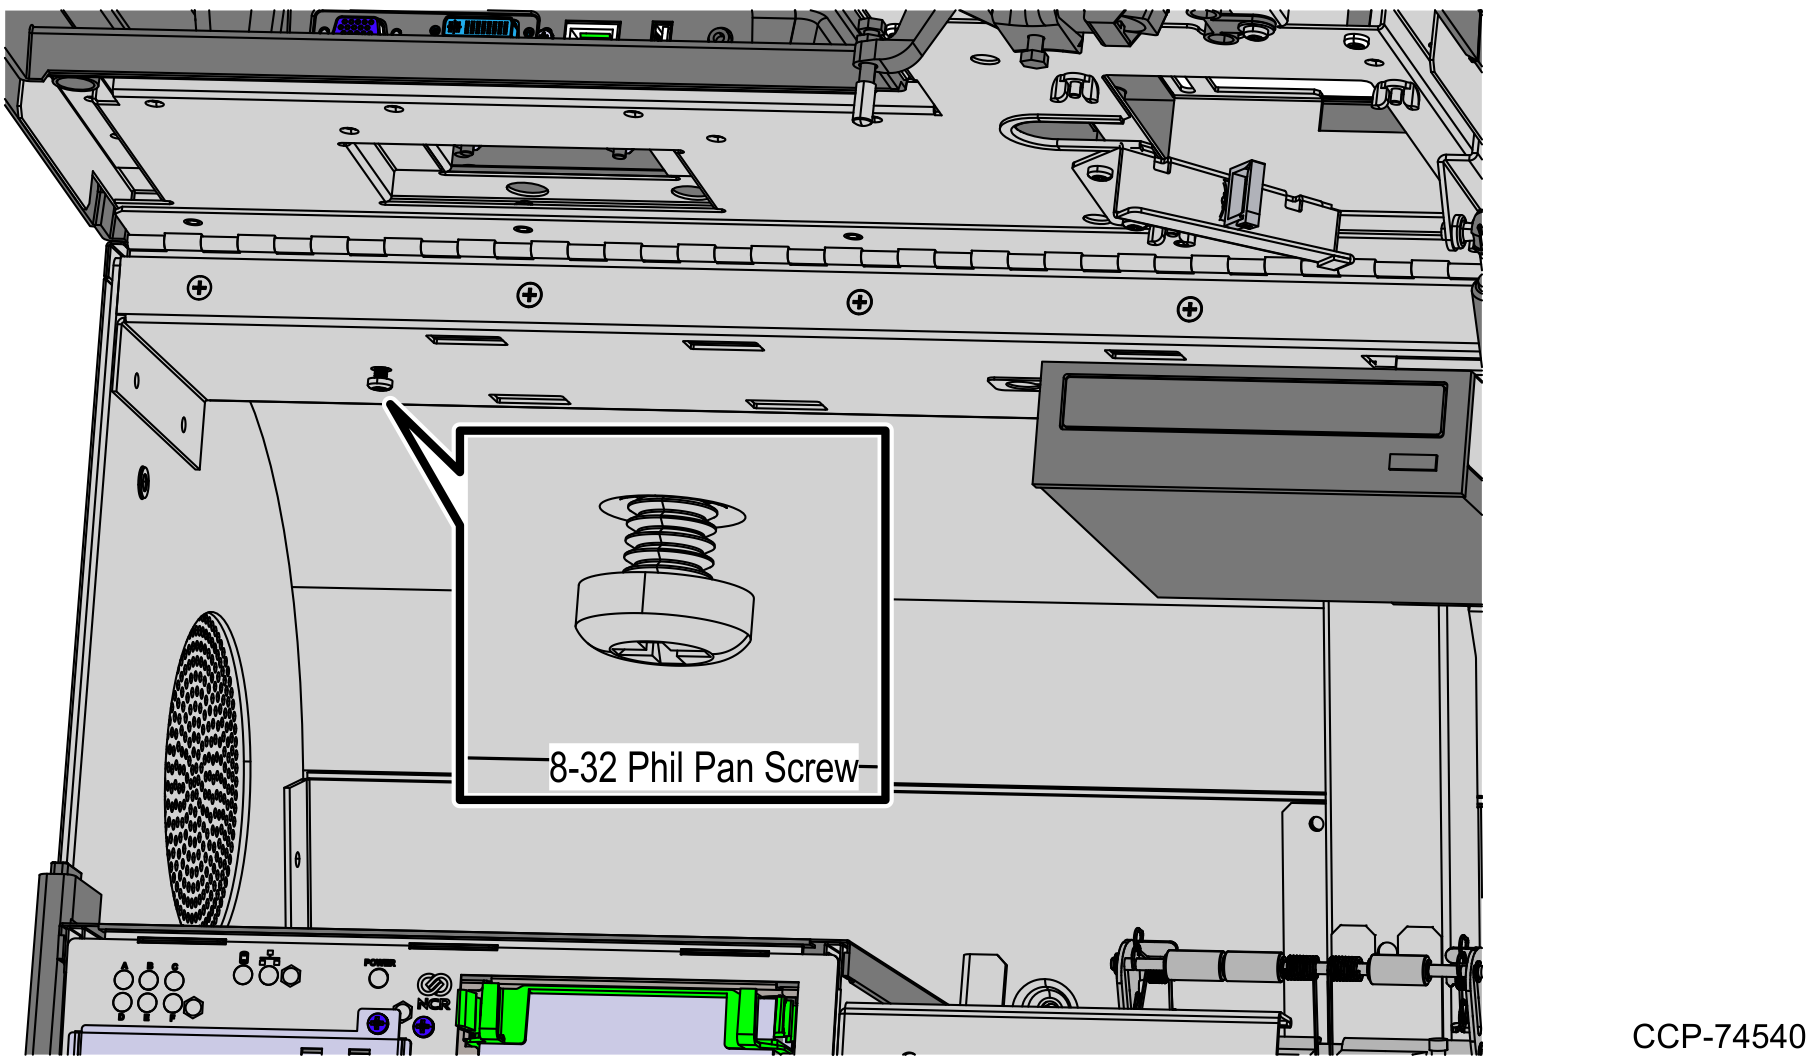
5.Partially install one 8-32 Phil Pan screw inside the core hood as shown in the image below.
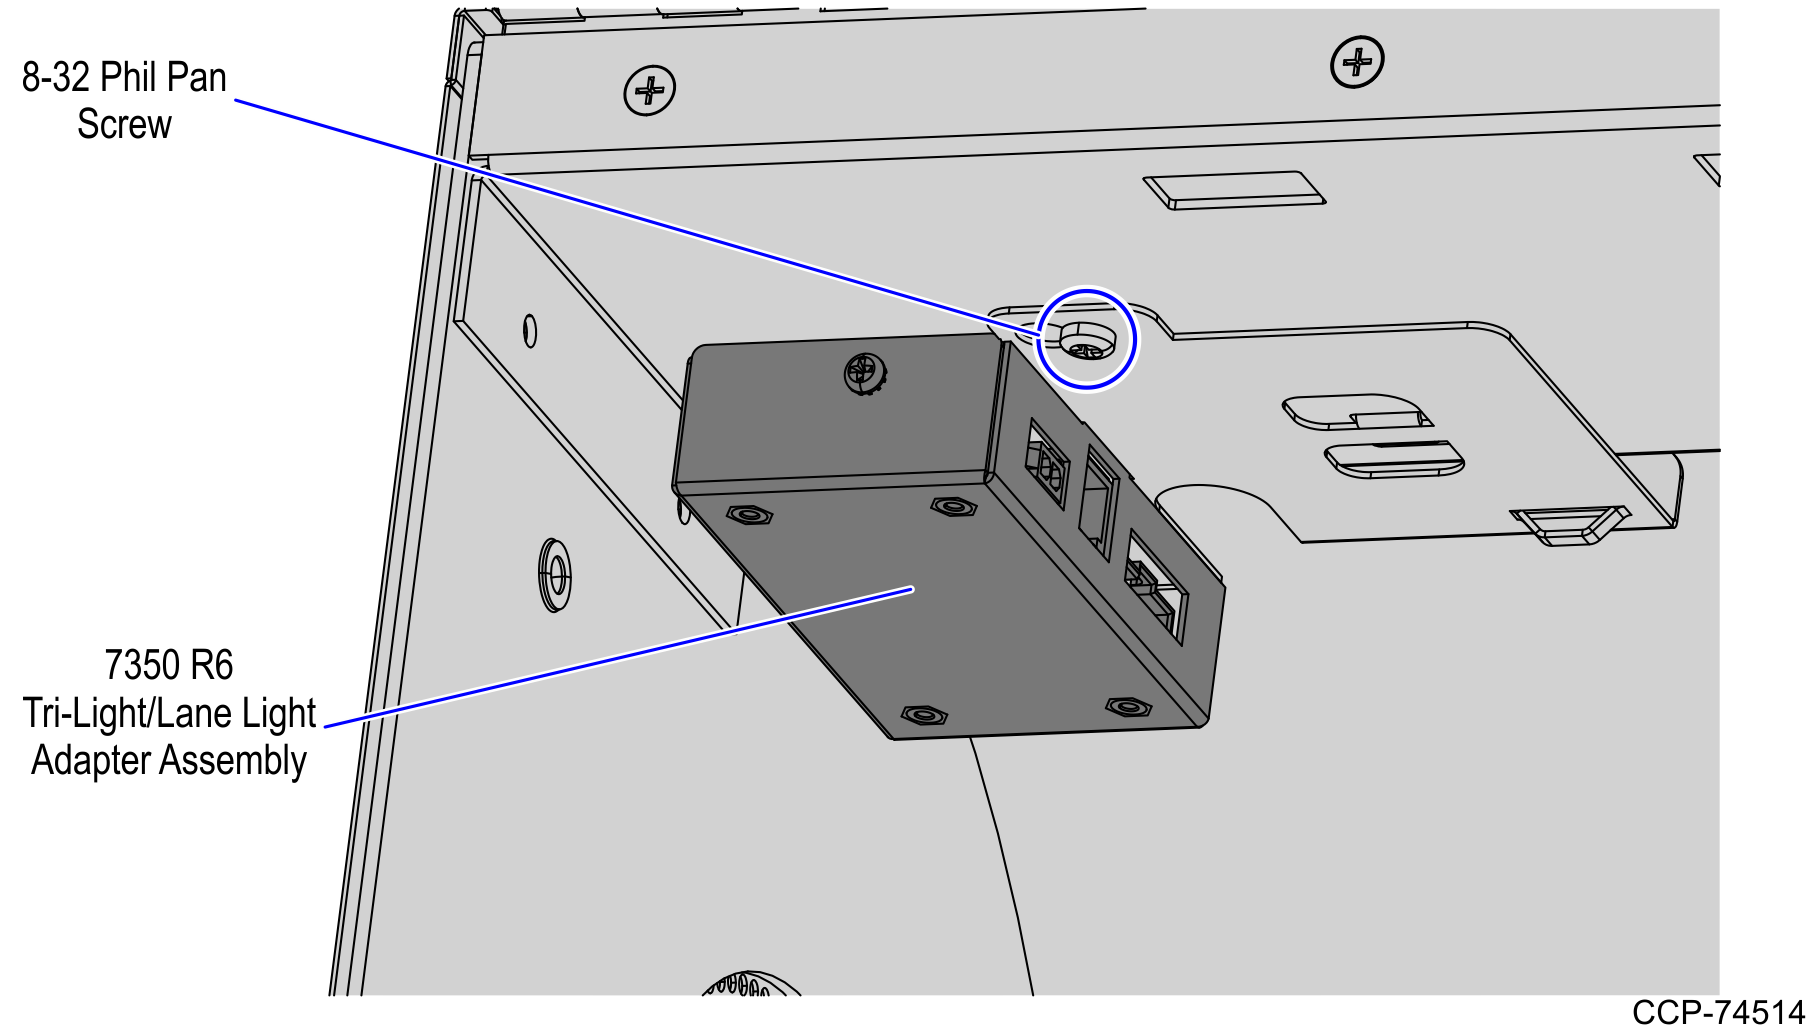
6.Align the 7350 R6 Tri-Light/Lane Light Adapter Assembly Bracket slot and hooks with the corresponding 8-32 Phil Pan Screw and slotted hole inside the core hood and then slide the bracket in the direction shown below.

7. Tighten the 8-32 Phil Pan screw to secure the 7350 R6 Tri-Light/Lane Light Adapter Assembly.
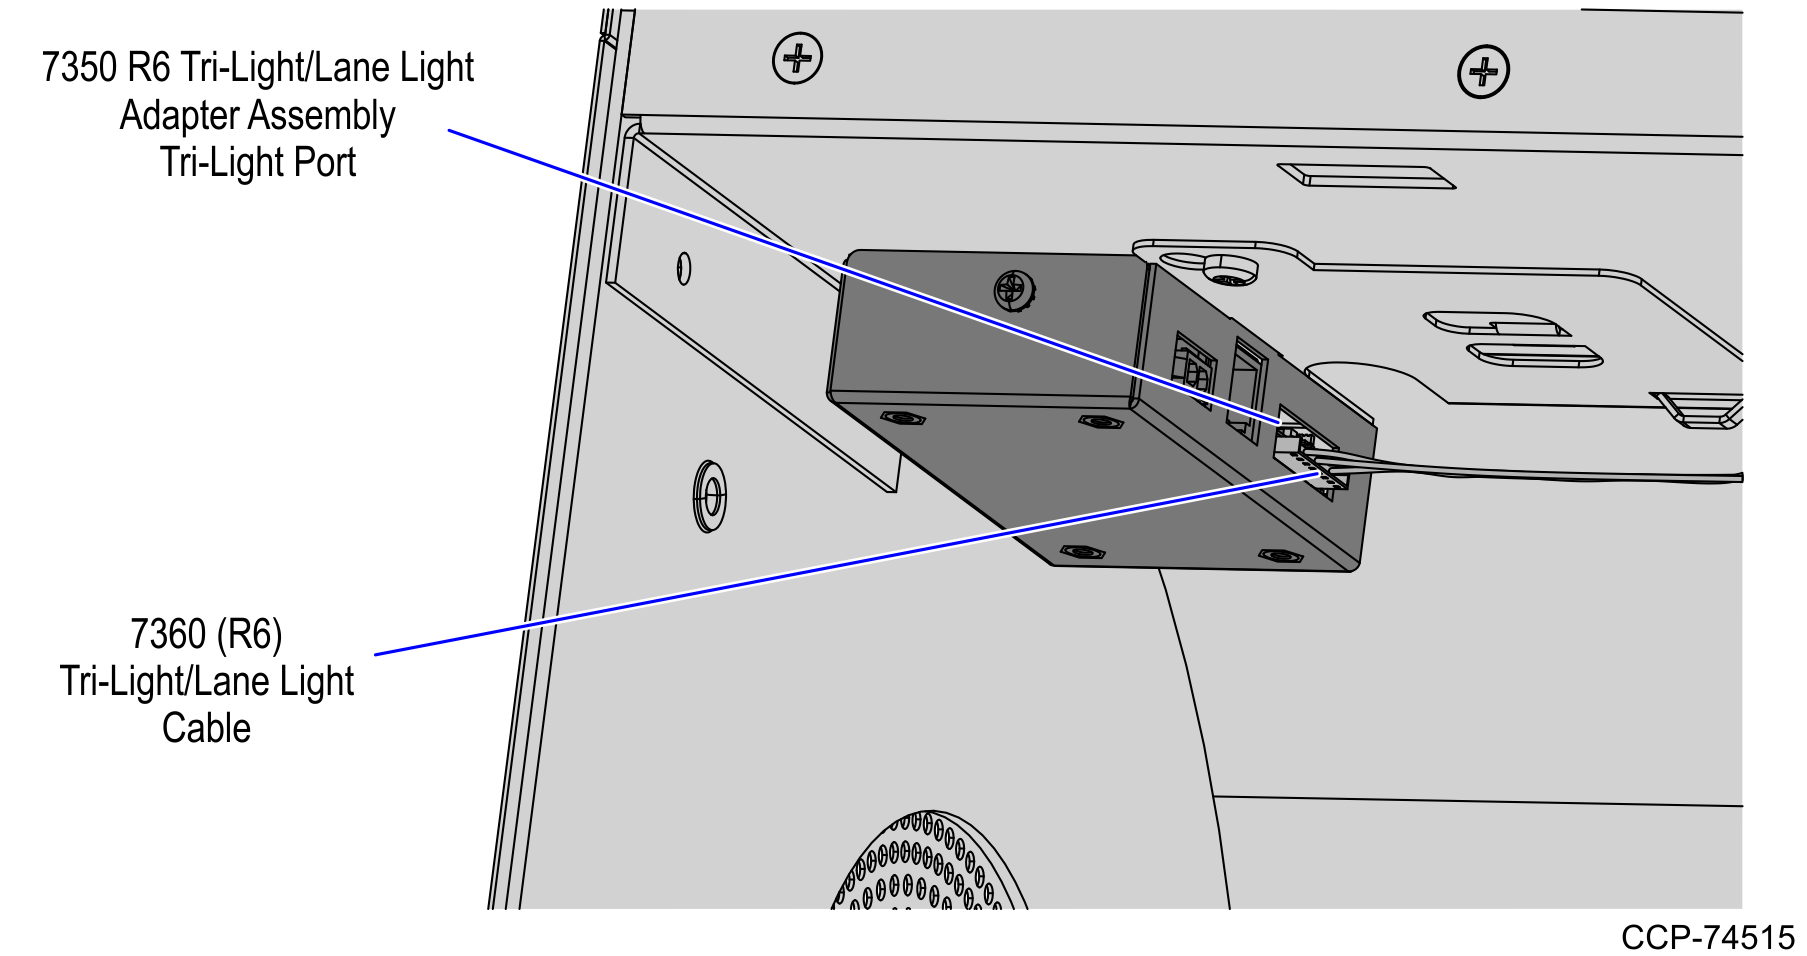
8.Connect the 7360 (R6) Tri-Light/Lane Light cable to the Tri-Light/Lane Light port of the 7350 R6 Tri-Light/Lane Light Adapter Assembly.
9.Connect the 7350 (R5) Tri-Light/Lane Light Signal Cable to the From E-Box port of the 7350 R6 Tri-Light/Lane Light Adapter Assembly.
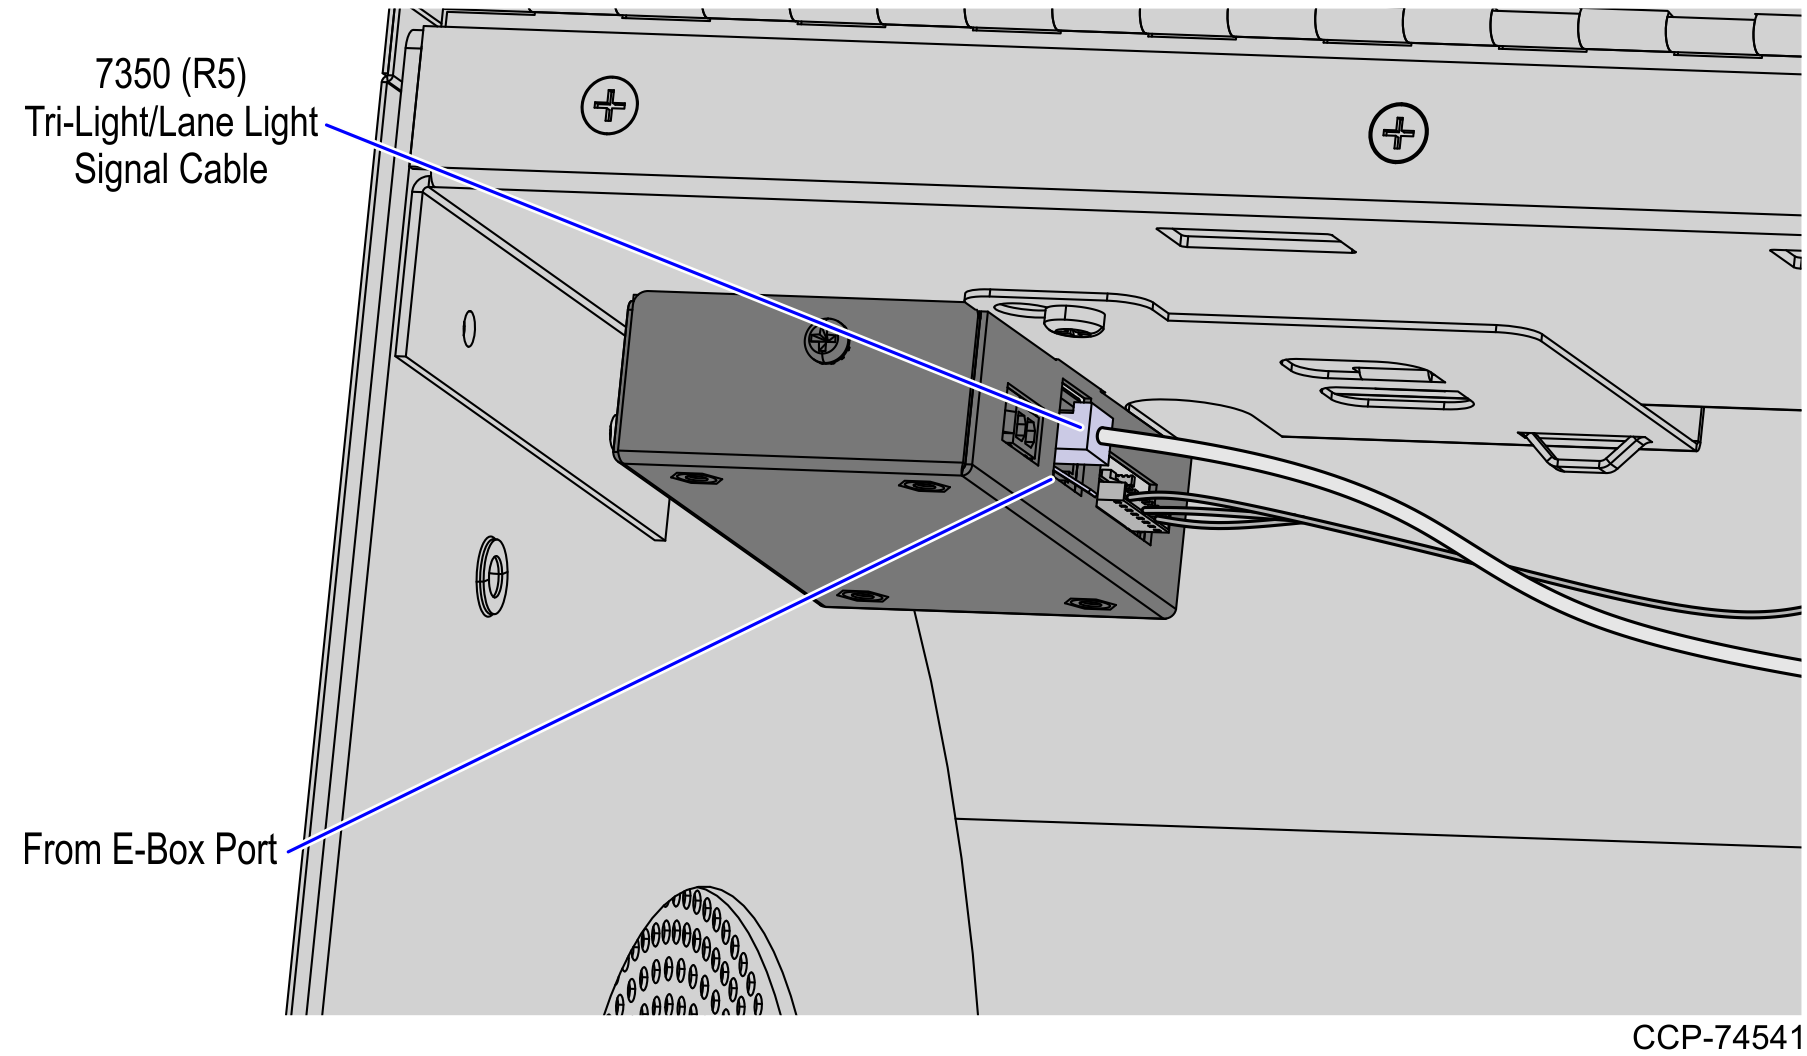
10.Route the 7350 (R5) Tri-Light/Lane Light Signal Cable through the E-Box cable guide and then connect to the E-Box Tri-Light/Lane Light port as shown in the image below.

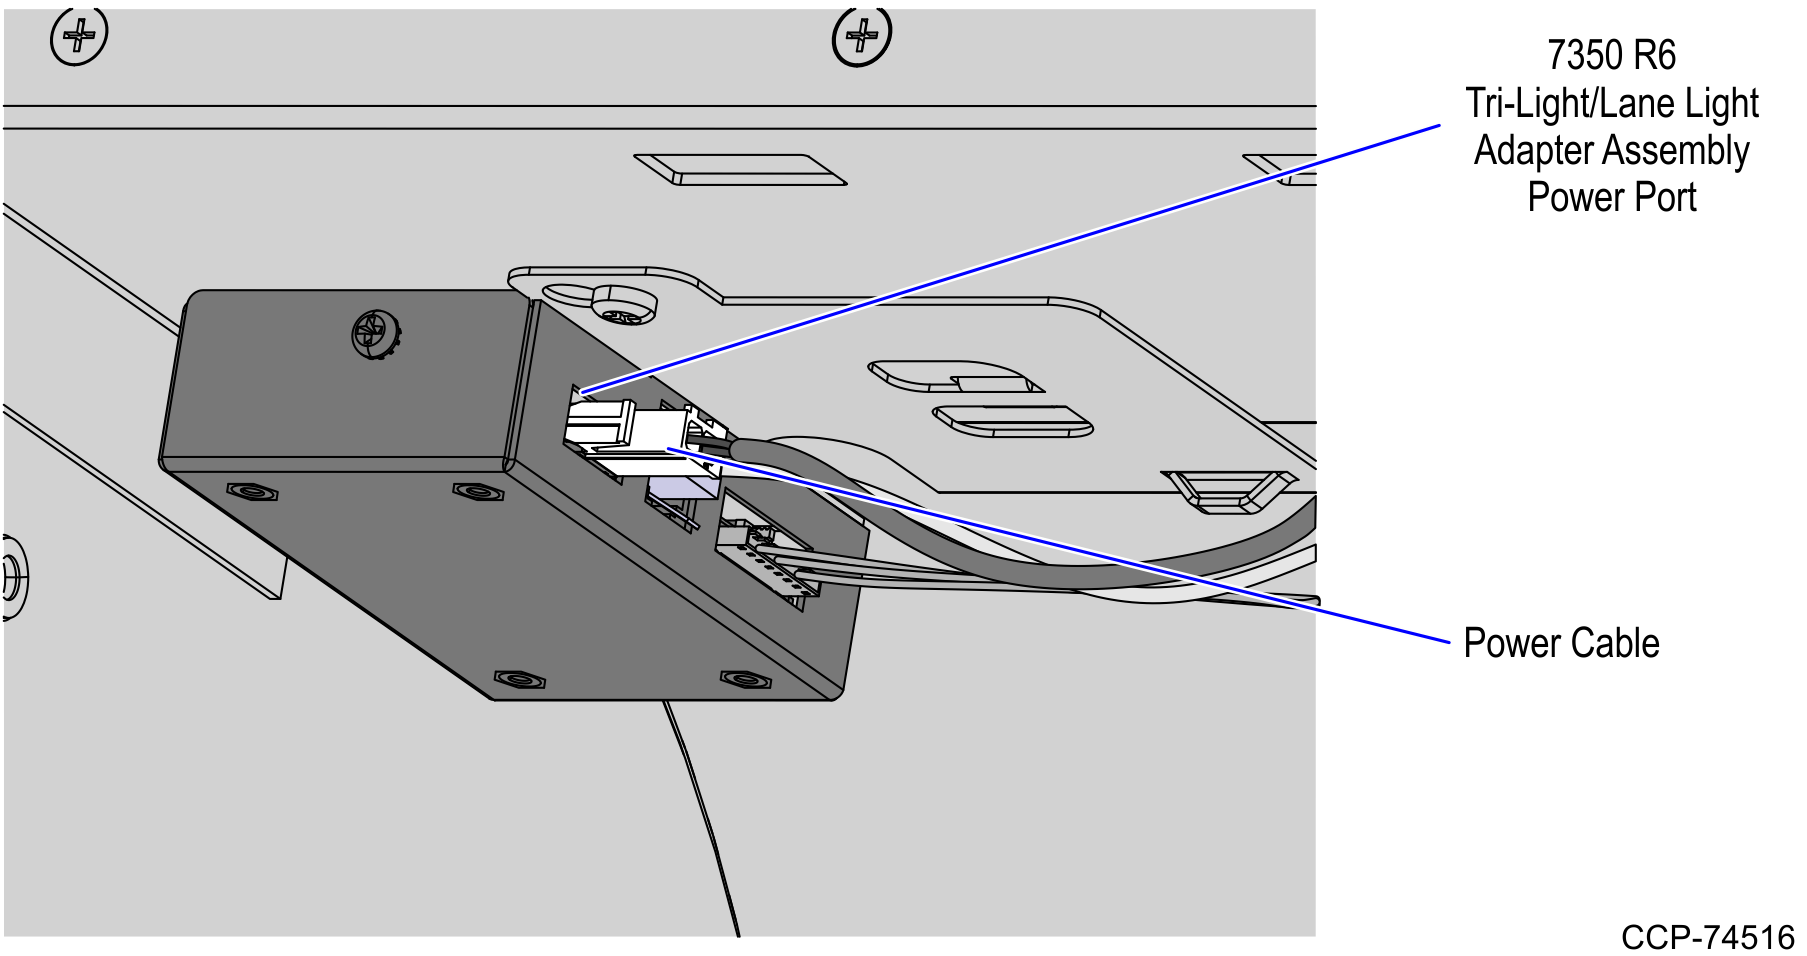
11.Connect the Power cable to the Power port of the 7350 R6 Tri-Light/Lane Light Adapter Assembly.
12.Depending on the currency device configuration, do the following:
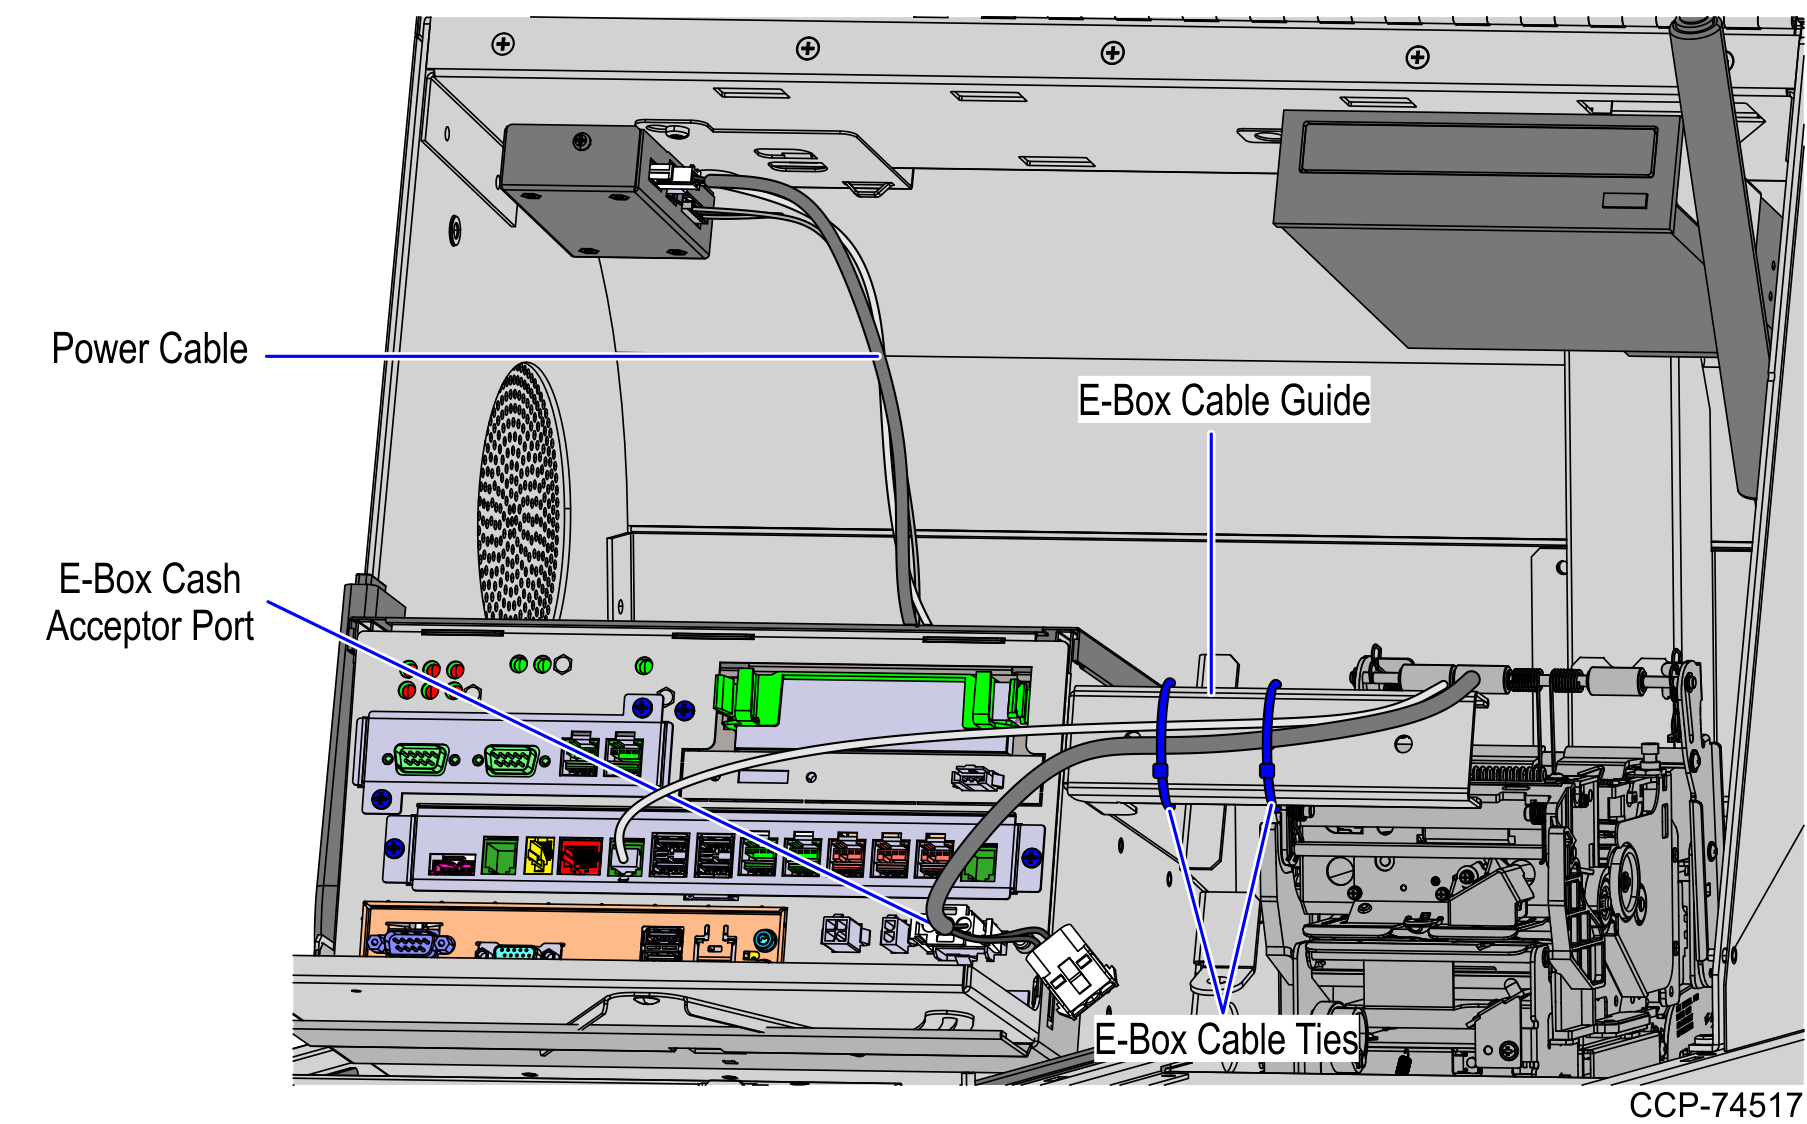
•Full Recycling Configuration - Route the Power cable through the E-Box cable guide and then connect to the E-Box Cash Acceptor port as shown in the image below.
Note: Secure the cables to the E-box Cable Guide using cable ties.
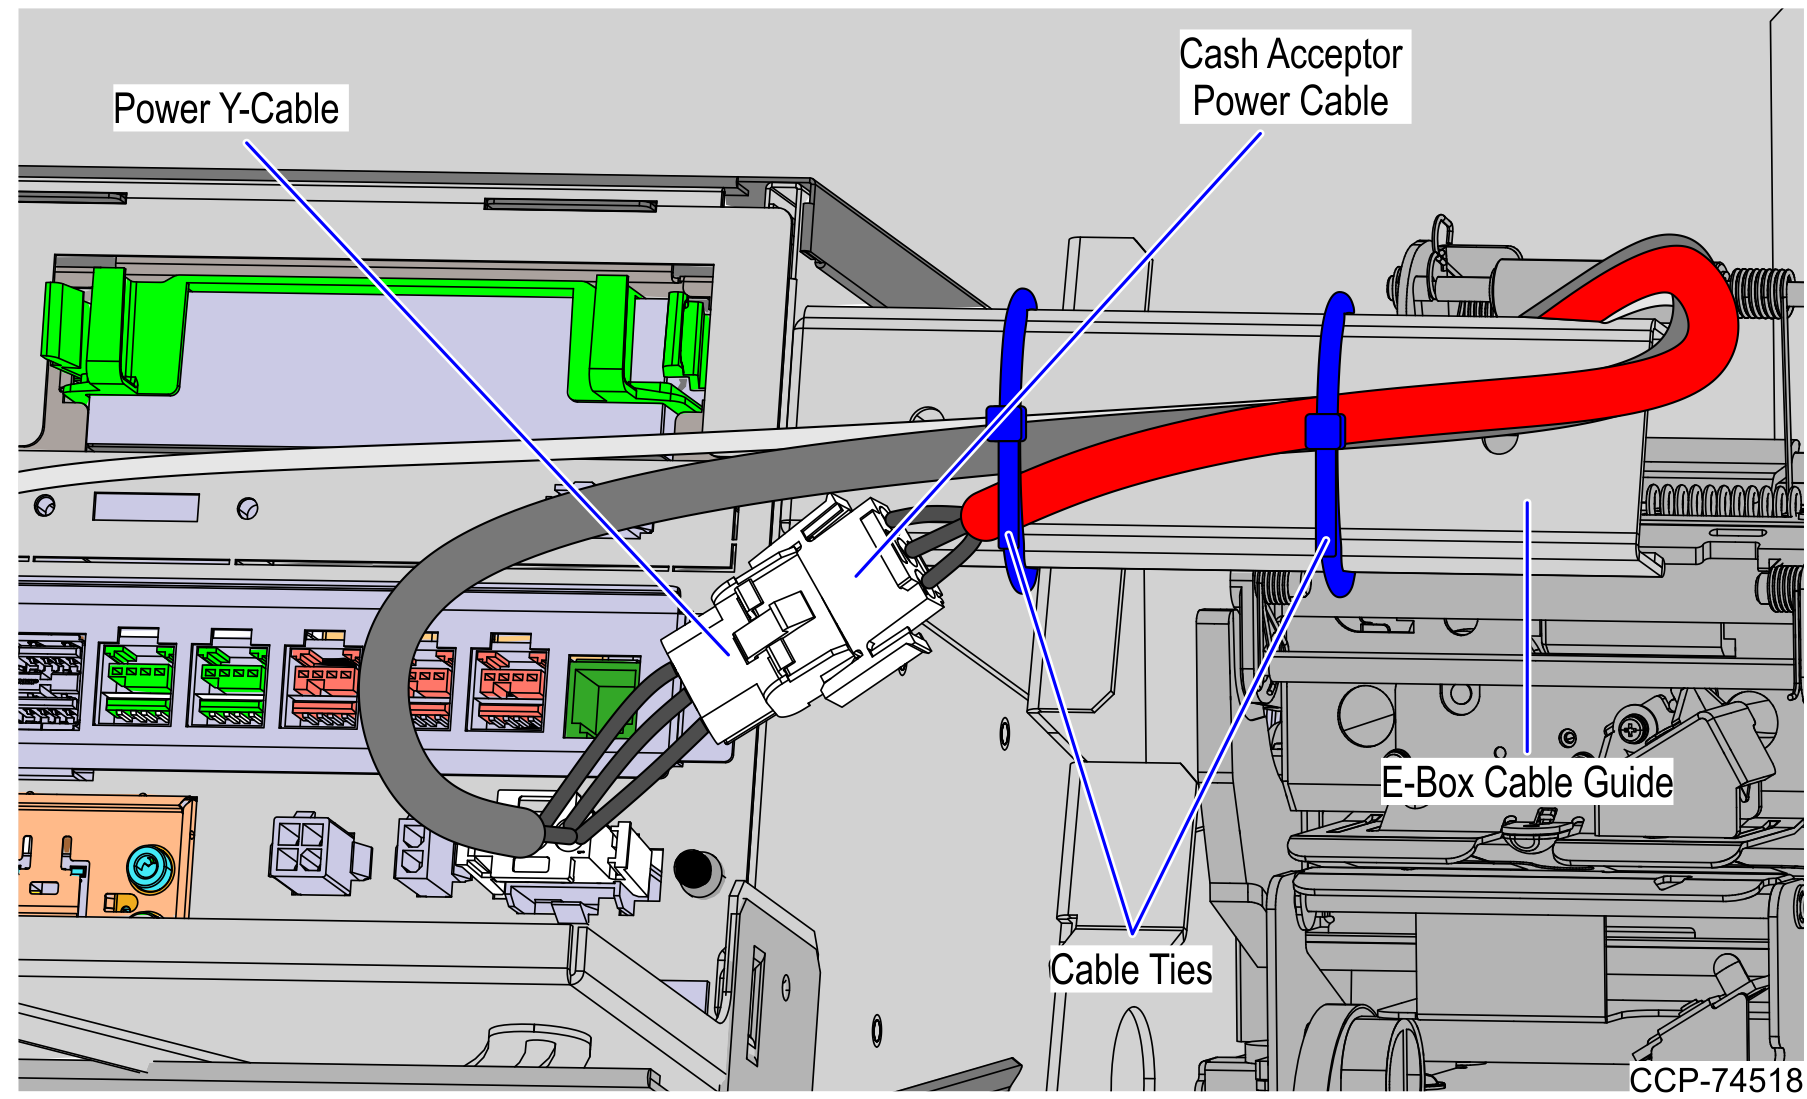
•Note Accept/Dispense Configuration - Disconnect the Cash Acceptor Power Cable and connect it to the Power Y-Cable as shown in the image below.
Note: Secure the cables to the E-box Cable Guide using cable ties.
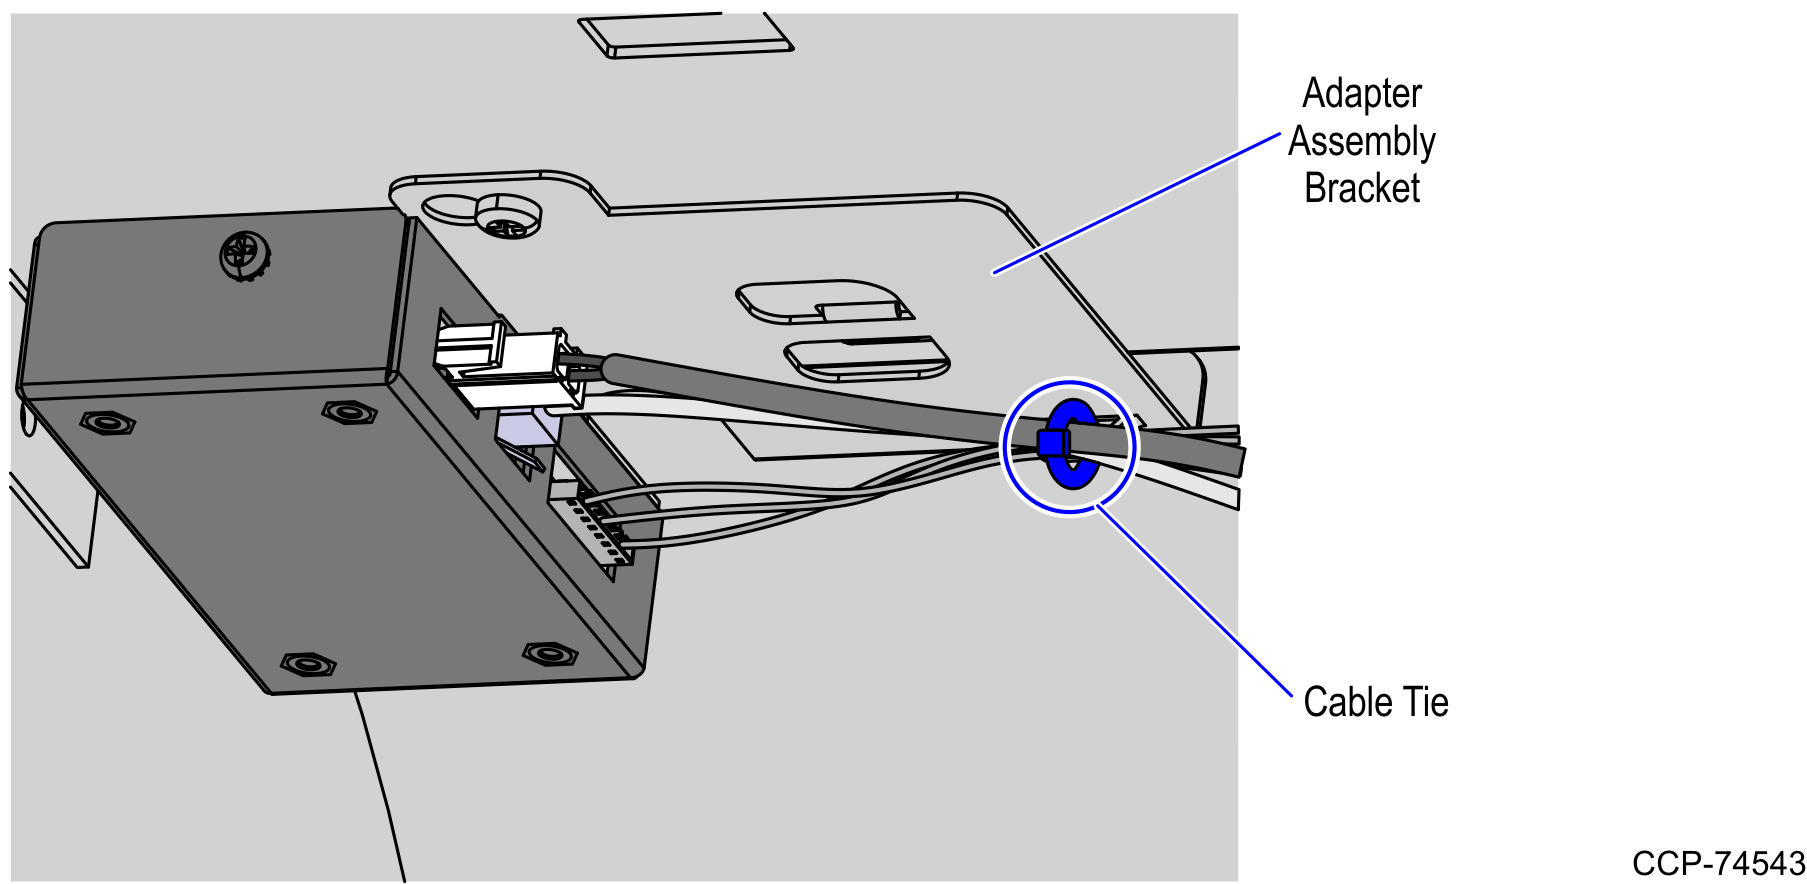
13.Secure the cables from the 7350 R6 Tri-Light/Lane Light Adapter Assembly to the Adapter Assembly Bracket using cable tie as shown in the image below.
14.Test the Tri-Light/Lane Light by accessing the Profile Manager Lite (PML). For more information refer to Accessing Profile Manager Lite (PML).
15.Tilt the E-Box Bracket backward as shown in the image below.

16.Re-install the scanner and close the Upper Cabinet Door.