SPI/BIOS Updating Procedures
When replacing the NCR CX5 All-in-One POS (7773) motherboard in the field, the BIOS will need to be flashed to the latest version based on the OS Platform running on the terminal. The BIOS is different according to the target operating system. Always check https://www5.ncr.com/support/support_drivers_patches.asp?Class=External/Terminals\7773\display for the best and latest BIOS according to the operating system.
BIOS Version Scheme:
- T0x: Windows/Linux
- TAx: Android
Using the Bootable USB Flash Key
- Create a USB Flash Drive by installing the BIOS update package to this USB key.Note
The USB flash drive disk size must be more than 512MB.
Linux PC
Use “dd” Linux command to deploy image in USB key:
sudo dd if=/CX5_UPDATE_BIOS_T0B.iso of=/dev/sdXWindows PC
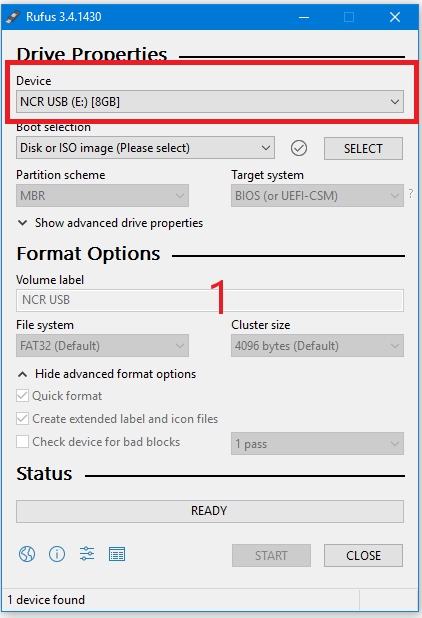
Download the Rufus Tool from the Rufus Website: https://rufus.ie/ and use the tool to deploy image into USB key.
- Select the device from the Device drop-down list.
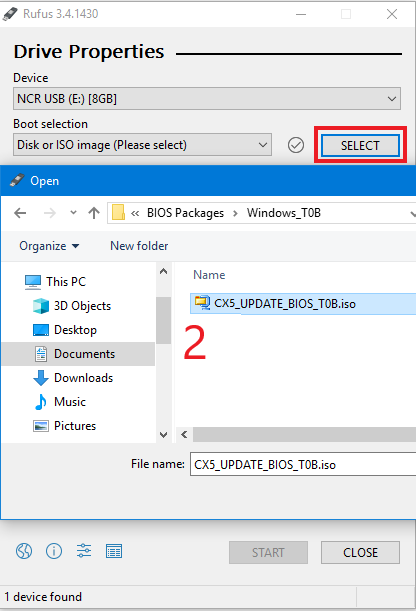
- Press Select to choose the image from the Boot Selection drop-down list.
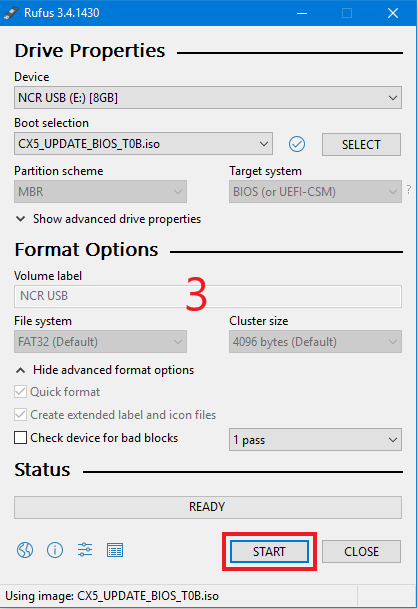
- Press Start to load the image.
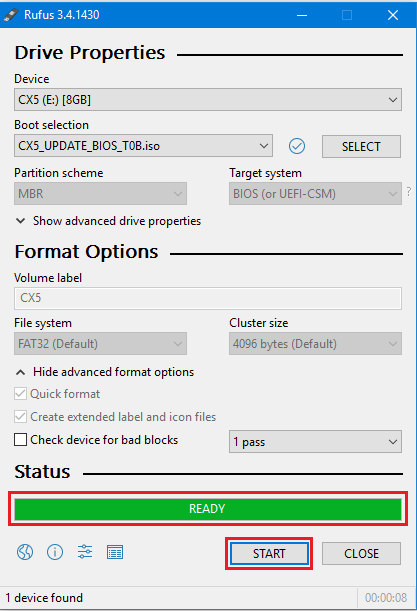
- When the load is complete, select Close.
- Select the device from the Device drop-down list.
- Insert the CX5 USB Flash Drive into the USB Port.
- Press [F8] during startup to bring up the Boot Menu.
- Select the USB device to boot the CX5 BIOS flash key. An option menu will load.
- Select option [1] to update BIOS with DMI preserved.Note
After the update has completed and the terminal is rebooted, the terminal may reboot additional times as it powers up. This is normal and expected behavior due to the nature of the features of the BIOS/SPI.
