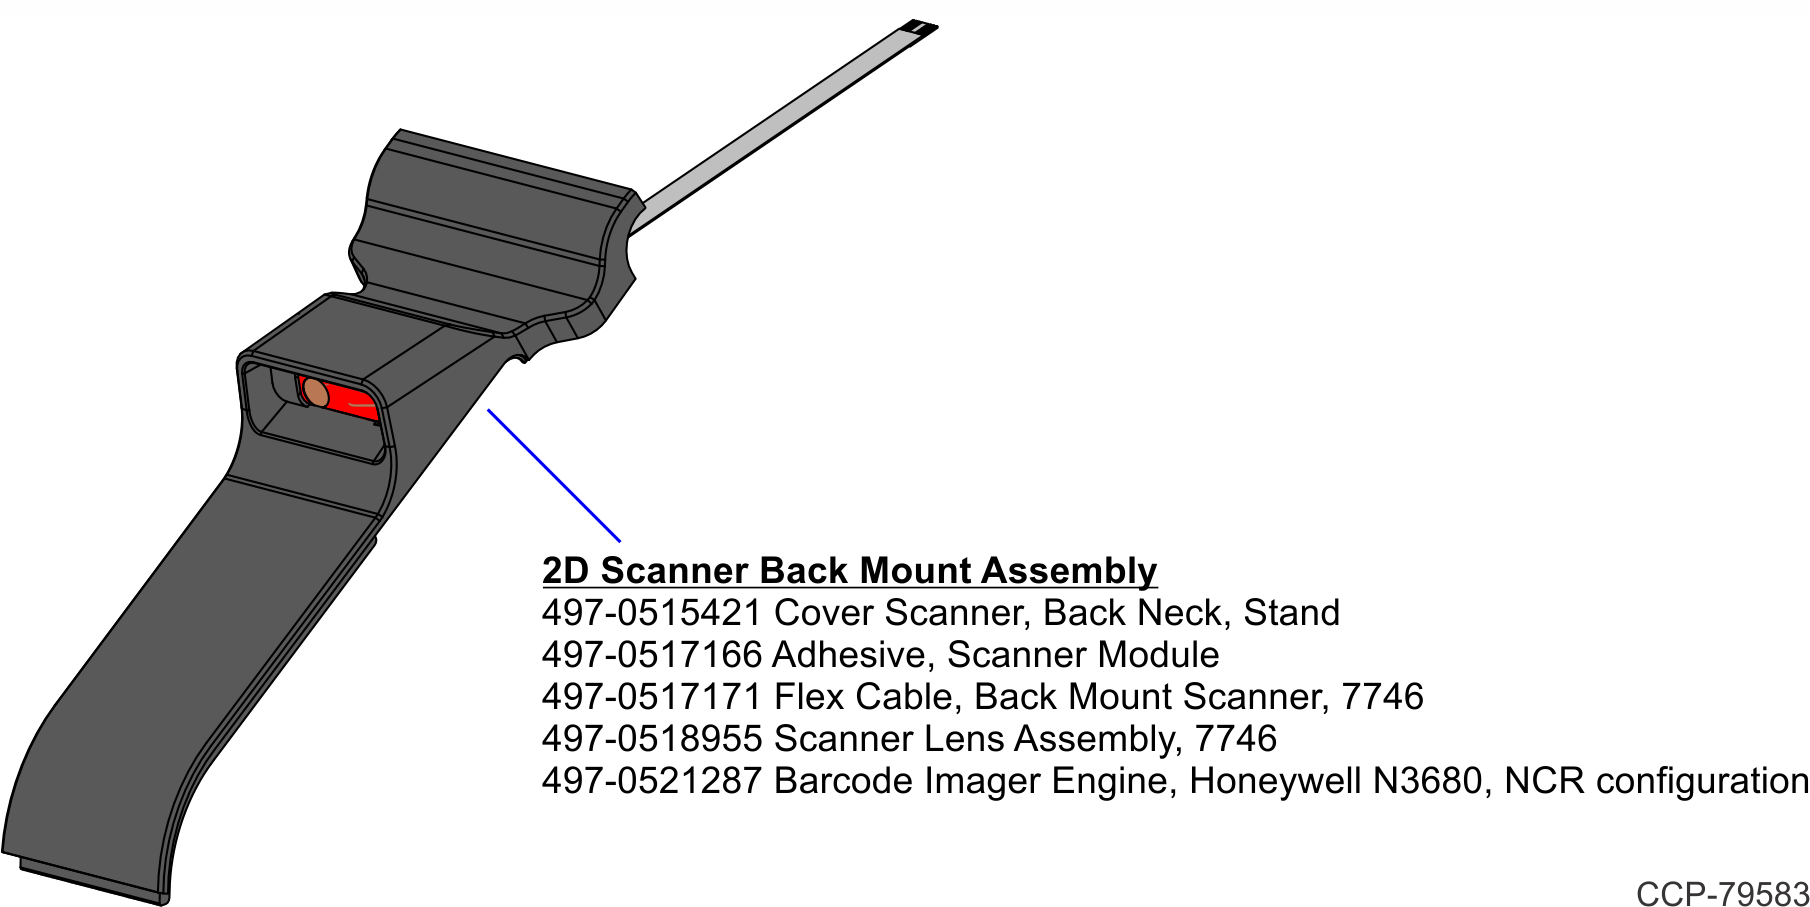
7746-K451 2D Scanner, Back Mount
This kit provides a 2D Scanner mounted on the neck of the NCR PX10/PX15 POS (7746).
Kit Contents
Installation Procedure
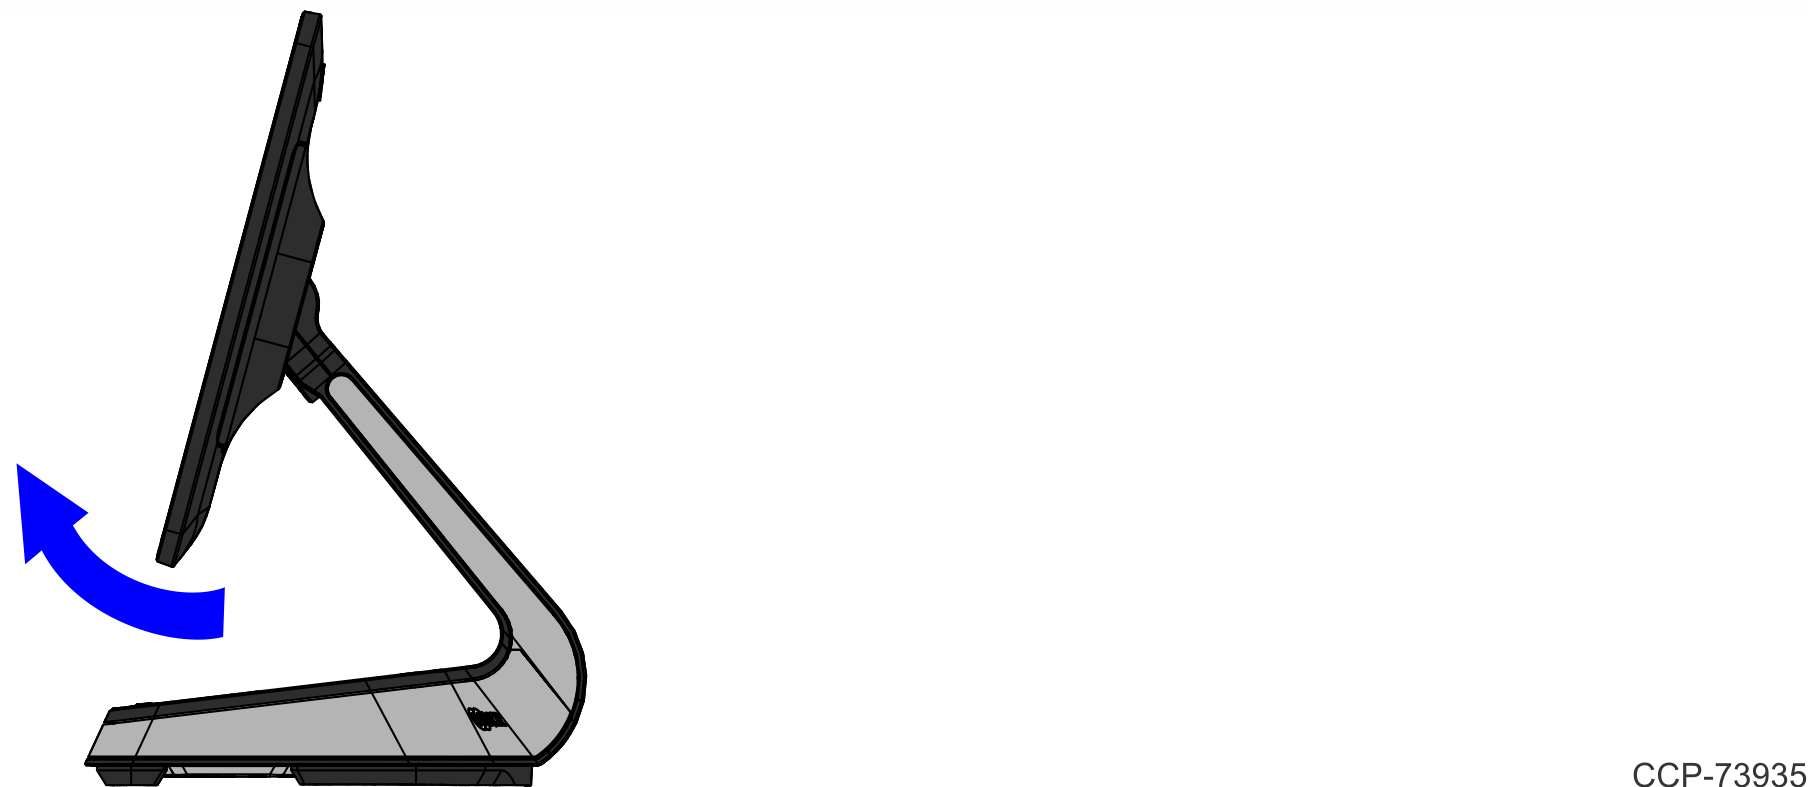
1.Pivot the display toward the back.
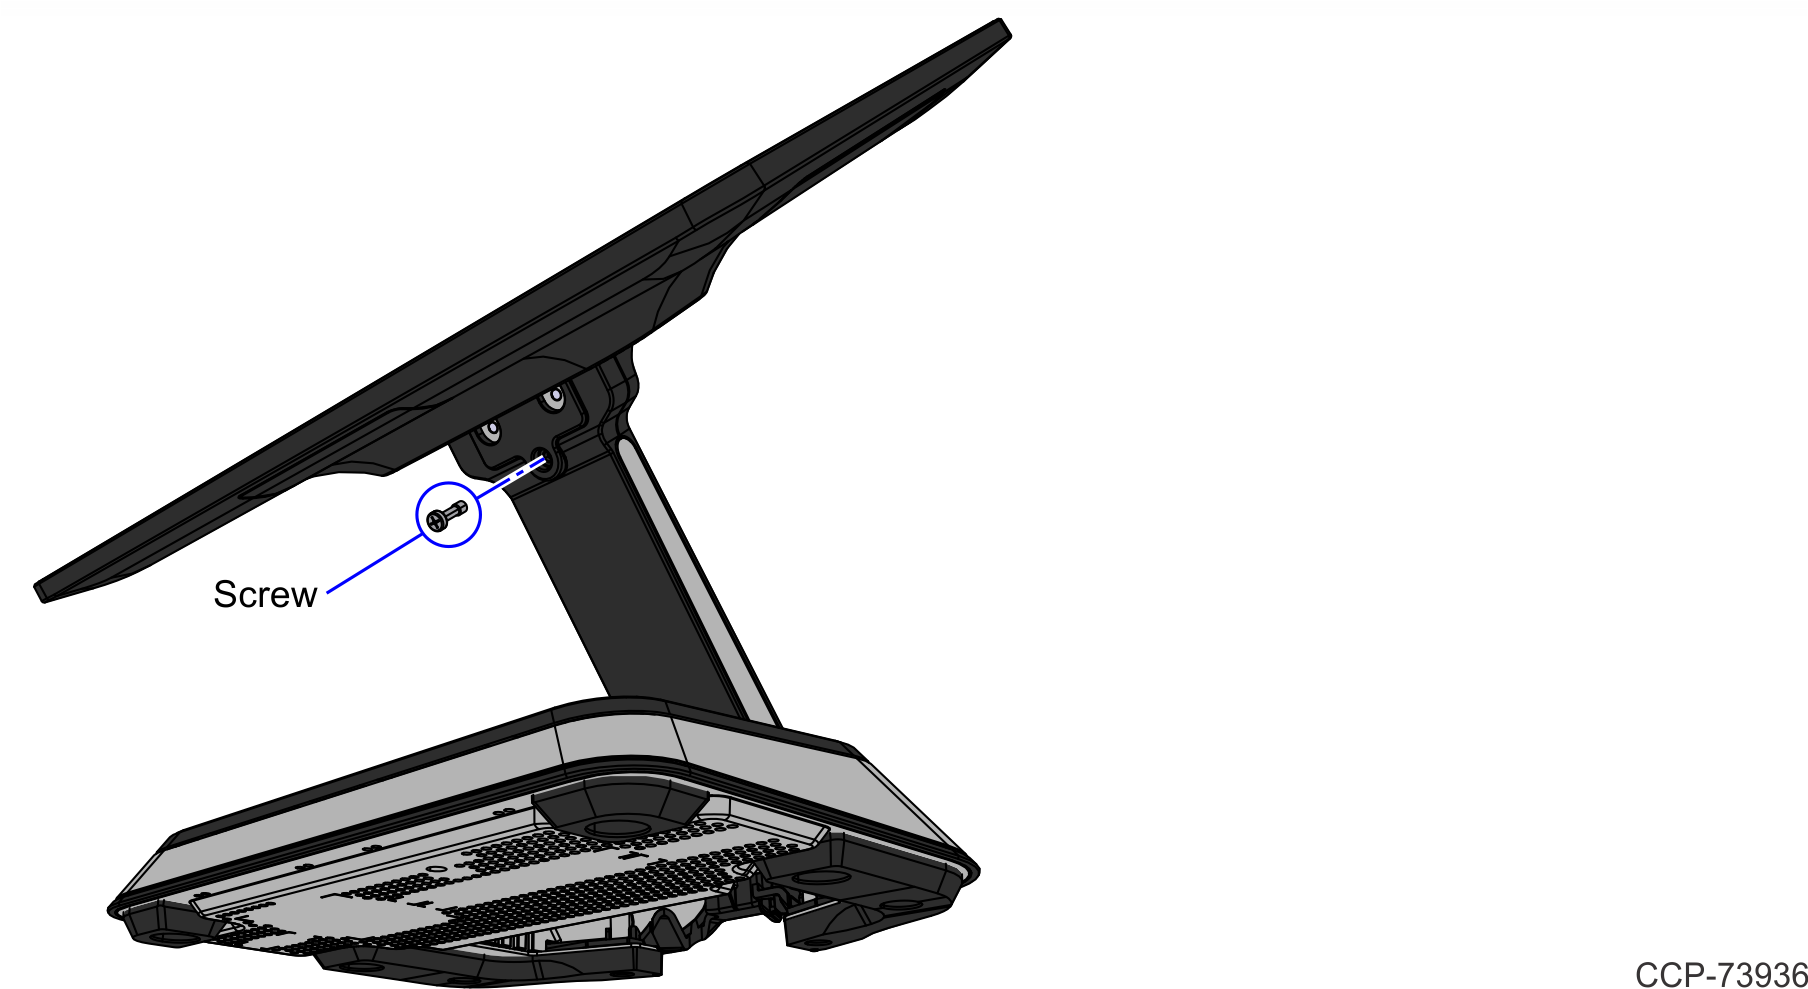
2.Remove the screw (1) that secures the Front Neck Cover to the neck.
Note: Use only a screwdriver with a #1 Philips bit to avoid stripping the screw head.
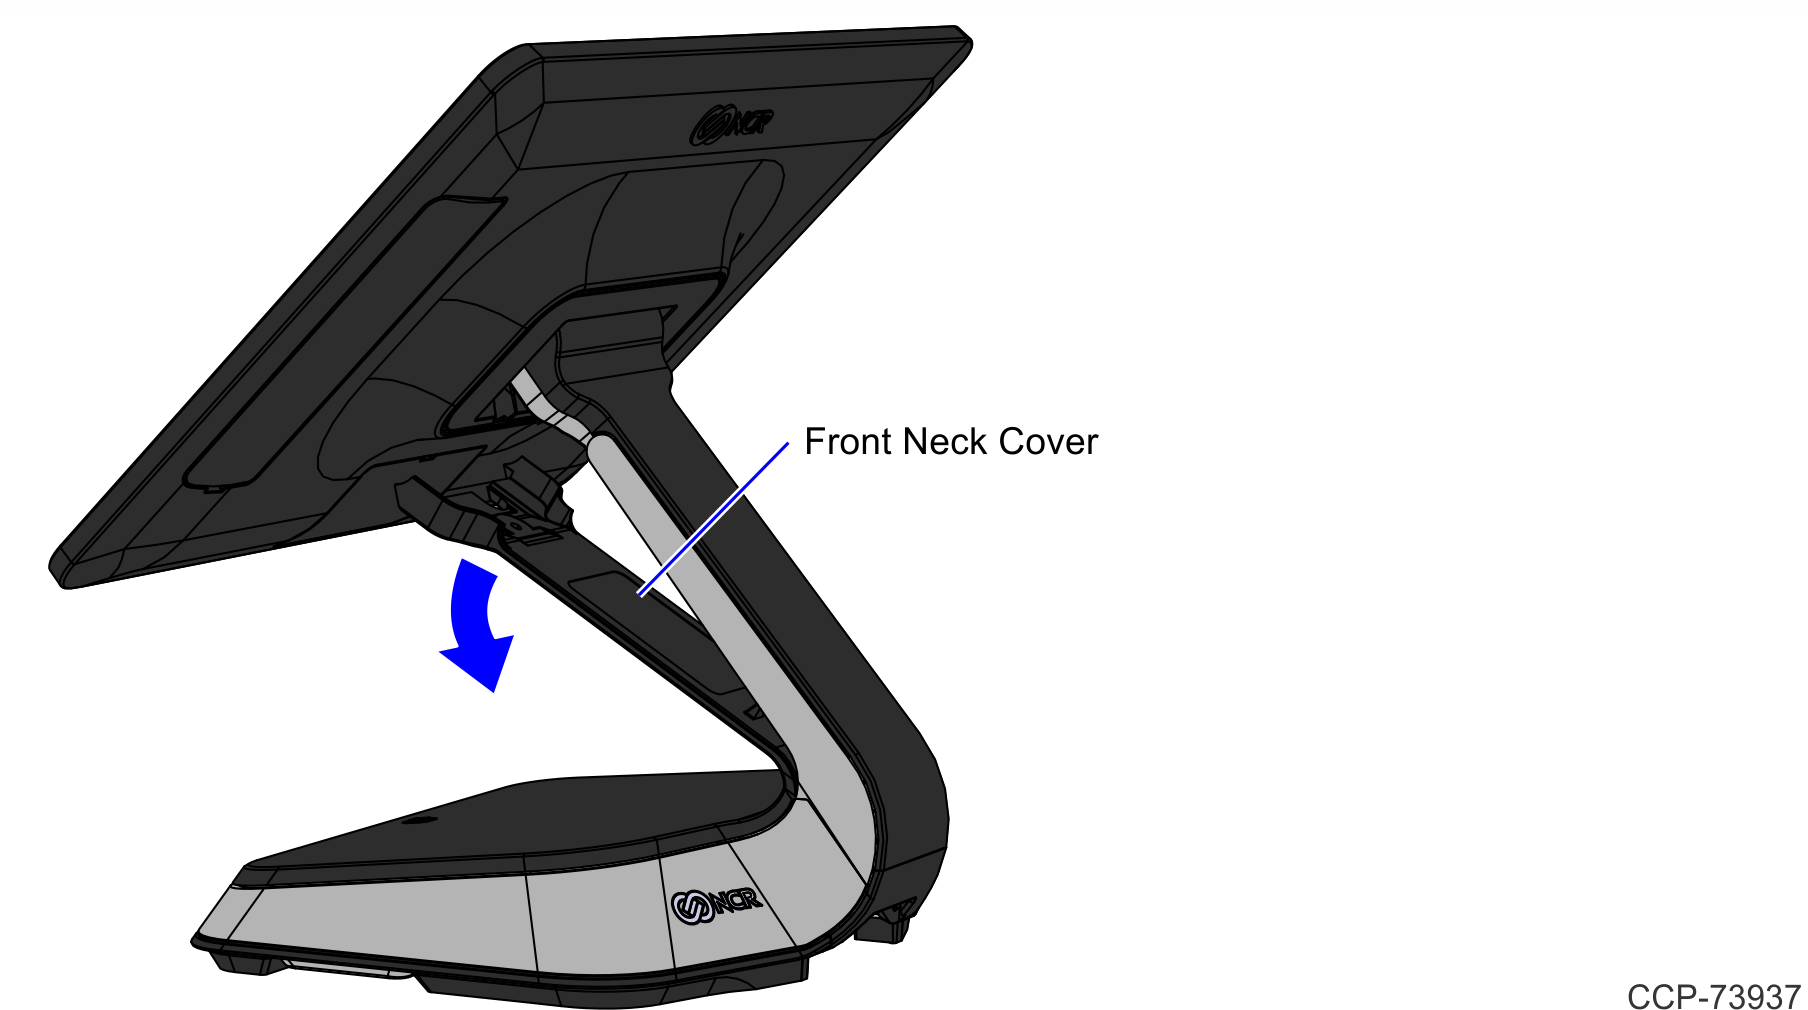
3.Pivot the Front Neck Cover away from the terminal.
4.Lay the terminal face down on a flat surface.
Caution: Always use a soft material (cloth, foam) to protect the display screen when placing the terminal face down.
5.Remove the screws (2) that secure the Rear Base Cap to the Neck.
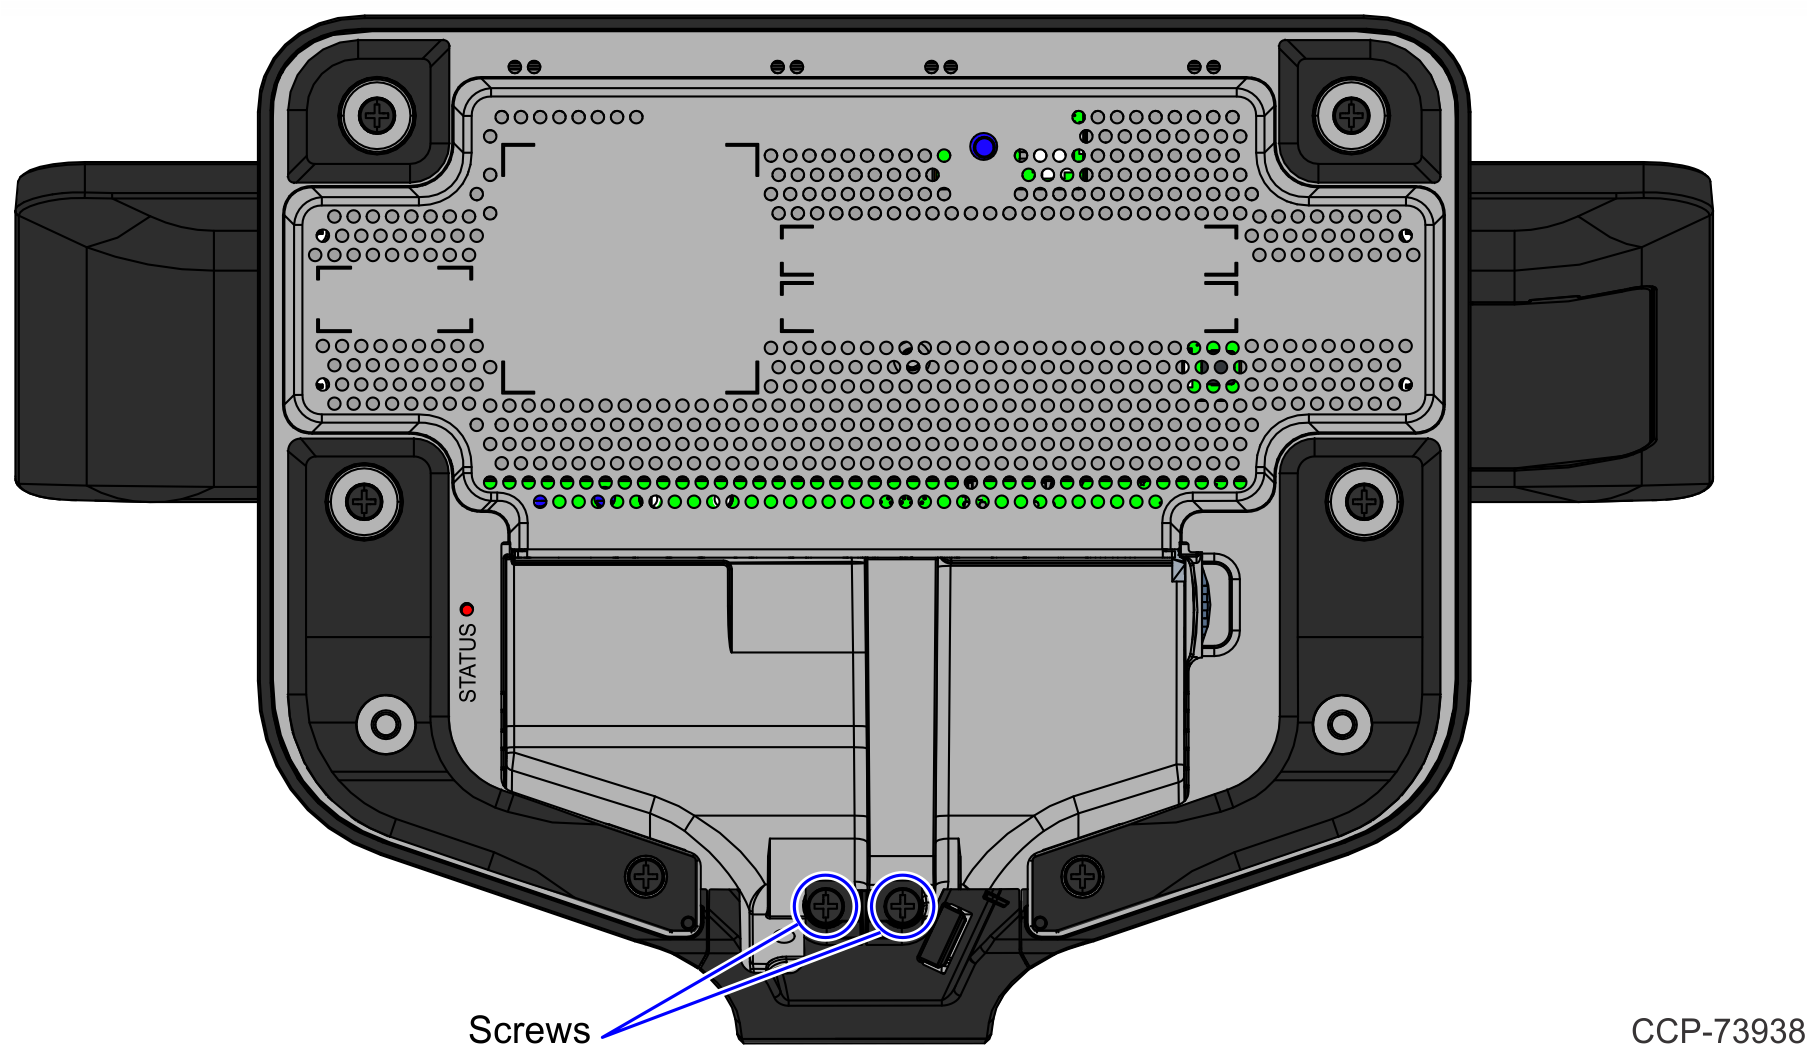
6.Remove the Rear Base Cap.

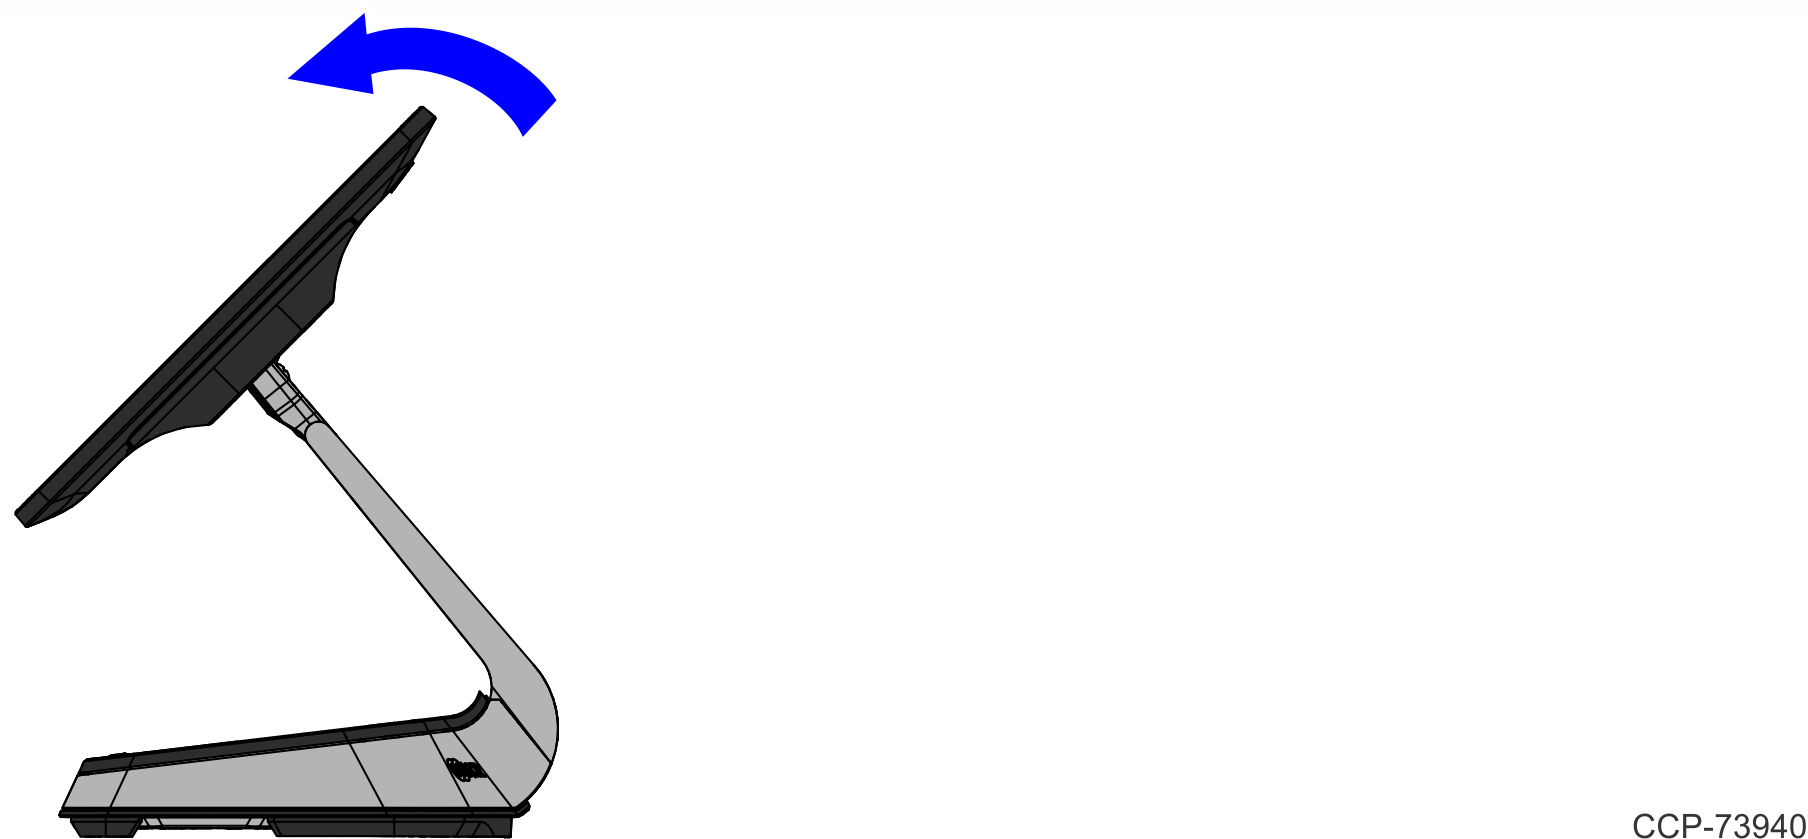
7.Set the terminal to stand upright, and then pivot the display toward the front.
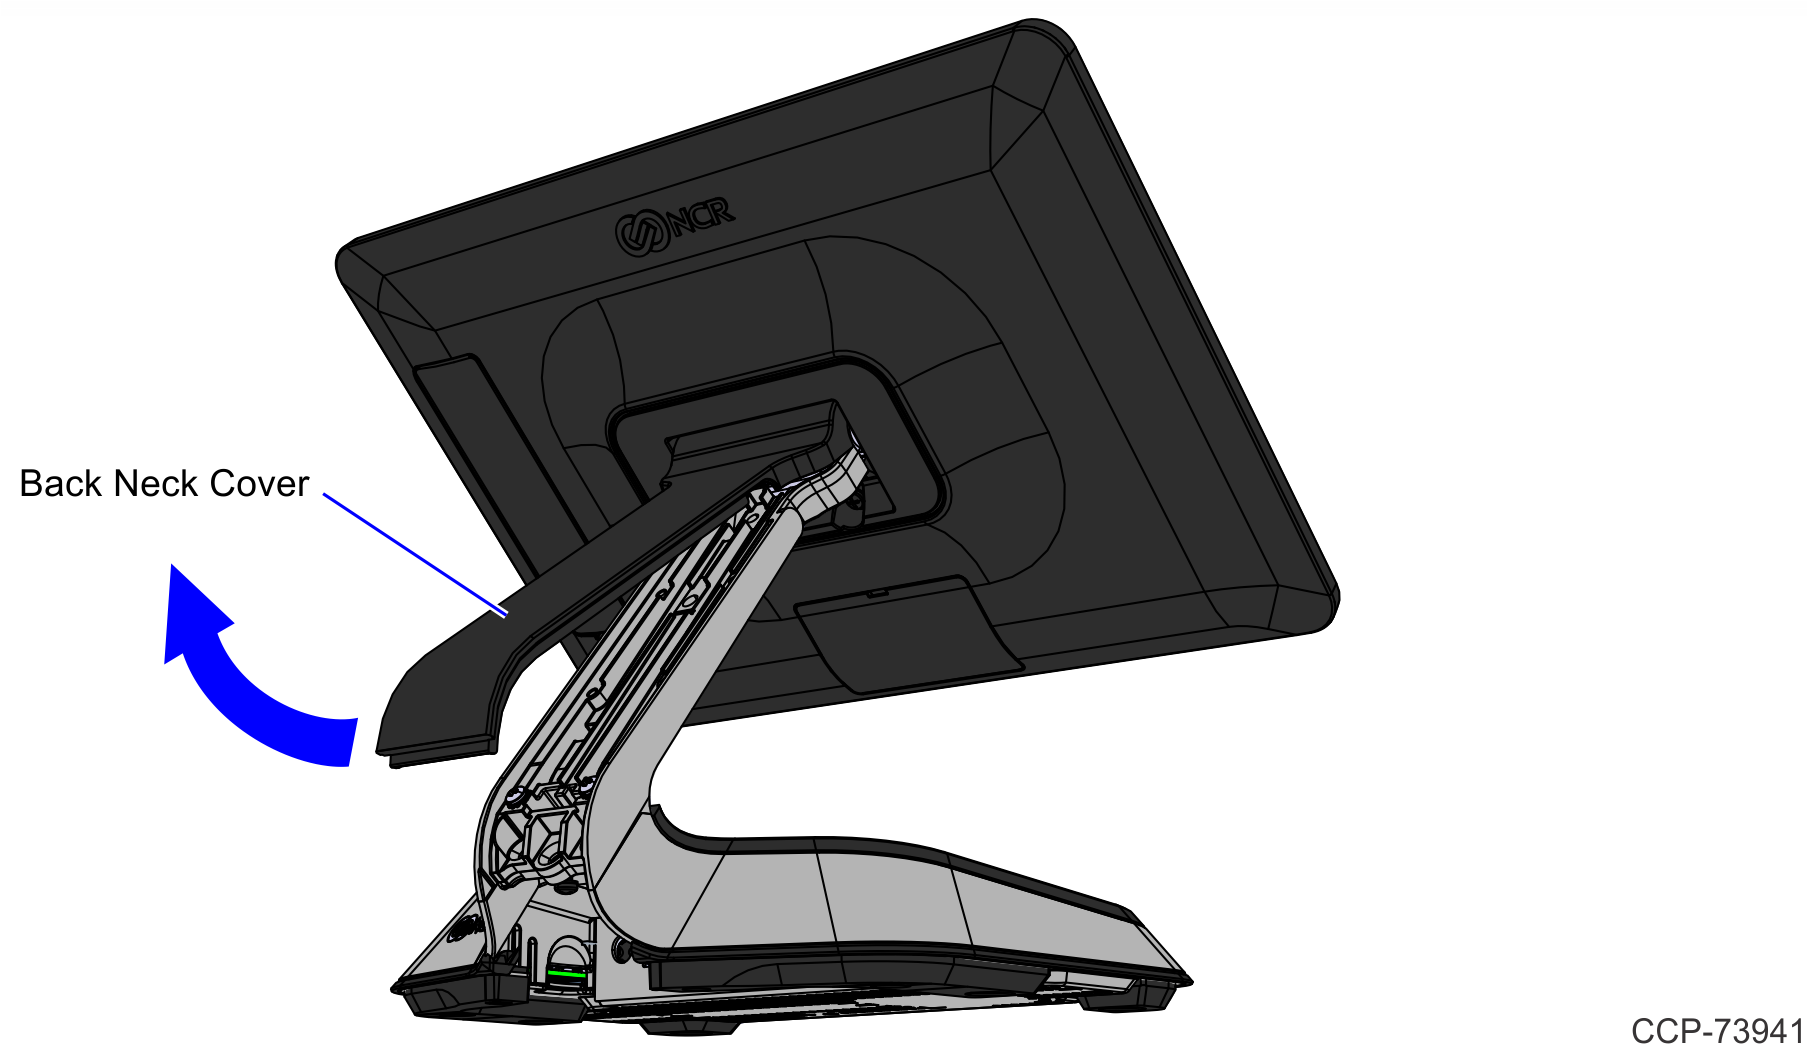
8.Pivot the Back Neck Cover away from the terminal.
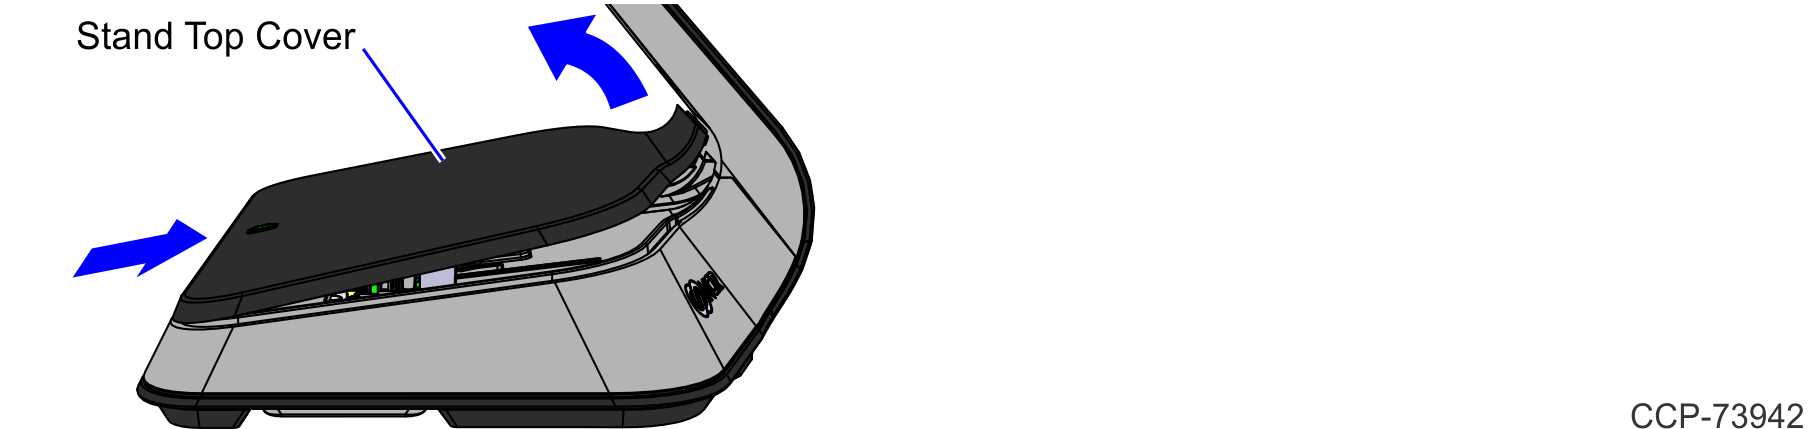
9.Slightly push the front side of the Stand Top Cover Assembly, and then pivot the cover open.
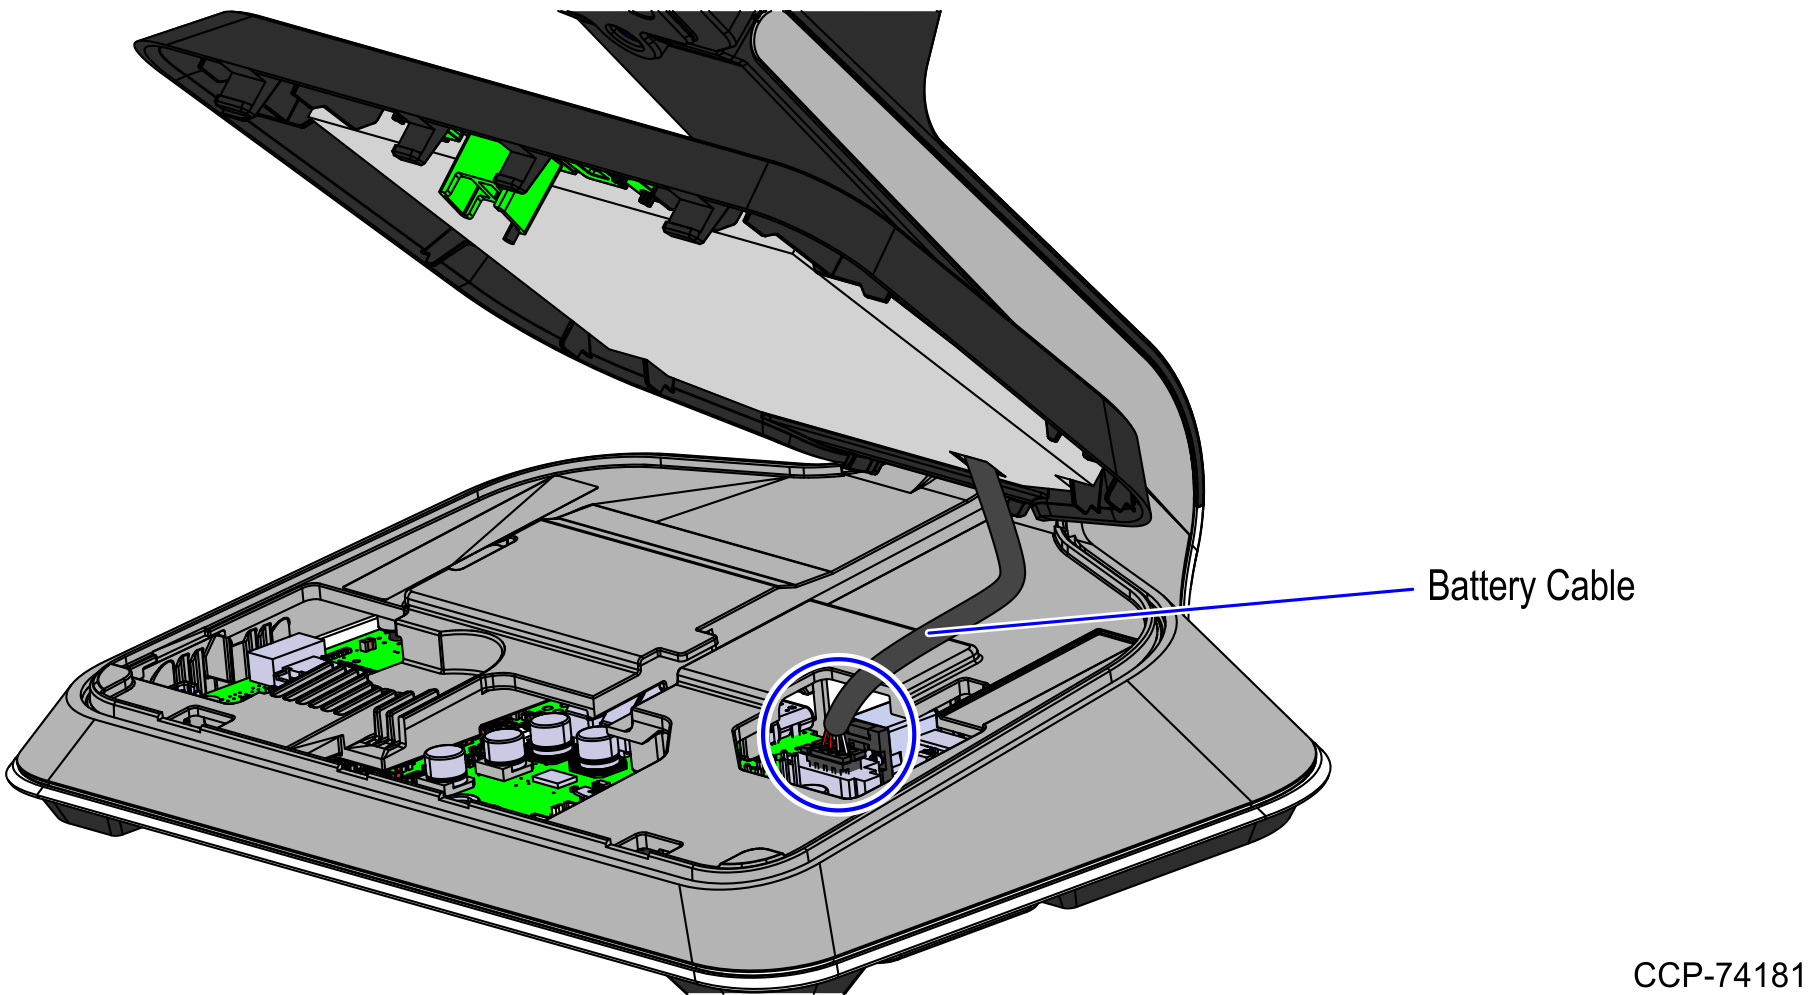
10.For versions with battery, disconnect the battery cable from the Motherboard.
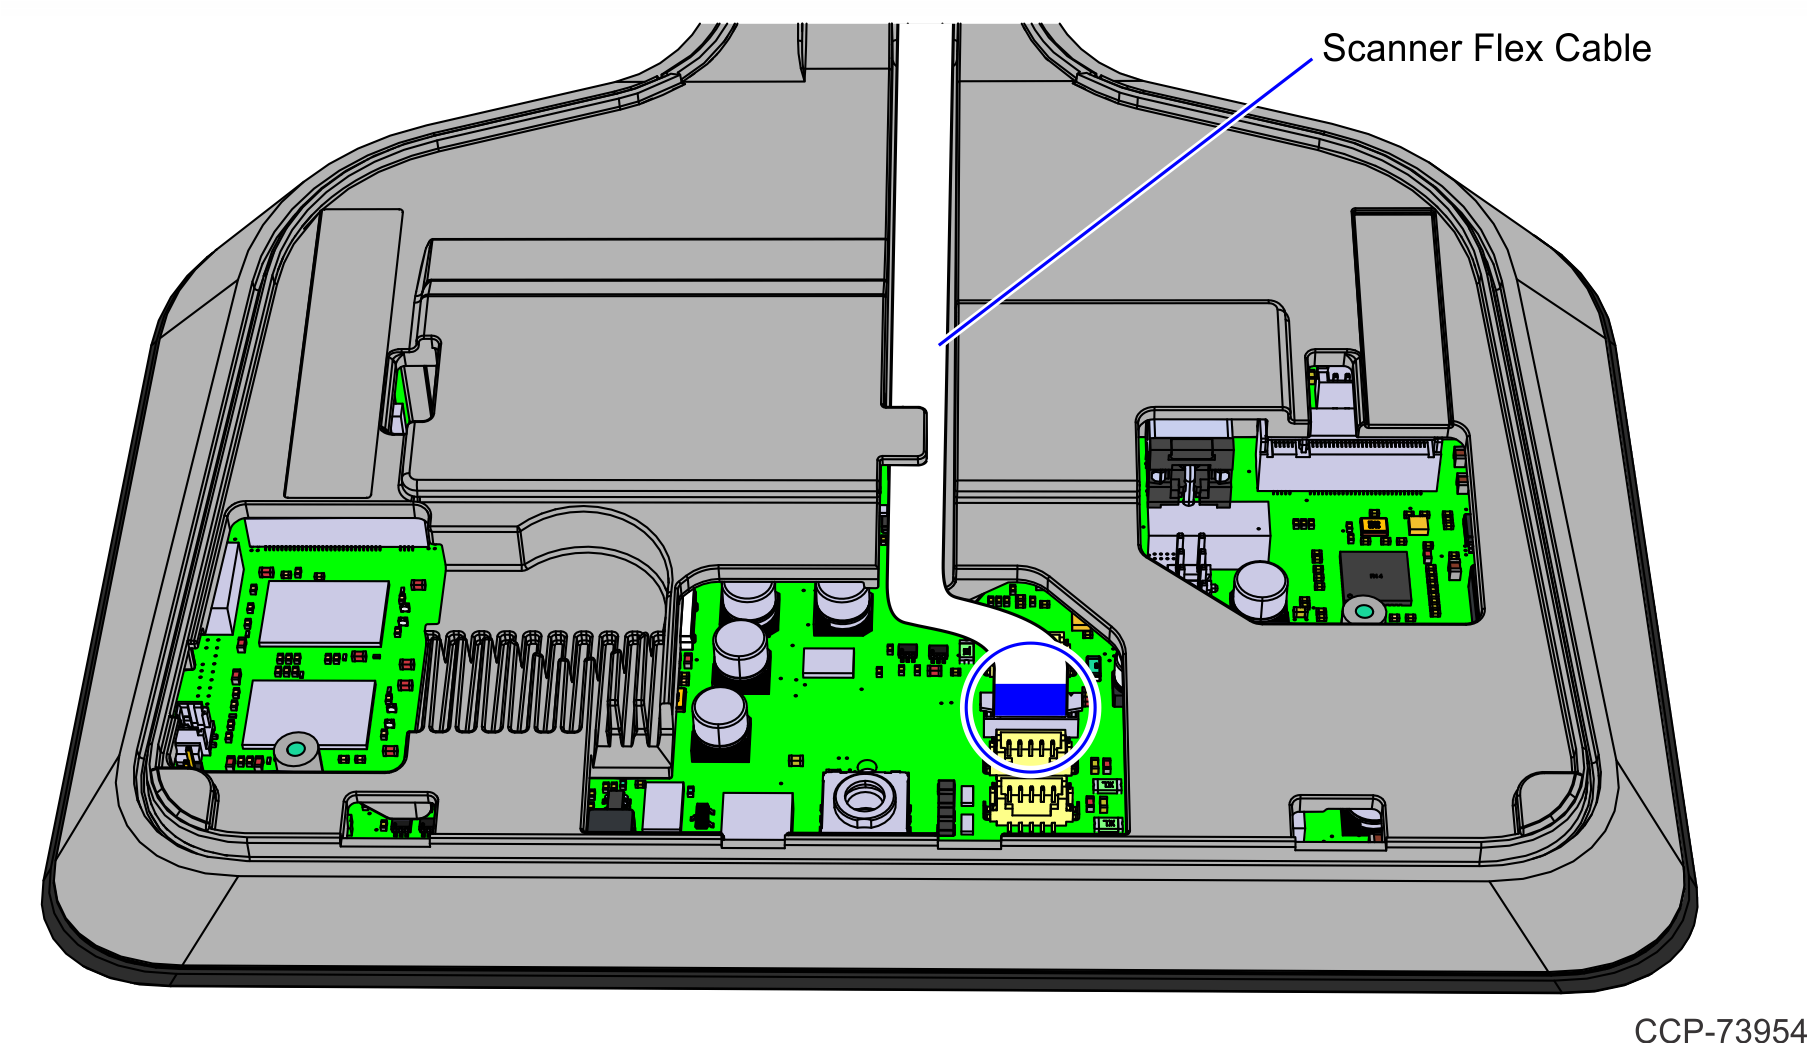
11.Insert the scanner flex cable through the opening at the bottom of the neck.
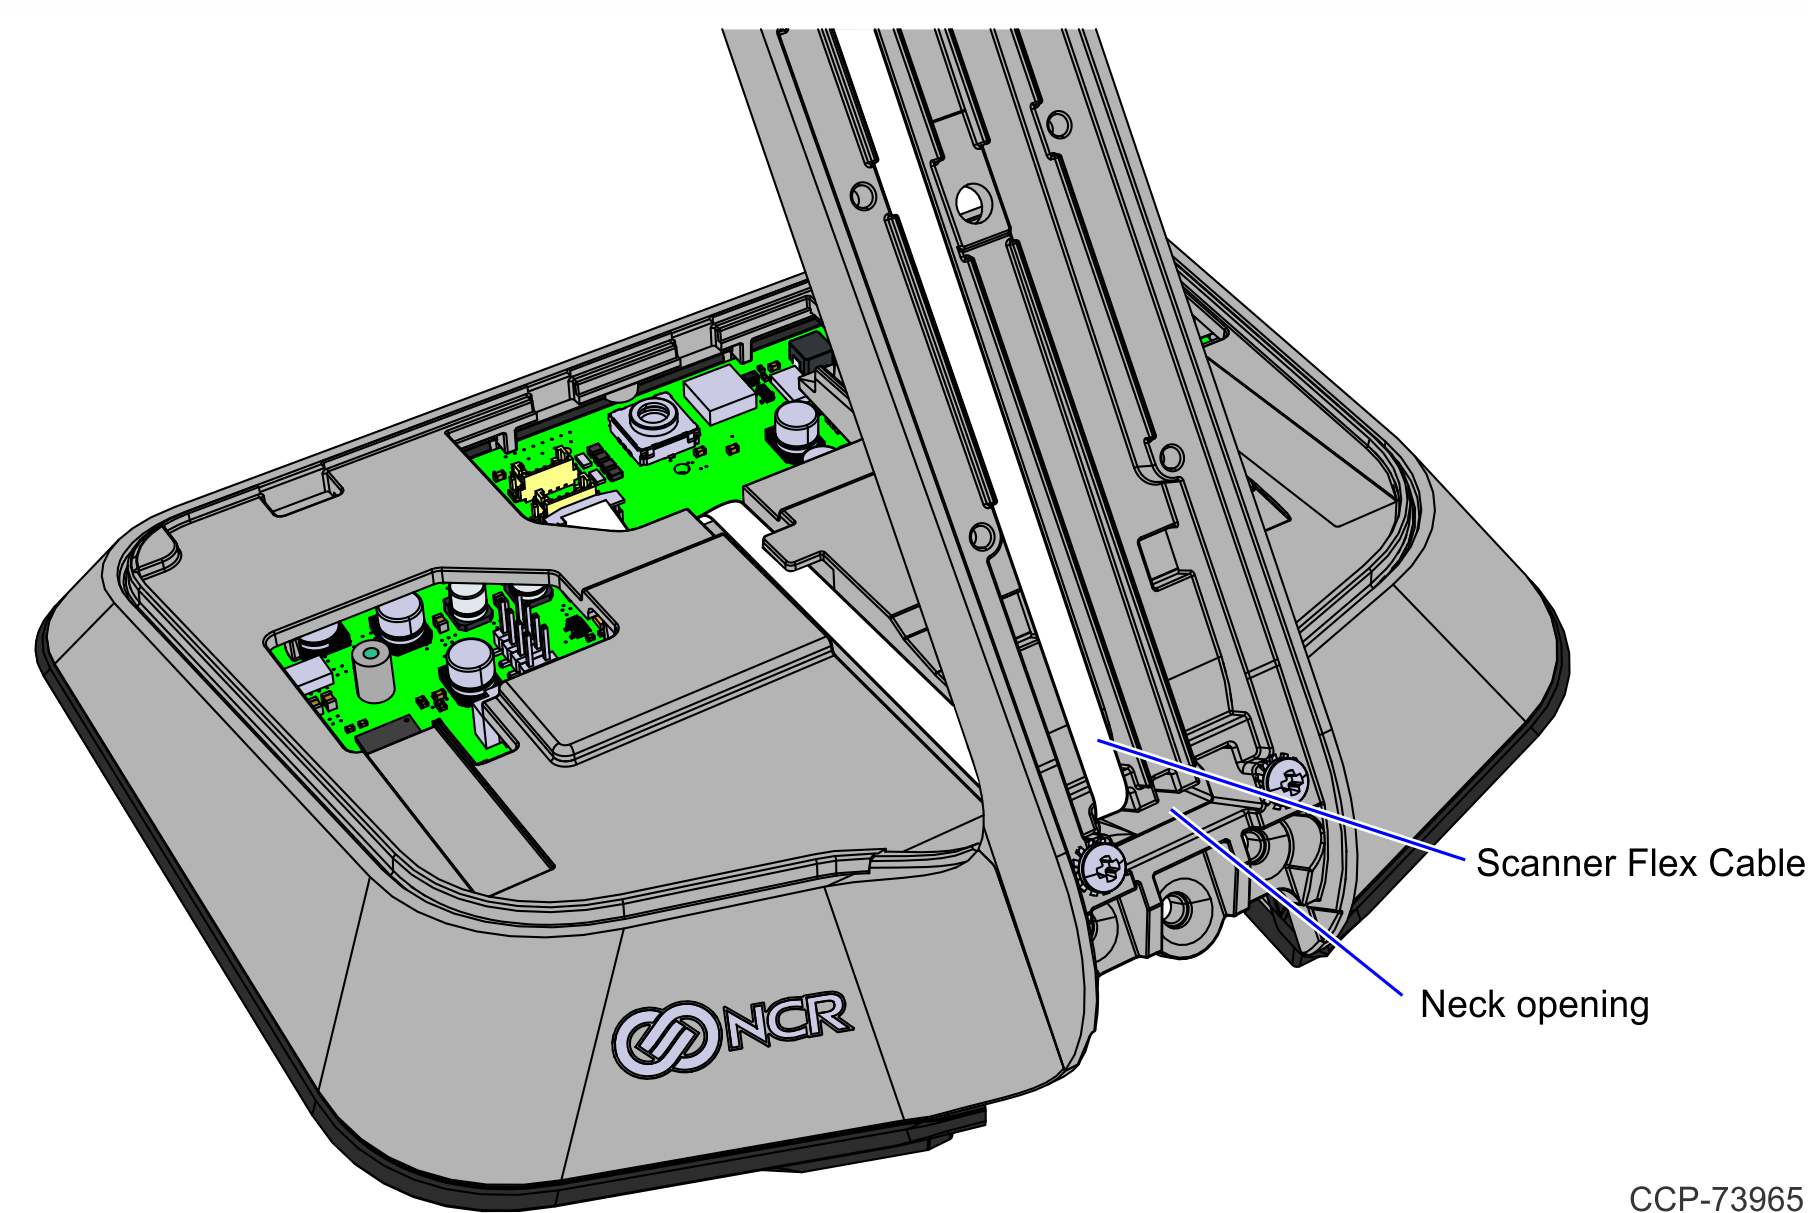
12.Route the scanner flex cable through the routing slot and connect the flex cable to the Motherboard with the blue side facing the front of the terminal.
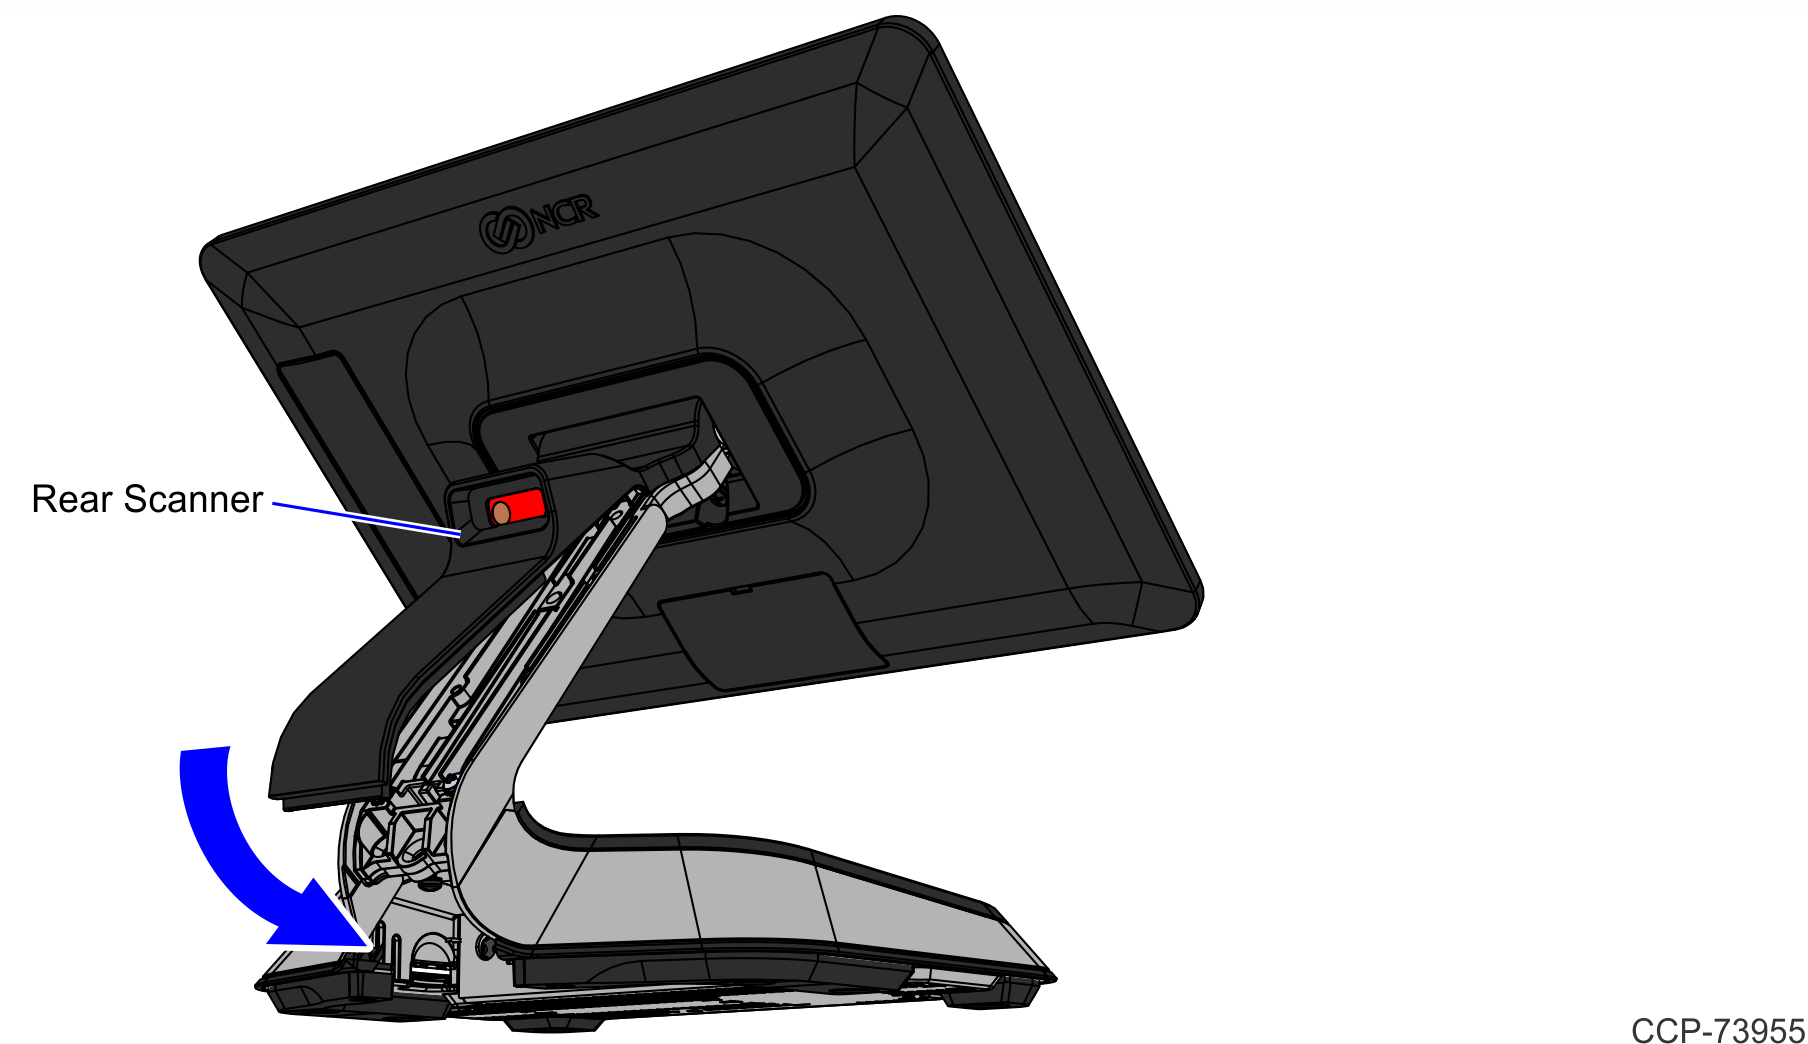
13.Position the rear scanner on the neck and pivot down.
14.Lay the terminal face down on a flat surface.
Caution: Always use a soft material (cloth, foam) to protect the display screen when placing the terminal face down.
15.While holding the terminal by the neck to hold the Rear Scanner in place, install the rear base cap.
16.Install the screws (2) to secure the rear base cap on the neck.
17.Reinstall the Stand Top Cover.
18.Reinstall the Front Neck Cover.