7746-K004 Wall Mount
This kit provides a base plate to mount the NCR PX10/PX15 POS (7746) on a wall.
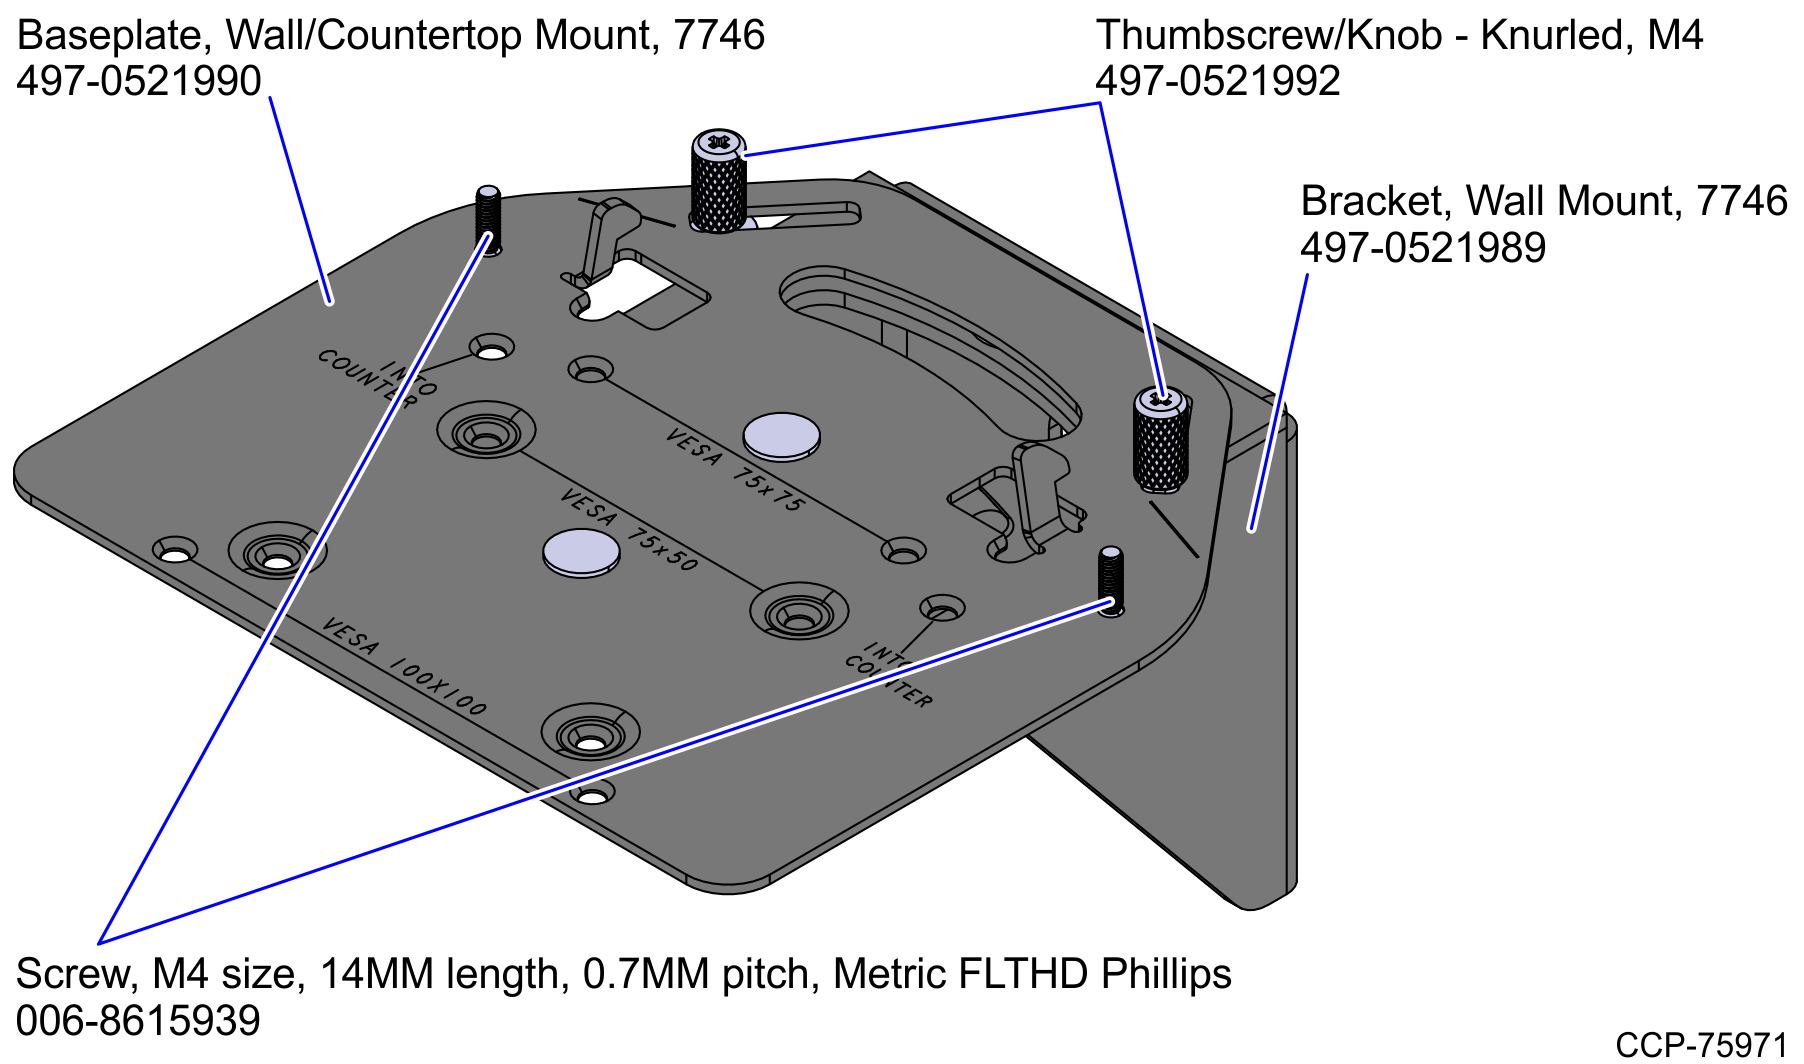
Kit Contents
Required Tools
•#2 Phillips screwdriver
•6 pieces No.8–7.5 inch round–head wood screws or similar, depending on the mounting substrate (supplied by customers)
Installation Procedure
1.Mount the base plate and wall bracket assembly on the wall.
a.Using the wall mount L-bracket as a template, mark the location of the holes.
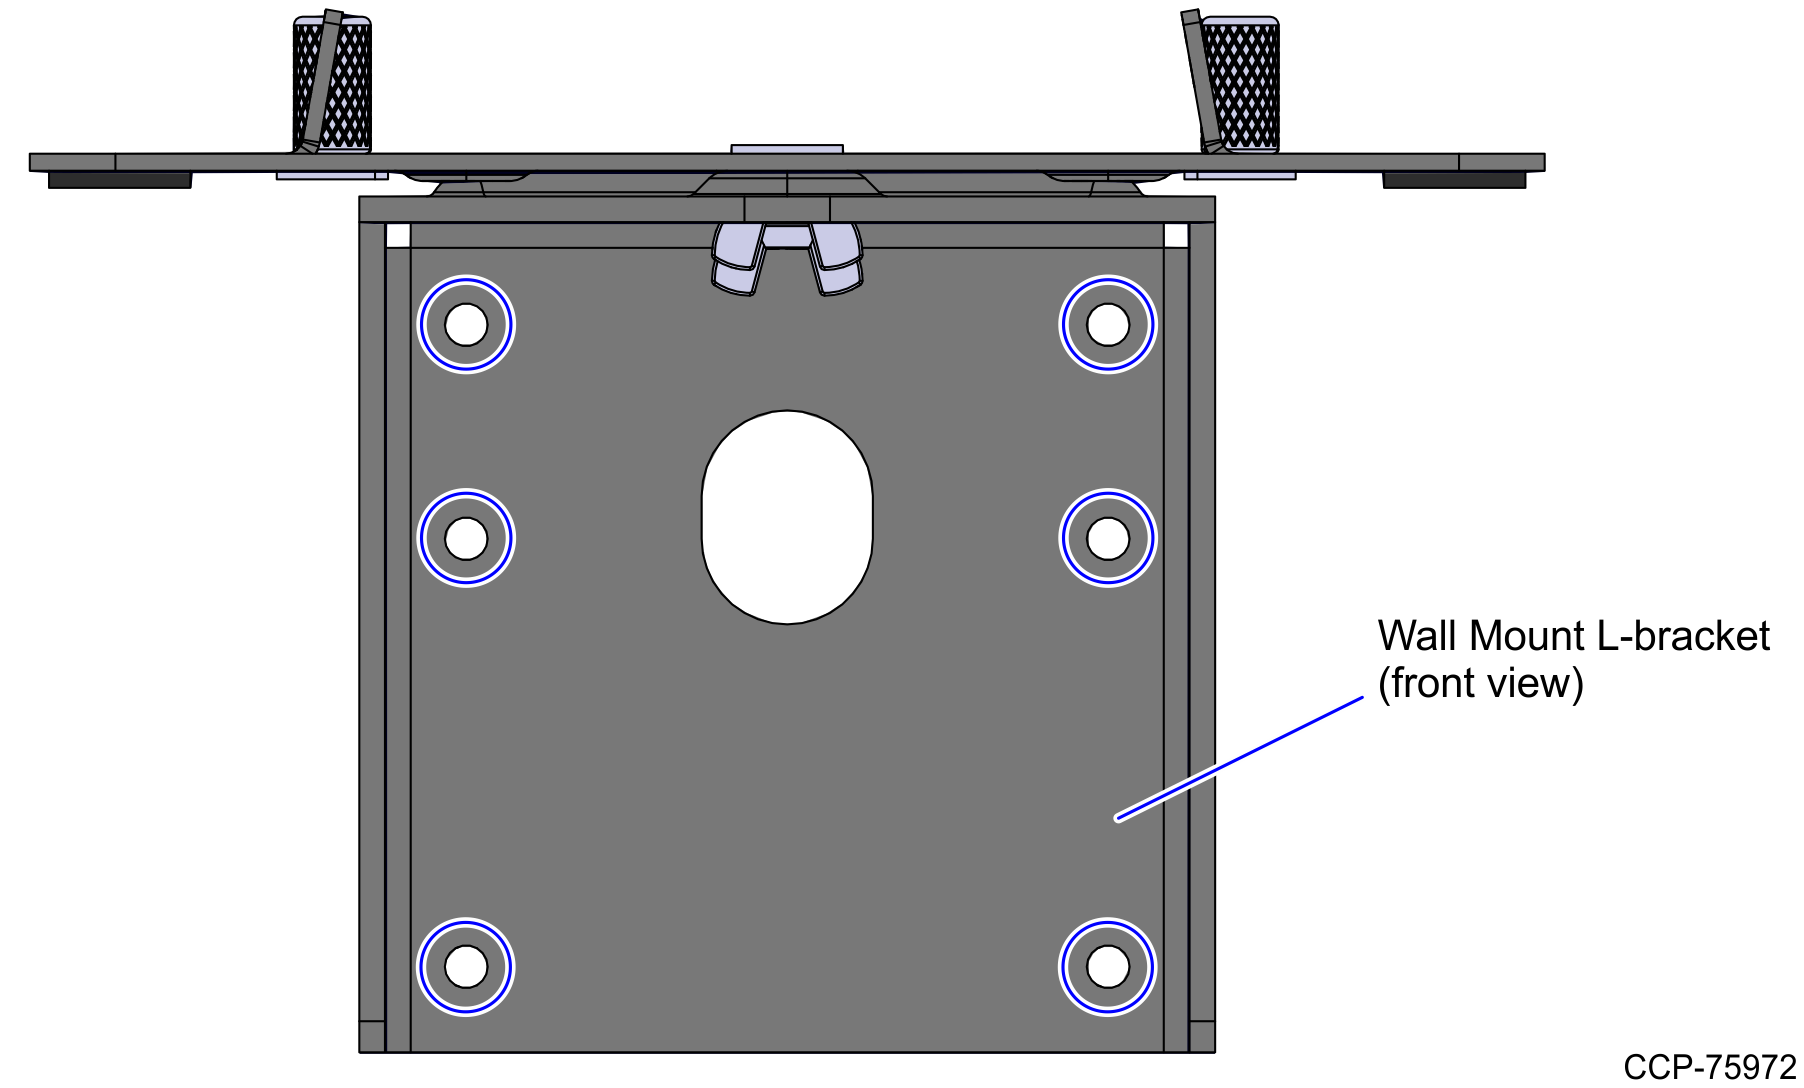
b.Position the assembly on the installation location and secure with screws (6).
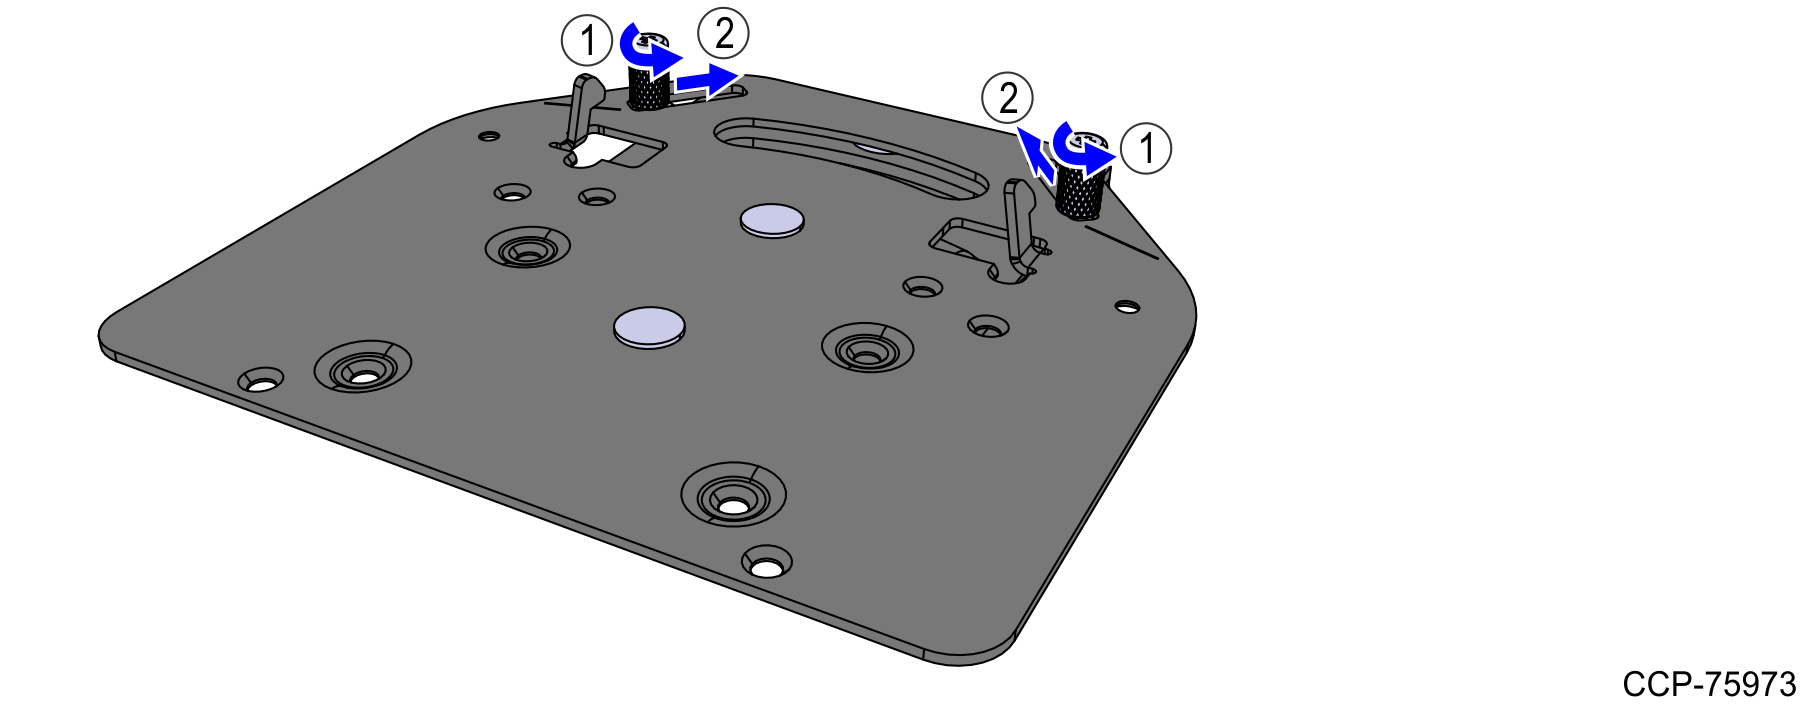
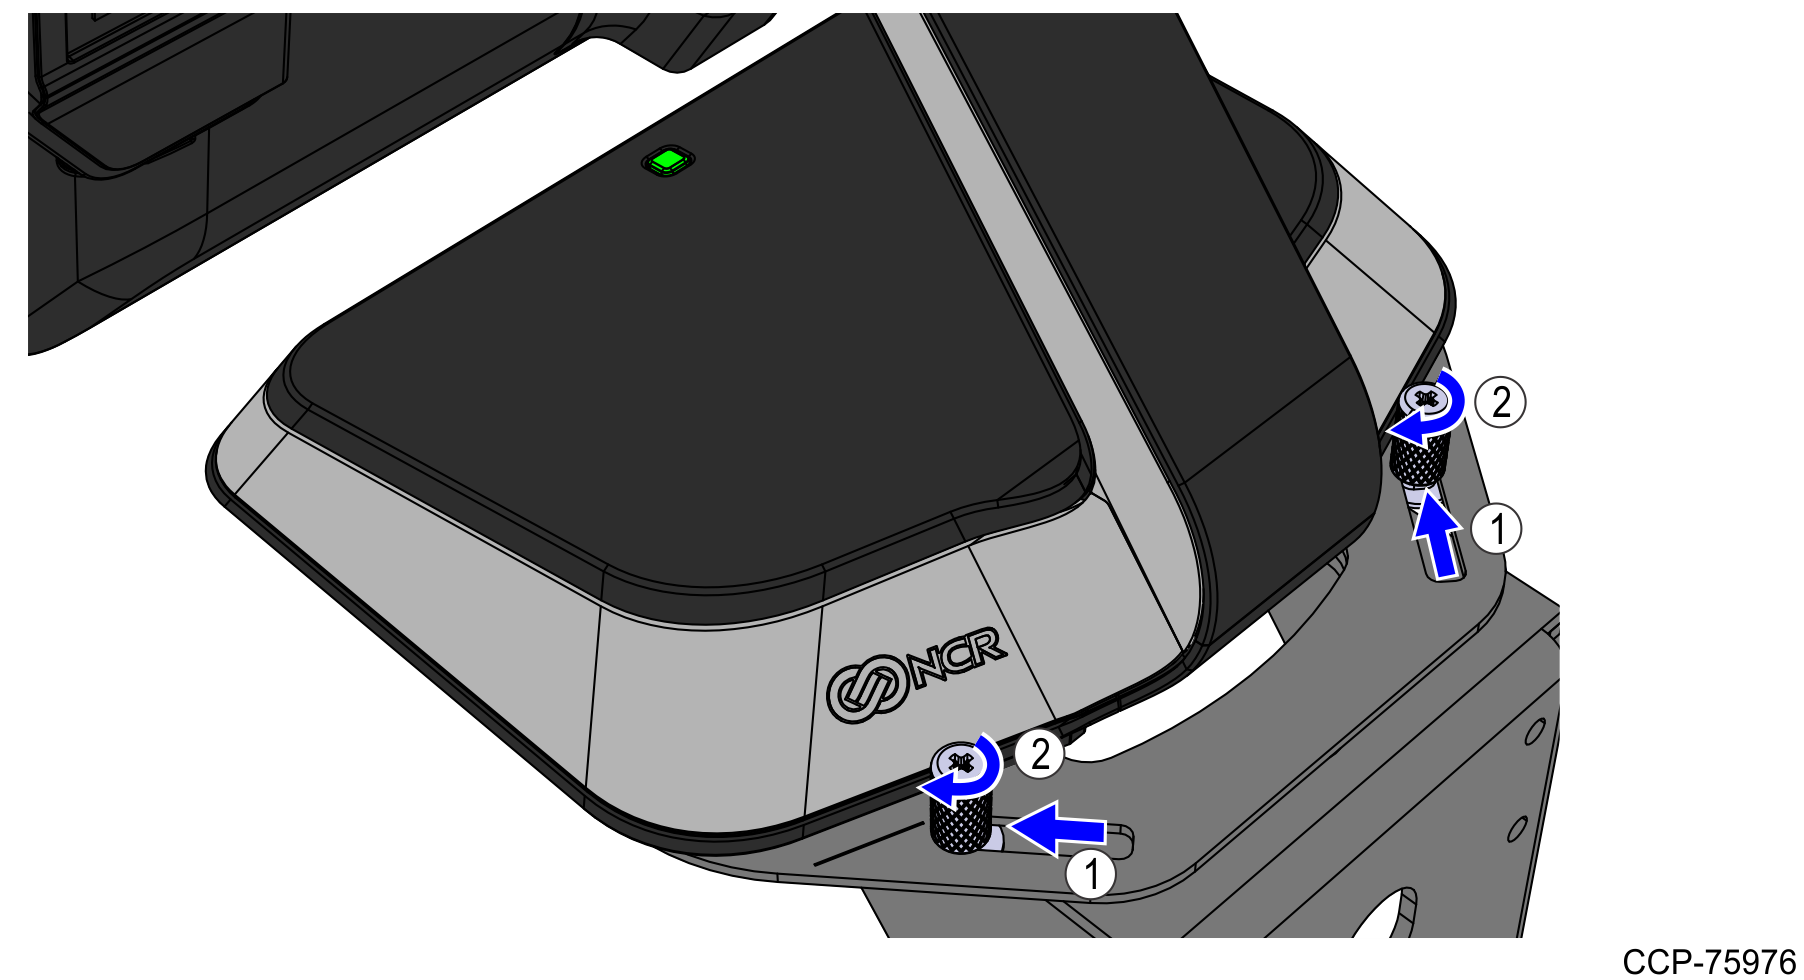
2.Loosen the thumbscrews, and then move them toward the back.
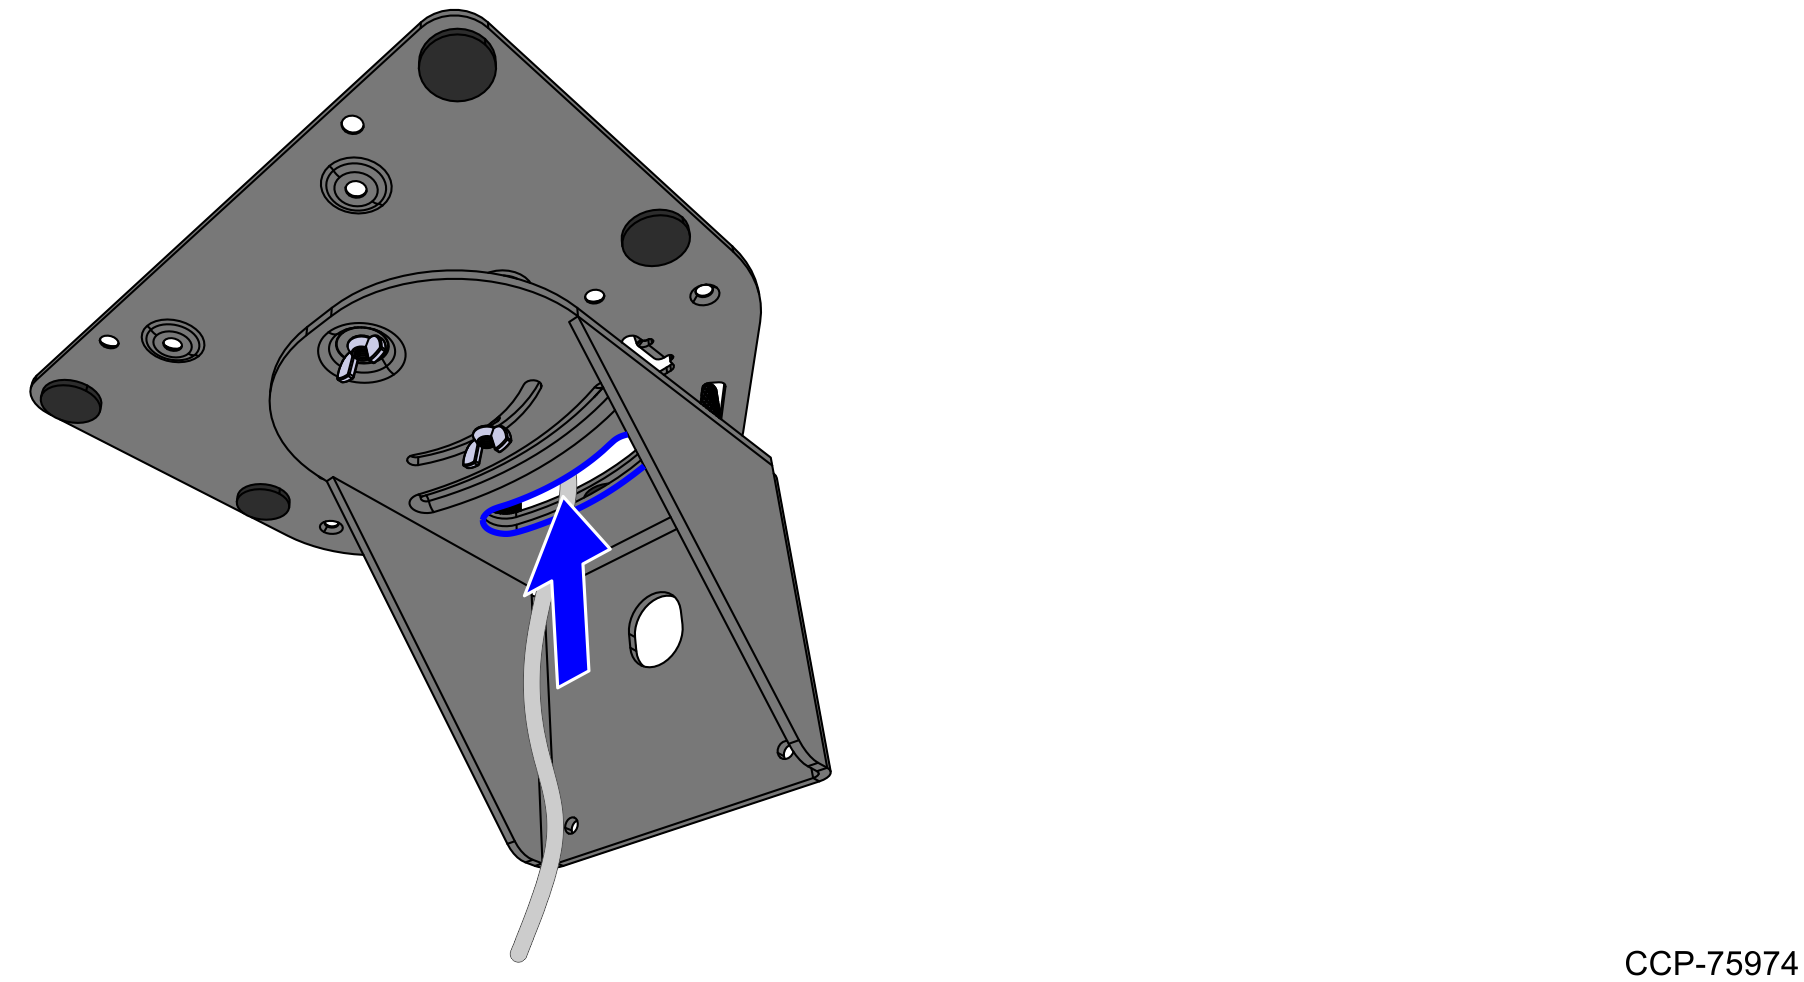
3.Route the cables through the hole indicated on the following image, and then connect the cables to their ports on the bottom of the 7746 terminal. For more information, refer to Terminal I/O.
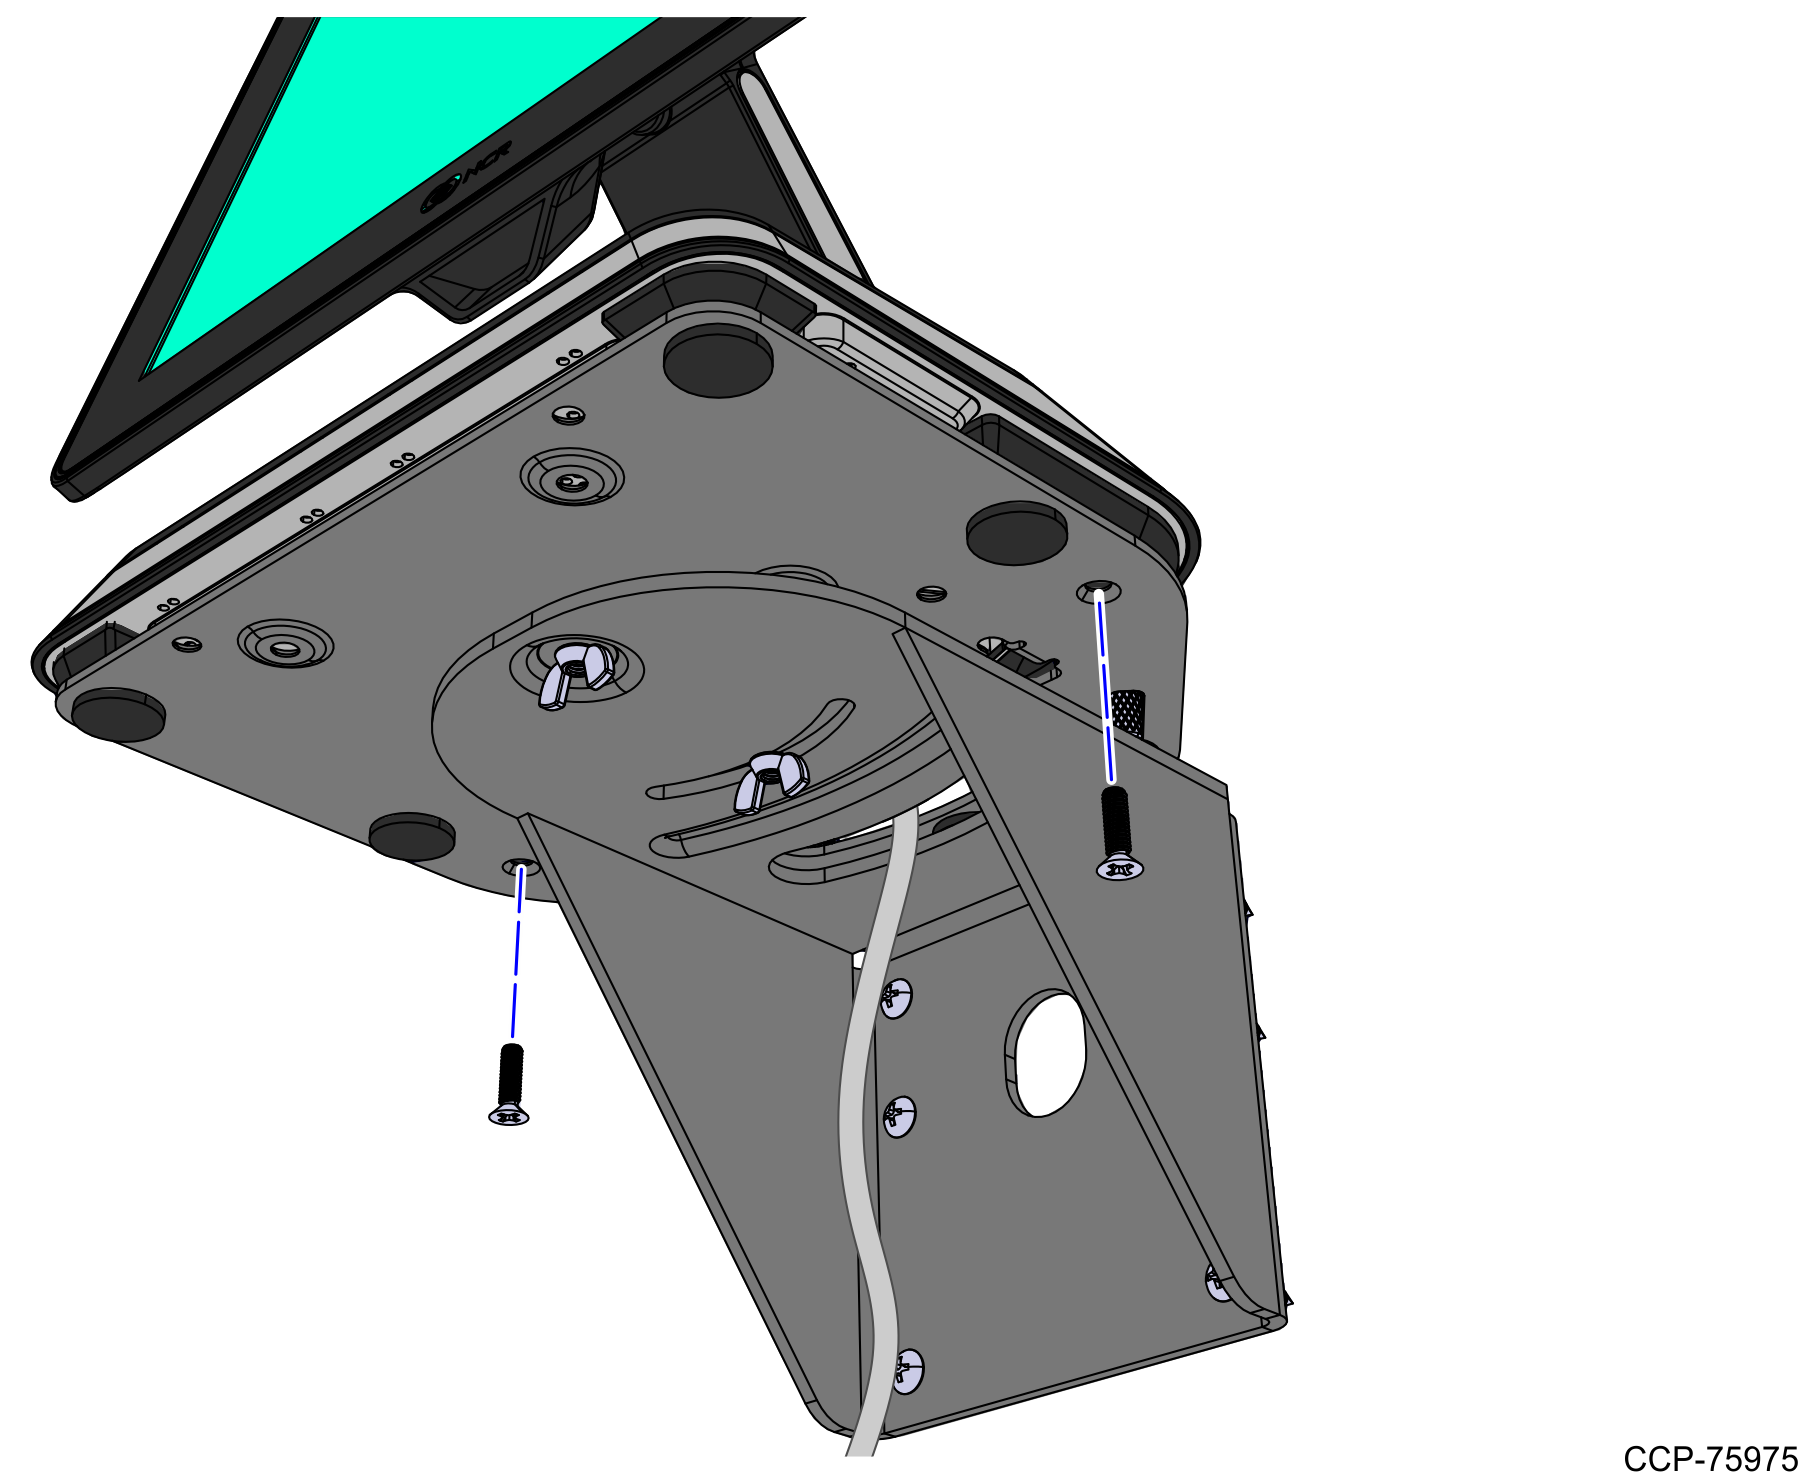
4.Mount the terminal on the base plate.
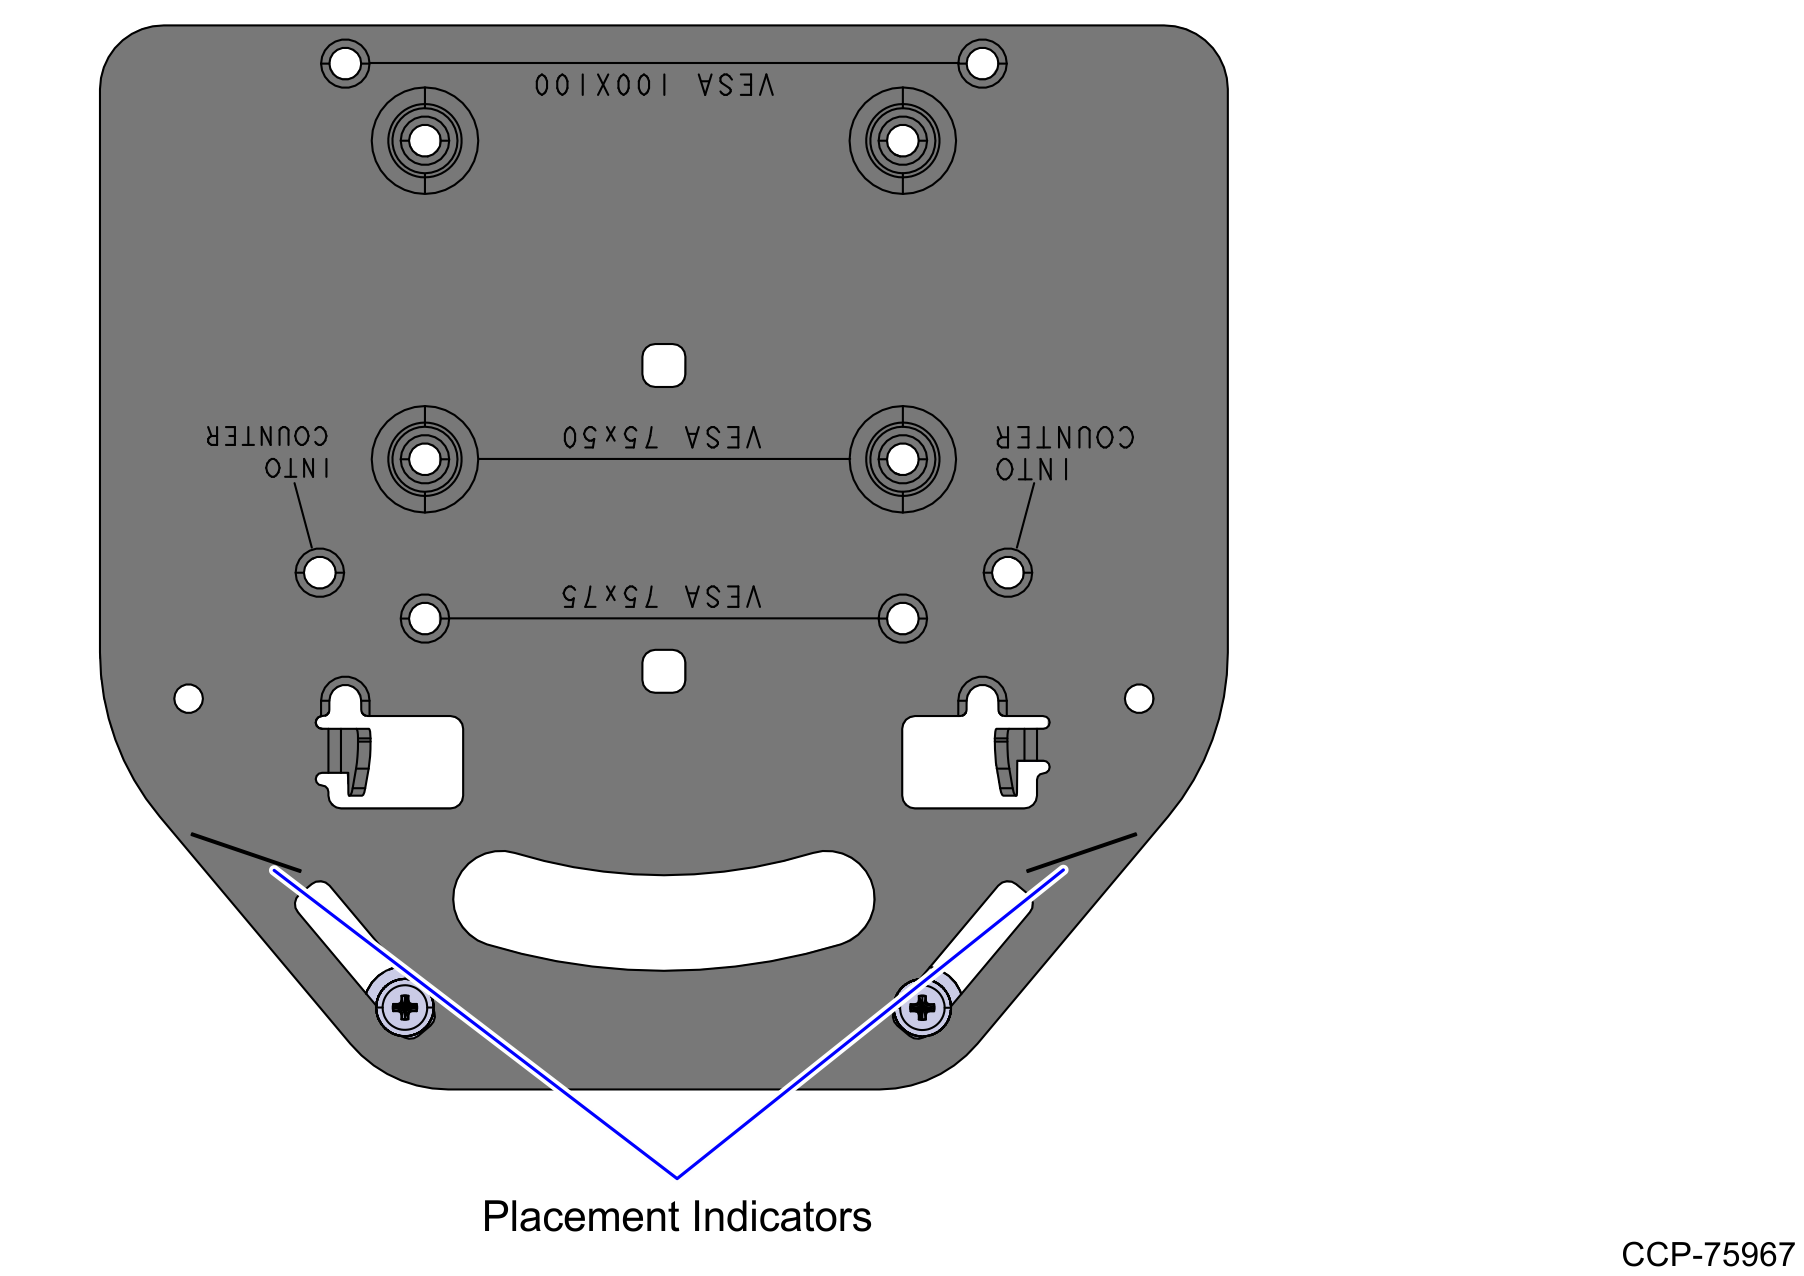
a.Place the terminal on top of the base plate and center it horizontally. Use the two lines on the base plate as placement indicators.
Caution: Ensure that no cables are pinched.

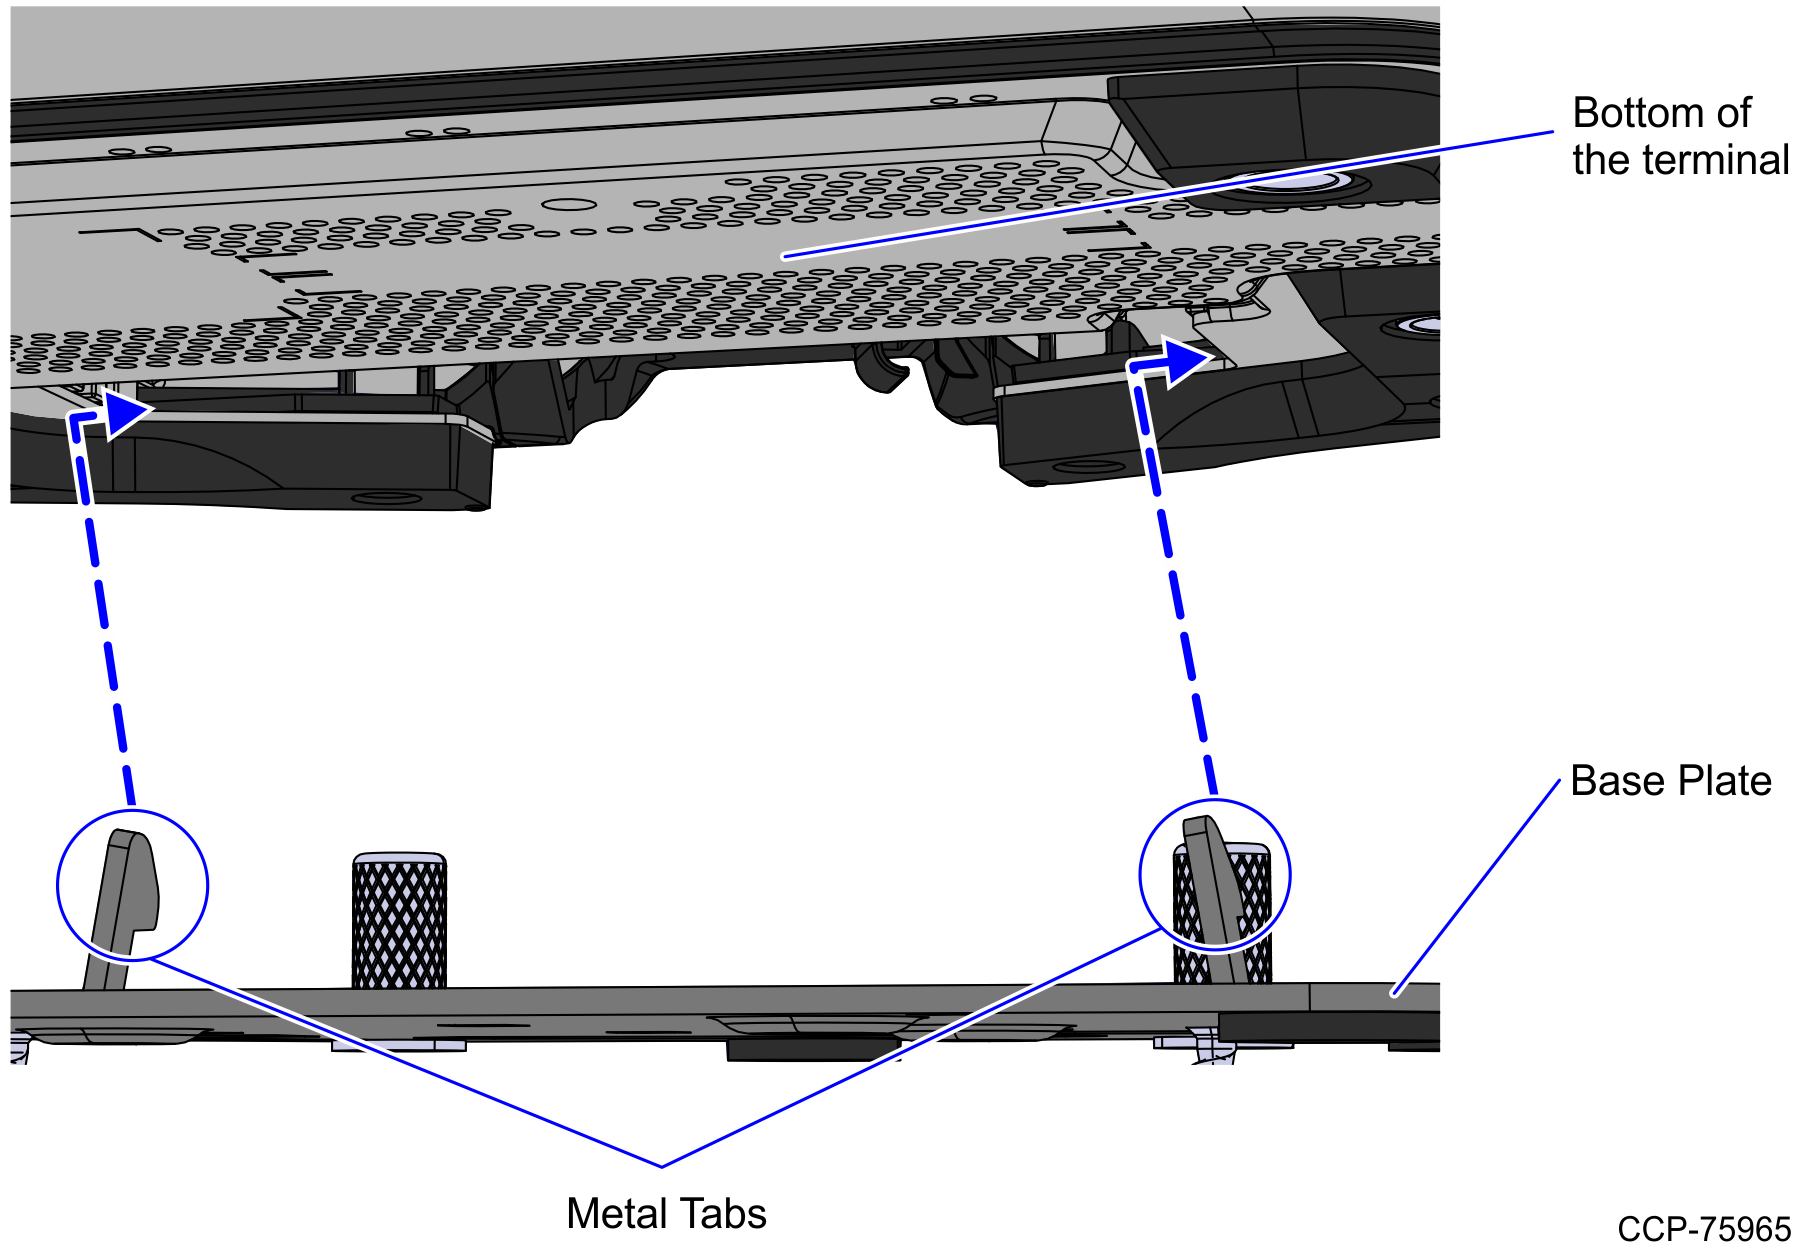
b.Move the terminal toward the front of the base plate to hook the metal tabs over the metal base of the terminal.
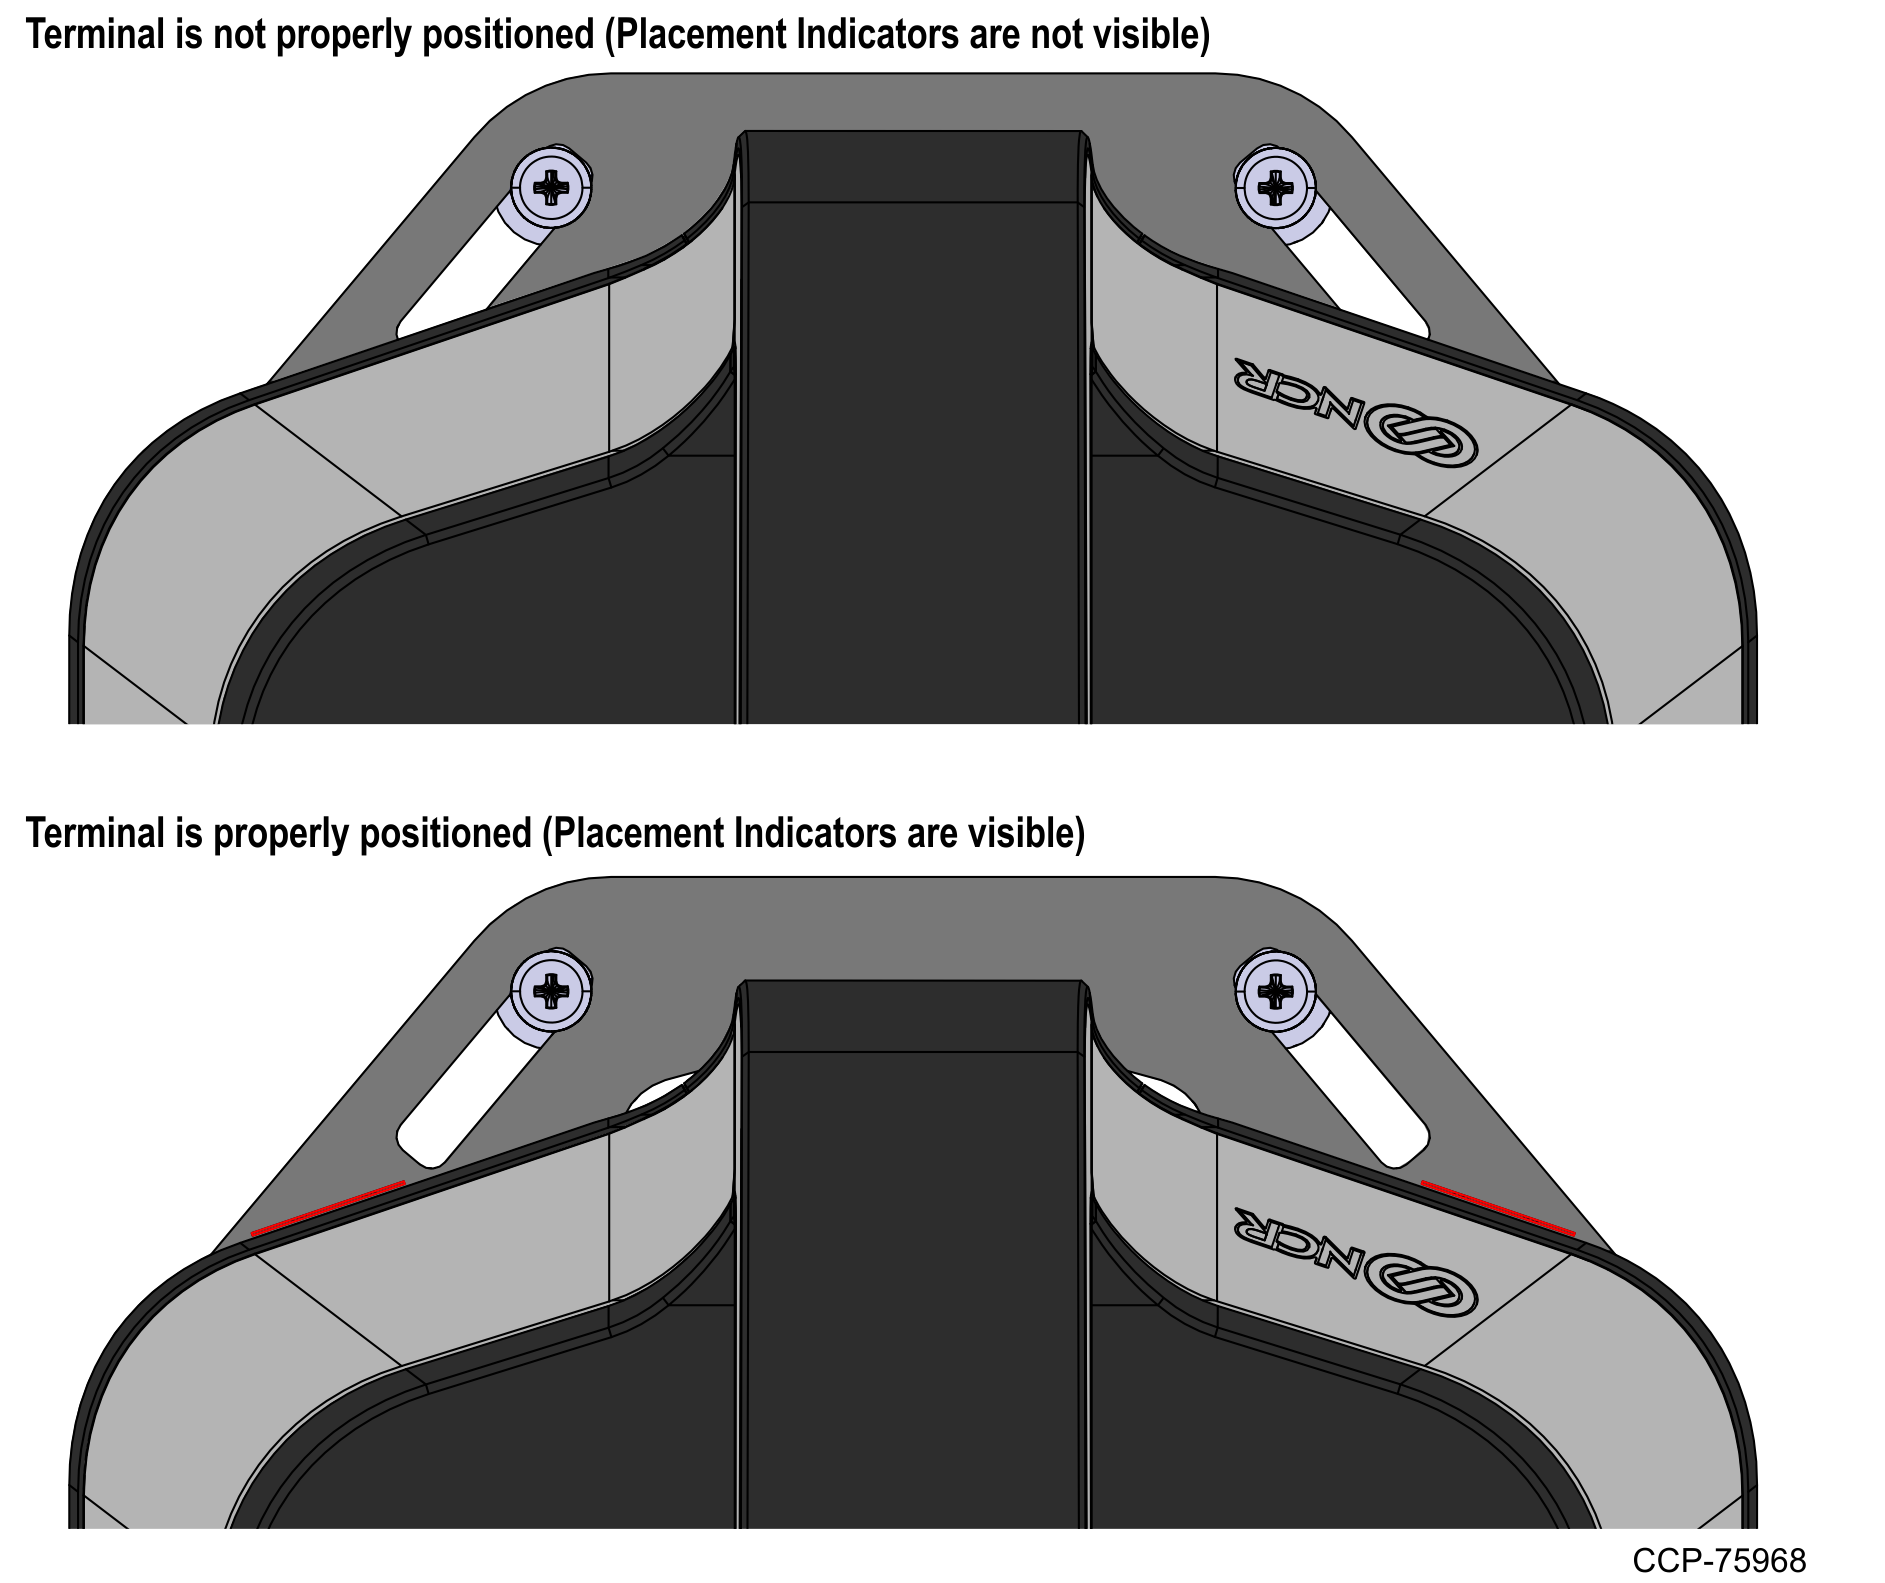
Note: Ensure that the terminal is properly installed. Both placement indicators on the base plate should be visible if viewed from the top.
c.Install the screws (2) to secure the terminal to the base plate.
5.Move the thumbscrews toward the terminal, and then tighten them.
Note: Ensure that the thumbscrews are touching the edge of the terminal.
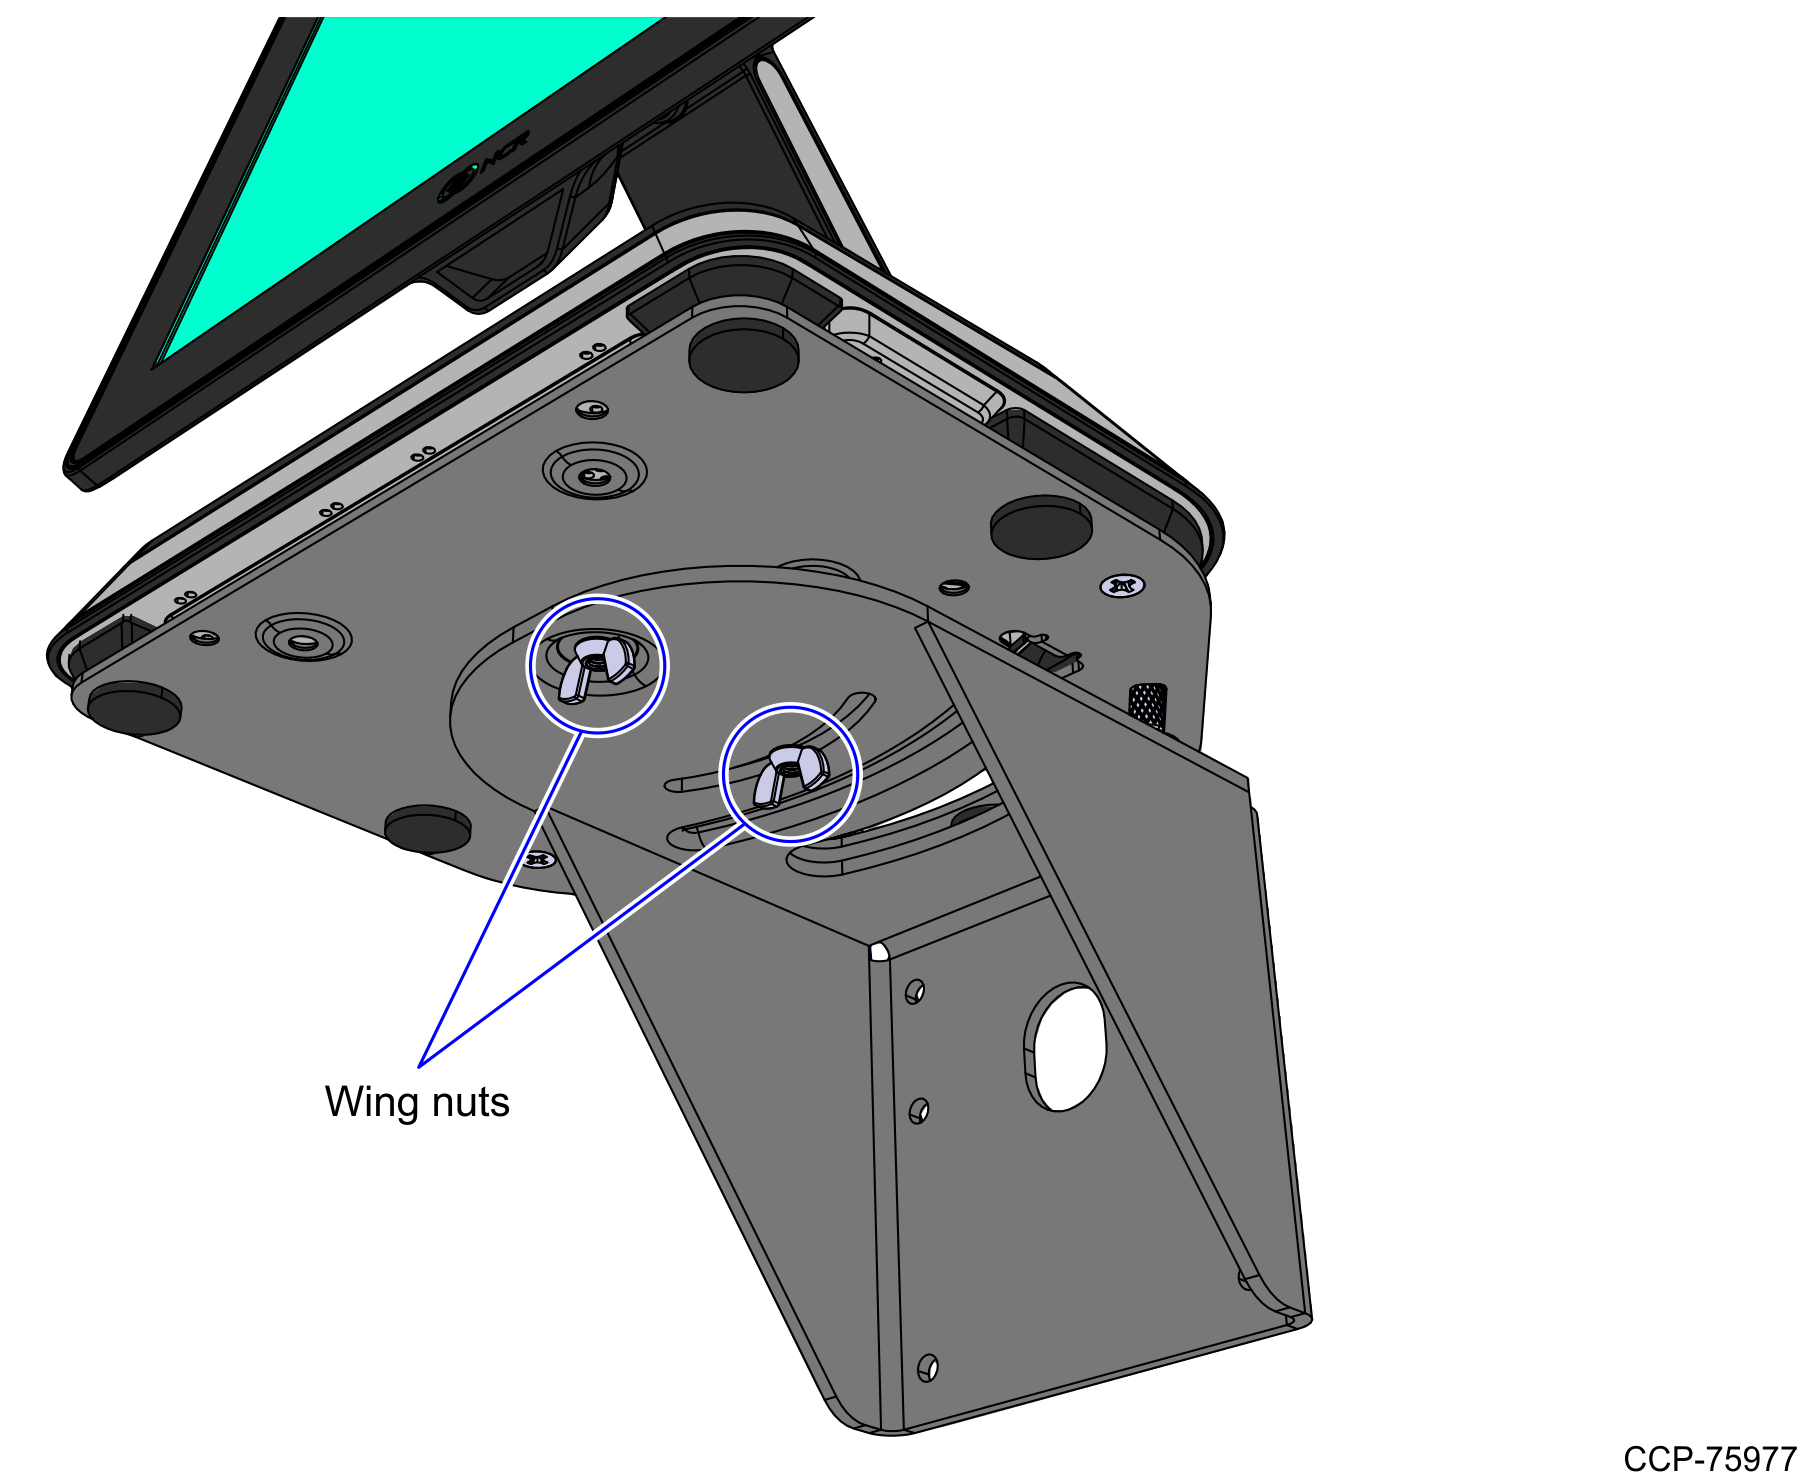
Swivel Feature
The 7746 Wall Mount kit has a swivel feature that allows users to rotate the base plate to the left or to the right.
To rotate the base plate, loosen the two wing nuts indicated in the following image.