Applying tax exemptions to transactions
Some organizations are qualified to make tax-exempt purchases. Customers belonging to these organizations who can present appropriate documentation or their tax exempt IDs to an authorized store associate are eligible to make their purchases tax-exempted.
Partial tax exemptions may also be applicable in some states or provinces. The Small Service Provider (SSP) uses local rules to determine the eligibility and application of the customer for tax exemption.
The POS application is capable of applying tax exemptions to the sales and exchange transactions of eligible customers. Alternatively, retailers can also disable their POS from applying this feature. When tendering, customers can only use tenders valid for tax exempt transactions to pay for their purchased items. Retailers define the eligible tenders valid for tax exempt transactions.
Retailers can configure each tax exemption type. Some tax exemption types are based on the province or state or the destination of the purchased items. When a tax exemption for a locale for all items in the transaction is not applicable, the POS application displays an information message.
When the POS is integrated with the Verifone Point payment solution and the customer signs the tax exemption through the PIN pad, the POS does not require the customer to also sign the receipt and does not print a signature line on the receipt.
The signature can be captured electronically if the retailer’s payment solution supports it. When the customer is unable to sign electronically, a signature line is printed on the tax rider receipt for the customer to sign.
Configurable features
The POS application can be configured with the following features.
- Specify tax receipt preferences.
- Automatically print the tax rider or frank a slip if electronic signature is not collected.
- Collect either an electronic signature, frank a slip, or print a tax exempt rider.
- Describe the tax exempt receipt header.
- Describe the tax legal receipt message.
- Describe the text that is displayed or printed on the rider, franked form, or PIN Pad signature box.
- Disable tax exemptions.
- For more information, refer to Tax Override Setup.
- Determine which tenders are valid in transactions with tax exemptions. For more information, refer to Tender Definitions.
- Specify franking preferences.
- Add additional franking text.
- Frank and print tax exempt information on the franking slip. By default, the application prints the franked tax exempt information on the chit.
- Modify the Franking Set ID.
- Specify the franking slip template.
- For more information, refer to Franking Setup.
- Disable the Begin Printing button on franking screen. For more information, refer to Menu Buttons.
- Enable the POS to automatically start franking when a franking form is inserted. For more information, refer to Receipt Printing.Important
Depending on the model of the printer integrated to the POS application, this feature may require configuring the printer device in the DeviceManager.xml file. For more information, refer to Configuring the POS to automatically frank documents.
- Specify the time period the POS waits for an associate to insert the franking form before displaying a warning message. For more information, refer to Receipt Printing.
- Specify which customer information is collected. For more information, refer to Information Form Definitions.
- Display an information message when an associate or customer enters an e-mail address that does not pass third-party validation. Permit the associate to return to the view or accept the invalid e-mail format. For more information, refer to Customer Configuration.
- Specify and apply various types of tax exemptions according to the different tax rules that exist in the US and Canada.
- Specify exemption types.
- Define the text of the buttons on the Tax Exempt Type screen.
- Describe the text to display for a specific tax exemption on the printed receipt.
- Determine whether the tax exemption is applied on selected items or the entire transaction.
- Print the tax exempt information on the customer receipt.
- Determine the states or provinces where tax exemption is available.
- Specify the states/provinces where a signature is required on the PIN pad or paper receipt.
- Specify the name of the text template displayed on the on the PIN pad signature collection screen and on the receipts.
- Determine the tax exempt customer information input fields.
- For more information, refer to Tax Exemption Definitions.
- Define calculation rules when applying tax exemptions. For more information, refer to Tax Exemption Rules.
- Enable the PIN pad to electronically capture the Terms and Conditions acceptance and the customer signature if the retailer’s payment solution supports it. For more information, refer to General.
For authorized associates to apply tax exemptions to a sales exchange transaction, follow these steps:
The following steps will use Band Use as the tax exempt type. A sample configuration of this tax type is shown in Tax Exemption Definitions.
- From the Sale Main Menu, scan or enter an item bar code.
- On the Sale Main Menu screen, select Make Tax Exempt. The application displays the Tax Exempt Type screen.
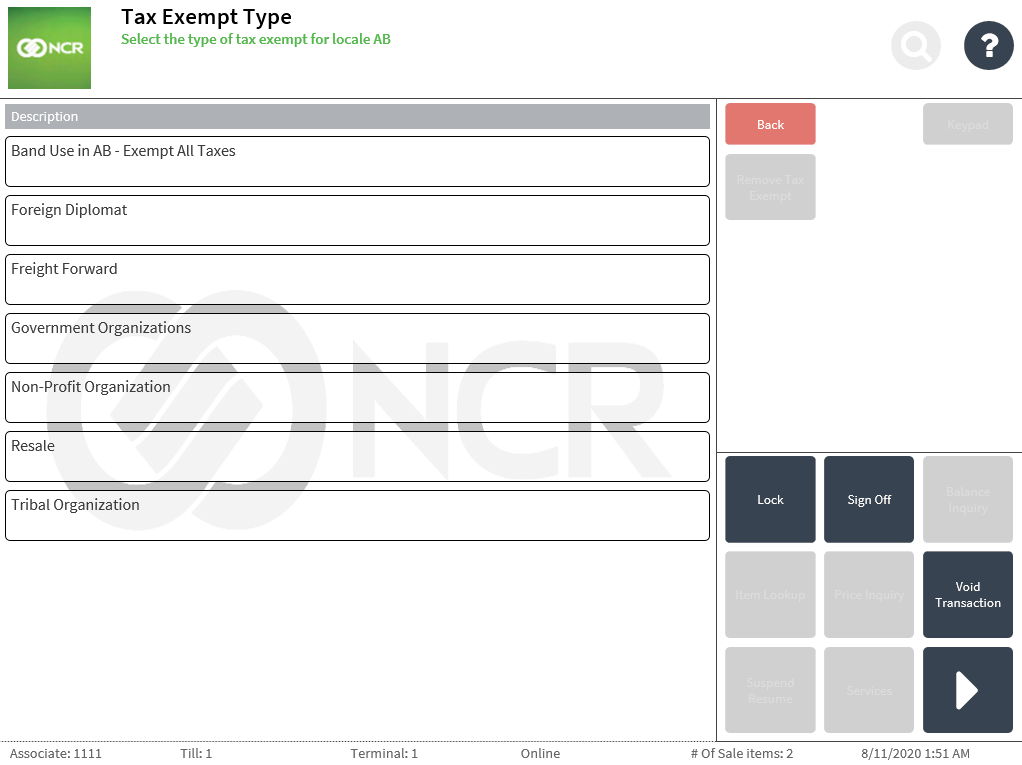
- Select the Tax Exempt type. The application displays the Tax Exempt Item Selection screen when the POS application is configured to apply tax exemptions to selected items.
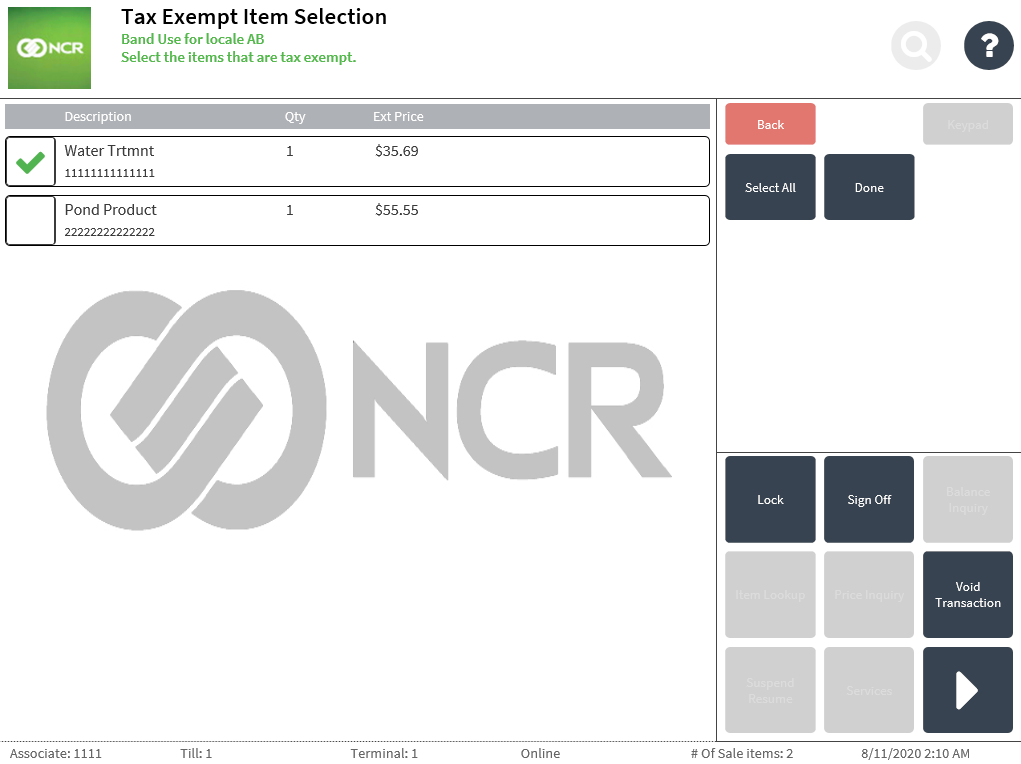
- Select the items that are tax exempt and select Done. The application displays Tax Exempt – Band Use screen.
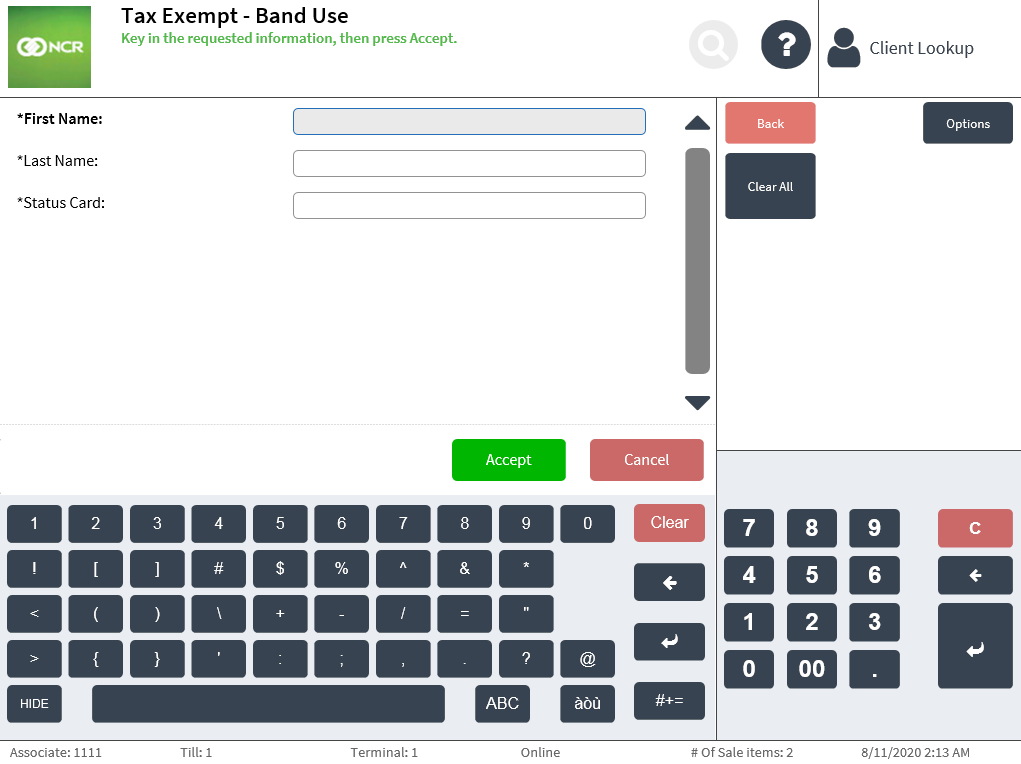
- Enter the required customer information.Note
Retailers can configure the type of information required from the customer during the exemption process.
- Select Accept. The application displays a confirmation message to have the customer sign at the end of the transaction. Note
When the POS is integrated with Common Client and the Terms And Conditions And Signature Prompt parameter is enabled, the customer can confirm acceptance of the Terms and Conditions and sign through the PIN pad.
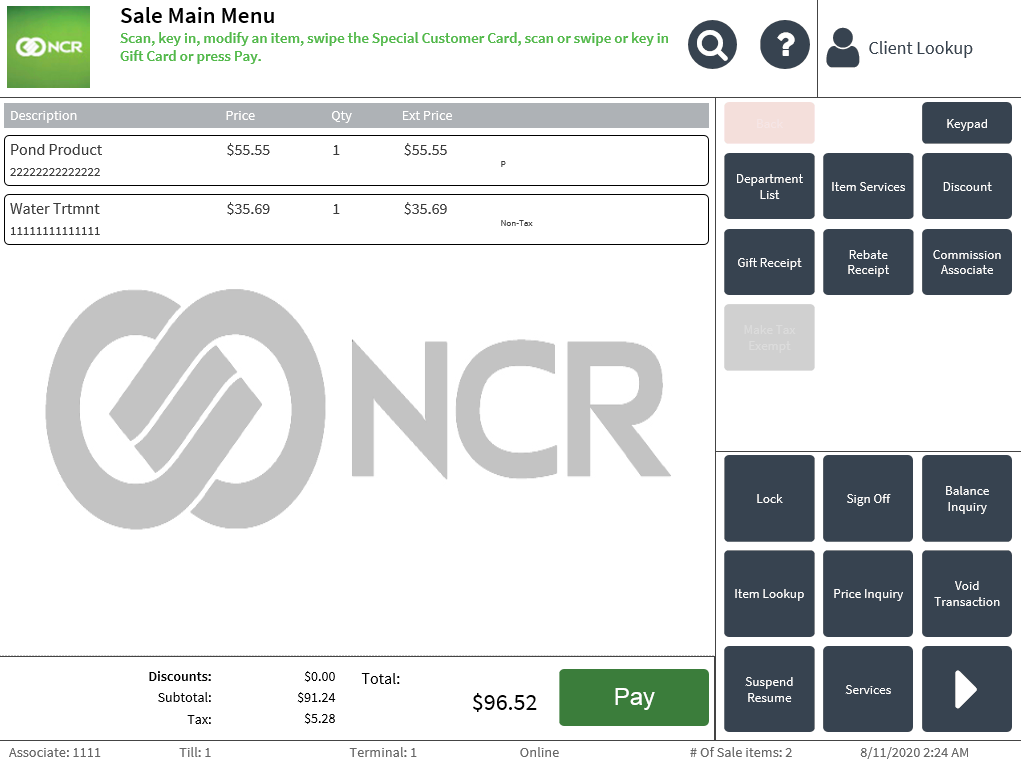
- Select OK. The application displays the Sale Main Menu. The Non-Tax item detail is displayed in line with the selected items on the Sale Main Menu screen.
- Complete the transaction. The application prints a non-taxable sales rider and the sales receipt when the customer is unable to sign electronically through the PIN pad.
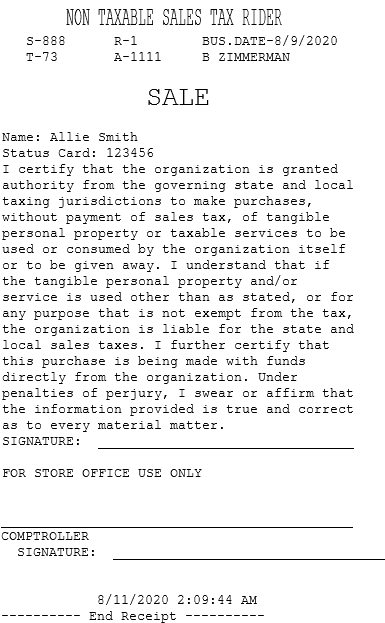
Non-taxable sales tax rider receipt
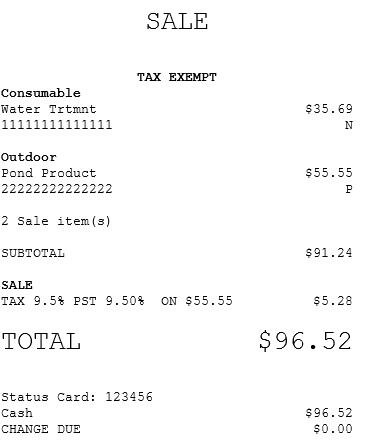
Receipt for a tax-exempted sales transaction
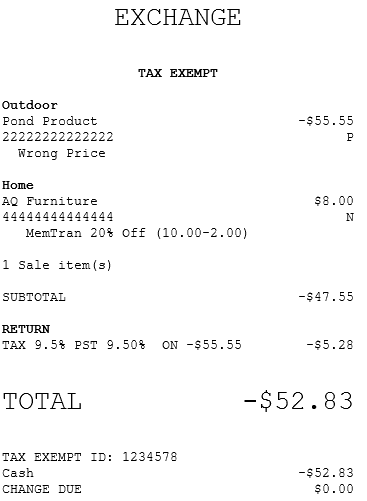
Receipt for a tax-exempted exchange transaction
The following is a sample receipt for a tax-exempted exchange transaction.
Signing on the mobile POS for tax exemptions
When using a mobile POS, the following options must be configured to allow customers to sign on the mobile POS device instead of on the PIN pad device:
- Enable Tax Exempt Electronic Signature. For more information, refer to Tax Override Setup.
- Enable Signature on Device. For more information, refer to Signature Capture.
To complete a tax exemption transaction using the mobile POS, follow these steps:
- After entering the required customer’s information, the application displays the following screen for the customer’s signature:
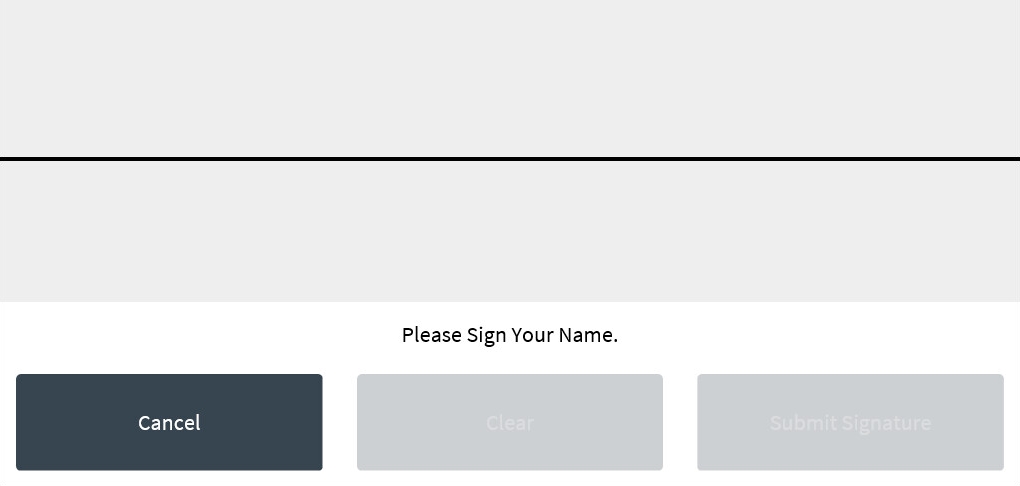
- Have the customer sign on the device and select Submit Signature. The application displays a signature verification screen.
- Select Signatures Matched to confirm the customer’s signature. The application displays the Tax Exempt Reasons screen.
- Complete the tax exemption transaction.