Printing item-specific receipt notes
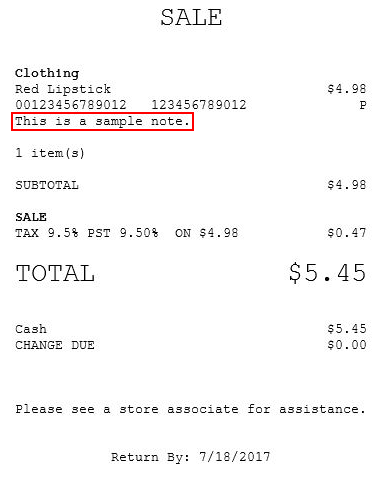
The associate can add an item-specific note on the printed receipt. The note is printed on the lines directly after the item and before the next item on the receipt.
The associate can enter a note from either of the following:
- A predefined note stored on the POS
- A specific note entered by the associate
The associate can also update or remove an item note during a sales transaction.
To print an item-specific note on the receipt, follow these steps:
- From the Sale Main Menu screen, select the item to add a note to. The application displays the item-related options.
- Select Add Note. The application displays the Item Notes screen.
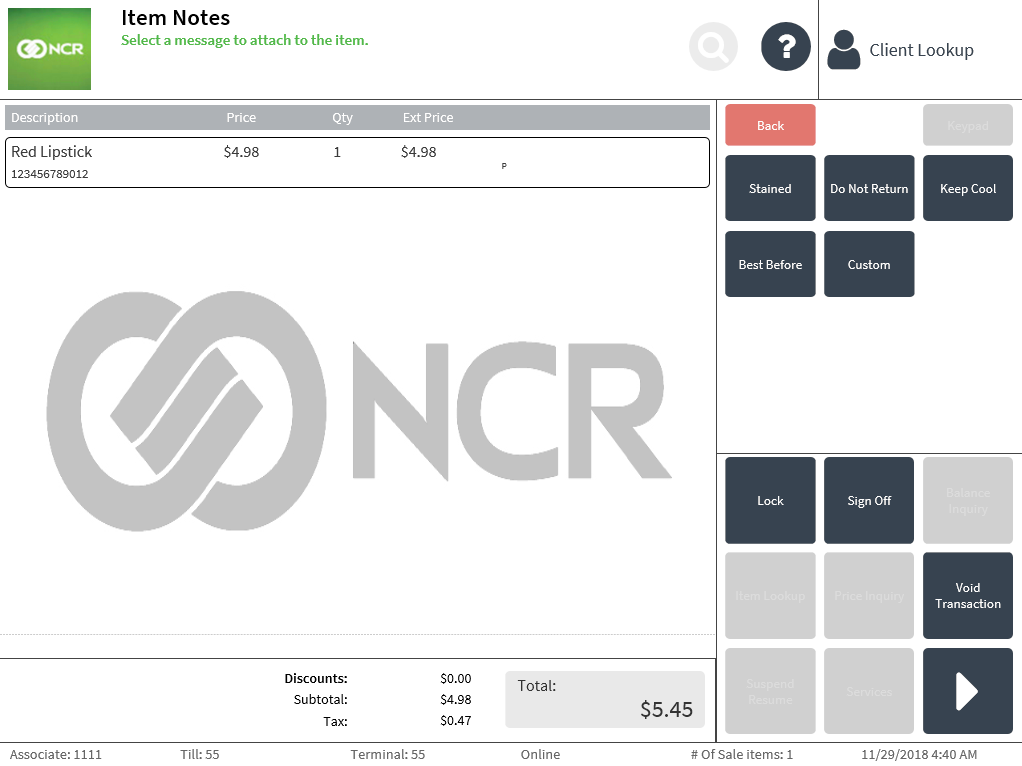
- Do one of the following:
- Select a Note button to add a note.
- Select Custom to enter a customized note. The application displays the Custom Note screen.
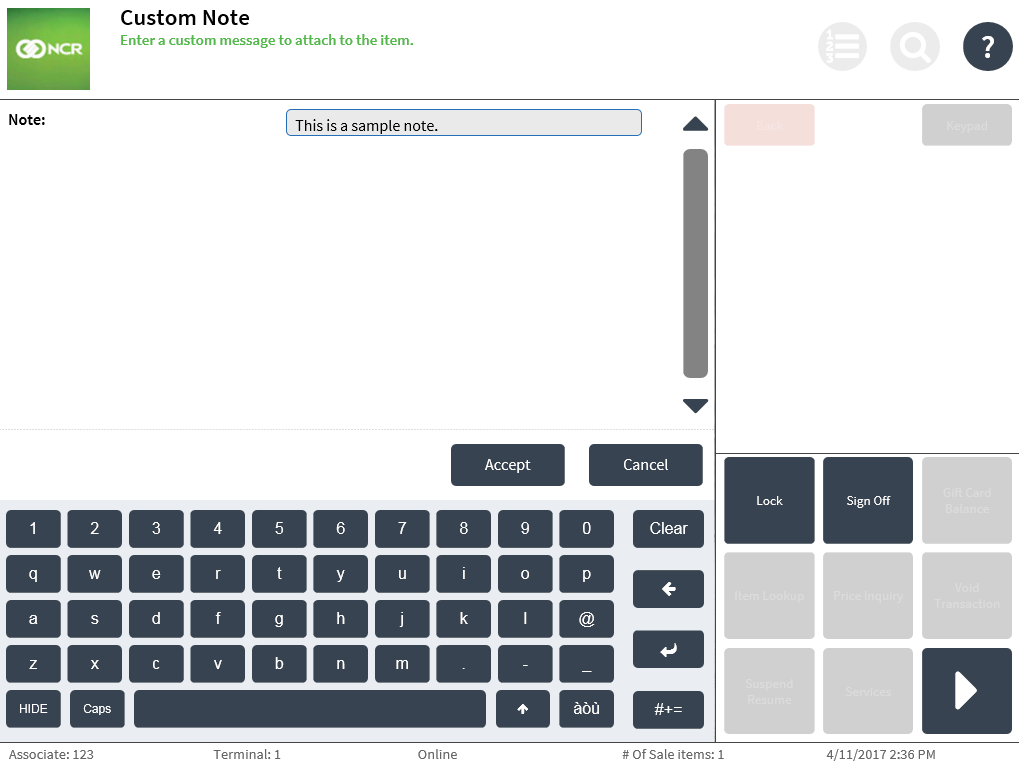
Enter a note in the Note field and then select Accept.
The application returns to the Sale Main Menu screen.
- To update or remove an item note, select the item and do one of the following:
- Select Update Note to update the item note.
- Select Clear Note to remove the item note.
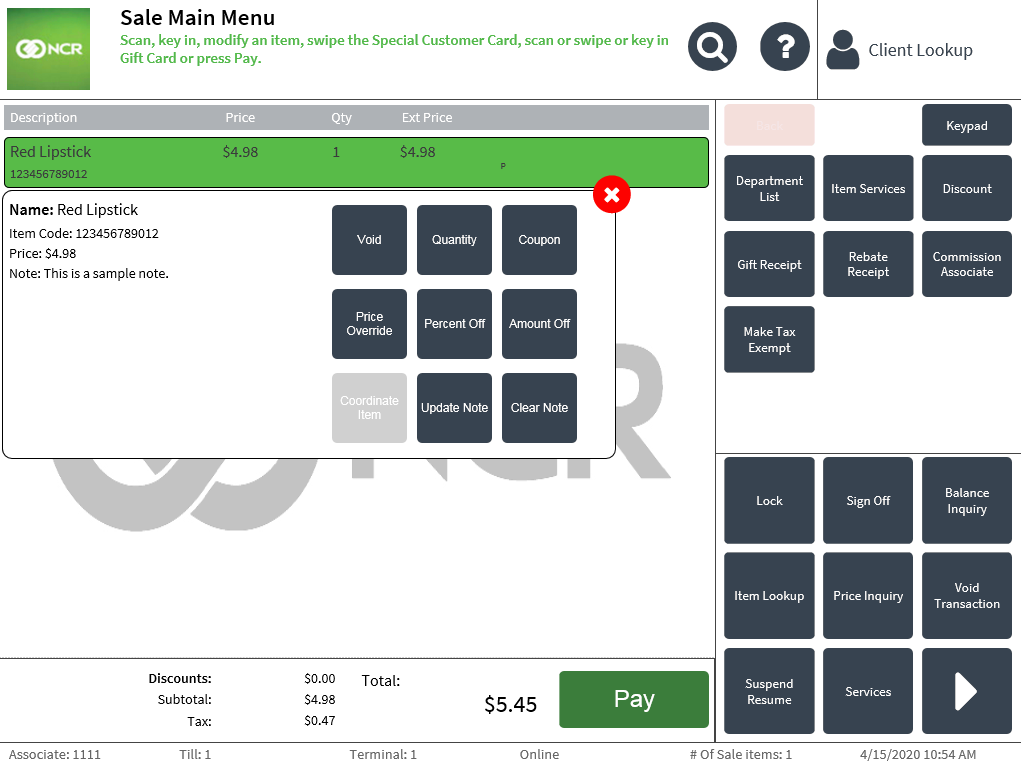
- Select Pay to complete the transaction and print the receipt.
Sale transaction receipt with note
The receipt reflects the note on the line below the item.