Deploying Options to Different EOM Servers
Retailers can deploy options to POS terminals connected to a different EOM server. The EOM application can export an XML file with the modified parameters or the change set options, then retailers can import the file to a different EOM Server. The imported options are then deployed to all the POS terminals connected to the In-Store Server of the destination EOM Server.
Exporting by batch
Change sets and modified parameters can be exported as an XML file from the following views:
- Options Deployment View—exports change sets
- Current Options window—exports the modified parametersNote
Scheduled change sets cannot be exported to an XML file.
Options Deployment View
To export a change set from the Options Deployment View, follow these steps:
- From the EOM Dashboard window, select a deployment. The application displays the Options Deployment View.
- Select Export Data. The application displays a drop-down list.
- Select Batch. The application displays the Export Data window.
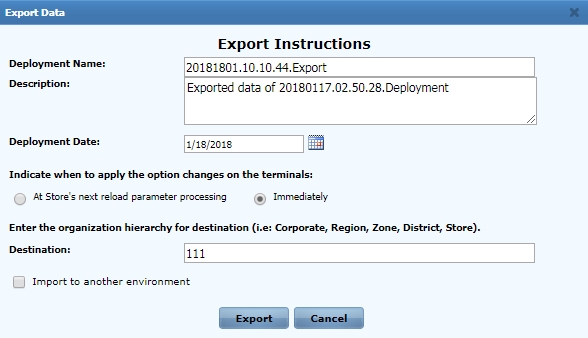
- Specify options in the Export Data window using the following table.
Option Description Deployment Name Identifies the deployment. Description Describes the exported options. Deployment Date Specifies the deployment date. Select a date from the drop-down calendar. Indicate when to apply the option changes on the terminals: At Store’s next reload parameter processing Deploys option changes once the parameters are updated through the Reload Parameters option in the POS application’s Support Functions. Immediately Deploys option changes immediately.
NoteEnsure that the Rabbit MQ Host Name for Option Data Value in the EOM Host Configuration section of the Administration Console in the EOM Server is correctly configured with the RabbitMQ Server. For more information, consult with an NCR Representative.
Enter the organization hierarchy for destination (i.e.: Corporate, Region, Zone, District, Store). Destination Identifies the change site where the options will be imported. Source Identifies the change site where the change set is exported from.
NoteThe Source drop-down list only appears when multiple change sites have modified parameters in a single change set.
Import to another environment Deploys the options to the destination EOM Server without exporting the deployment. When selected, the Import button replaces the Export button on the Export Data window.
NoteFor more information on importing change sets without exporting the options, refer to Importing using the EOM web application.
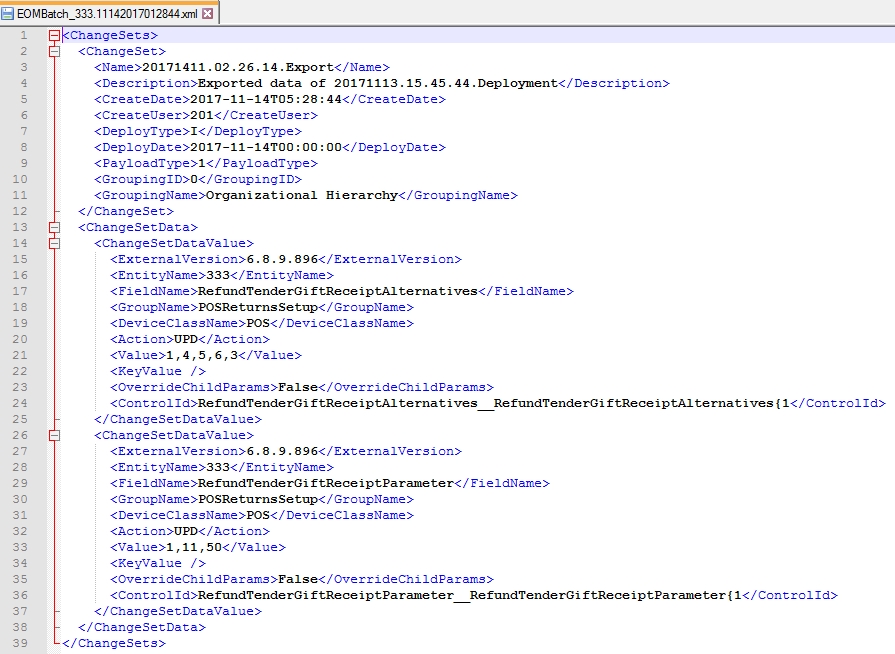
- Select Export. The application exports the change set options into an Extensible Markup Language (XML) file.Example
The following image displays the change set options in an XML file.
Current Options window
To export the modified parameters from the Current Options window, follow these steps:
- From the Current Options window, select a change site. Change sites can be the whole Enterprise, an entire region, a specific zone, a specific store, or a specific device in a store.
- Select Export Data. The application displays a drop-down list.
- Select Batch. The application displays the Export Data window.
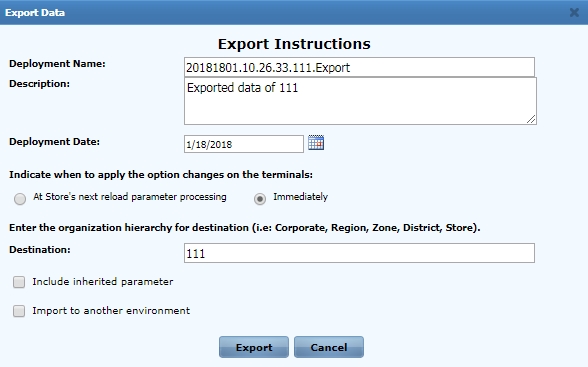
- Specify options in the Export Data window using the following table.
Option Description Deployment Name Identifies the deployment. Description Describes the exported options. Deployment Date Specifies the deployment date. Select a date from the drop-down calendar. Indicate when to apply the option changes on the terminals: At Store’s next reload parameter processing Deploys option changes once the parameters are updated through the Reload Parameters option in the POS application’s Support Functions. Immediately Deploys option changes immediately.
NoteEnsure that the Rabbit MQ Host Name for Option Data Value in the EOM Host Configuration section of the Administration Console in the EOM Server is correctly configured with the RabbitMQ Server. For more information, consult with an NCR Representative.
Enter the organization hierarchy for destination (i.e.: Corporate, Region, Zone, District, Store). Destination Identifies the change site where the options will be imported. Include inherited parameter Includes the modified parameters inherited from the organization hierarchy in the exported file.
NoteOption changes are inherited to all the nodes under a selected change site. For example, if South East is selected as the change site, then all the stores under South East inherits the new option changes.
Import to another environment Deploys the options to the destination EOM server without exporting the deployment. When selected, the Import button replaces the Export button on the Export Data window.
NoteFor more information on importing change sets without exporting the options, refer to Importing using the EOM web application.
- Select Export. The application exports the modified parameters into an Extensible Markup Language (XML) file.