Changing passwords on the In-Store Server
The passwords of default RabbitMQ users in an In-Store Server can be changed using the following methods:
These methods require updating the following configuration files.
| File name | Location | |
|---|---|---|
| 32-bit system | 64-bit system | |
| Ncr.As.PosHost.exe.config | %PROGRAMFILES%\NCR\AdvancedStore\POS | %PROGRAMFILES(X86)%\NCR\AdvancedStore\POS |
| Ncr.As.PosClientConnectionManager.exe.config | ||
| Ncr.Retail.Platform.Setup.RabbitMQ.exe.config | ||
Only apply the following methods if there are existing RabbitMQ nodes in the system which will not be reset, and the RabbitMQ Setup utility will not be re-configured or re-run.
Changing passwords during installation
This password change method requires updating the specified configuration files during installation, before connecting the In-Store server to the Enterprise.
Apply the following steps in each specified configuration file.
- Open the file using a text editor.
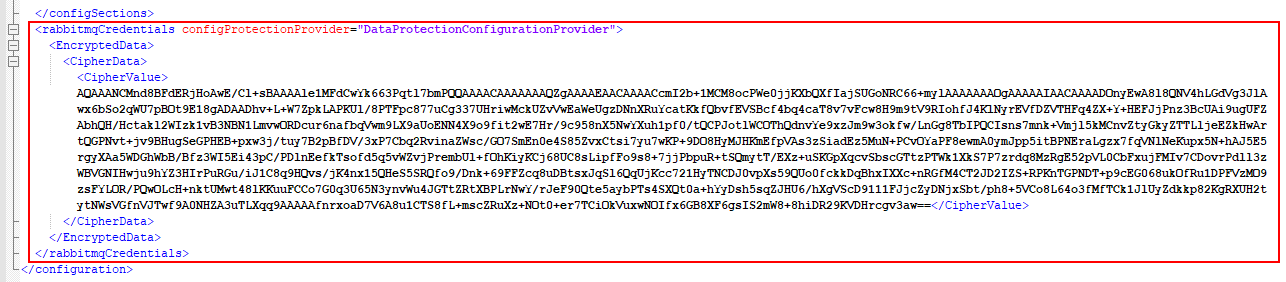
- Locate the rabbitmqcredentials section.

- At the line of select users, modify the password attribute value as preferred. Important
Make sure that password changes match in all files.
- (Optional) The following credential update options can also be applied:
- Add tags to the user. Modify the tag attribute value of the user.
- Make the user an administrator. Add the isadmin attribute value with the Y value in the user's line.
- Save the changes, and then close the file.
- Connect the In-Store Server to the Enterprise. For more information, refer to Connecting the In-Store Server to the Enterprise. During this process, the updated credentials data is enforced into the system. The credentials will also be encrypted in each file.
Changing passwords after installation
To update the RabbitMQ credentials after Advanced Store is installed, follow these tasks, in this order:
Updating passwords using RabbitMQ application
Use any of the following RabbitMQ application methods to update the password of a default user:
- Using the change password option in the RabbitMQ Management webpage.
- Running the change password command at the RabbitMQ Command Prompt window.
For more information about these password change methods, refer to the RabbitMQ website (www.rabbitmq.com).
Enforcing the password changes in the In-Store Server system
Enforce the password changes in the system by updating the configuration files using the Secure Config tool. For more information about running the Secure Config tool, refer to Accessing the Secure Configuration utility.
This procedure uses the directory of the configuration files. Make sure to take note of the directory of the files.
Follow these steps:
- Open the Secure Config tool window. The system opens and displays the ConfigureSetting window.
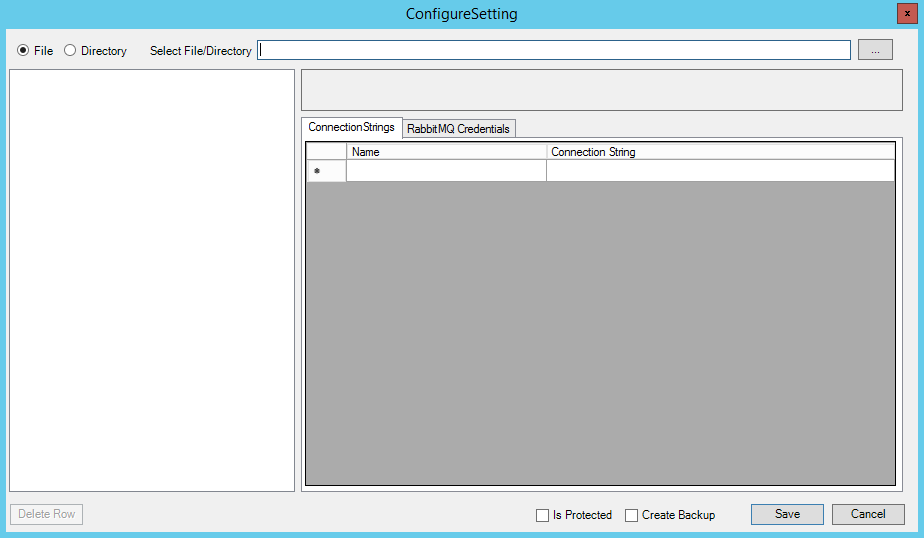
- At the Select File/Directory field, enter or locate a configuration file. The application loads the file data.
- Select the RabbitMQ Credentials tab. The application displays the RabbitMQ Credentials contained in the file.
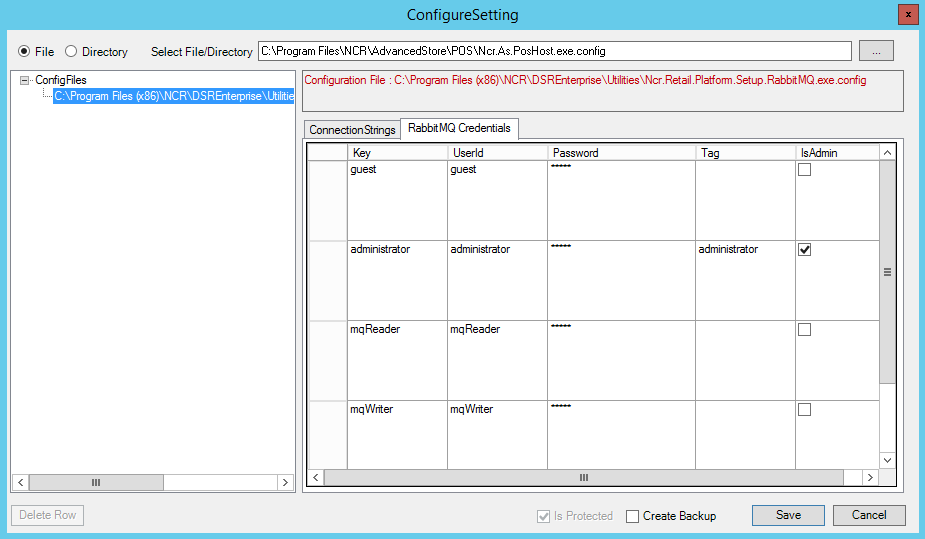
- Click on the select users' corresponding Password cell and modify the password as preferred. Important
Make sure that the password changes in the files match the password changes applied in the RabbitMQ application.
- (Optional) The following credential update options can also be applied:
- Add tags to the user on its corresponding Tag cell.
- Make the user an administrator. Check the corresponding IsAdmin box of the user.
- Select Save.
- Repeat steps 3—5 on the remaining configuration files in the system.
- After updating all the required config files in the system, close the application window.