Making a sale
The AS POS application uses the following methods to sell items:
- Scan the item code or price lookup (PLU) code.
- Enter the item code or price lookup (PLU) code on the keypad.
- Use Lookup to find the item code or price lookup (PLU) code.
- Sell the item through its corresponding department.
When the POS is integrated with Common Client and the scanned item requires additional information, the customer can confirm the information through the PIN pad. The customer can also opt in or opt out of promotional e-mails through the PIN pad.
For this sample sales transaction, item codes will be scanned to make a sale. To scan items, follow these steps:
- Use the bar code scanner to scan the customer’s items. The application displays the items on the Sale Main Menu screen.
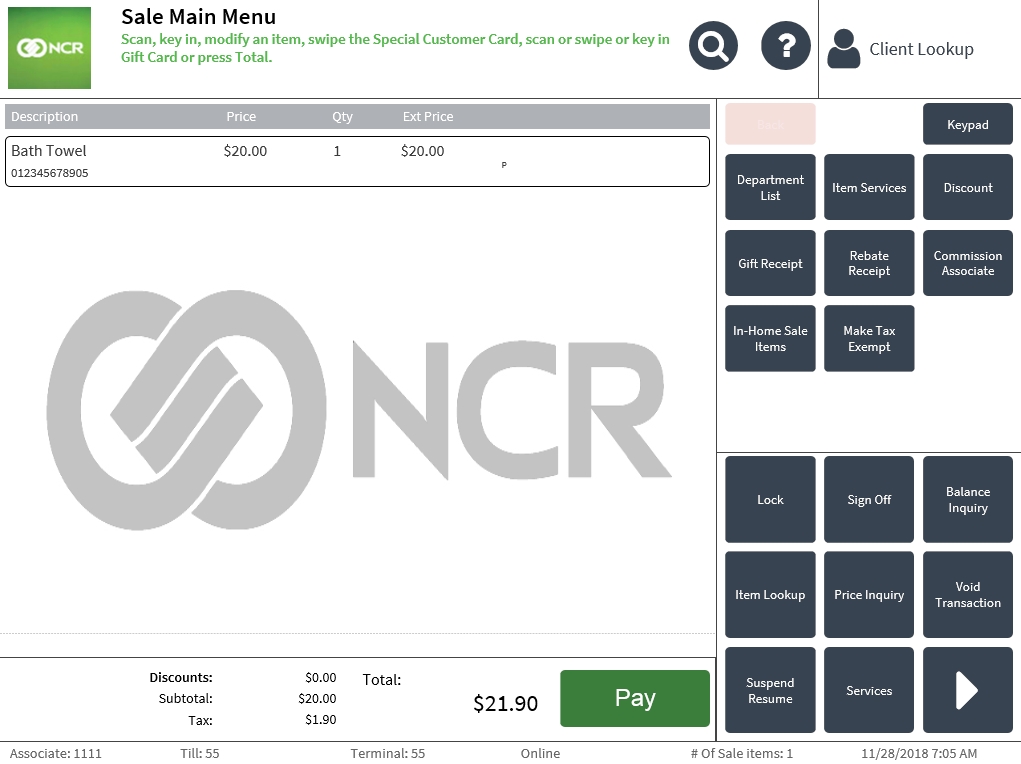 Note
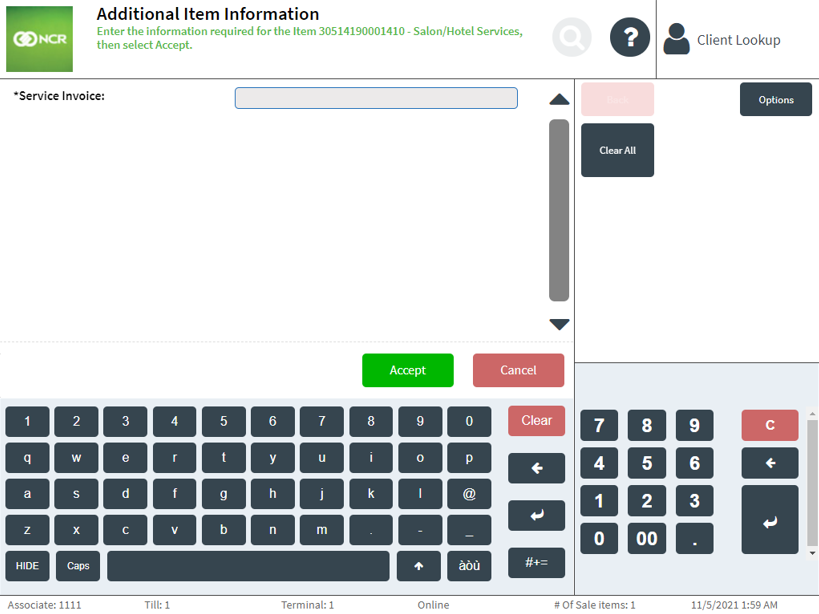
NoteWhen some items require additional information before they can be added to the transaction, the application displays the Additional Item Information screen.
- After scanning all the items, select Pay. The application displays the Tender Menu screen.
- Select a payment method. The following tenders are displayed by default:
- Cash—accepts cash payments.
- Check—accepts check payments.
- Foreign Currency—accepts payments in foreign currency.
- Credit Card—uses the credit card to pay for items.
- Debit—uses the debit card to pay for items.
- Gift Card—uses the gift card to pay for items.
- Traveler’s Check—accepts traveler’s check payments.
- Merchandise Card—uses the merchandise card to pay for items.
- Promo Card—uses the promo card to pay for items.
- Business Invoice—accepts business invoice as payment.
- Coupon—accepts coupon as payment.
- Gift Certificate—accepts gift certificate to pay for items.
- Select or enter the cash tender amount. The application displays the demographic information screen.
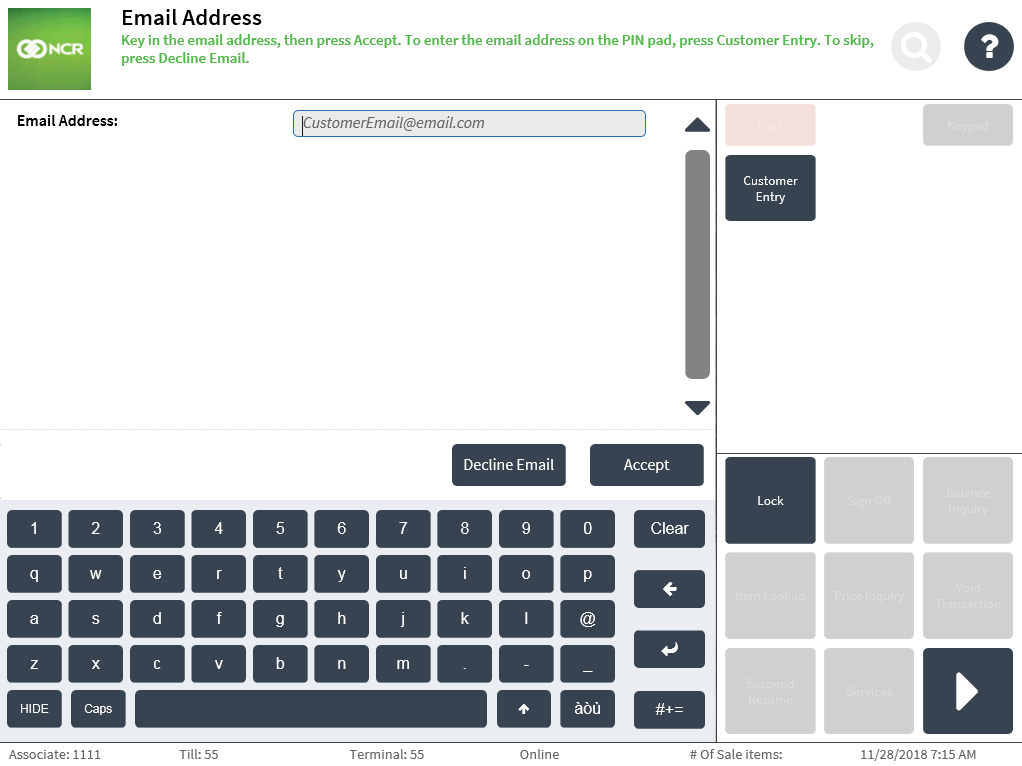
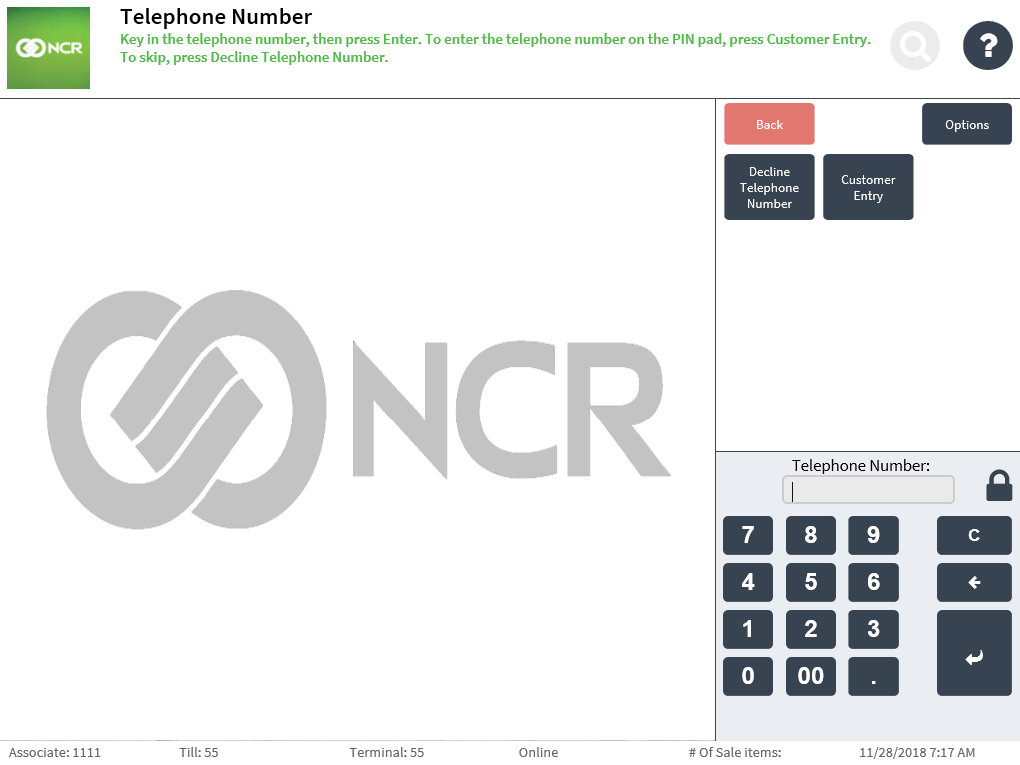
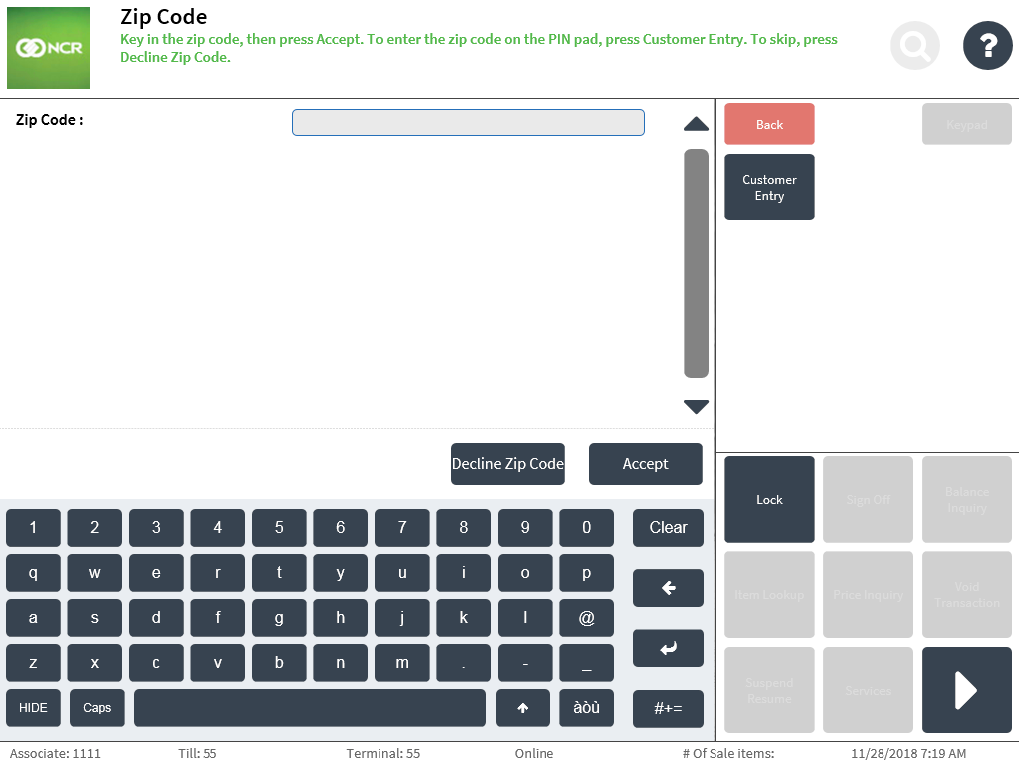
- Enter the demographic information. When the POS is integrated with a payment solution, the customer can enter information on the PIN pad by selecting Customer Entry.
- Enter an e-mail address and select Accept.
- Enter a telephone number and select Enter.
- Enter a zip code and select Accept.
- Enter an e-mail address and select Accept.
- The application displays the Receipt Preference screen. Note
If the Change Due amount is greater than the cash in drawer, the application displays the Insufficient Cash Funds in Drawer screen. Select Continue to proceed with transaction; otherwise, select Cancel.
- Select a receipt type:
- Printed—prints a hard copy of the receipt.
- Digital—sends a copy of the receipt through e-mail.
- Both—prints a hard copy of the receipt and sends a copy of the receipt through e-mail.
For details on printing a sales receipt, refer to Totaling a Customer’s Purchases.
- Close the cash drawer. The application displays the Sale Main Menu or the Sign On screen and prints the receipt.
The Service Invoice field is pre-populated when another item that requires Service Invoice information is added to the sales transaction.
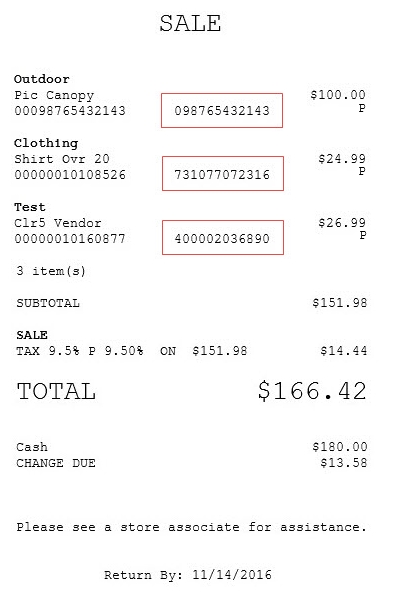
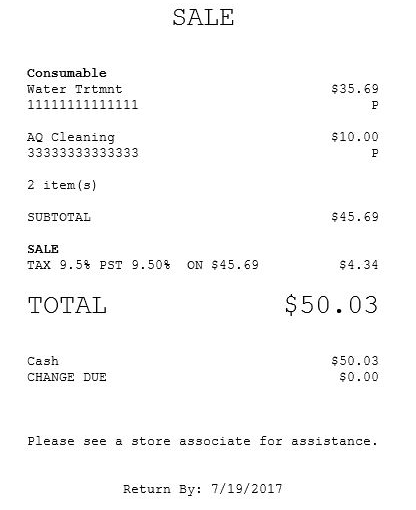
Sales receipt
By default, the AS POS application is configured to print sales receipts without return prices.
When configured, additional item information like Service Invoice is printed.
Sales receipt with return prices
The AS POS application can be configured to print the return price of an item. The return price is usually the same as the sale price of an item but is otherwise indicated in the receipt. For more information, refer to Returns Setup.
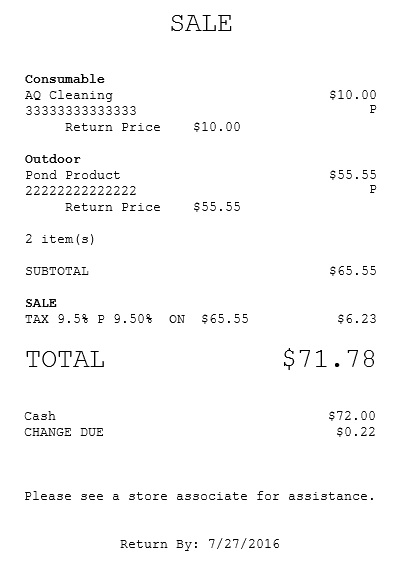
There are instances when the return price of an item is different from its sale price. For example, if the terms of a promotion are “Buy 2, Get a 3rd for 50%,” all three items have a return price that differs from the sale price printed on the receipt.
Sales receipt with product SKU
For inventory purposes and to help track the stocks in a store, the corresponding stock keeping unit (SKU) number of a product is printed on the Advanced Store transaction receipts. When available, the product SKU is printed on the same line and to the right of the product code.