Connecting the Cables
There are three different types of cables that connect to the printer:
•Power supply cable—supplies power from the power supply or POS terminal. For more information about the power supply, refer to Power Requirements.
•Communication cable—connects the printer to the host computer.
•Cash drawer cables—connects the printer to one or two cash drawers.
Caution: Take caution of the following actions:
• Before disconnecting the Communication Cable and the Cash Drawer Cable from the printer, always disconnect the Power Cable from the power source.
•Before connecting the Power Cable to the power source, always connect the Communication Cable and the Cash Drawer Cable from the printer.
Follow these steps to connect the cables to the printer and host computer. For illustrations, refer to the images in the next sections.
1.Unplug the power cable from the power source.
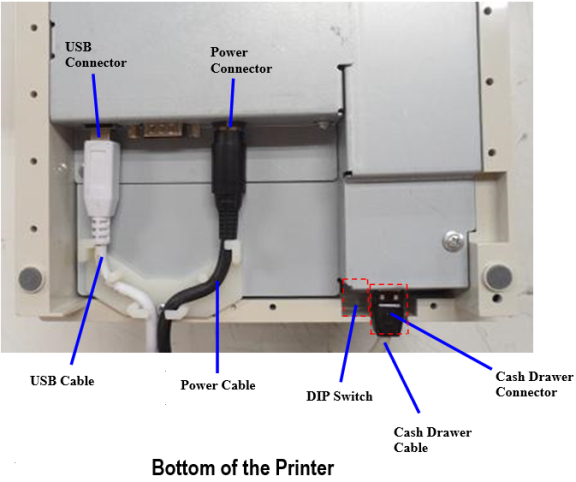
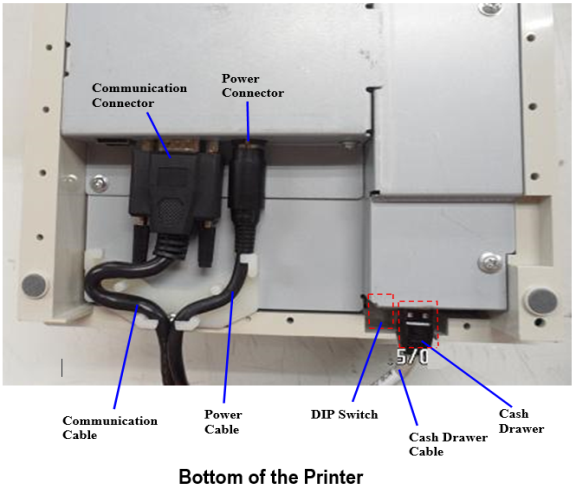
2.Connect the power and communication cables to their respective connectors under the printer, as illustrated in the image that follows this section.
Note: For the RS-232 cable, be sure to screw the communication cable to the communication connector on the printer.
3.Route the cables through the cable strain relief on the bottom of the printer, then through the two slots in the cable access cover as illustrated in the image.
4.Connect the communication cable to the appropriate host computer connector.
5.Connect the cash drawer cables to the printer and cash drawers. The connectors are standard phone jacks located at the rear of the printer.
6.For host powered installation, plug the DC cable into the POS terminal or plug the power cord into the power supply for remote power supply installation, then plug the power supply into an outlet.
At this point, the printer receives power. If the On Line LED (green) is on, the printer is on-line. Otherwise, the printer is not receiving power. Check to ensure that the host terminal is on or that the power supply is on.
RS-232 Cable Connection
USB Cable Connection