5915-K400 Pole Mount with XL Display Adapter
This kit provides a Pole Mount for the following:
•XL10W Display (5910)
•XL15 Display (5915)
•XL15W Display (5916)
•XR7 Plus POS (7703)
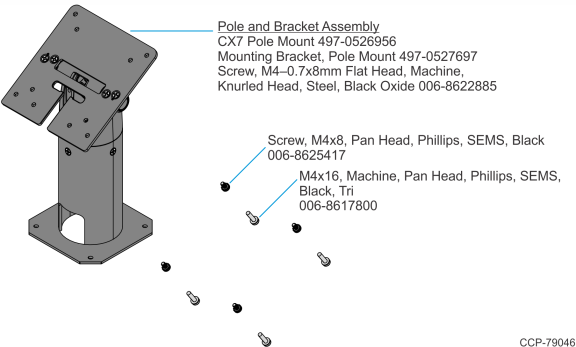
Kit Contents
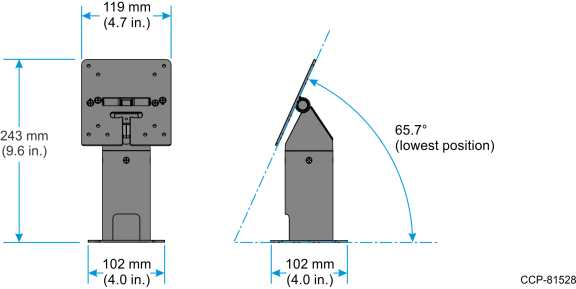
Dimensions
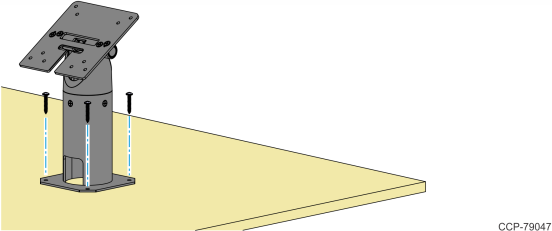
Installation Procedure
1.Install the Pole on the countertop with four (4) screws (one on each corner).
2.Connect the Cables on the back of the Display then route the Cables through the Pole. For more information, refer to the Cable Routing section:
•XL15 Display (5915) / XL15W Display (5916)
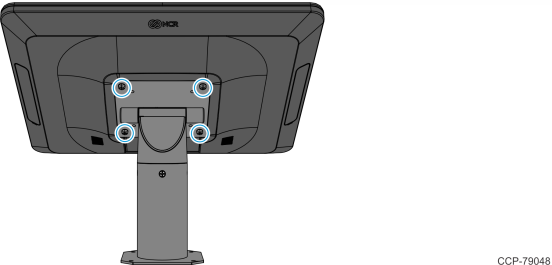
3.Install the Display on the Bracket (4 screws). Use the appropriate screws for the display.
|
Display |
Screw |
|---|---|
|
XL10W Display (5910) |
006-8625417 |
|
XL15 Display (5915) |
006-8617800 |
|
XL15W Display (5916) |
006-8617800 |
|
XR7 Plus POS (7703) |
006-8625417 |
Cable Routing
XL10W Display (5910)
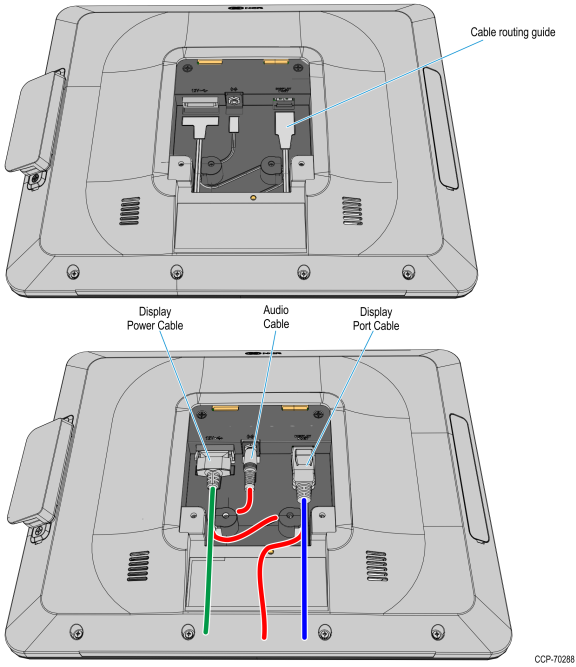
Display Port Model
Connect the Display cables and route them according to the imprinted routing guide.
1.Connect and route the Audio Cable first. Route the cable looping around the cable strain relief posts as shown.
2.Connect the Display Power Cable and route straight down over the Audio Cable.
3.Connect the Display Port Cable and route straight down over the Audio Cable.
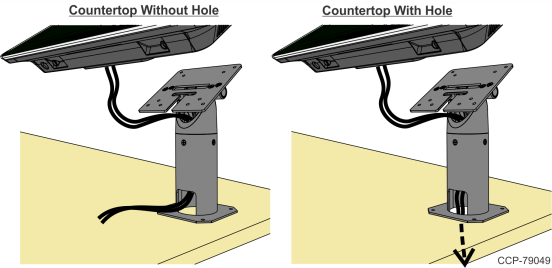
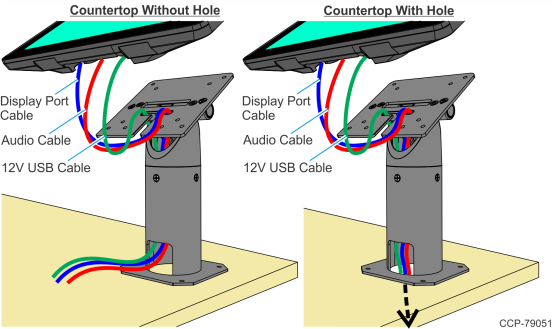
4.Route the Cables through the Bracket and down through the Pole as shown.
Note: If there’s a hole in the countertop, the cables can be routed through the counter as well.
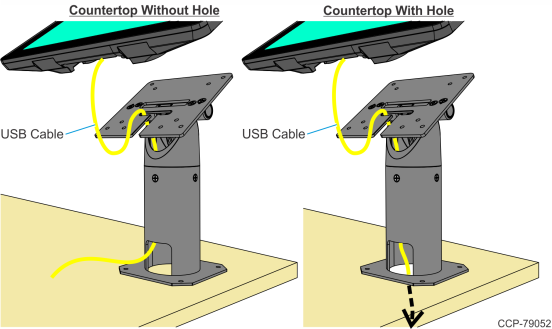
USB Model
1.Connect and route the USB Cable looping around the cable strain relief posts as shown.
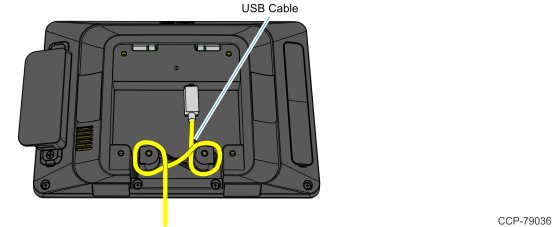
2.Route the Cable through the Bracket and down through the Pole as shown.
Note: If there’s a hole in the countertop, the cable can be routed through the counter as well.
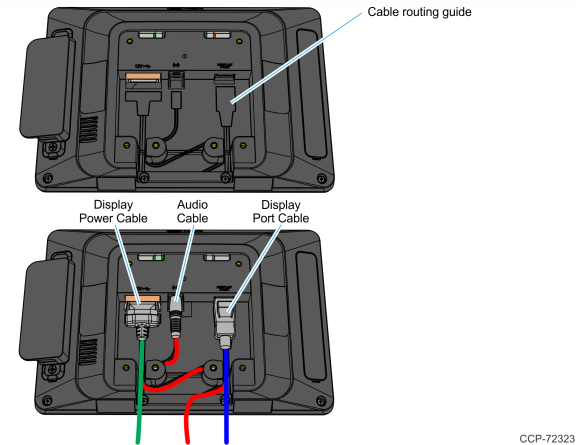
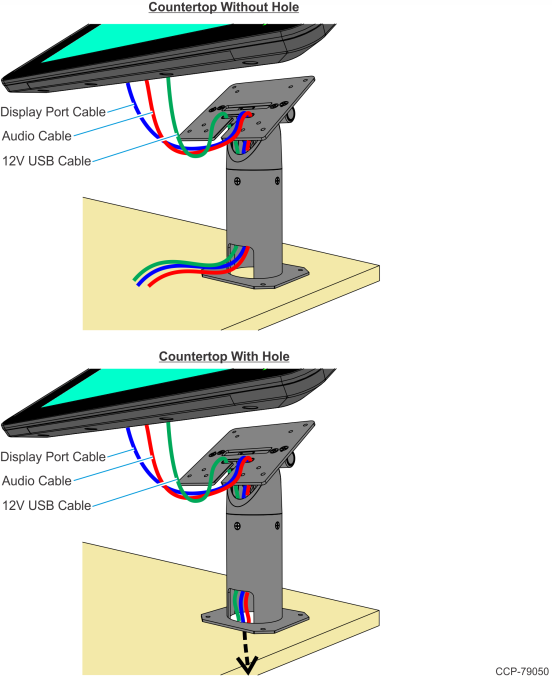
XL15 Display (5915) / XL15W Display (5916)
Connect the Display cables and route them according to the imprinted routing guide.
1.Connect and route the Audio Cable first. Route the cable looping around the cable strain relief posts as shown.
2.Connect the Display Power Cable and route straight down over the Audio Cable.
3.Connect the Display Port Cable and route straight down over the Audio Cable.
4.Route the Cables through the Bracket and down through the Pole as shown.
Note: If there’s a hole in the countertop, the cables can be routed through the counter as well.
XR7 Plus POS (7703)
1.Connect the Cables to the I/O Panel.
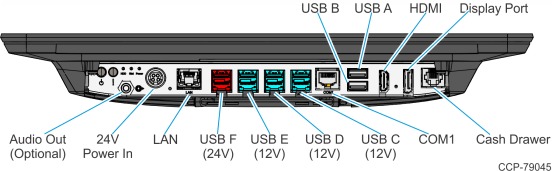
2.Route the Cables down through the Pole as shown.
Note: If there’s a hole in the countertop, the cables can be routed through the counter as well.