9700-0064/0065-5915 Enhanced Keypad with No MSR Filler Plate, Keylock
This provides an Enhanced Keypad (with No MSR Filler Plate and Keylock) for the XL15 Display (5915).
•9700-0064-5915 — Enhanced Keypad with No MSR Filler Plate, Keylock, Black
•9700-0065-5915 — Enhanced Keypad with No MSR Filler Plate, Keylock, White
Contents
|
PID |
Part Number |
Description |
|---|---|---|
|
9700-0064-5915 |
497-0526786 |
Enhanced Keypad with No MSR Filler Plate, Keylock, Black |
|
9700-0065-5915 |
497-0526787 |
Enhanced Keypad with No MSR Filler Plate, Keylock, White |
Procedure
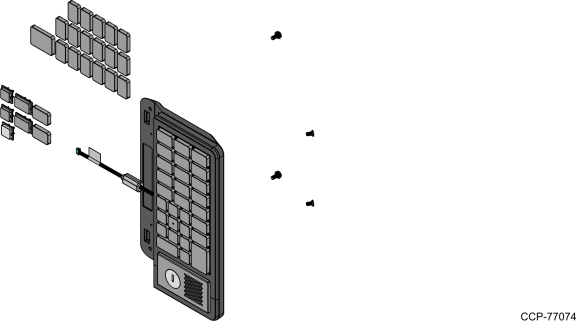
Enhanced Keypad
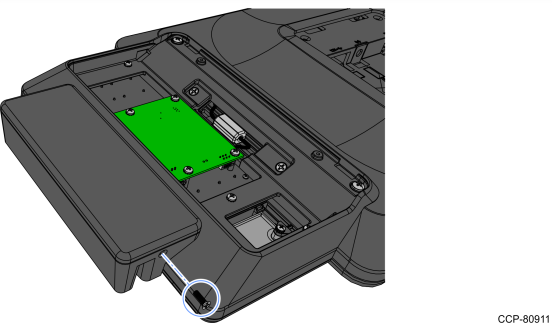
Installing the Enhanced Keypad
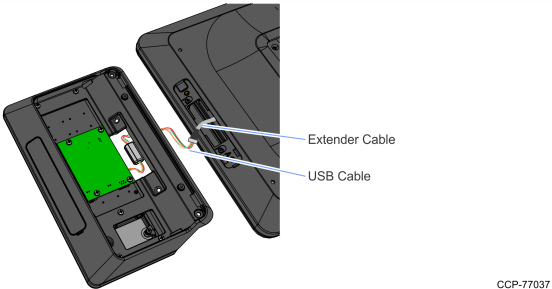
1.Connect the USB cable to the extender cable.
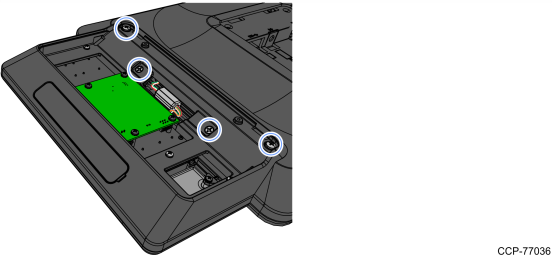
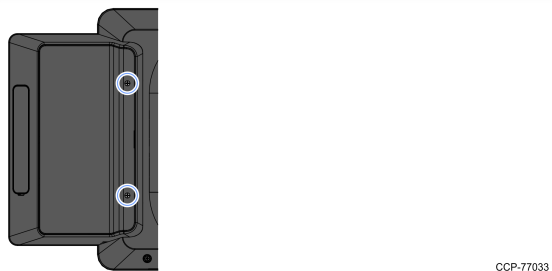
2.Install the Enhanced Keypad on the Display (4 screws).
3.Hook the Rear Cover to the Enhanced Keypad and snap into place.
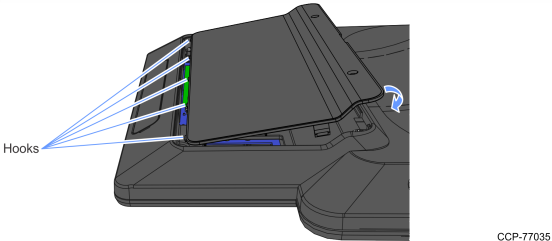
4.Secure the Rear Cover with two (2) screws.
Key Tip
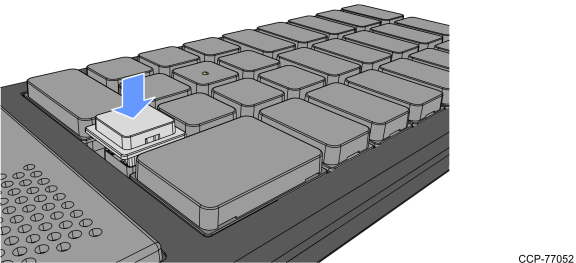
Installing a Key Tip
Place the Key Tip over its position on the keyboard and press the key until it snaps into place.
Note: For 1x1 Key Tips, the indentations must always be on the left and right sides.
Removing a Key Tip
Use a Key Removal Tool to remove a Key Tip from the keyboard.
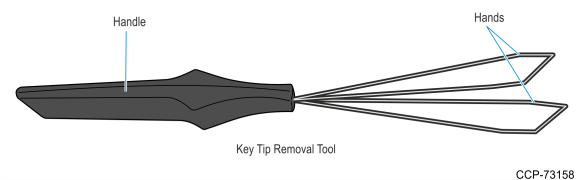
Insert the hands of the removal tool under each side of the Key Tip and carefully pull the tool upward until the Key Tip pops off its retainer clips.

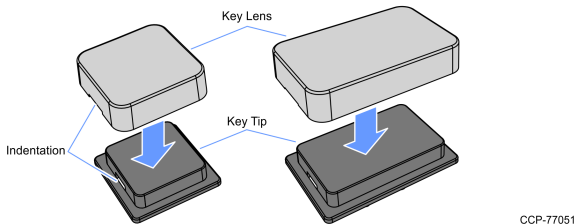
Key Lens
Installing a Key Lens
Position the Key Lens over the Key Tip and then gently press the lens until it snaps and locks into place.
Note: The snaps on the lens must be aligned with the indentations on the Key Tip.
Removing a Key Lens
To remove a Key Lens, slide any thin object under the corner of the Key Lens and gently pop it off the Key Tip.
MSR/JIS MSR
An MSR or JIS MSR can be installed on the Enhanced Keypad.
•Installing the Enhanced Keypad MSR
•Installing the Enhanced Keypad JIS MSR
Installing the Enhanced Keypad MSR
1.Remove the two (2) screws securing the Rear Cover to the Enhanced Keypad.
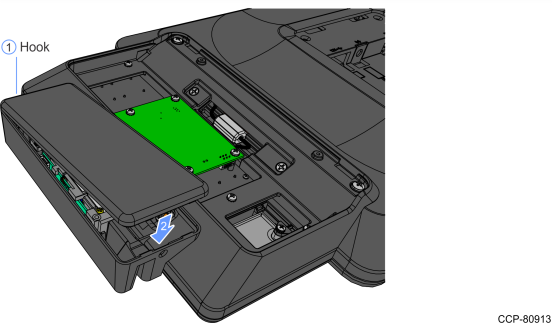
2.Insert a flat screw driver in the slot to unsnap the Rear Cover, then unhook the Rear Cover from the Keypad housing.
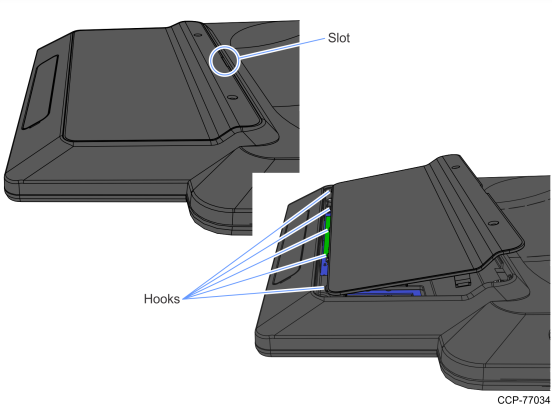
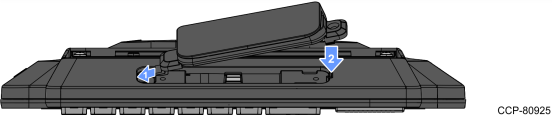
3.Use a screw driver to unlatch the recessed side of the Filler Plate and then slightly pull the Filler Plate to unhook from the Enhanced Keypad.

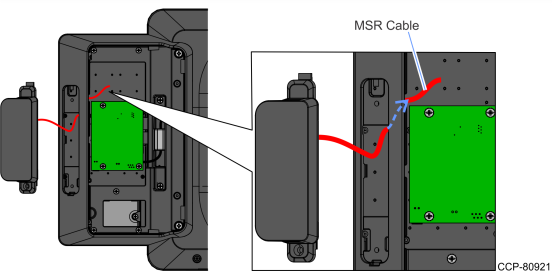
4.Route the MSR Cable through the opening as shown.
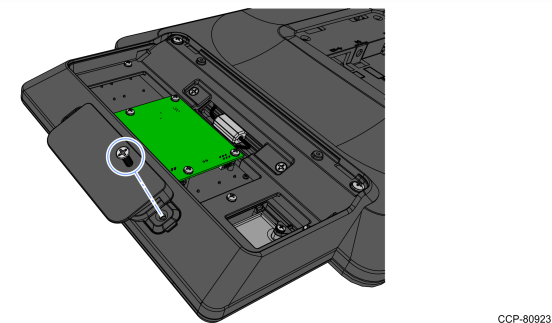
5.Insert the hook of the MSR into the rectangular hole on the Enhanced Keypad and press the other end to mount the MSR. Make sure the cable does not get pinched.
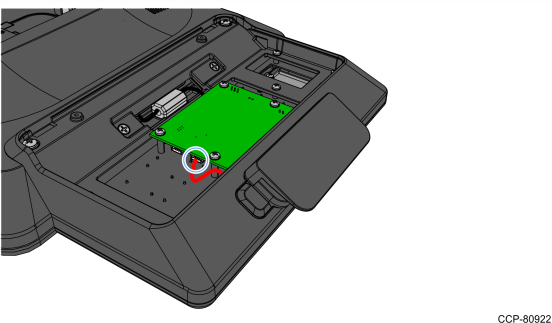
6.Secure the MSR to the Enhanced Keypad with a screw.
7.Connect the MSR Cable to the PCBA.
8.Reinstall the Rear Cover of the Enhanced Keypad securing it in place with the two (2) screws removed in step 1.
Installing the Enhanced Keypad JIS MSR
1.Remove the two (2) screws securing the Rear Cover to the Enhanced Keypad.
2.Insert a flat screw driver in the slot to unsnap the Rear Cover, then unhook the Rear Cover from the Keypad housing.
3.Use a screw driver to unlatch the recessed side of the Filler Plate and then slightly pull the Filler Plate to unhook from the Enhanced Keypad.
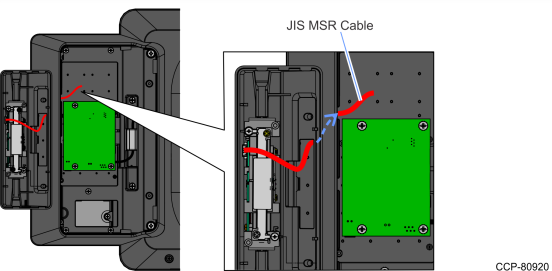
4.Route the JIS MSR Cable through the opening as shown.
5.Install the JIS MSR Front Cabinet on the Enhanced Keypad (2 screws).
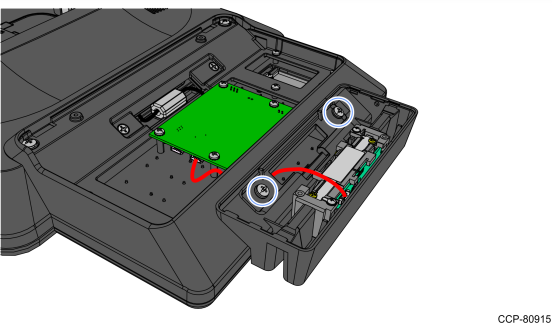
6.Connect the JIS MSR Cable to the PCBA.

7.Hook the JIS MSR Rear Cabinet into the Front Cabinet and pivot to close.
8.Secure with a screw.
9.Reinstall the Rear Cover of the Enhanced Keypad securing it in place with the two (2) screws removed in step 1.
Keypad Driver
The NCR USB Utilities package for the Enhanced Keypad module is located in the following location:
Refer to the Readme document for the driver installation instructions.
Keypad Remap Utility
The NCR POS Keyboard Remap Utility provides a graphical user interface for keyboard remapping for the following:
•5932 Keyboards
•5953 Dynakeys
•5954 Dynakeys
•X-Series Dynakeys
•Enhanced Keypads
The utility is located in the following location:
https://www5.ncr.com/support/support_drivers_patches.asp?Class=External/NCRKeyboard\Remap\display
Refer to the Readme document for the utility installation procedure.