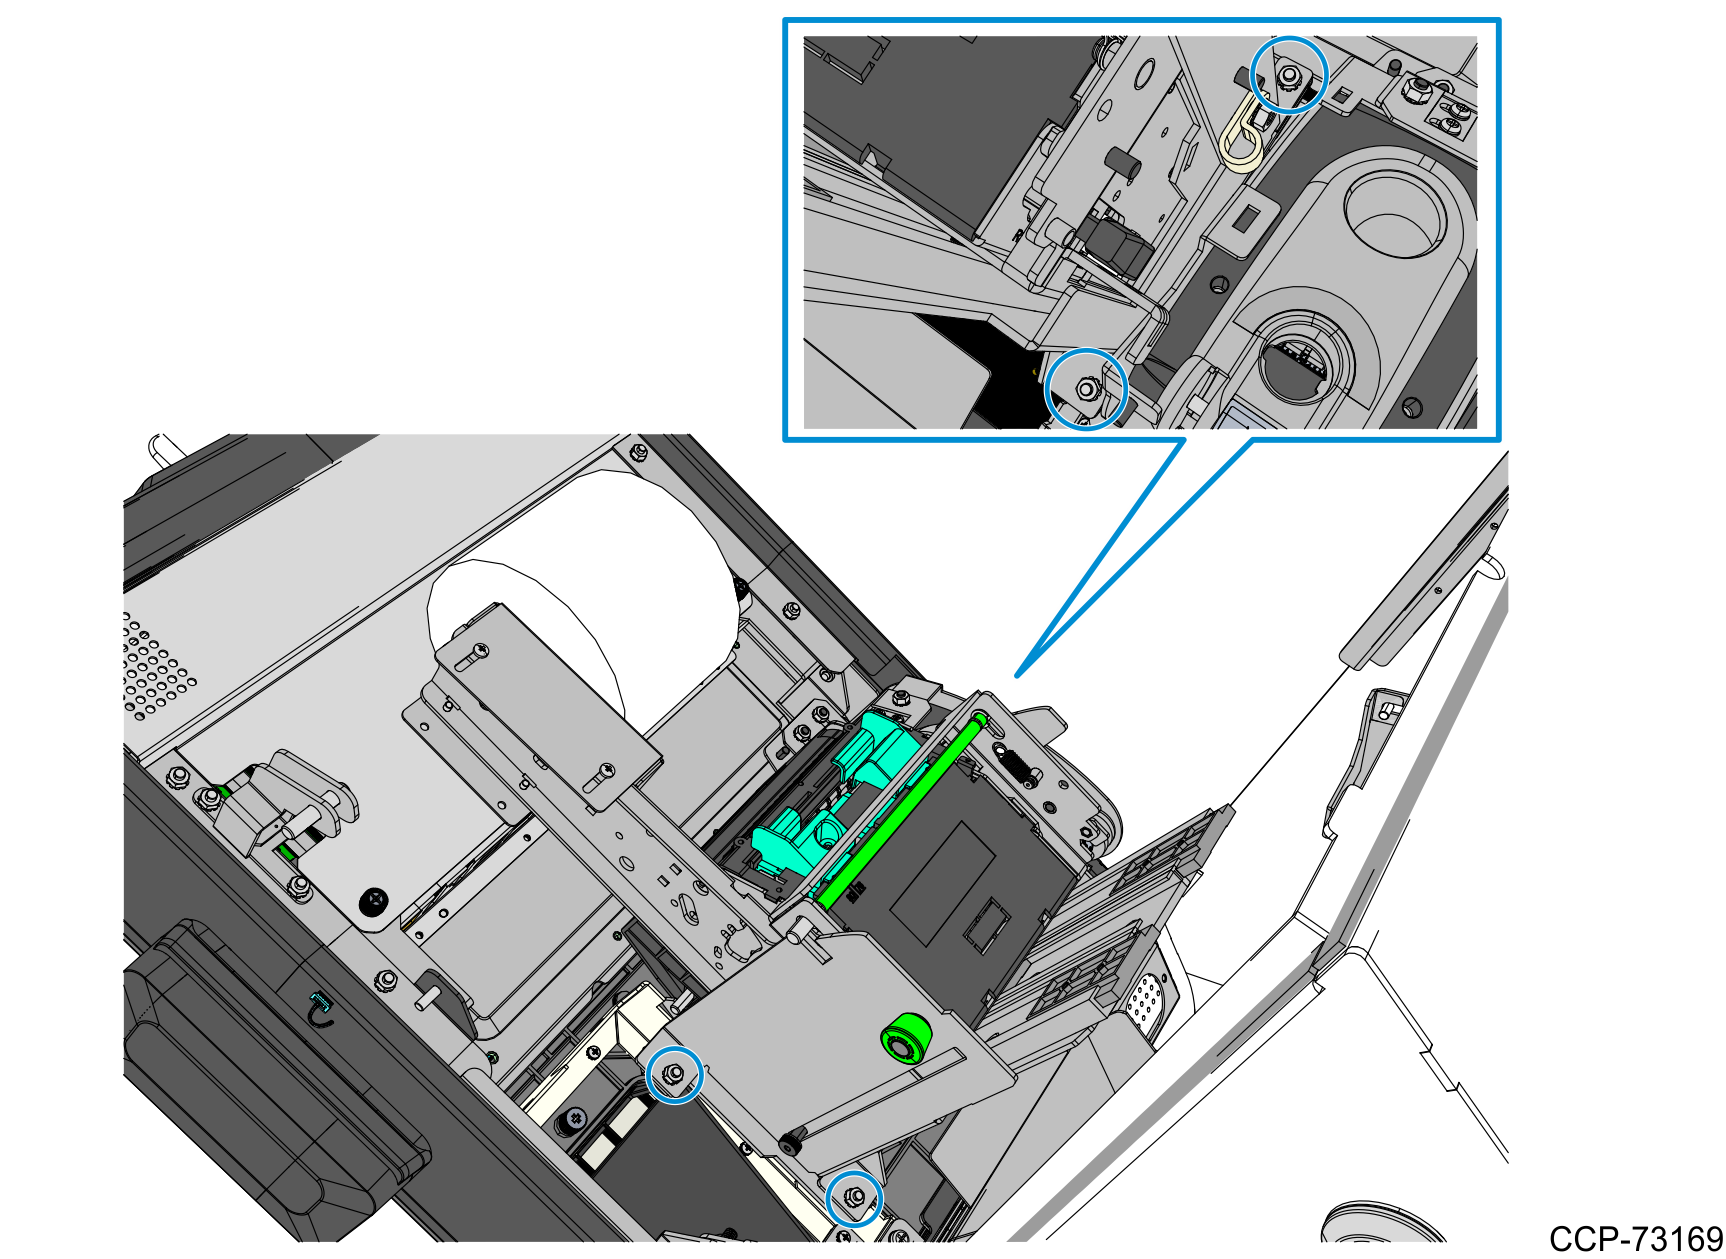
Removing the Receipt Printer
- Slide up Receipt Printer into service position.
- Push the printer assembly release rod upward.
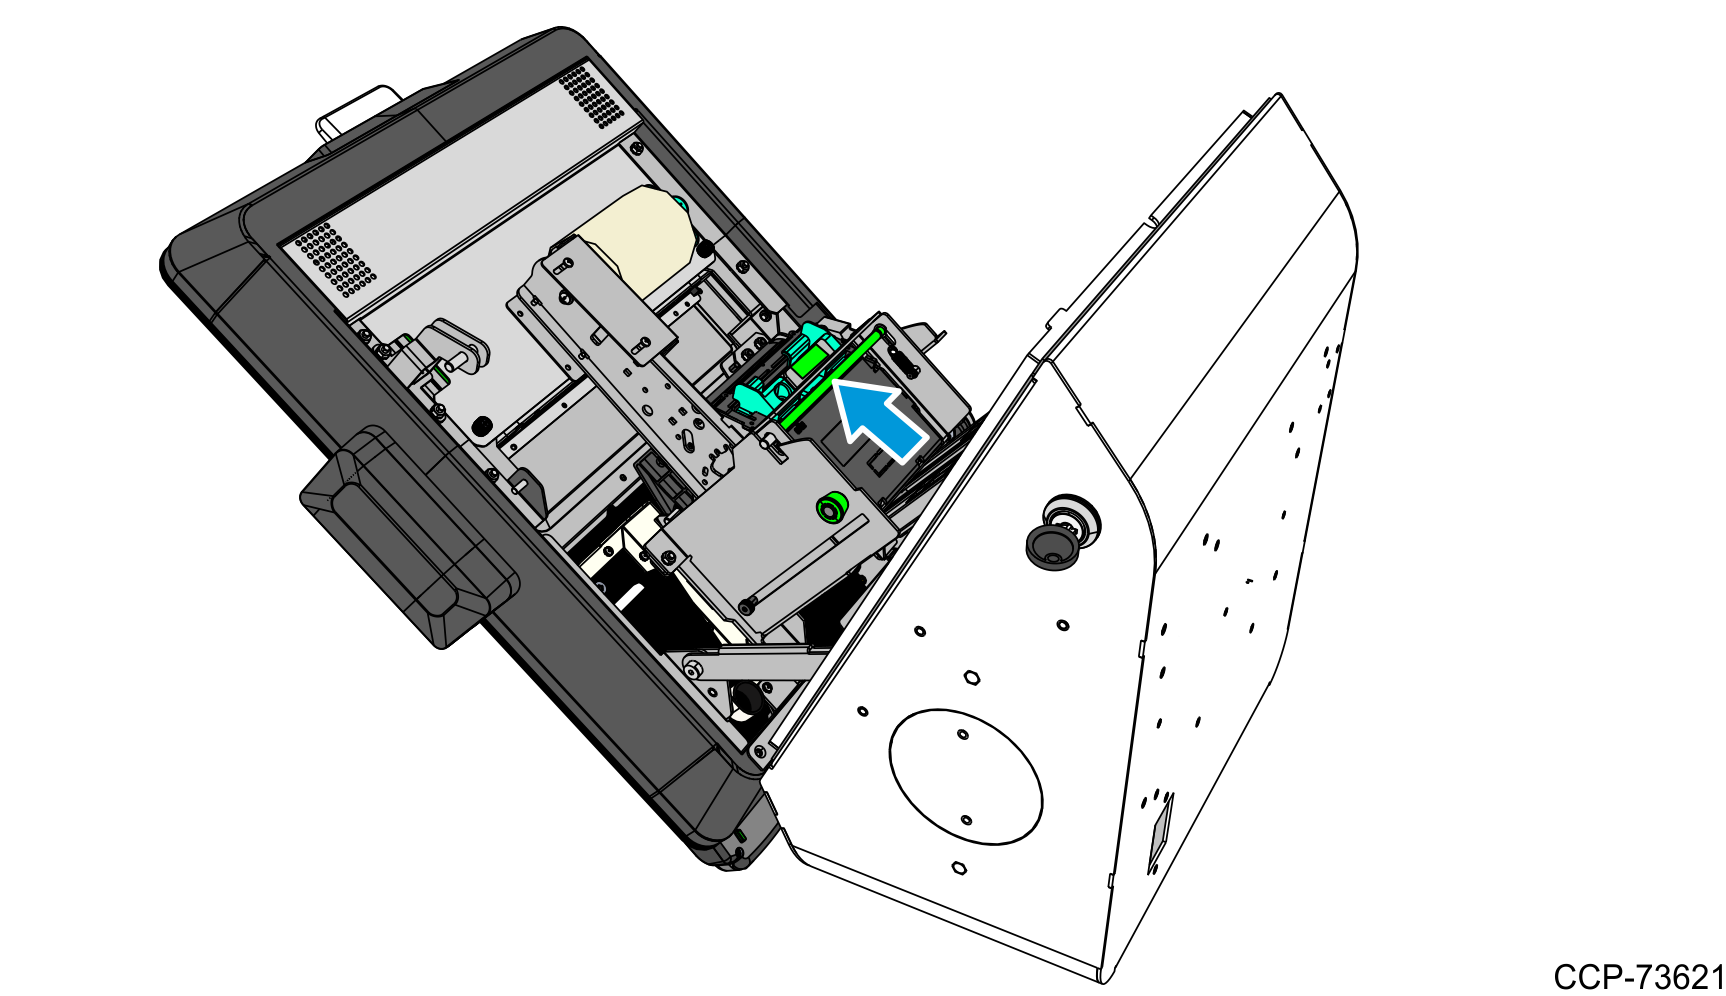
- Pull the printer assembly backward until fully extended and secured by the green plunger.Caution
Ensure that the green plunger holds the printer assembly in place. Do not release the printer assembly if it is not yet secured by the green plunger.
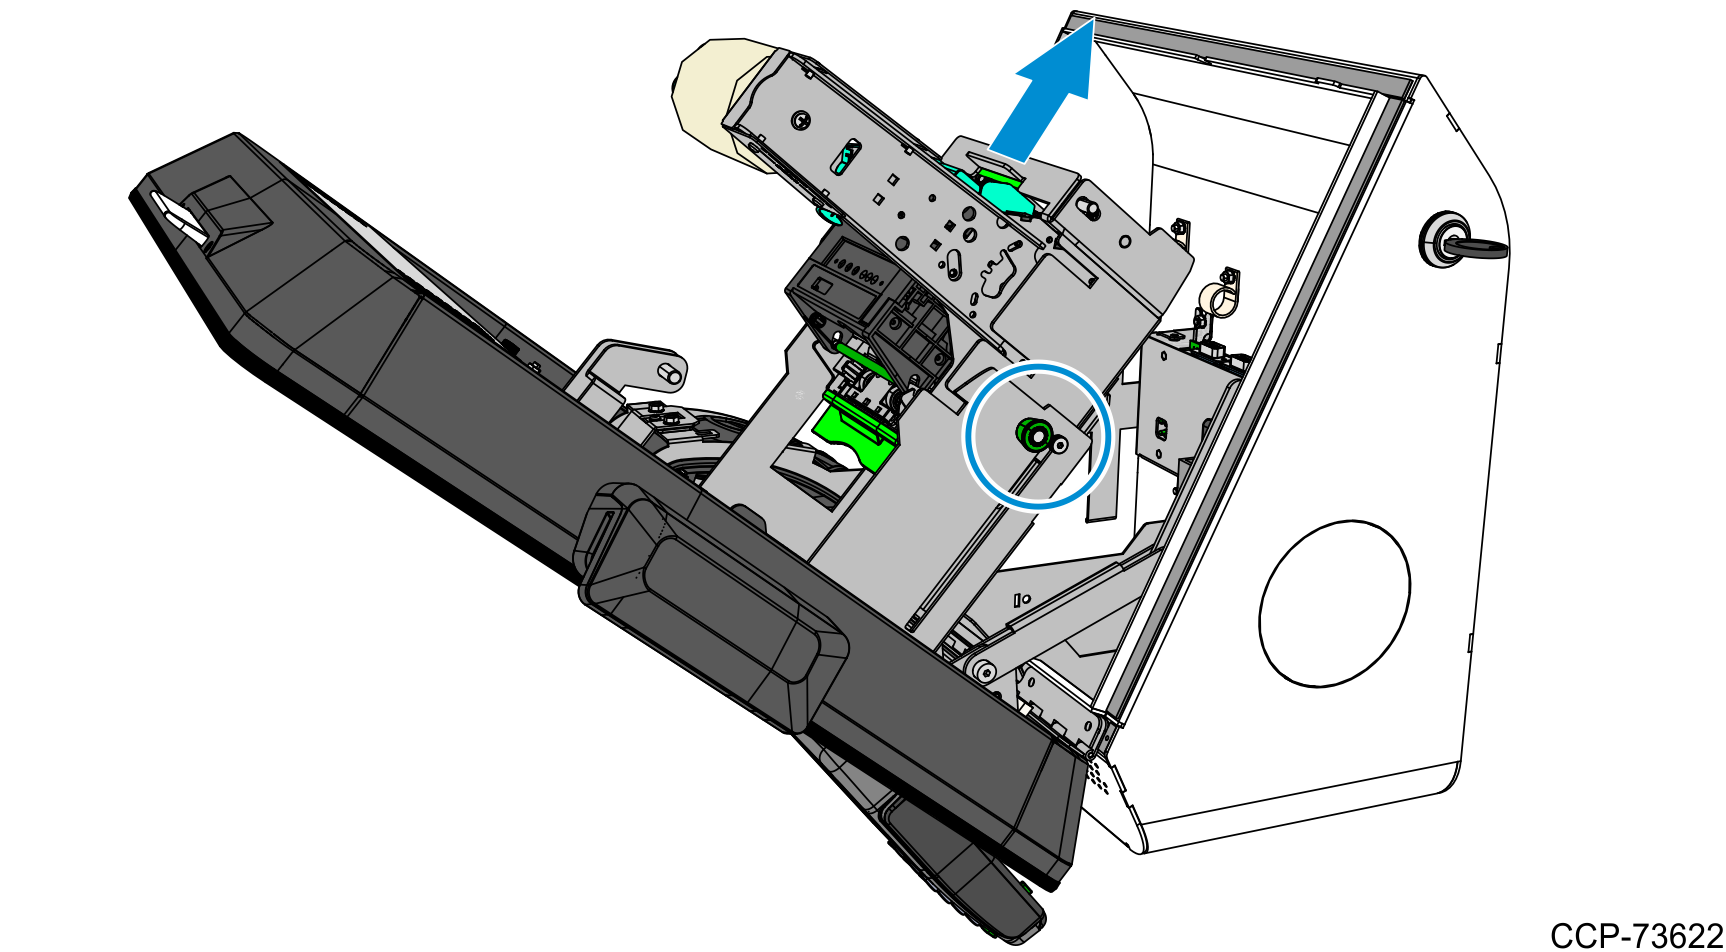
- Push the printer assembly release rod upward.
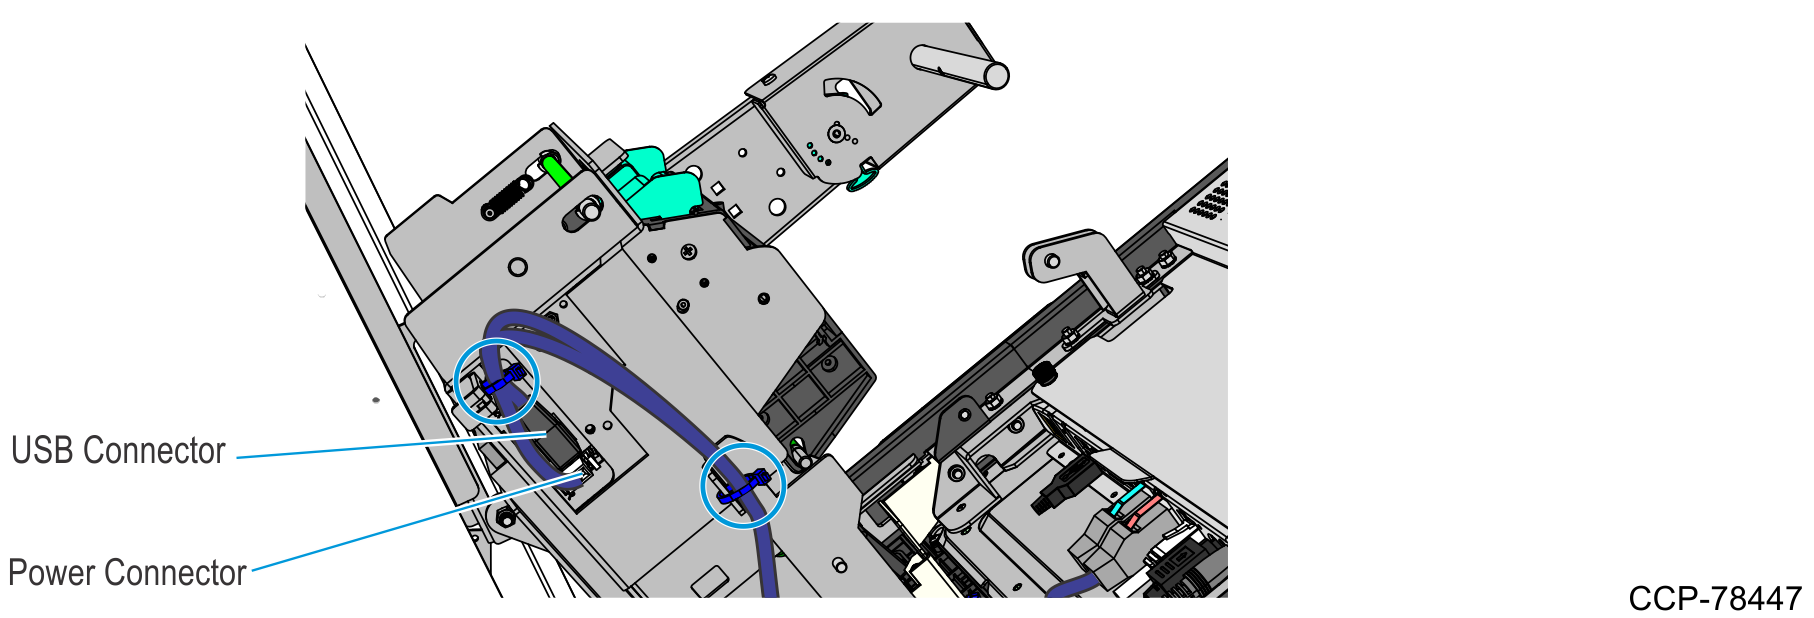
- Disconnect the USB and Power cables from the printer. Remove the cable tie securing the cables to the printer bracket encircled below.
- Slide the printer back down and remove the four nuts securing the Receipt Printer assembly to the kiosk.