Installing the Receipt Printer
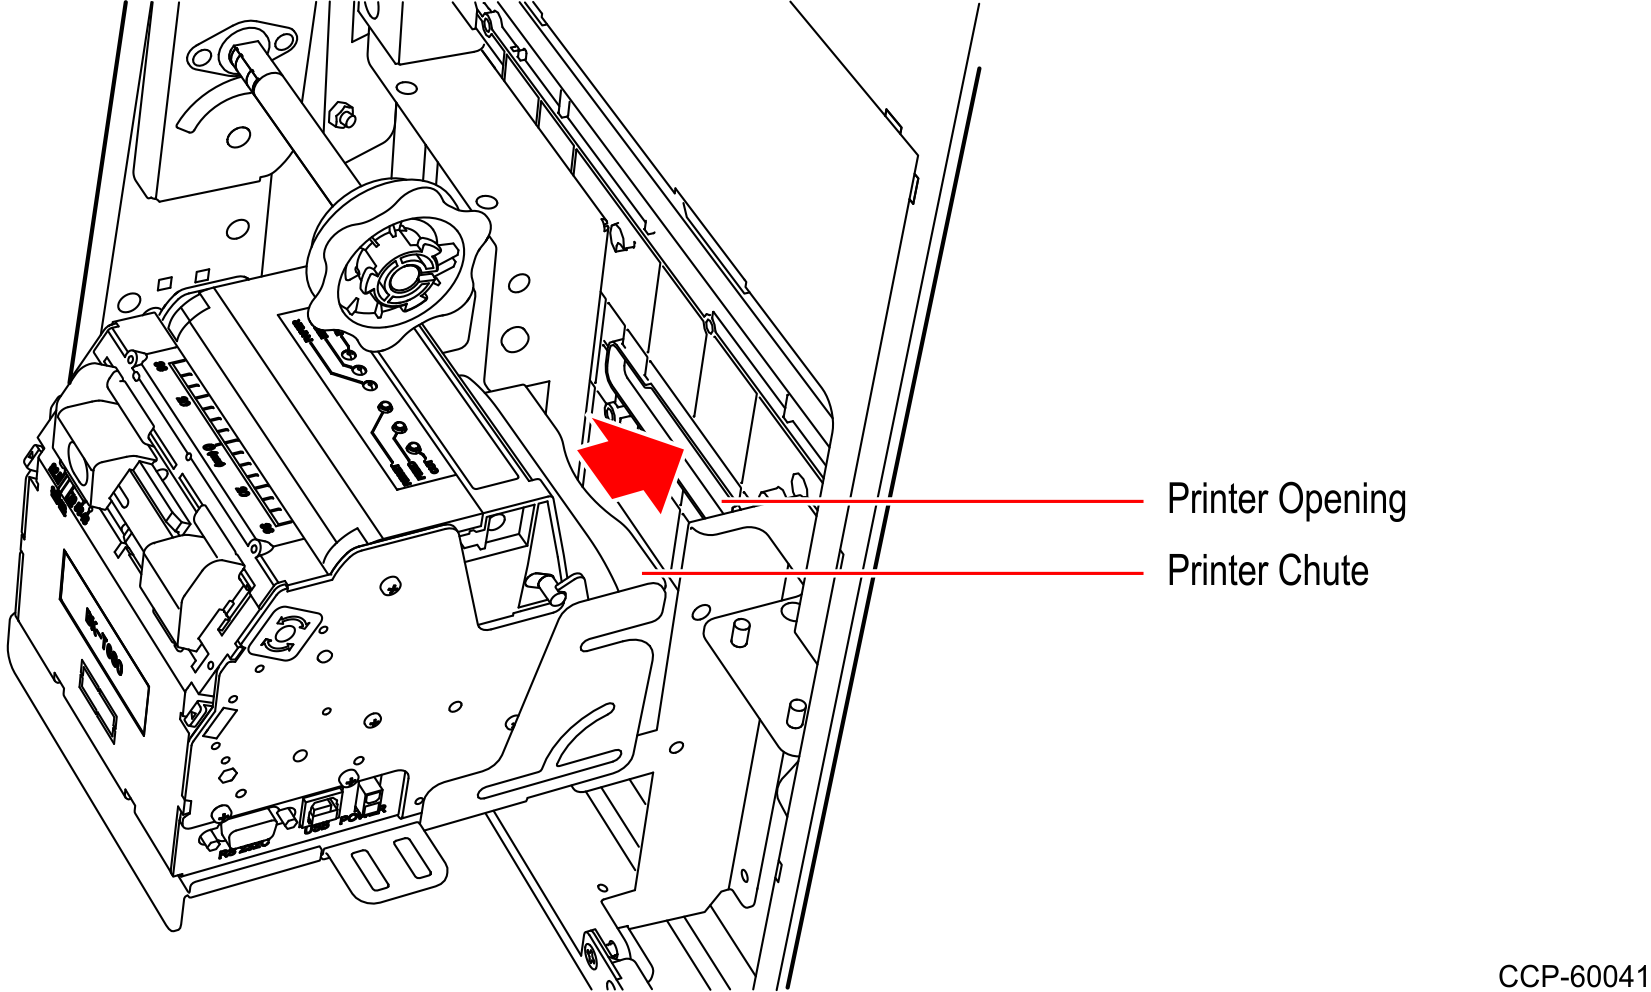
- Install the Printer Assembly to the kiosk, aligning the Printer Chute with the Printer Opening.Note
Be careful not to damage the Printer Chute and the areas around the Printer Opening.
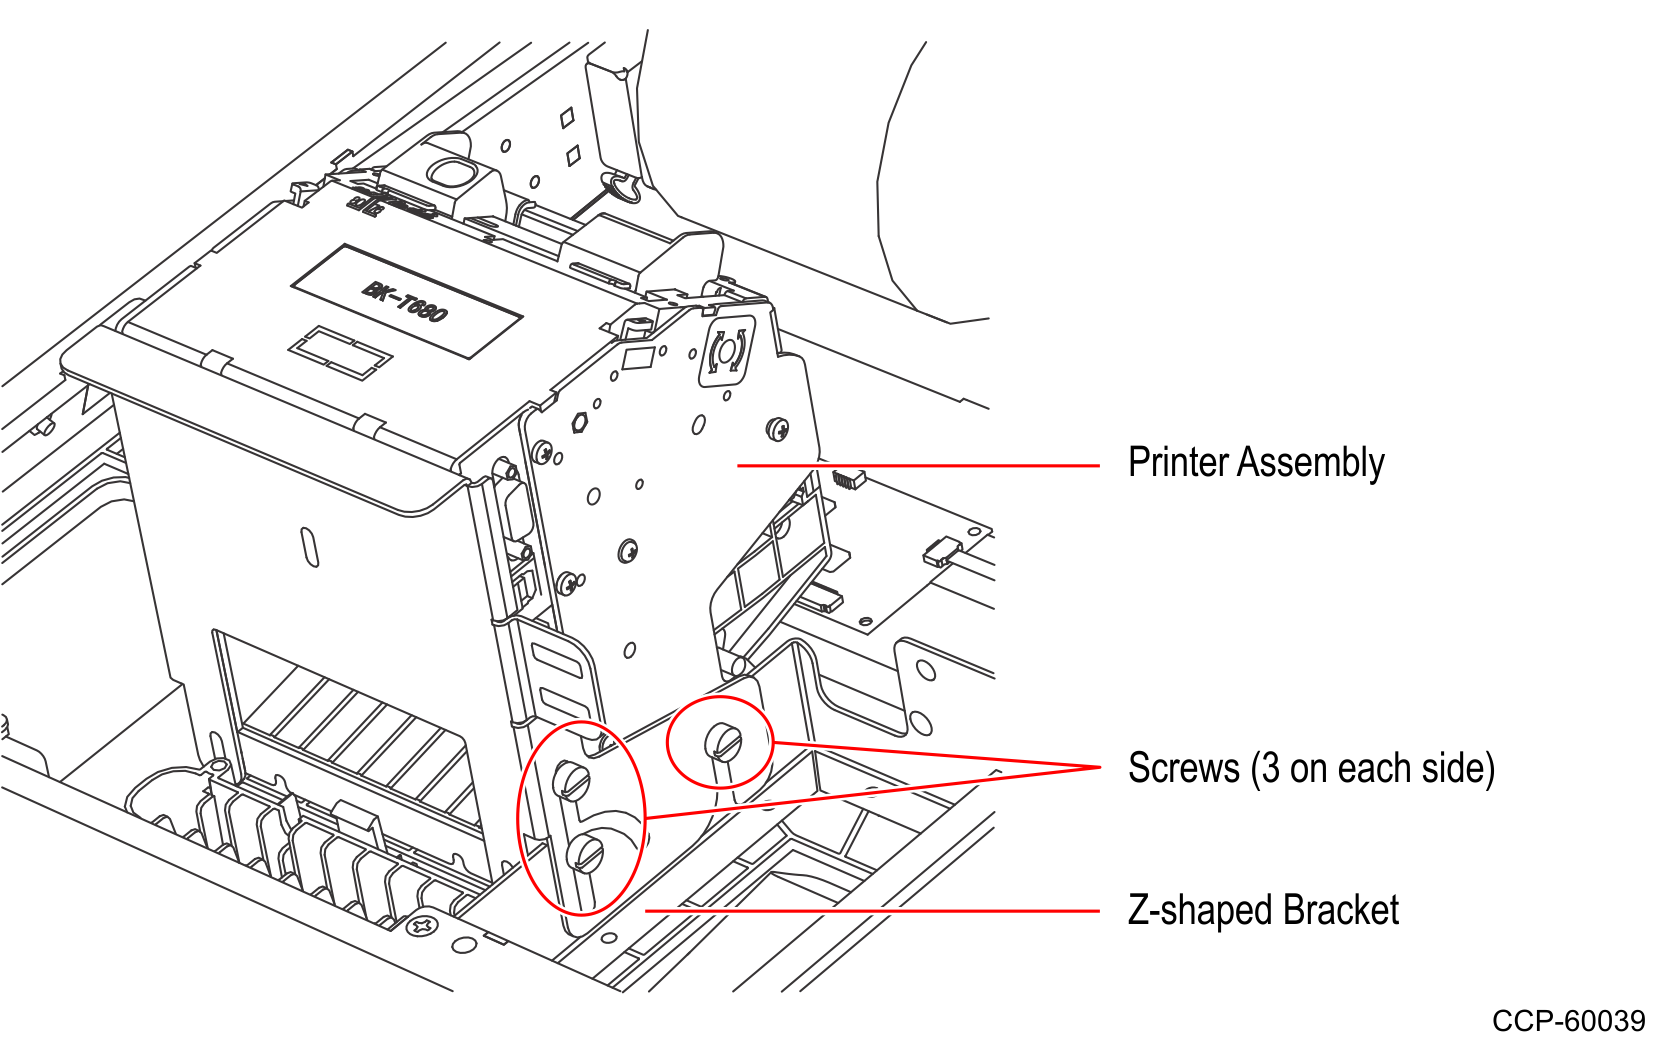
- Using the six screws (three on each side), secure the Printer Assembly to the Z shaped Bracket.
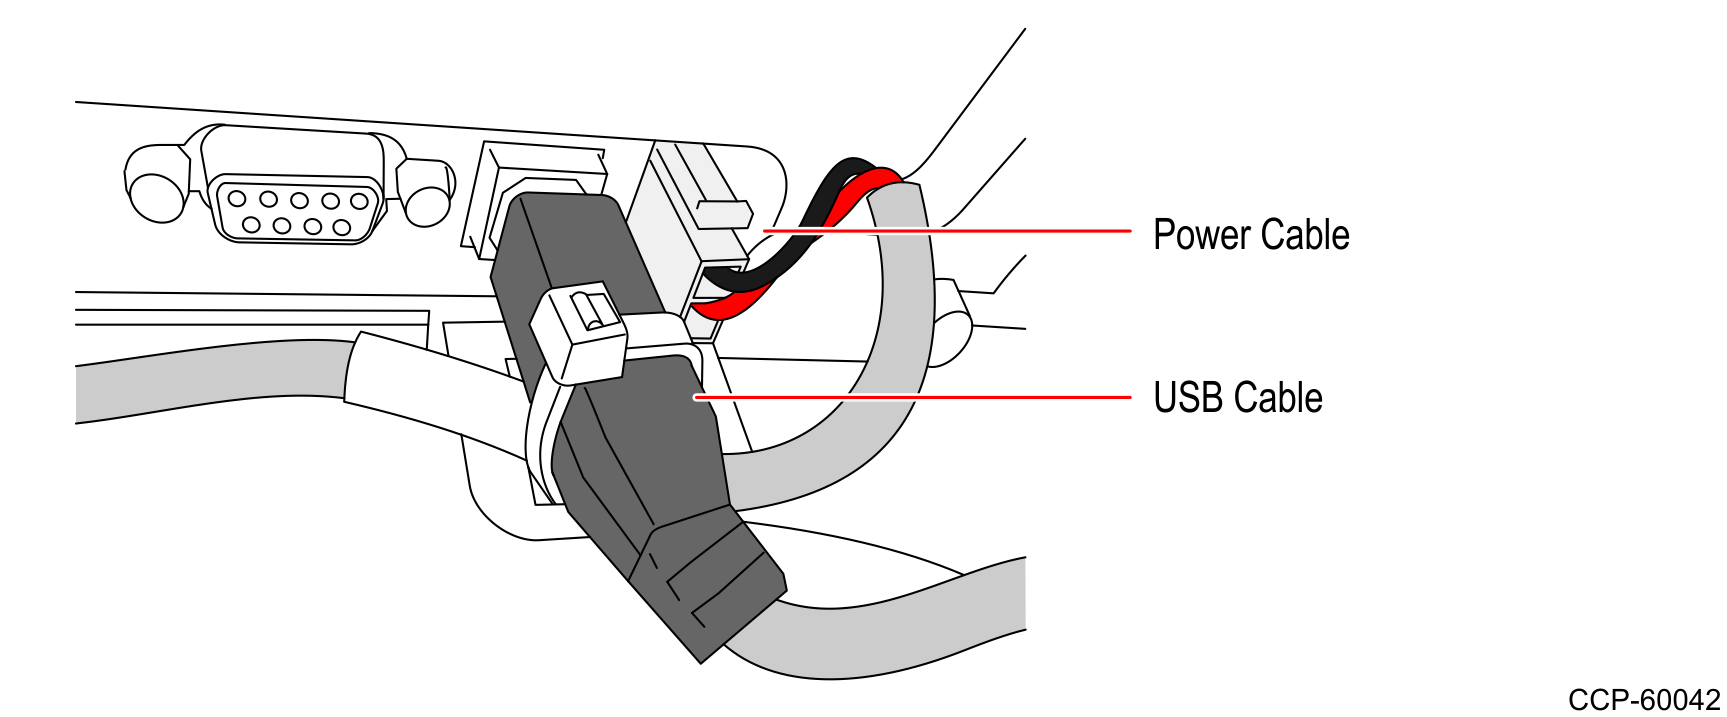
- Connect the Printer USB and Power Cables.
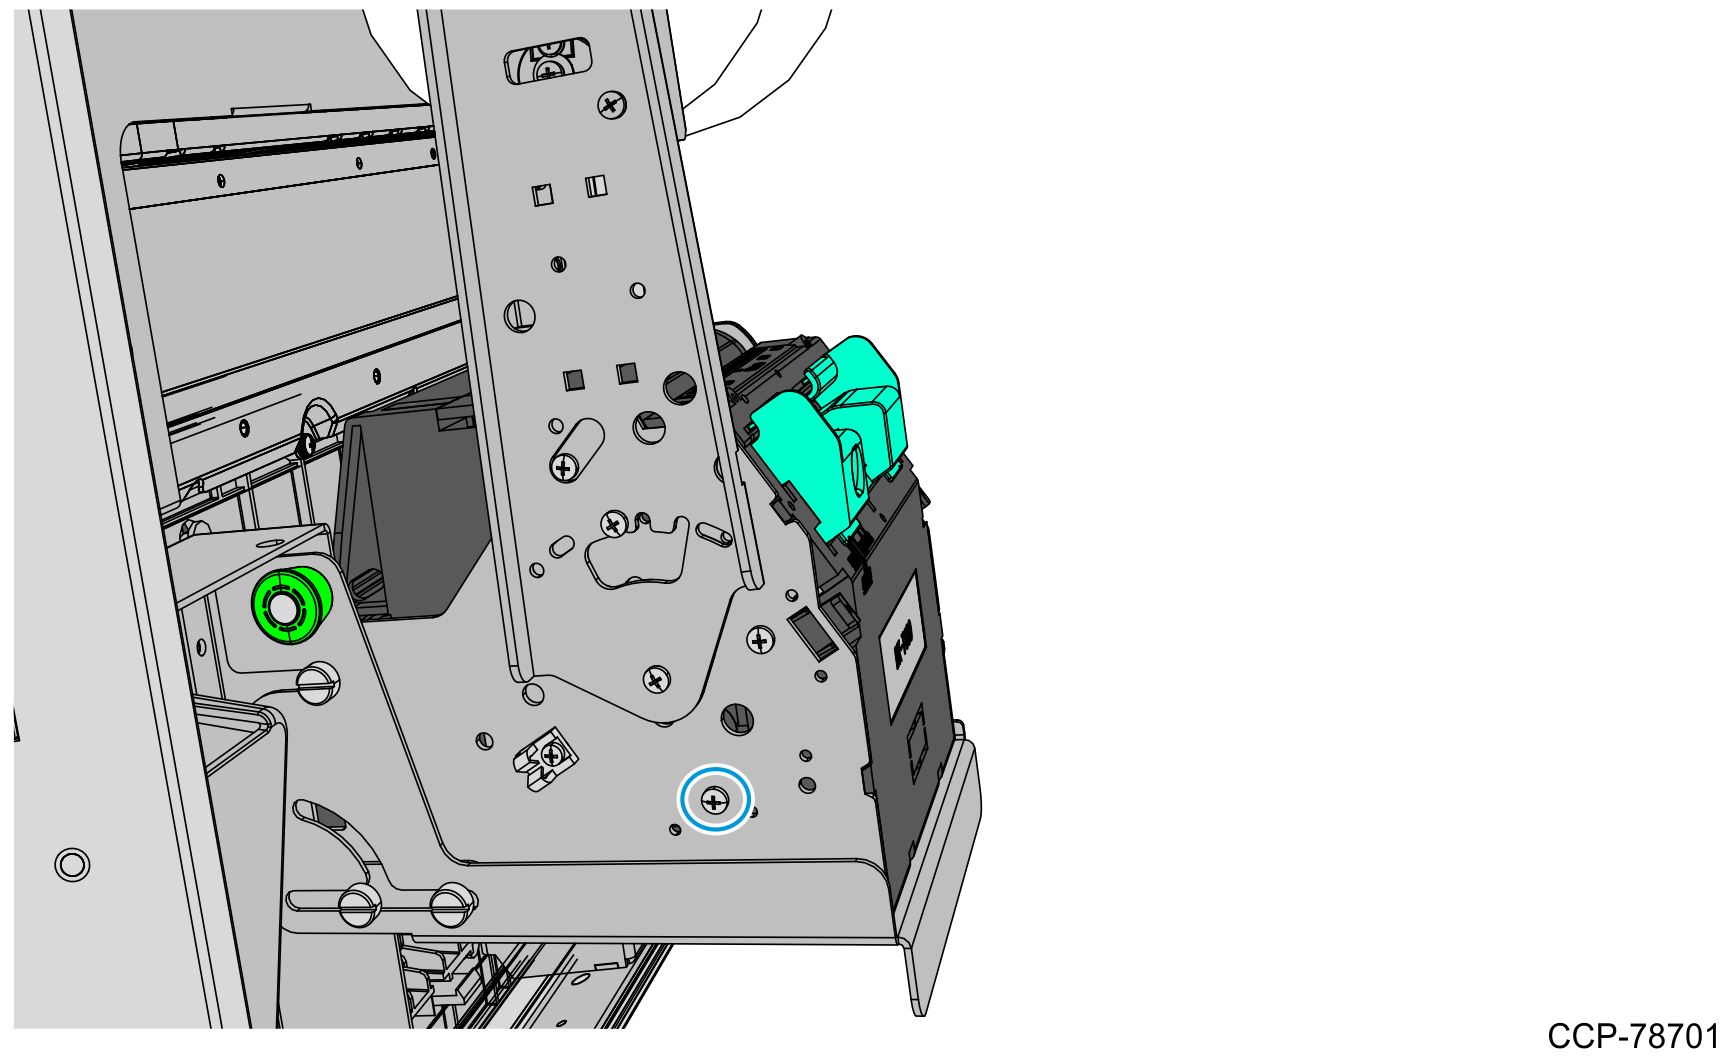
- Install the Grounding Cable for the Receipt Printer.Note
Units with PID 7709-2200-8090, 7709-2300-8090, 7709-8600-0001, 7709-8600-0002 do not need to perform this procedure. Skip to the next step.
- From the right side of the Receipt Printer, remove the screw indicated in the following image.
- Mount a 6-inch grounding cable using the same screw that was previously detached.
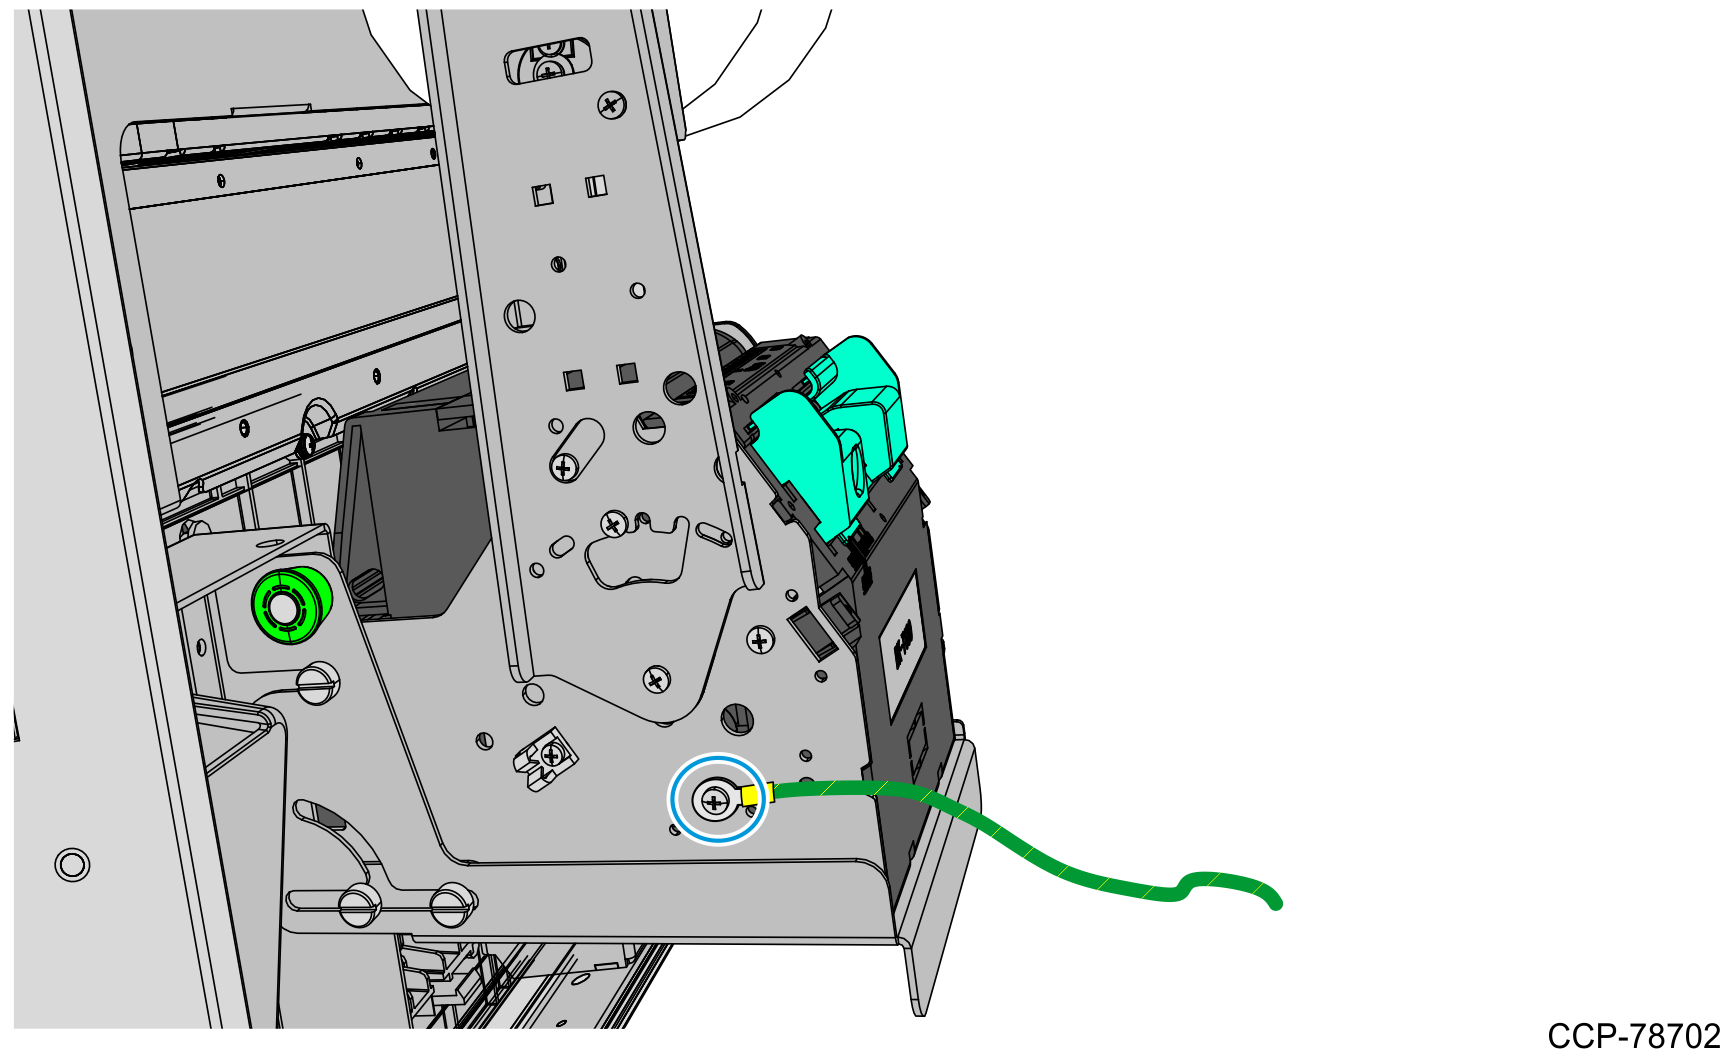
- From the right side of the Receipt Printer, remove the screw indicated in the following image.
