Replacing the Printer Bracket
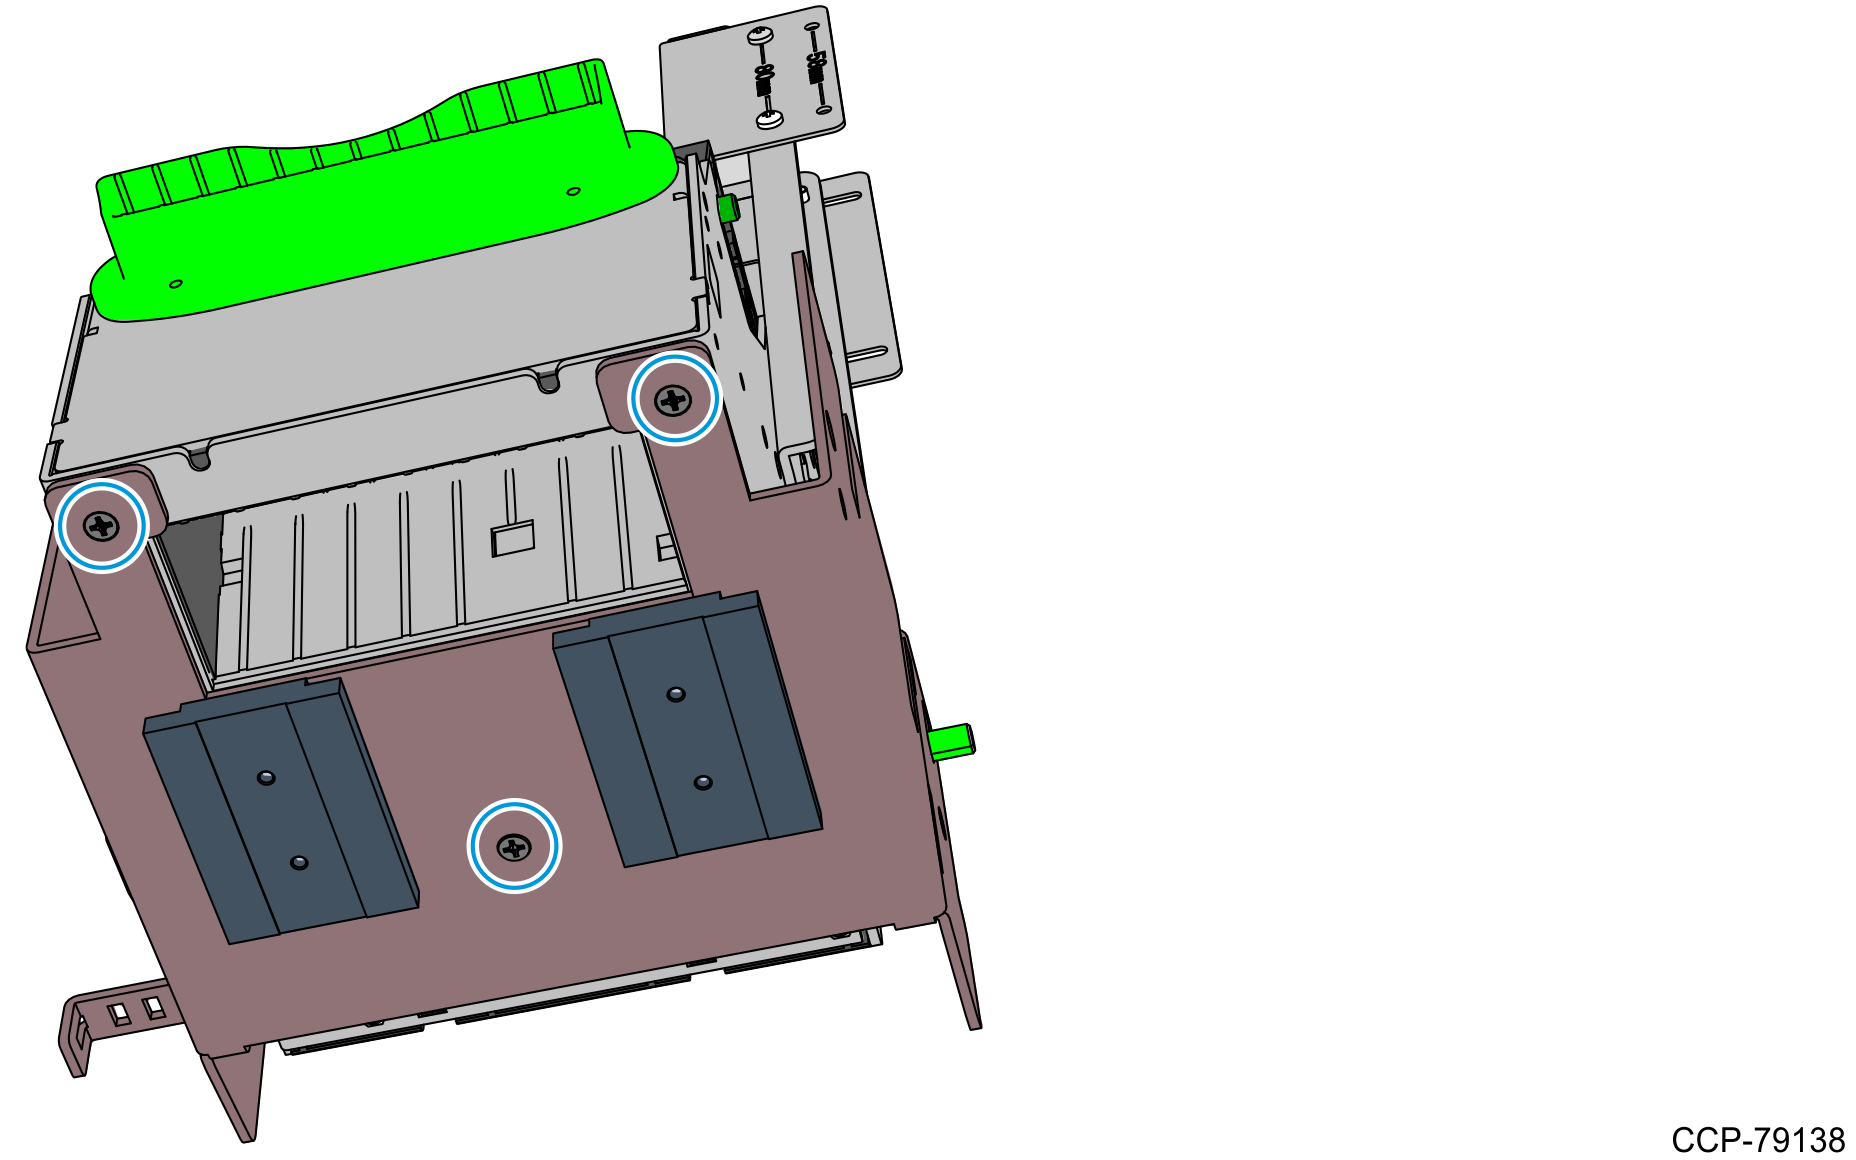
- Disassemble the printer assembly by removing the parts shown in the following image. These parts will be reused later when installing the upgrade kit.Note
The old printer tray and printer bracket will no longer be used in the installation of this kit.
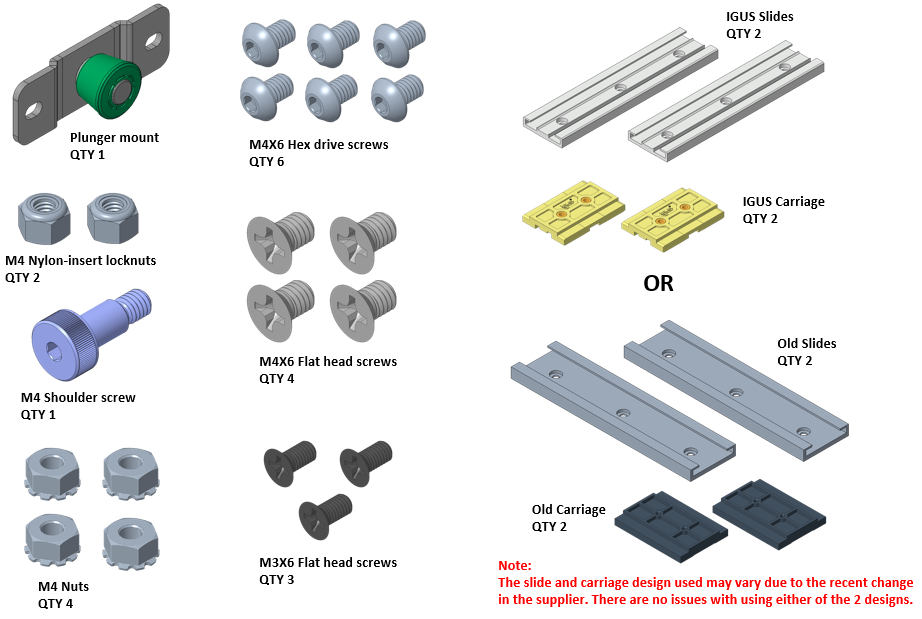
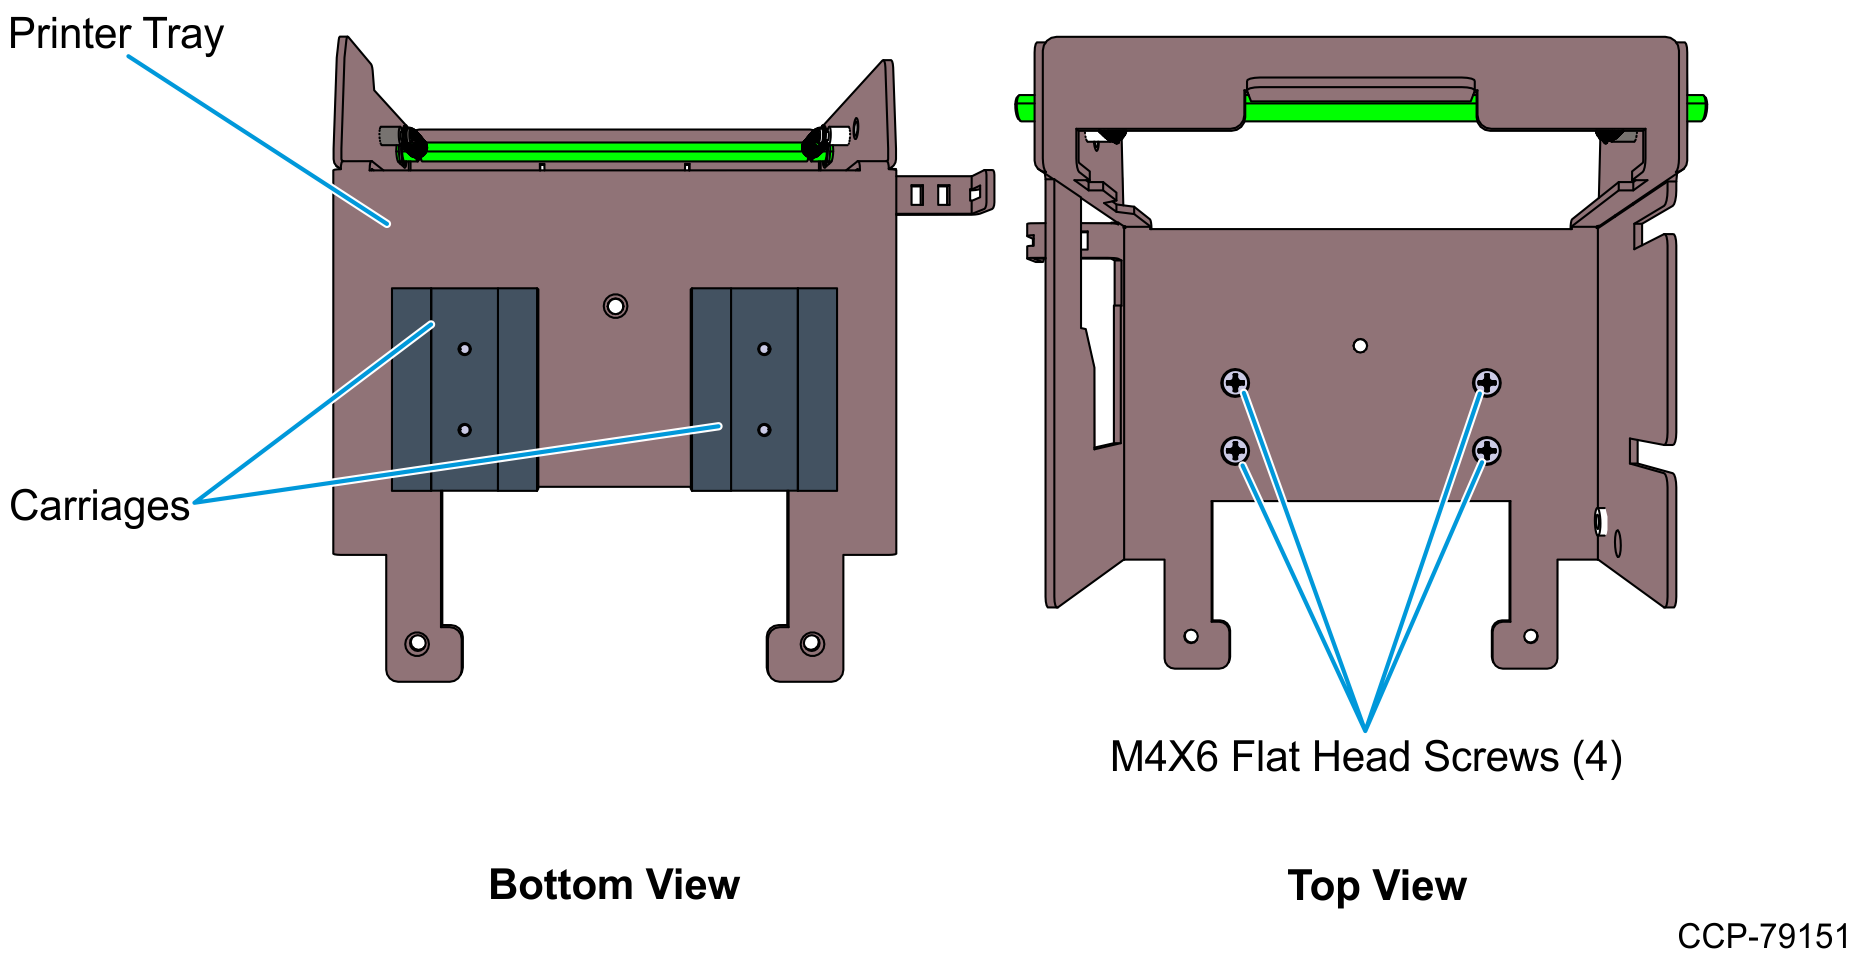
- Install the two Carriages on the New Printer Tray that comes with the kit, and then secure them with four M4X6 flat head screws.
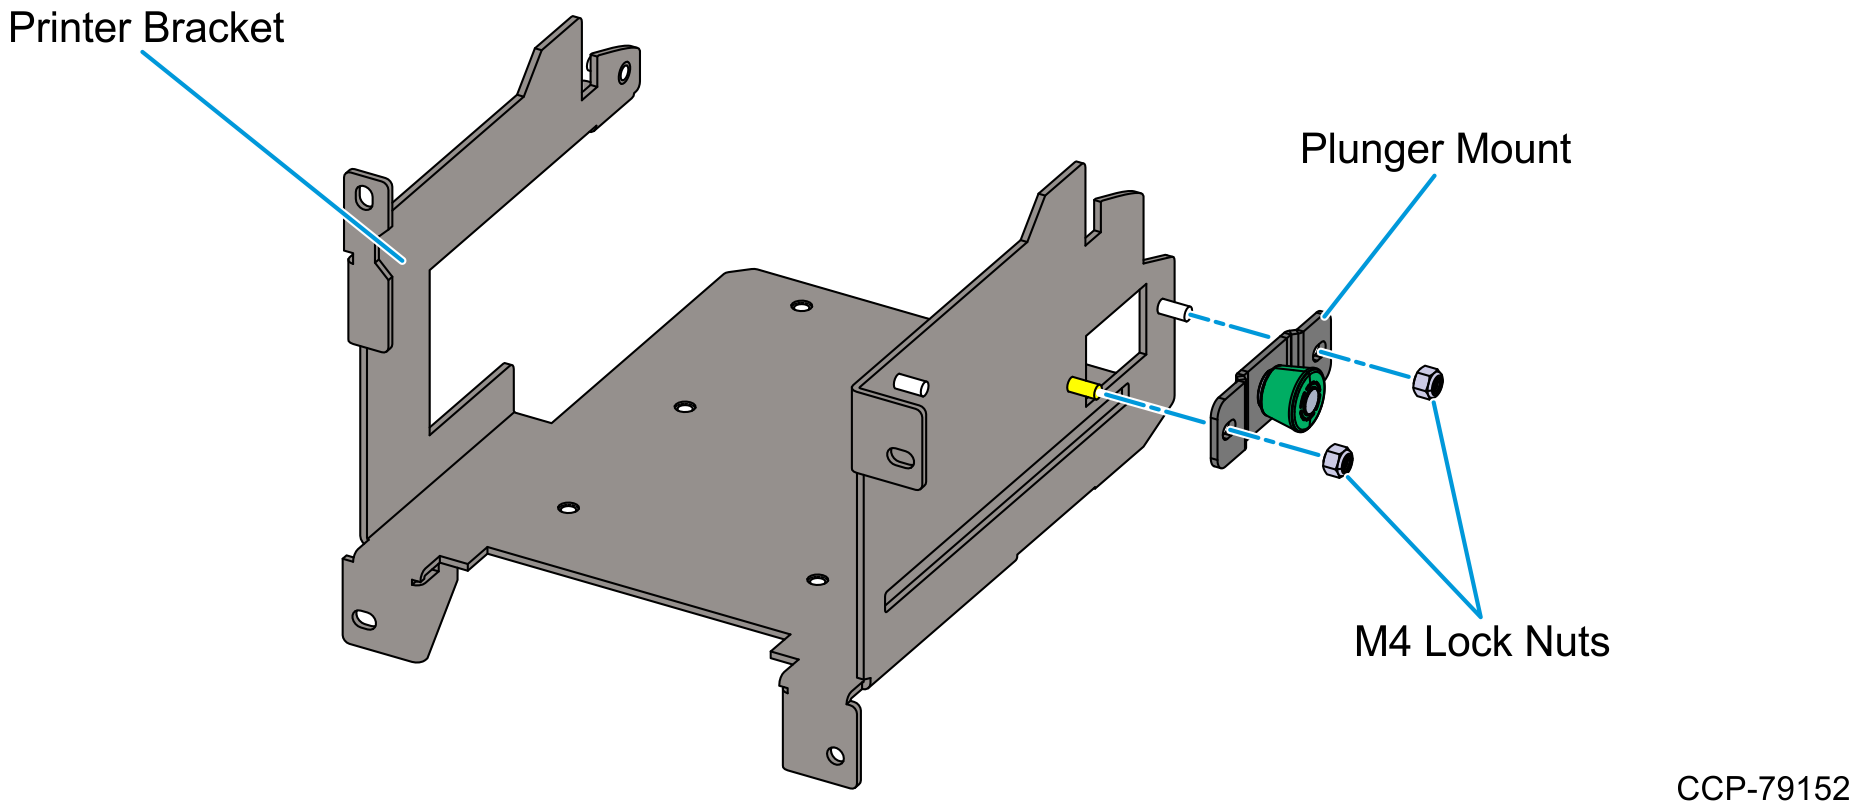
- Install the Plunger Mount on the New Printer Bracket and secure it with two M4 lock nuts.
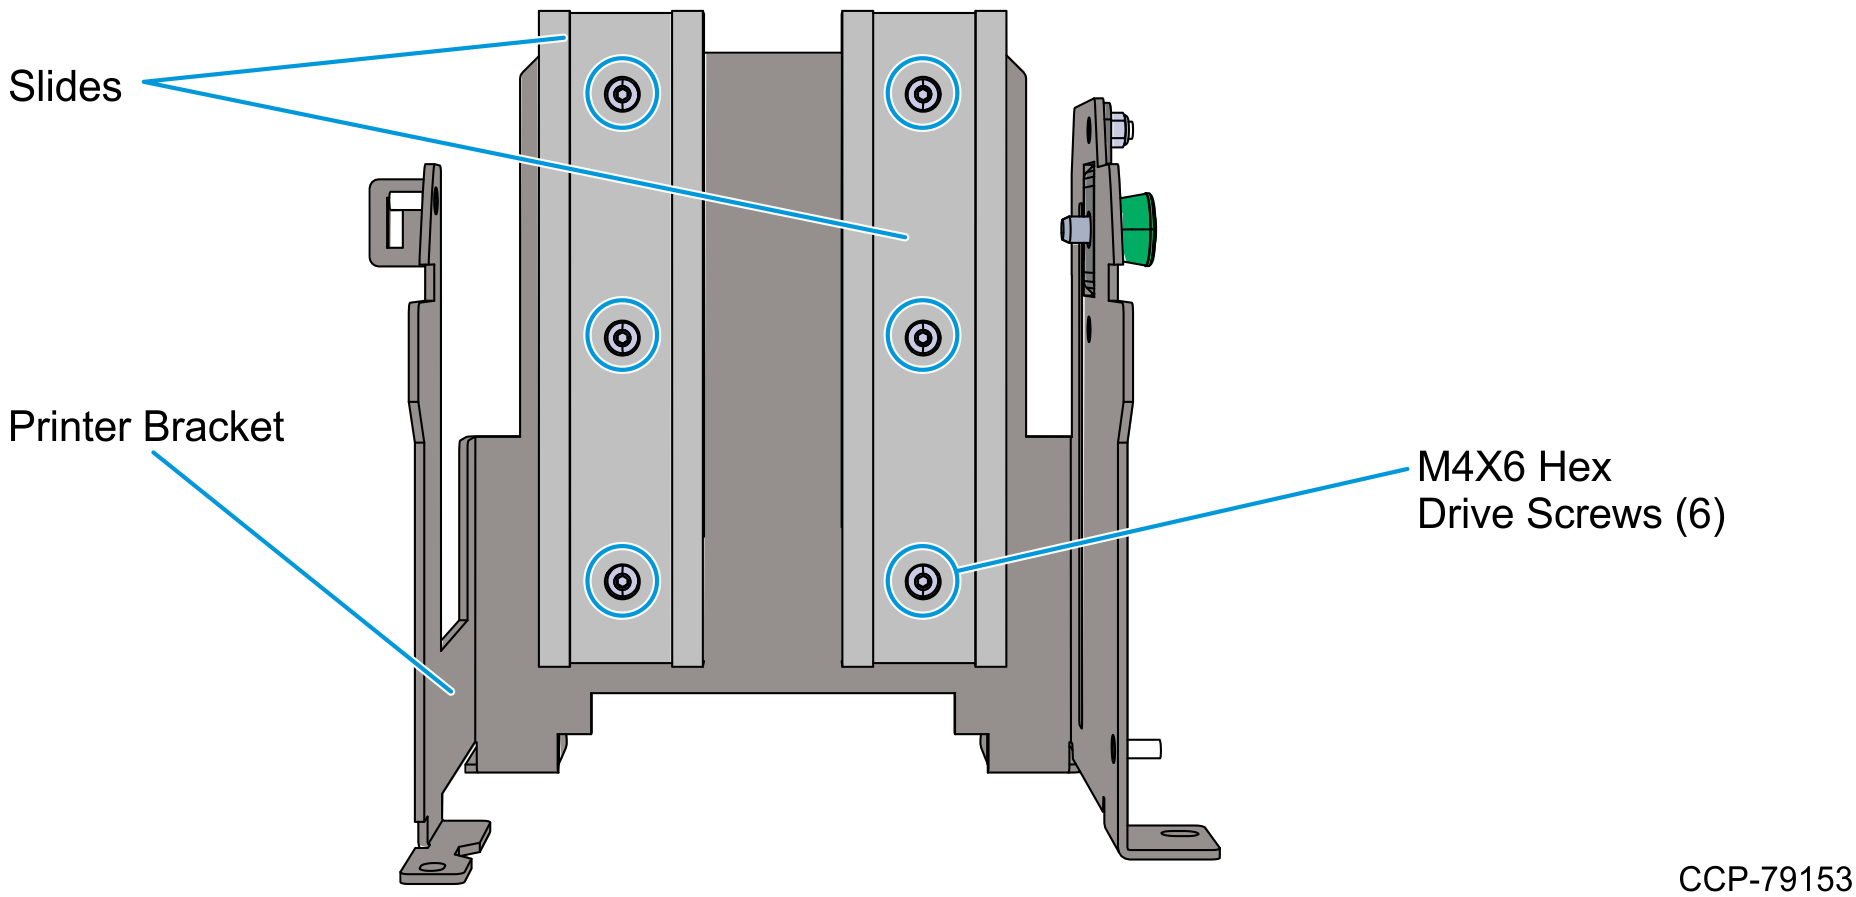
- Install the two Slides on the New Printer Bracket.
- Align the mounting holes on the Slides with the mounting holes on the New Printer Bracket, and secure them with six M4X6 hex drive screws.
 Note
NoteEnsure that all six mounting holes on the Slides are properly aligned with the six mounting holes on the Printer Bracket and that the two Slides are parallel to each other. This is also to ensure that the Printer Tray slides smoothly on the bracket.
- Align the mounting holes on the Slides with the mounting holes on the New Printer Bracket, and secure them with six M4X6 hex drive screws.
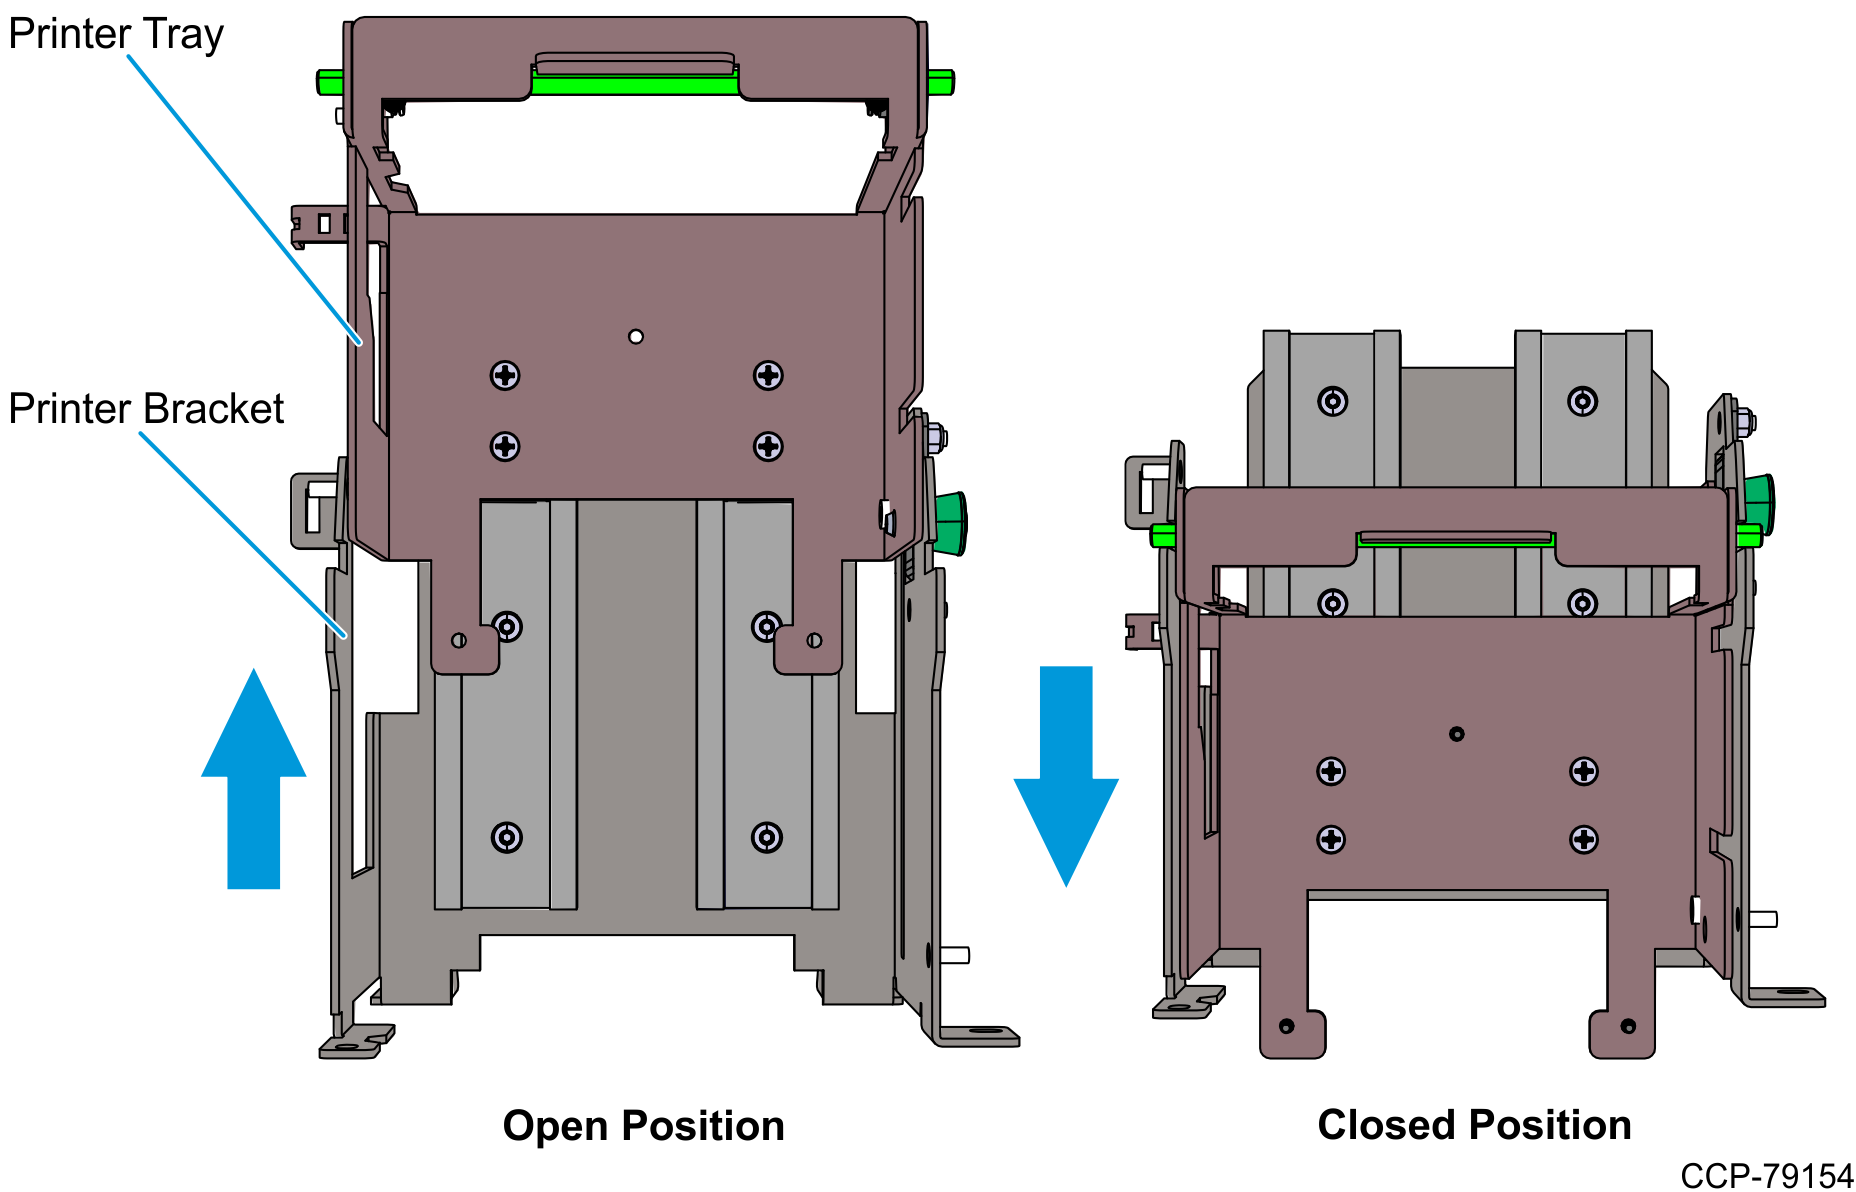
- Install the New Printer Tray on the Printer Bracket assembly and check if it slides smoothly. If it does not, the Slides are not parallel and therefore need to be adjusted.
- Install the Receipt Printer on its tray.
- Remove the Printer Tray from the Printer Bracket.
- Mount the Receipt Printer onto the tray and secure with three M3X6 flat head screws.
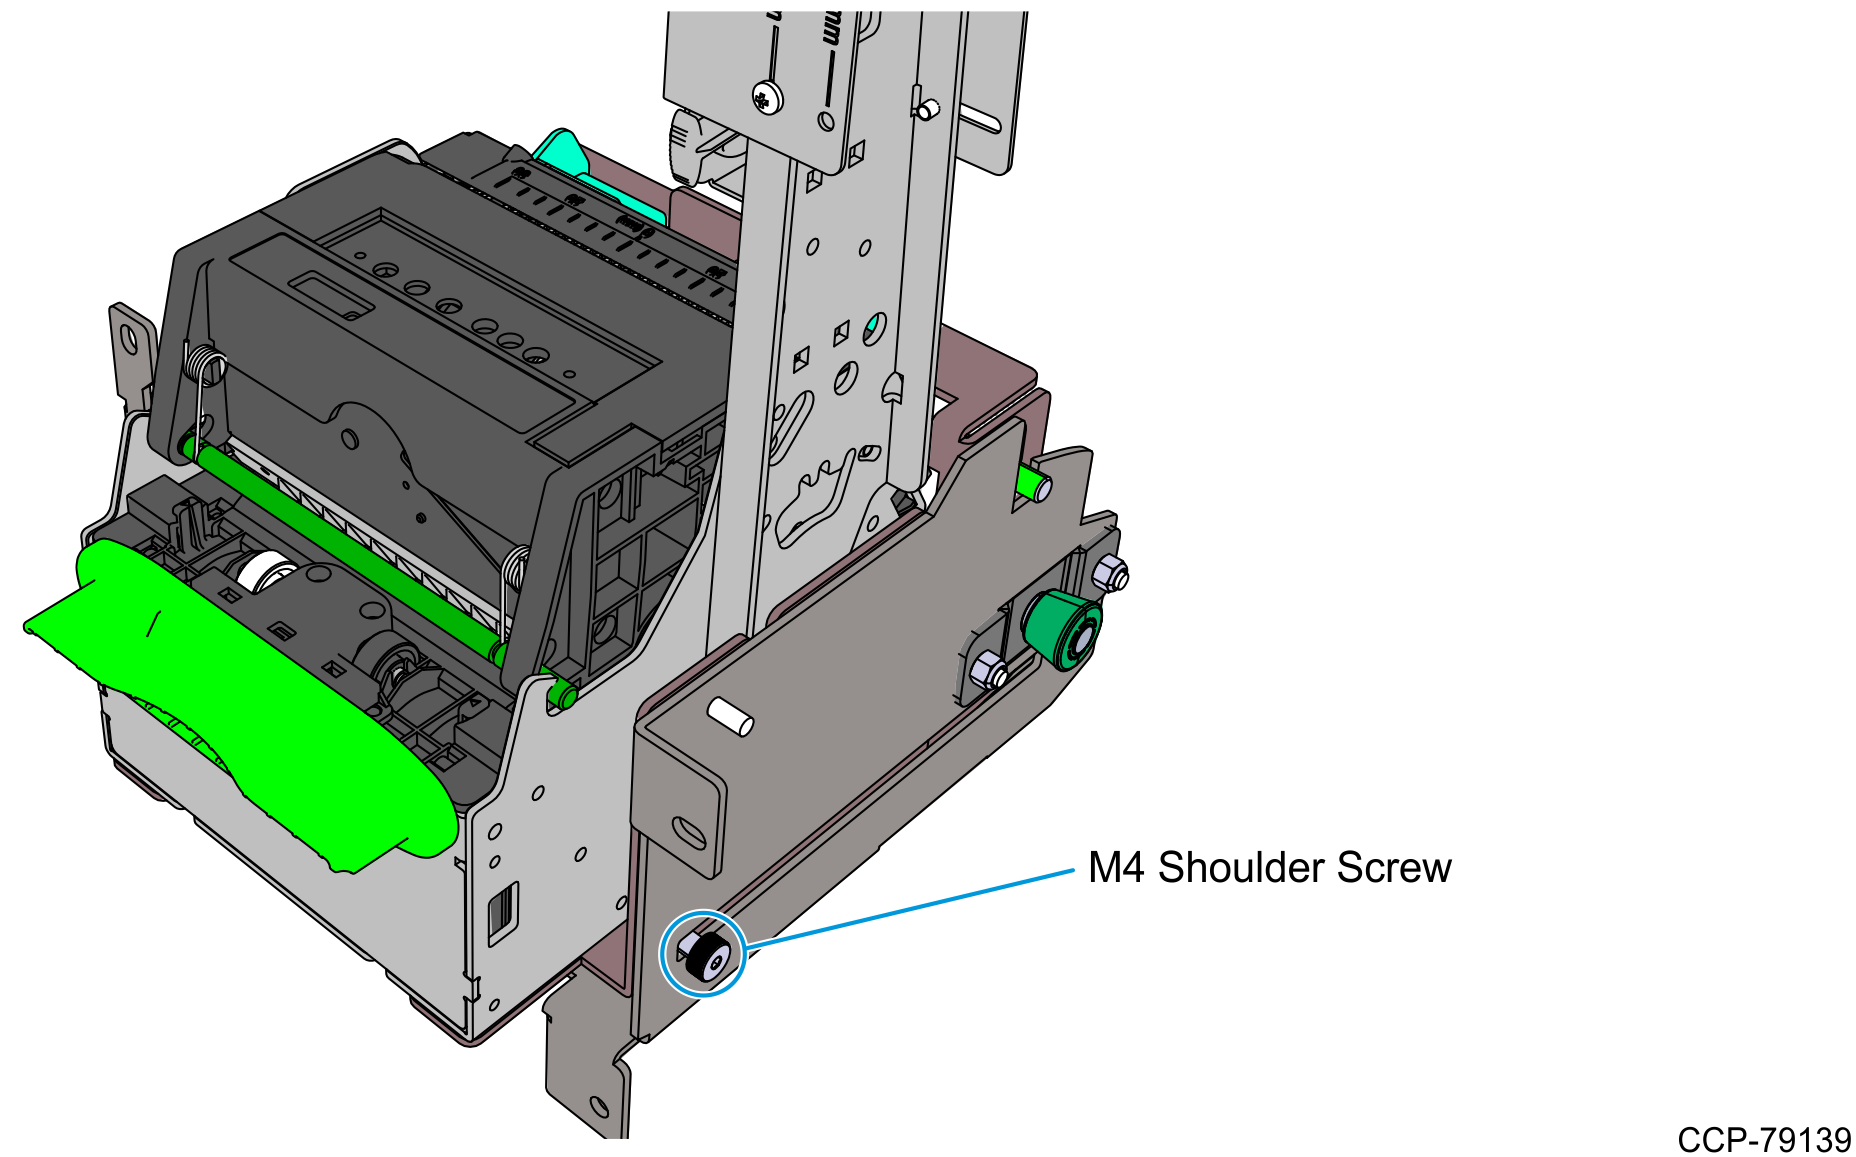
- With the Printer Tray in closed position, install the M4 shoulder screw to secure the Printer Assembly to the Printer Bracket.