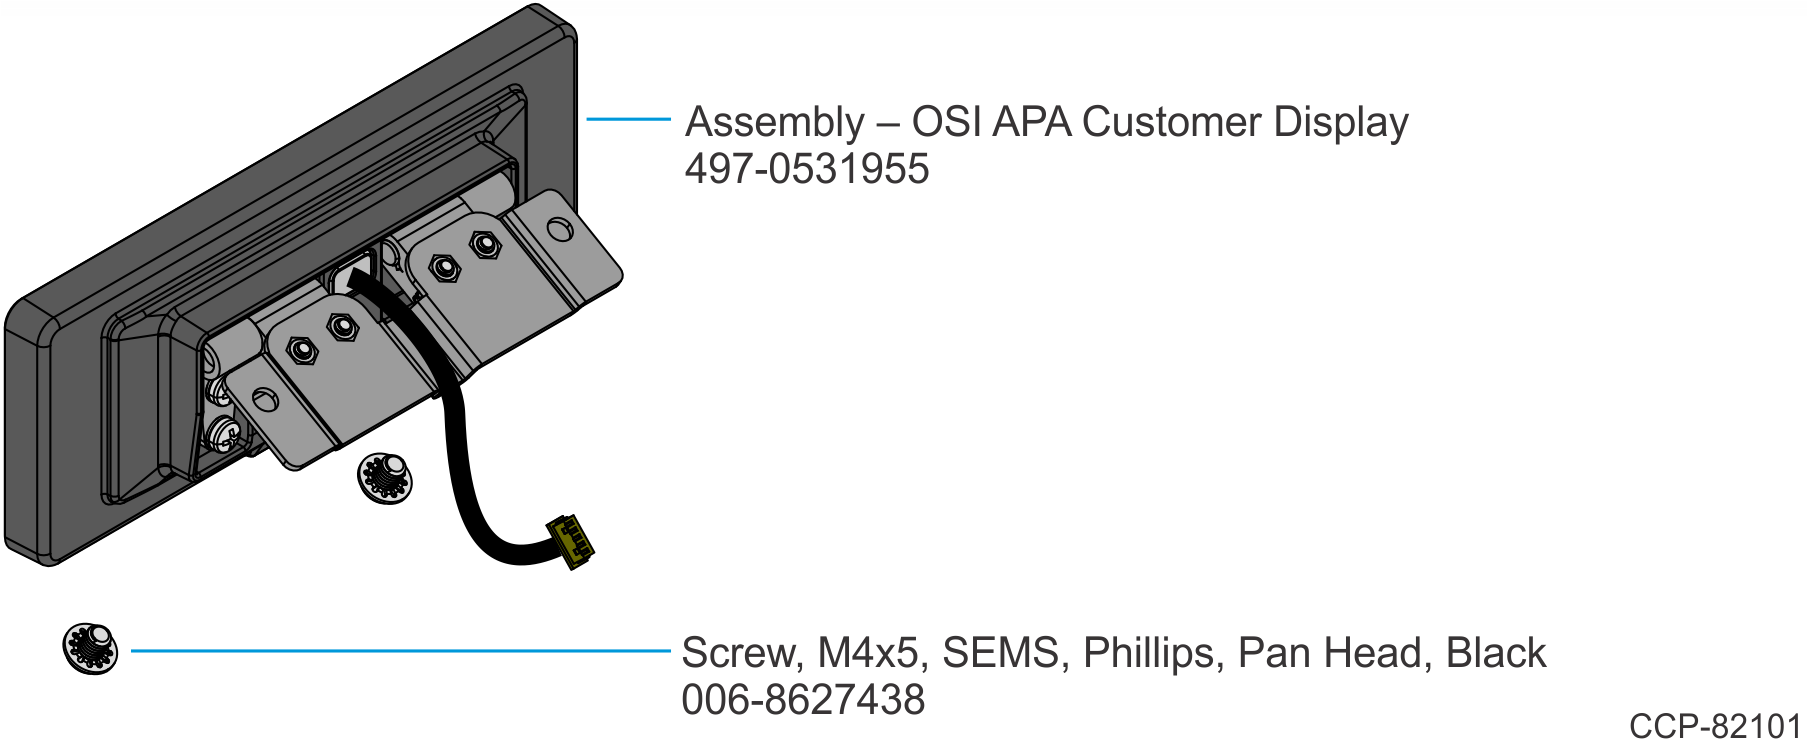
7772-K471 OSI APA (All Points Addressable) Graphical Display
This kit provides an OSI APA (All Points Addressable) Graphical Display for the following POS:
- NCR Voyix CX7 All-in-One POS (7772)
- NCR Voyix CX5 All-in-One POS (7773)
Kit Contents
Installation Procedure
Warning
Disconnect the AC power cord from the AC outlet and wait 30 seconds before servicing the terminal.
- Lay the Display face down on a flat surface.Note
Always use a soft material (cloth, foam) to protect the display screen when placing the terminal face down.
- Remove the Cable Cover.
- Remove the two (2) screws that secure the Cable Cover to the Back Cover.
- Rotate and unhook the Cable Cover from the Back Cover.
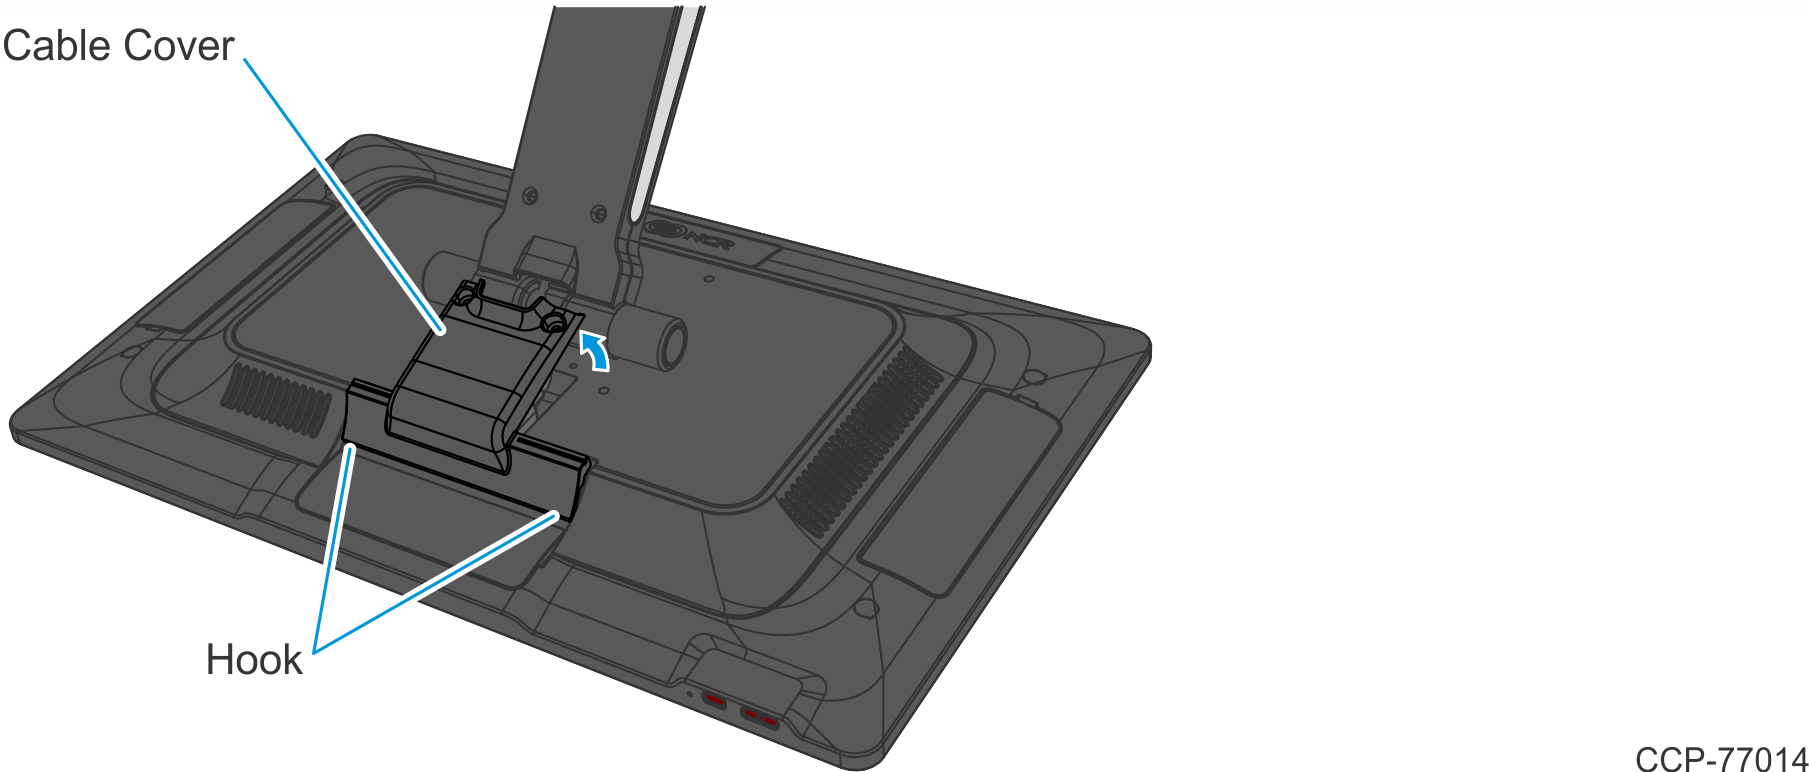
- Remove the two (2) screws that secure the Cable Cover to the Back Cover.
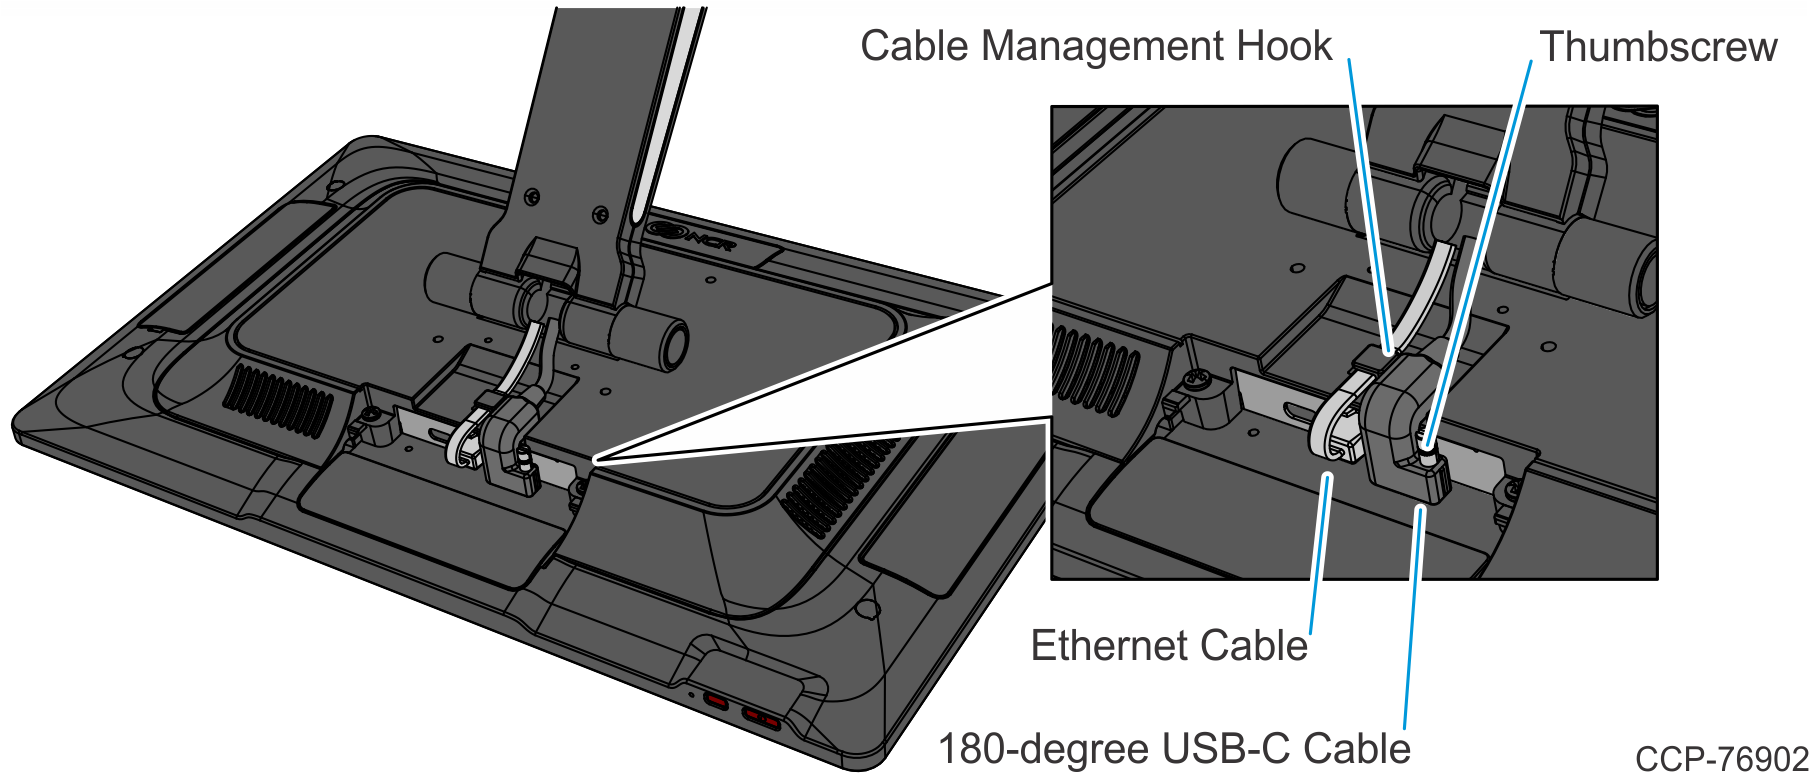
- Disconnect the Cables.
- Loosen the thumbscrew of the 180-degree USB-C Cable then disconnect the Cable.
- Remove the Ethernet Cable from the Cable Management Hook then disconnect the Cable.
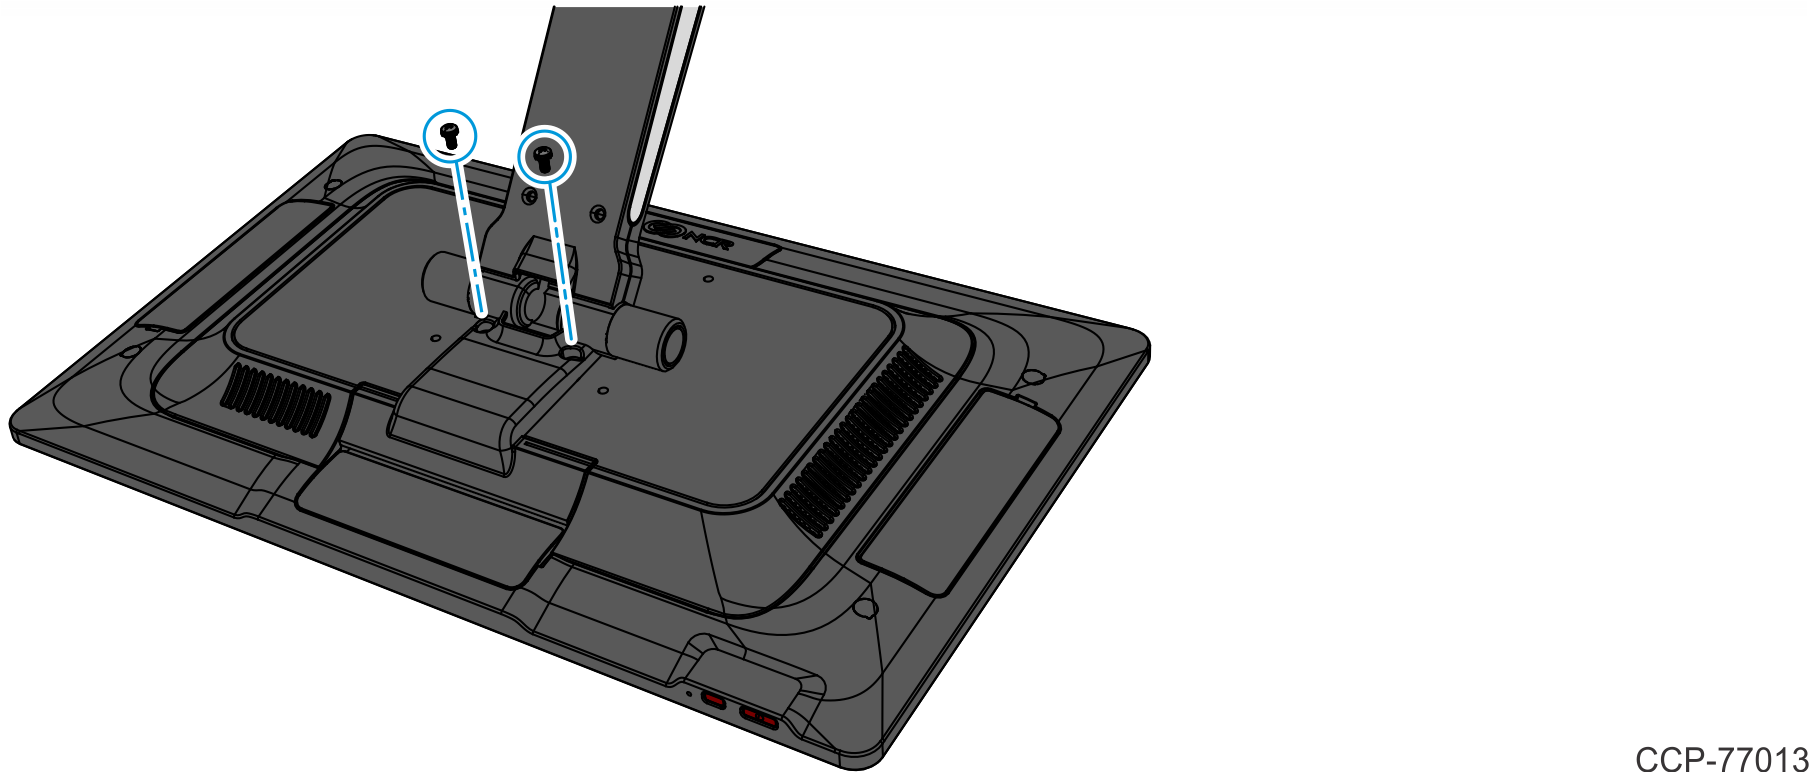
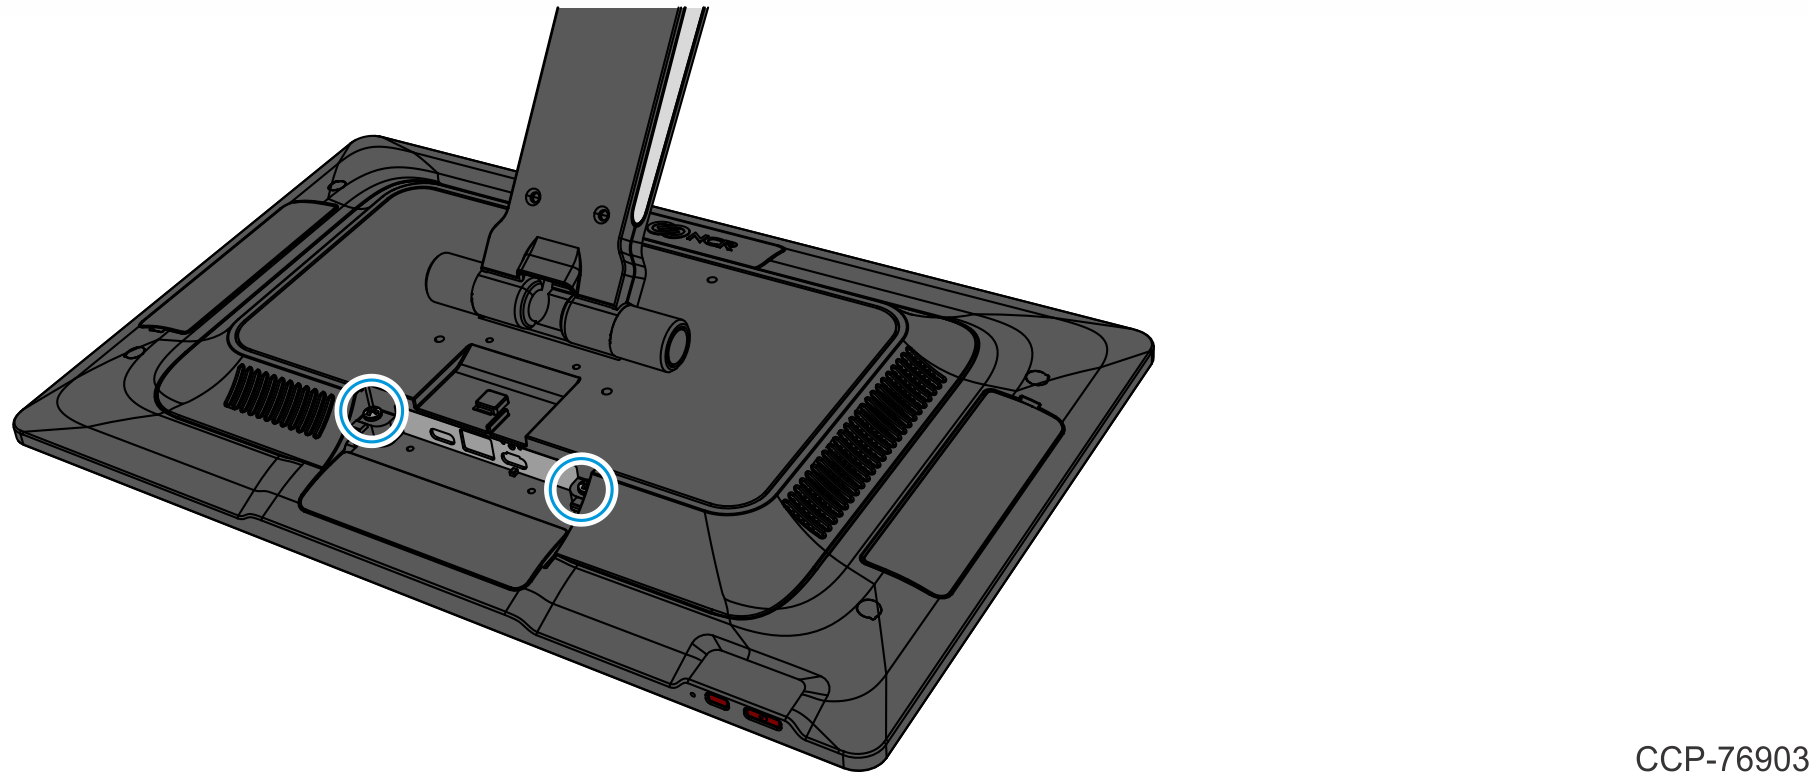
- Loosen the two (2) captive screws that secure the Back Cover to the Display.
- Rotate the Back Cover away from the Display and unhook the Back Cover Tabs.
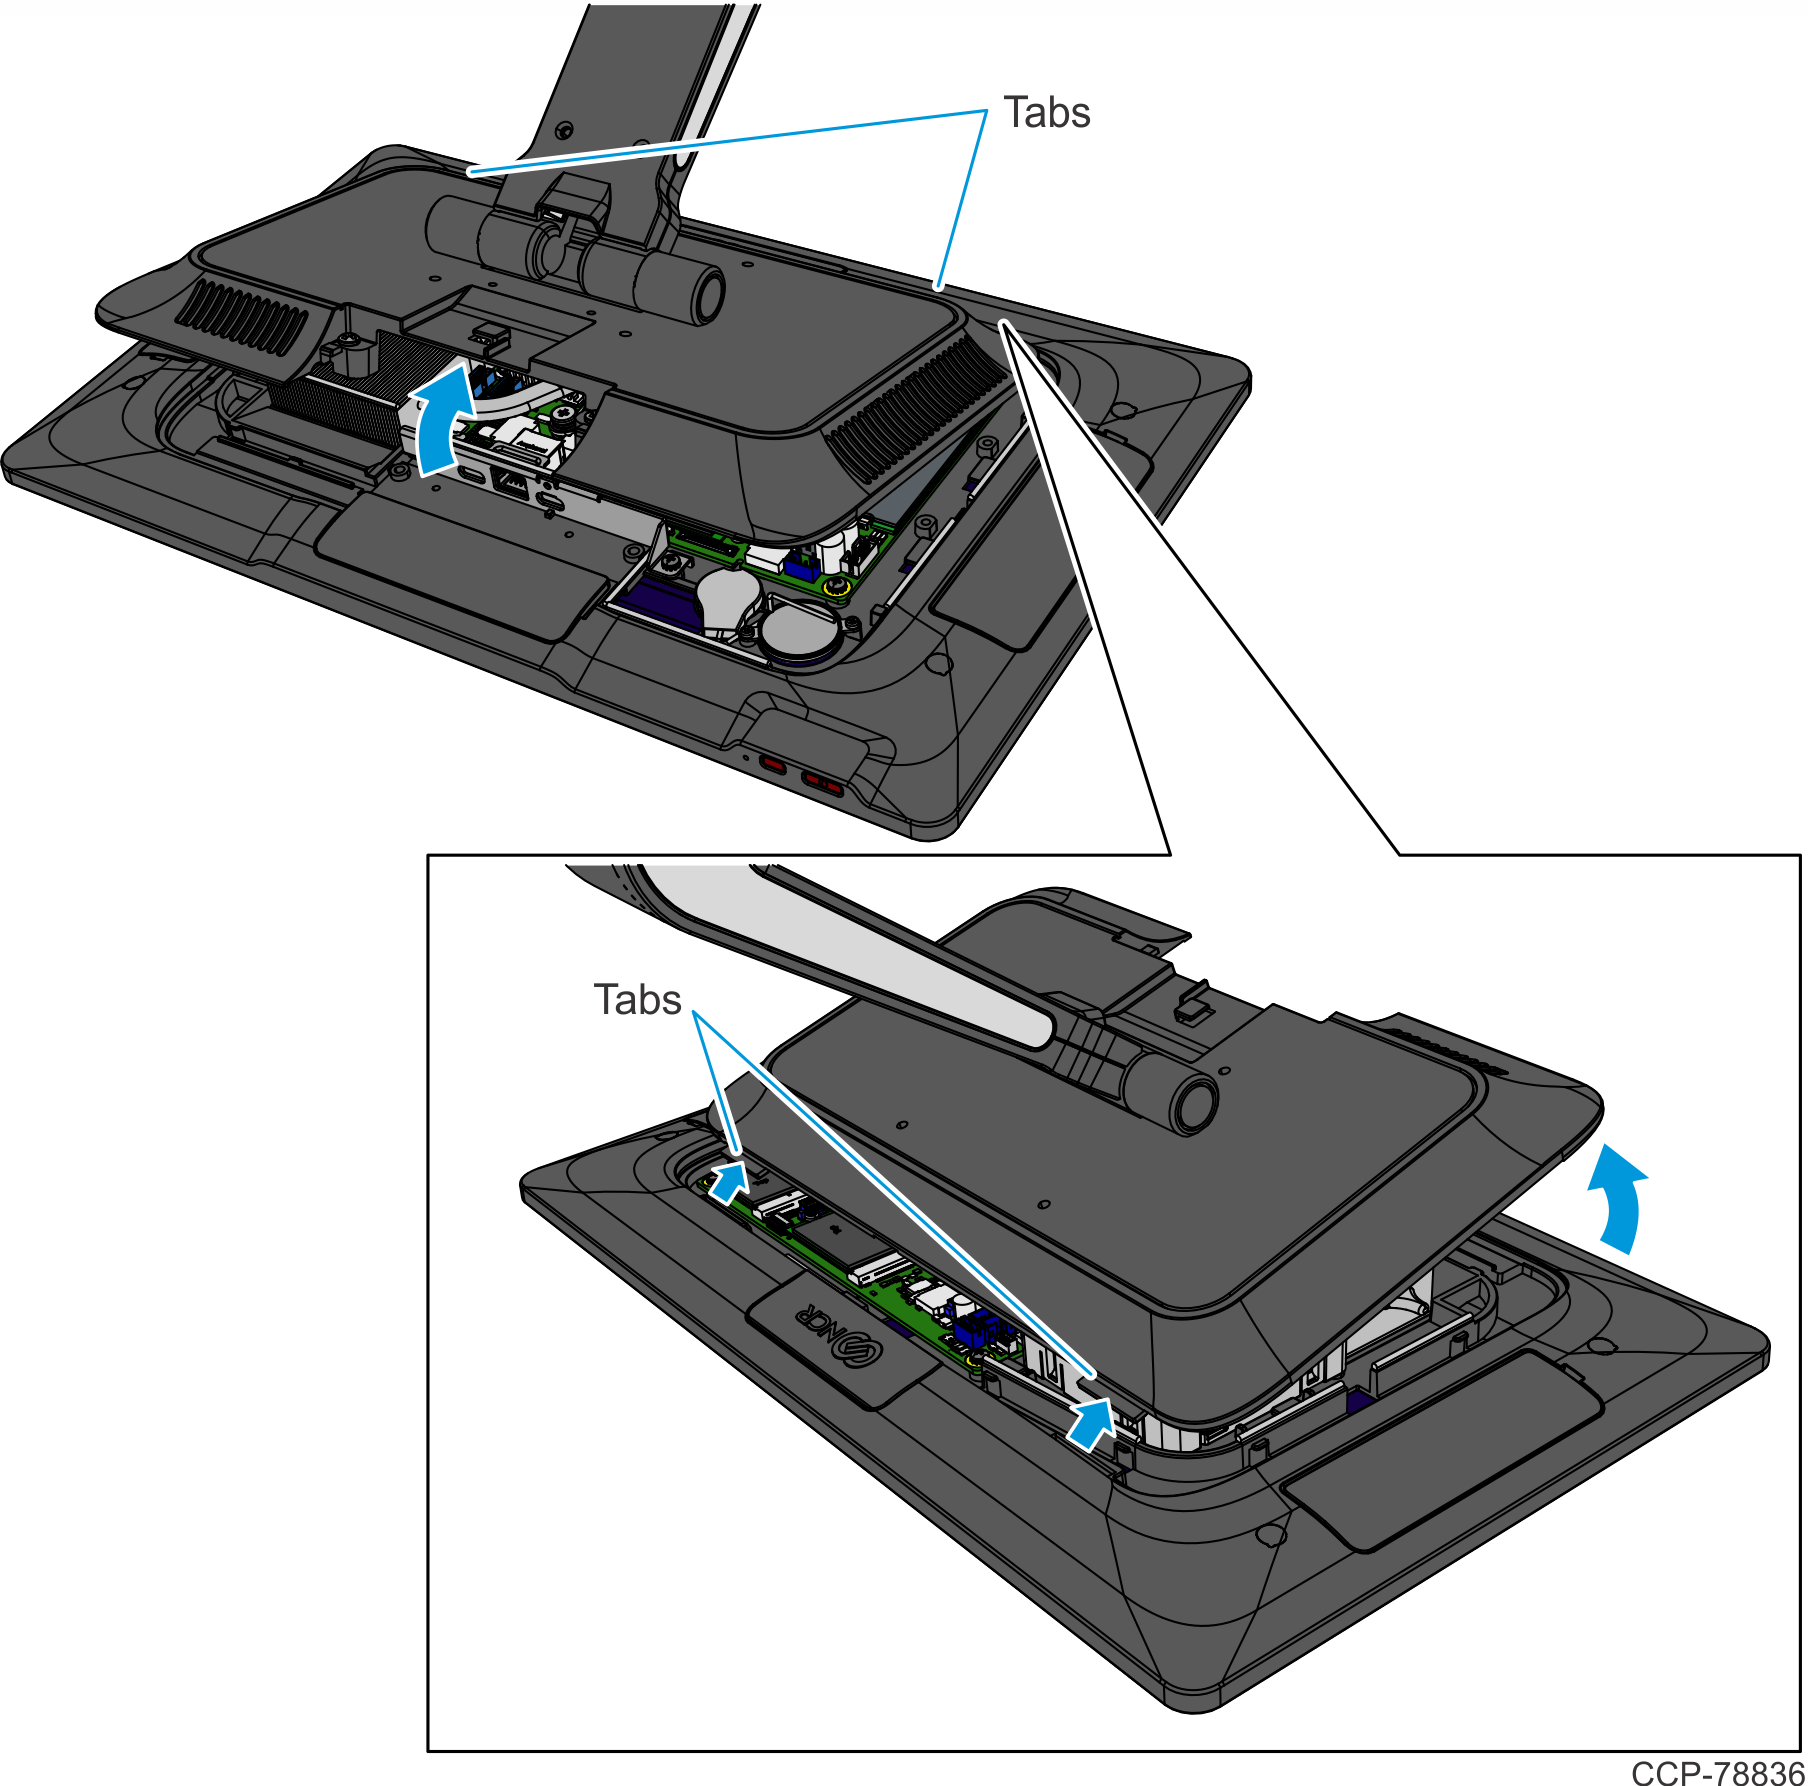
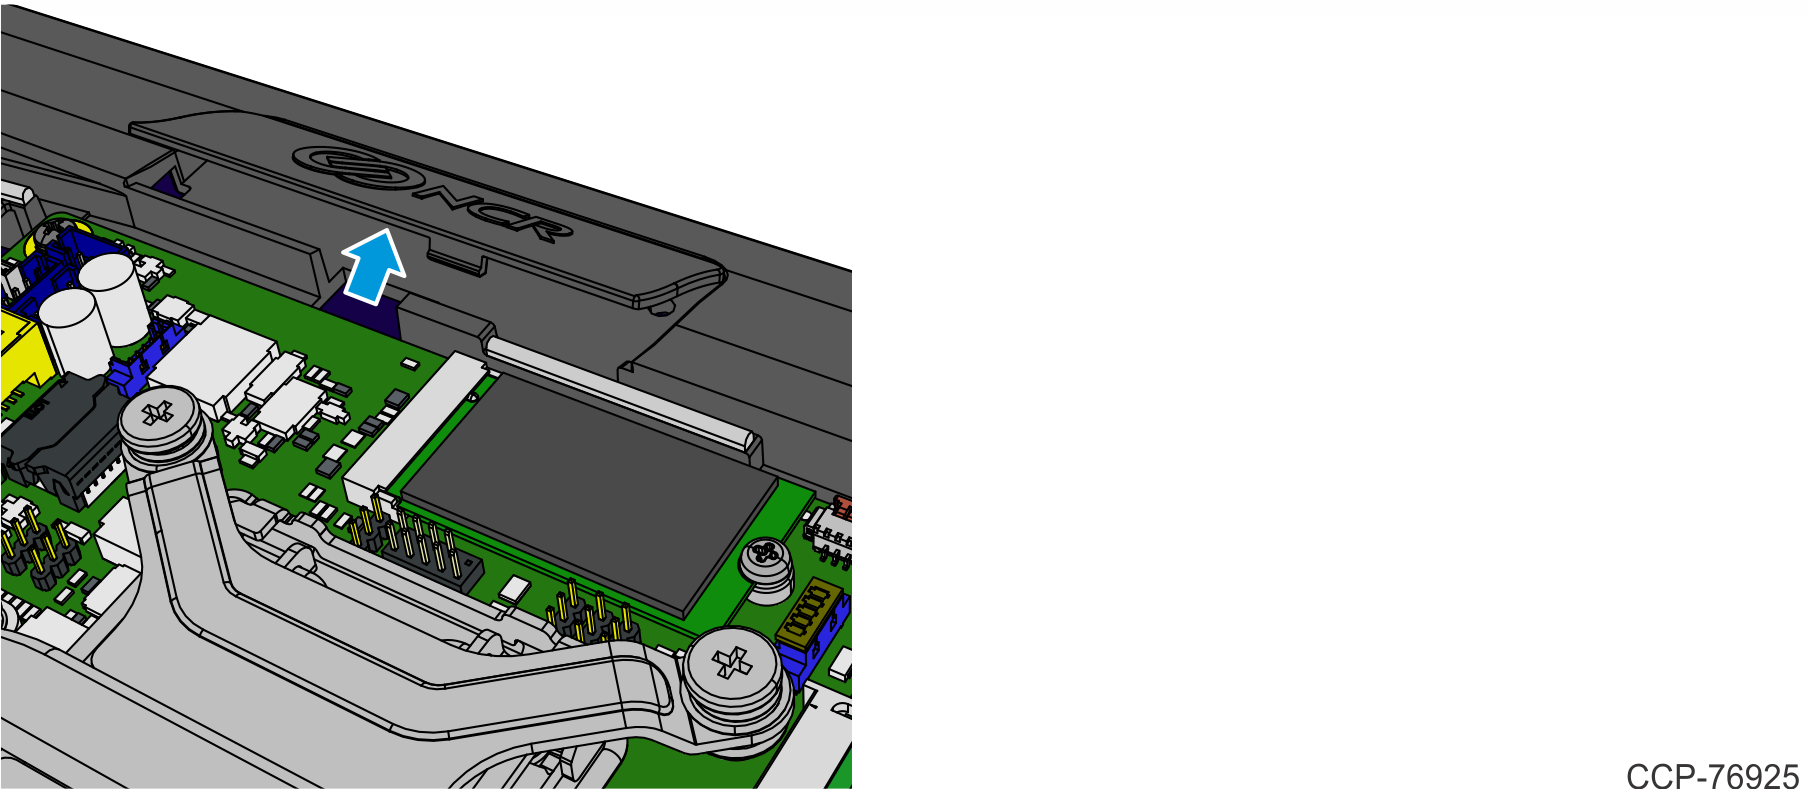
- Lift the bottom of the Plate (Logo Badge) to unsnap it from the display housing.
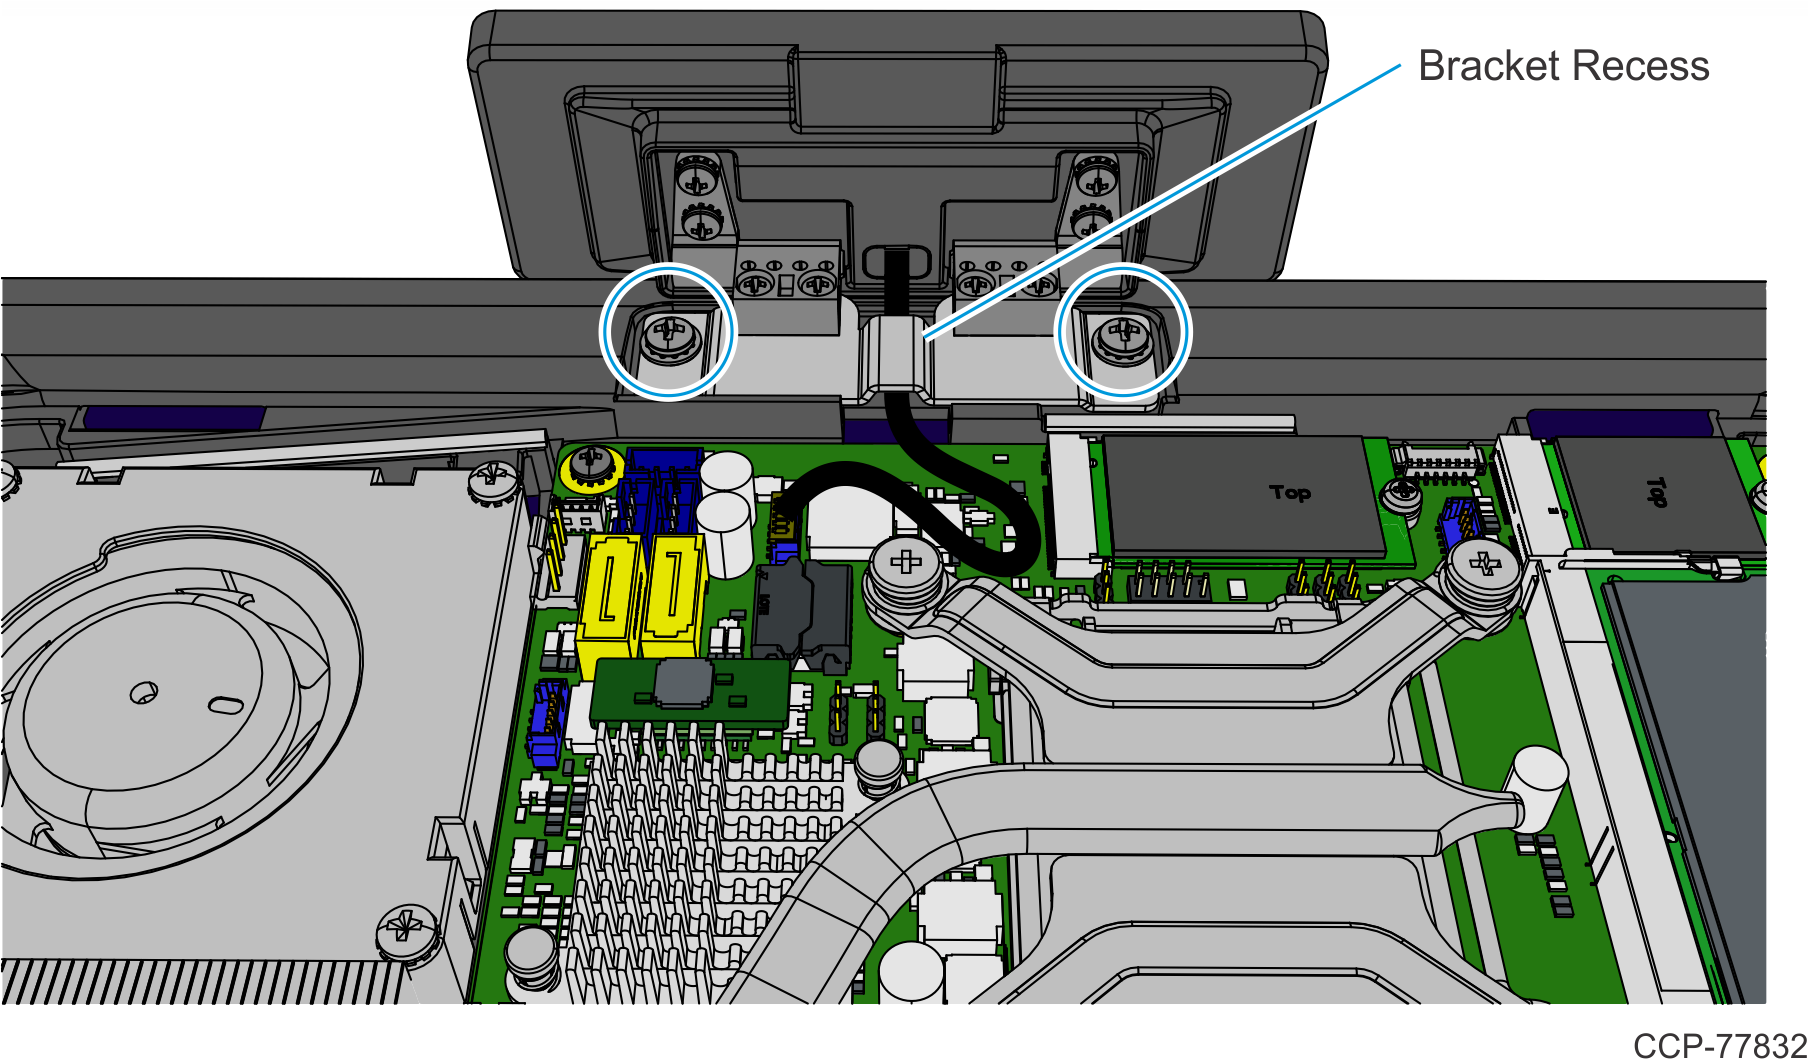
- Route the Cable through the Bracket recess and install the Bracket on the display housing (2 screws).
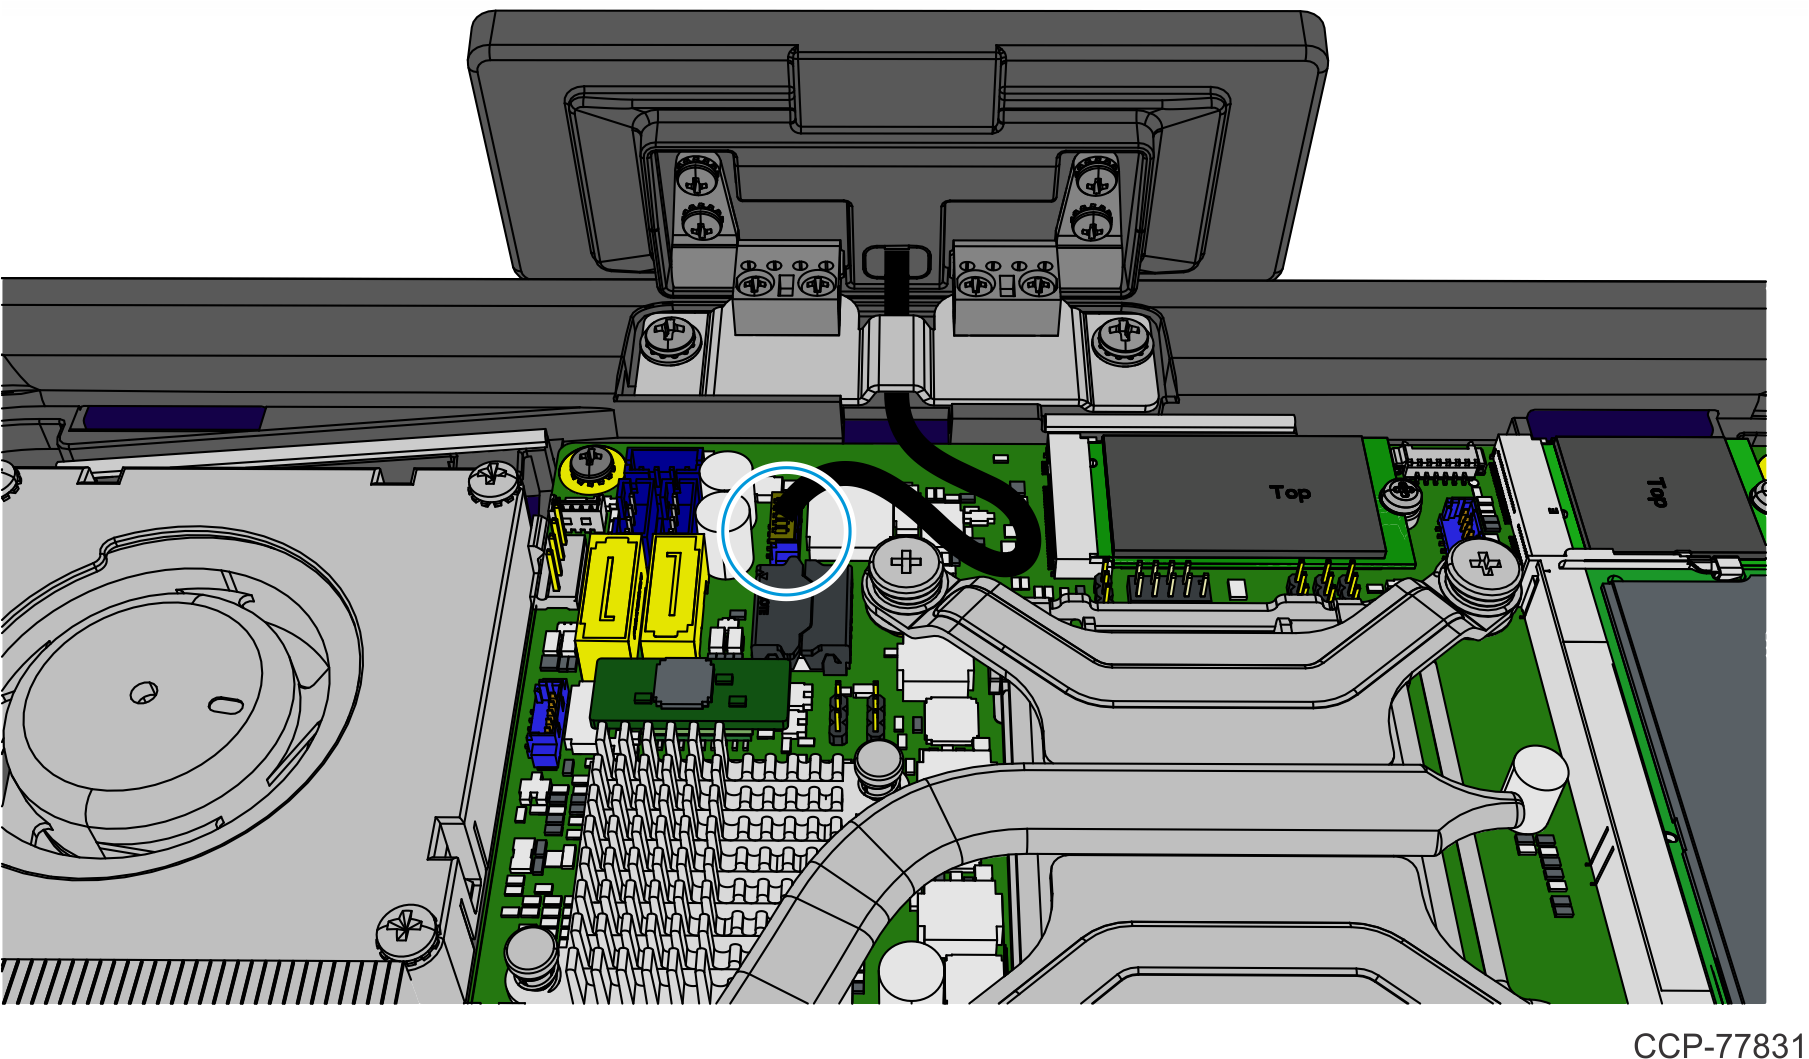
- Connect the APA Graphical Display Cable to the Motherboard.
- Reinstall the Display Back Cover.
- Reconnect the 180-degree USB-C Cable and Ethernet Cable.
- Reinstall the Cable Cover.
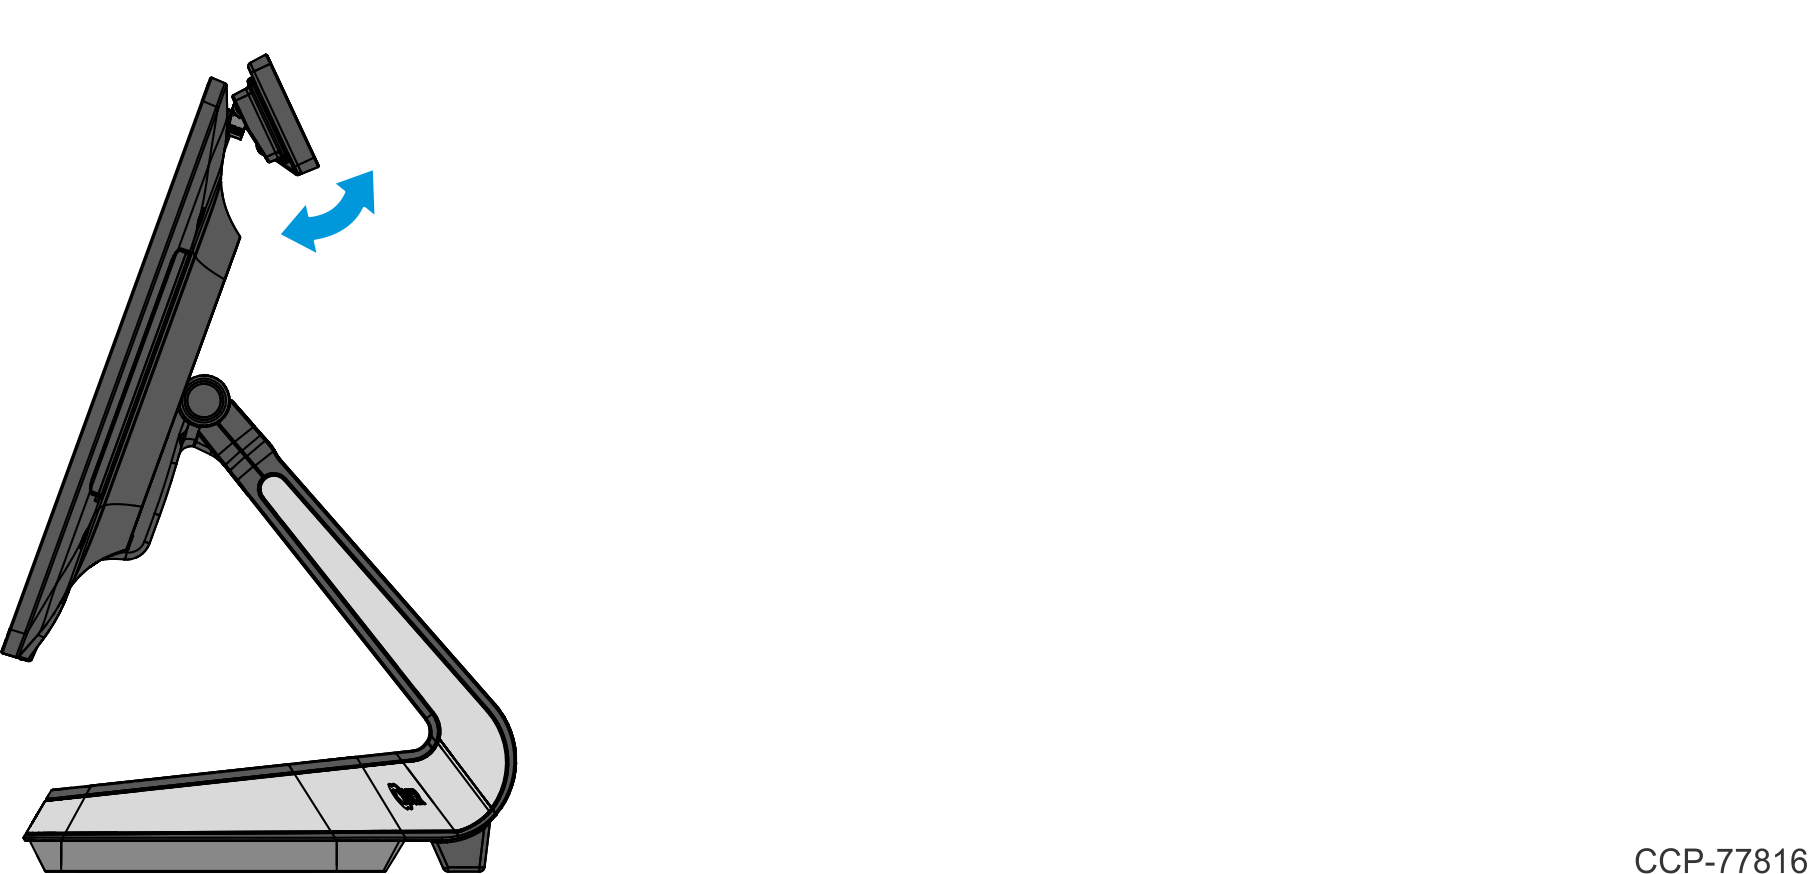
- Pivot the APA Graphical Display into position.