7772-K149 External CX Keypad Module
This kit provides an external keypad module for the NCR CX7 All-in-One POS (7772).
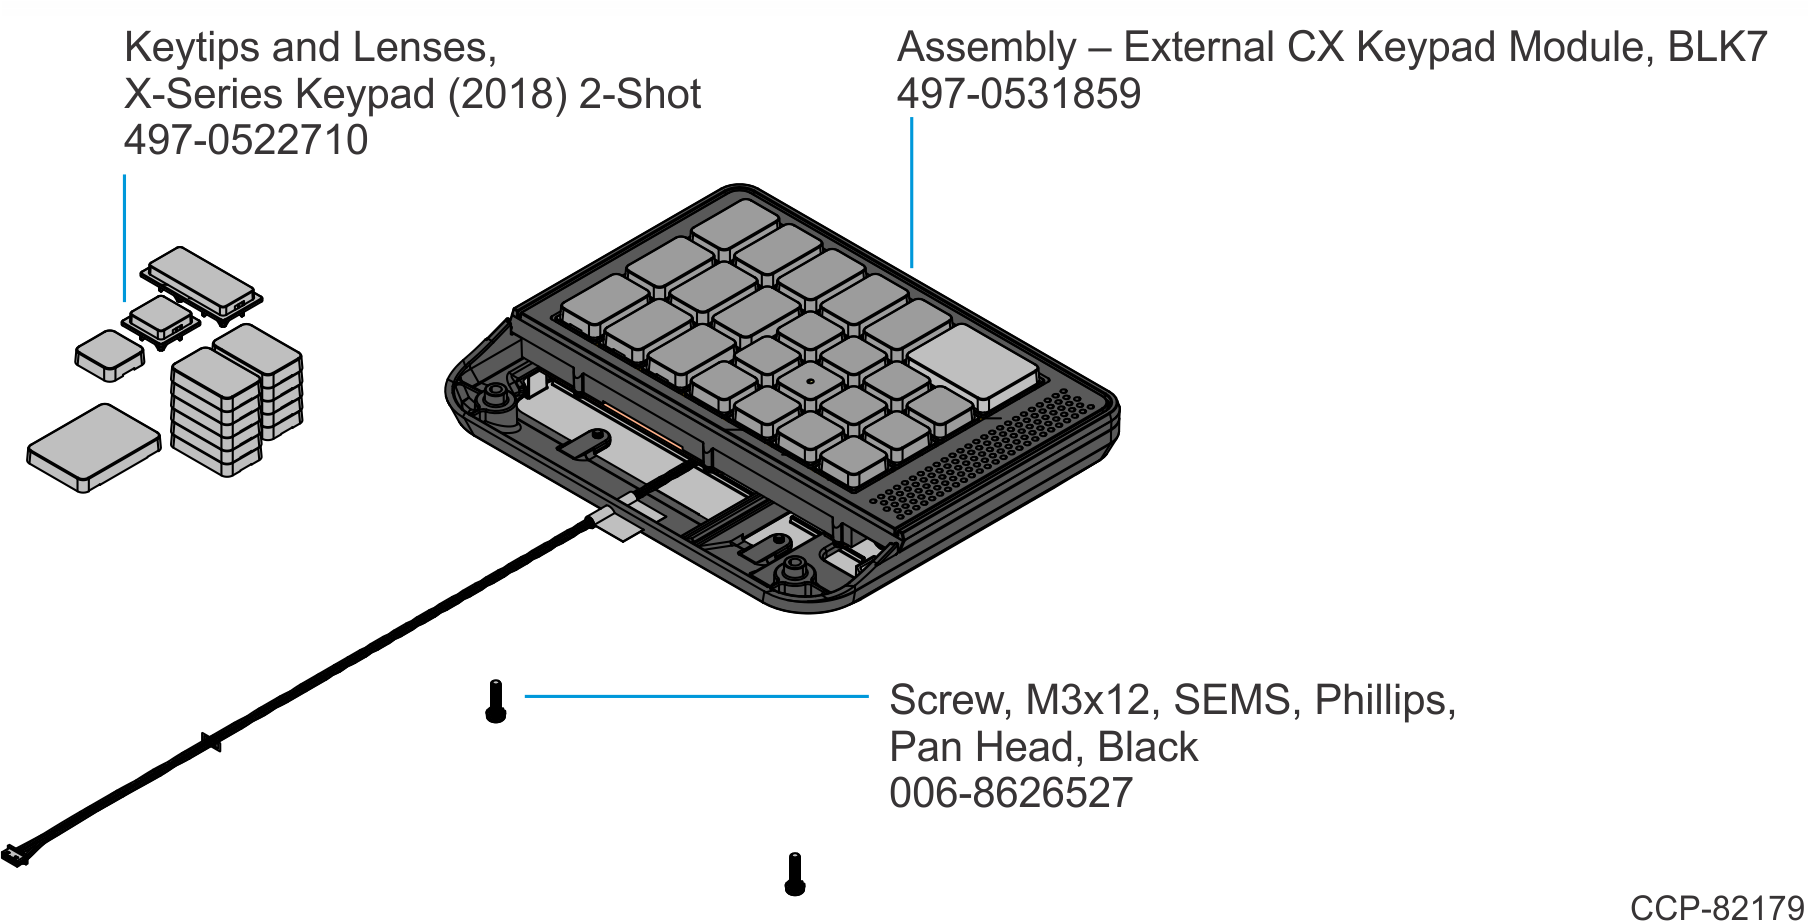
Kit Contents
Installation Procedure
Warning
Disconnect the AC power cord from the AC outlet and wait 30 seconds before servicing the terminal.
- Lay the Display face down on a flat surface.Note
Always use a soft material (cloth, foam) to protect the display screen when placing the terminal face down.
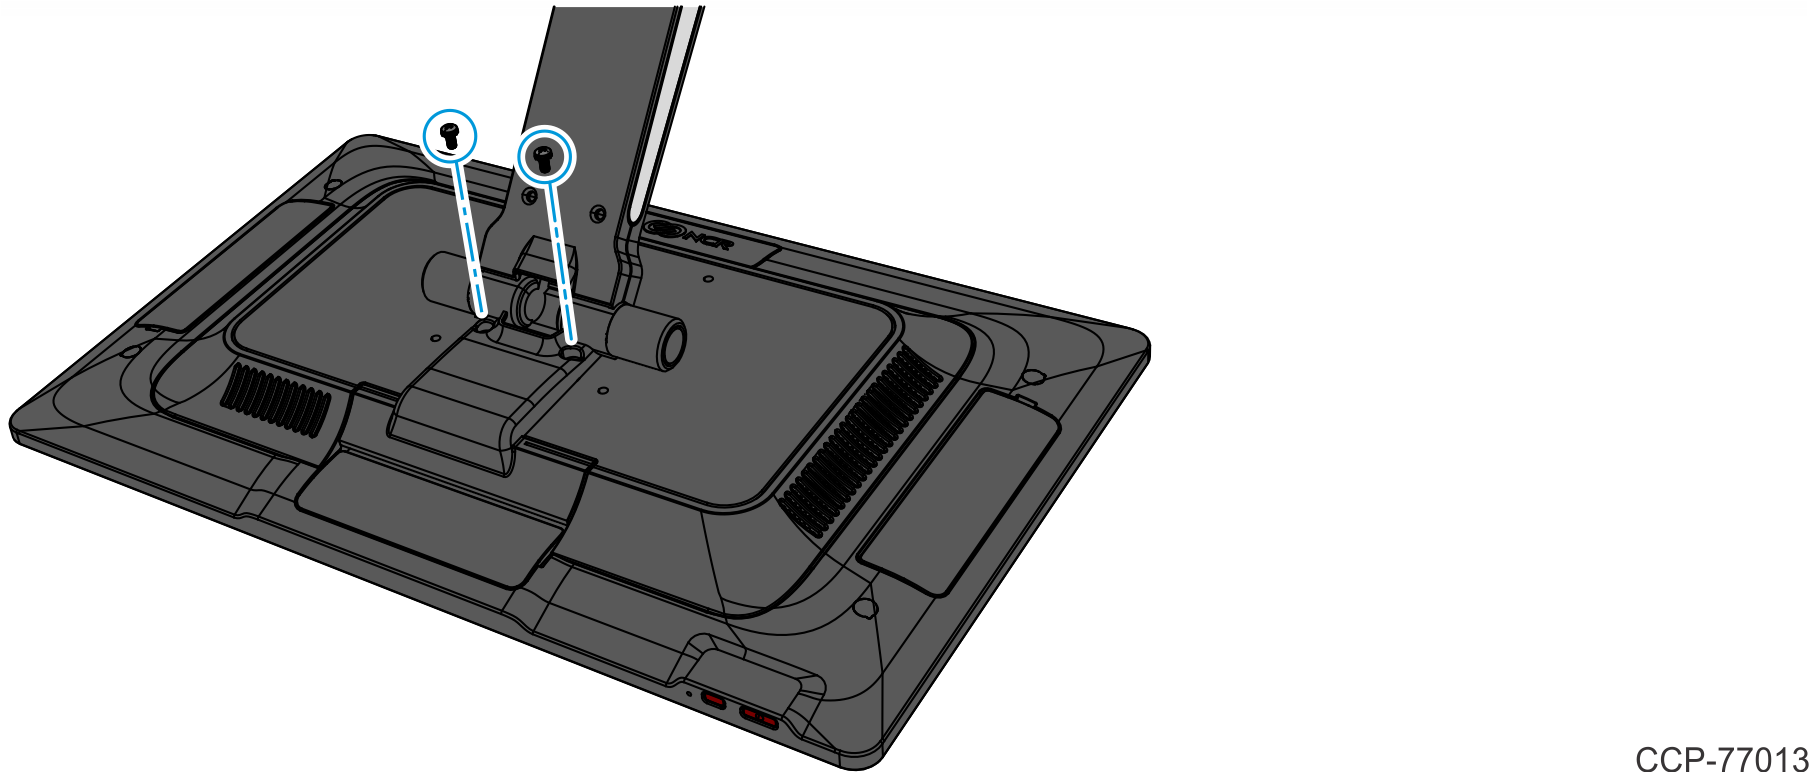
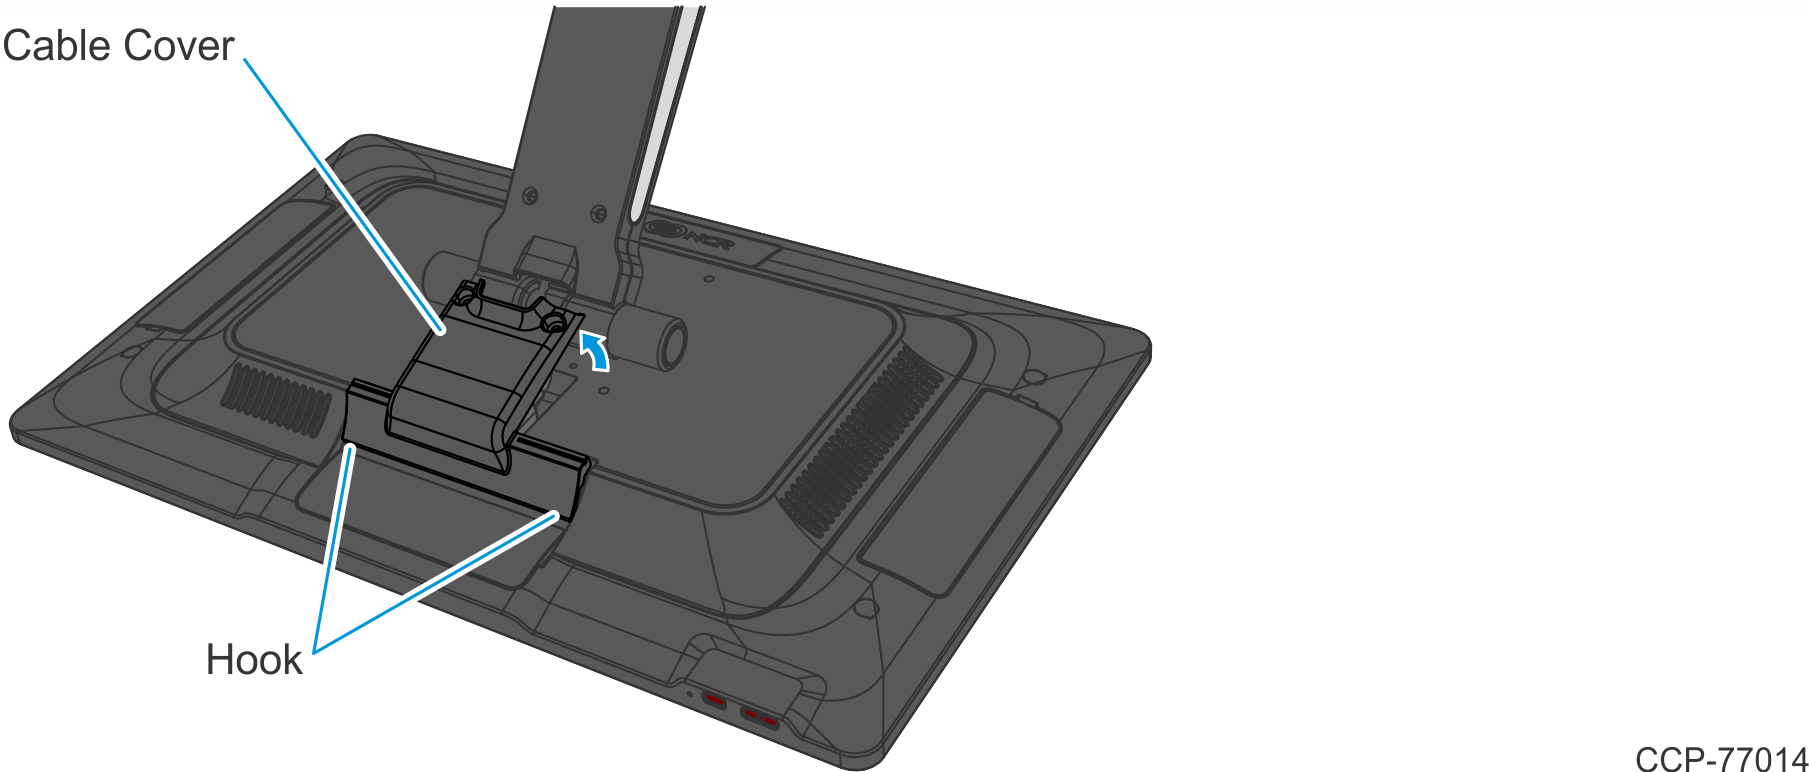
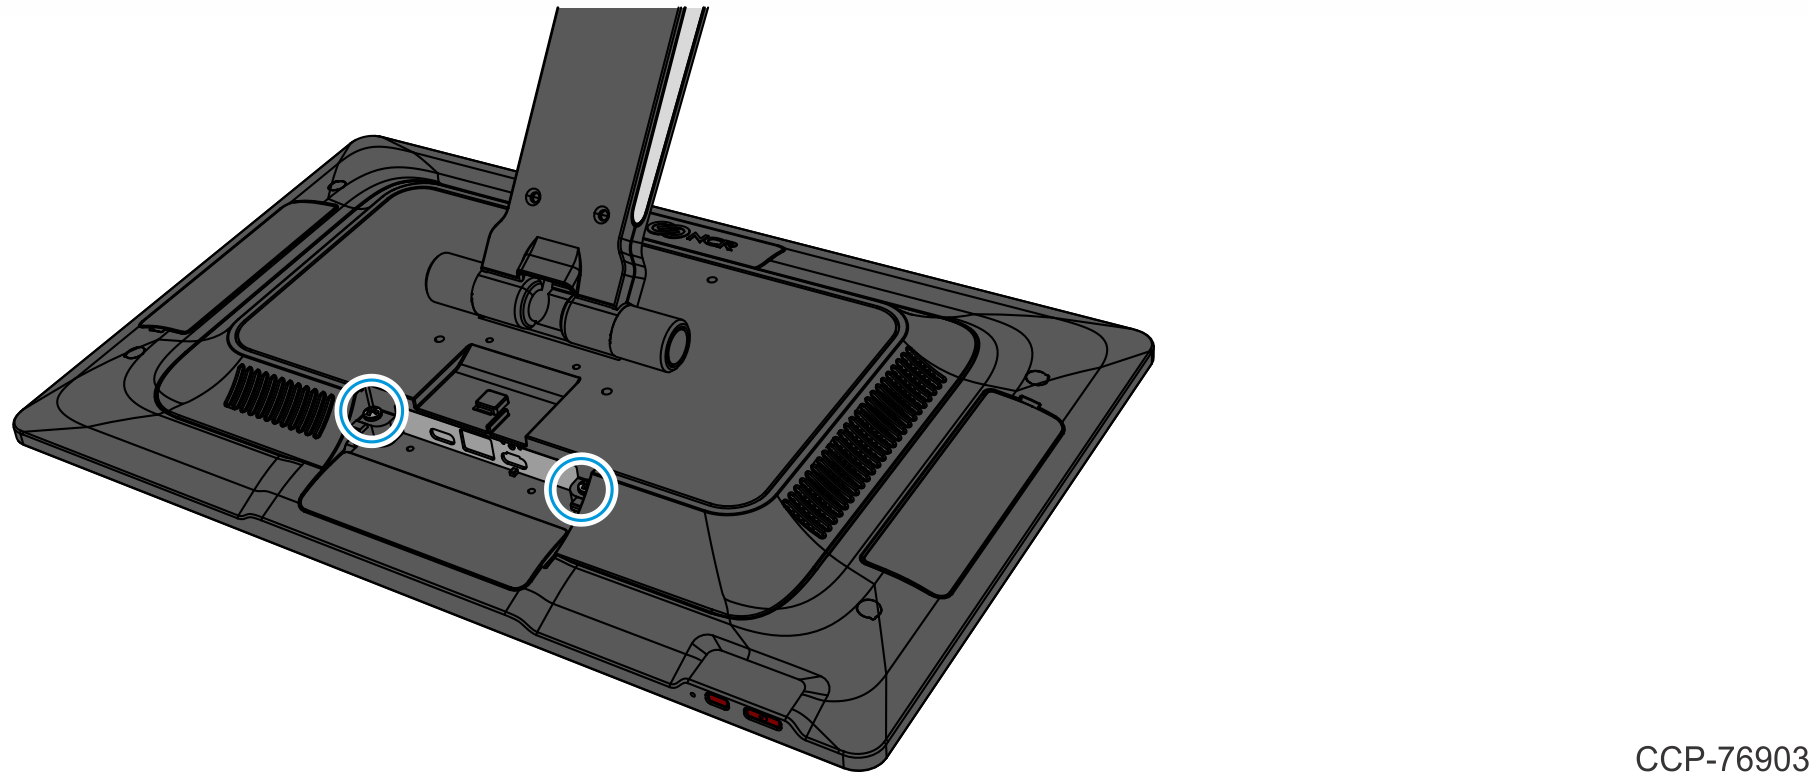
- Remove the Cable Cover.
- Remove the two (2) screws that secure the Cable Cover to the Back Cover.
- Rotate and unhook the Cable Cover from the Back Cover.
- Remove the two (2) screws that secure the Cable Cover to the Back Cover.
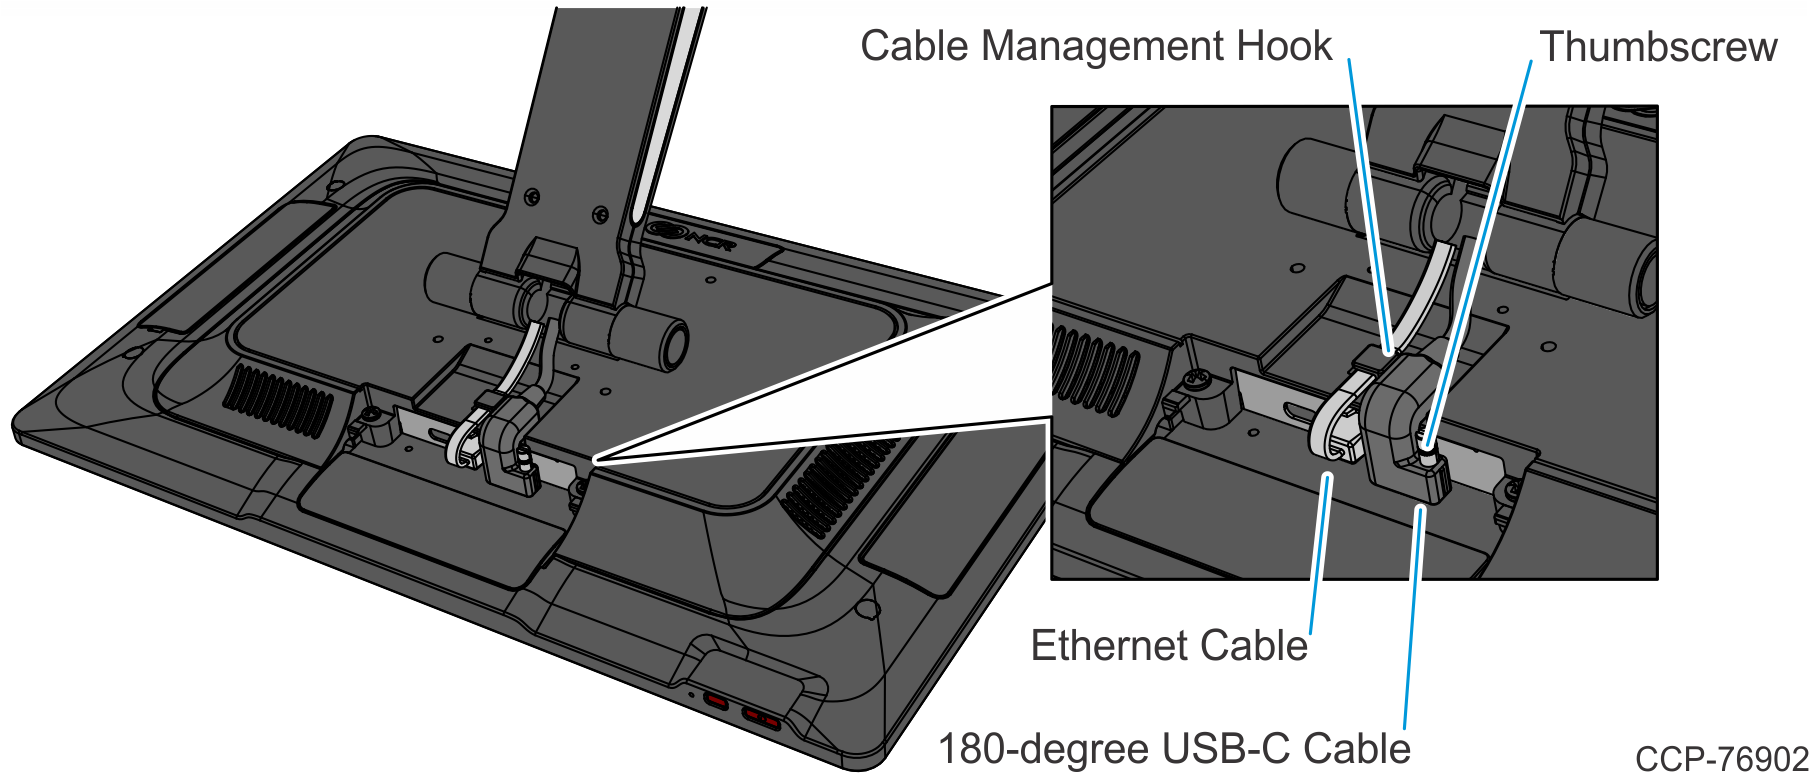
- Disconnect the Cables.
- Loosen the thumbscrew of the 180-degree USB-C Cable then disconnect the Cable.
- Remove the Ethernet Cable from the Cable Management Hook then disconnect the Cable.
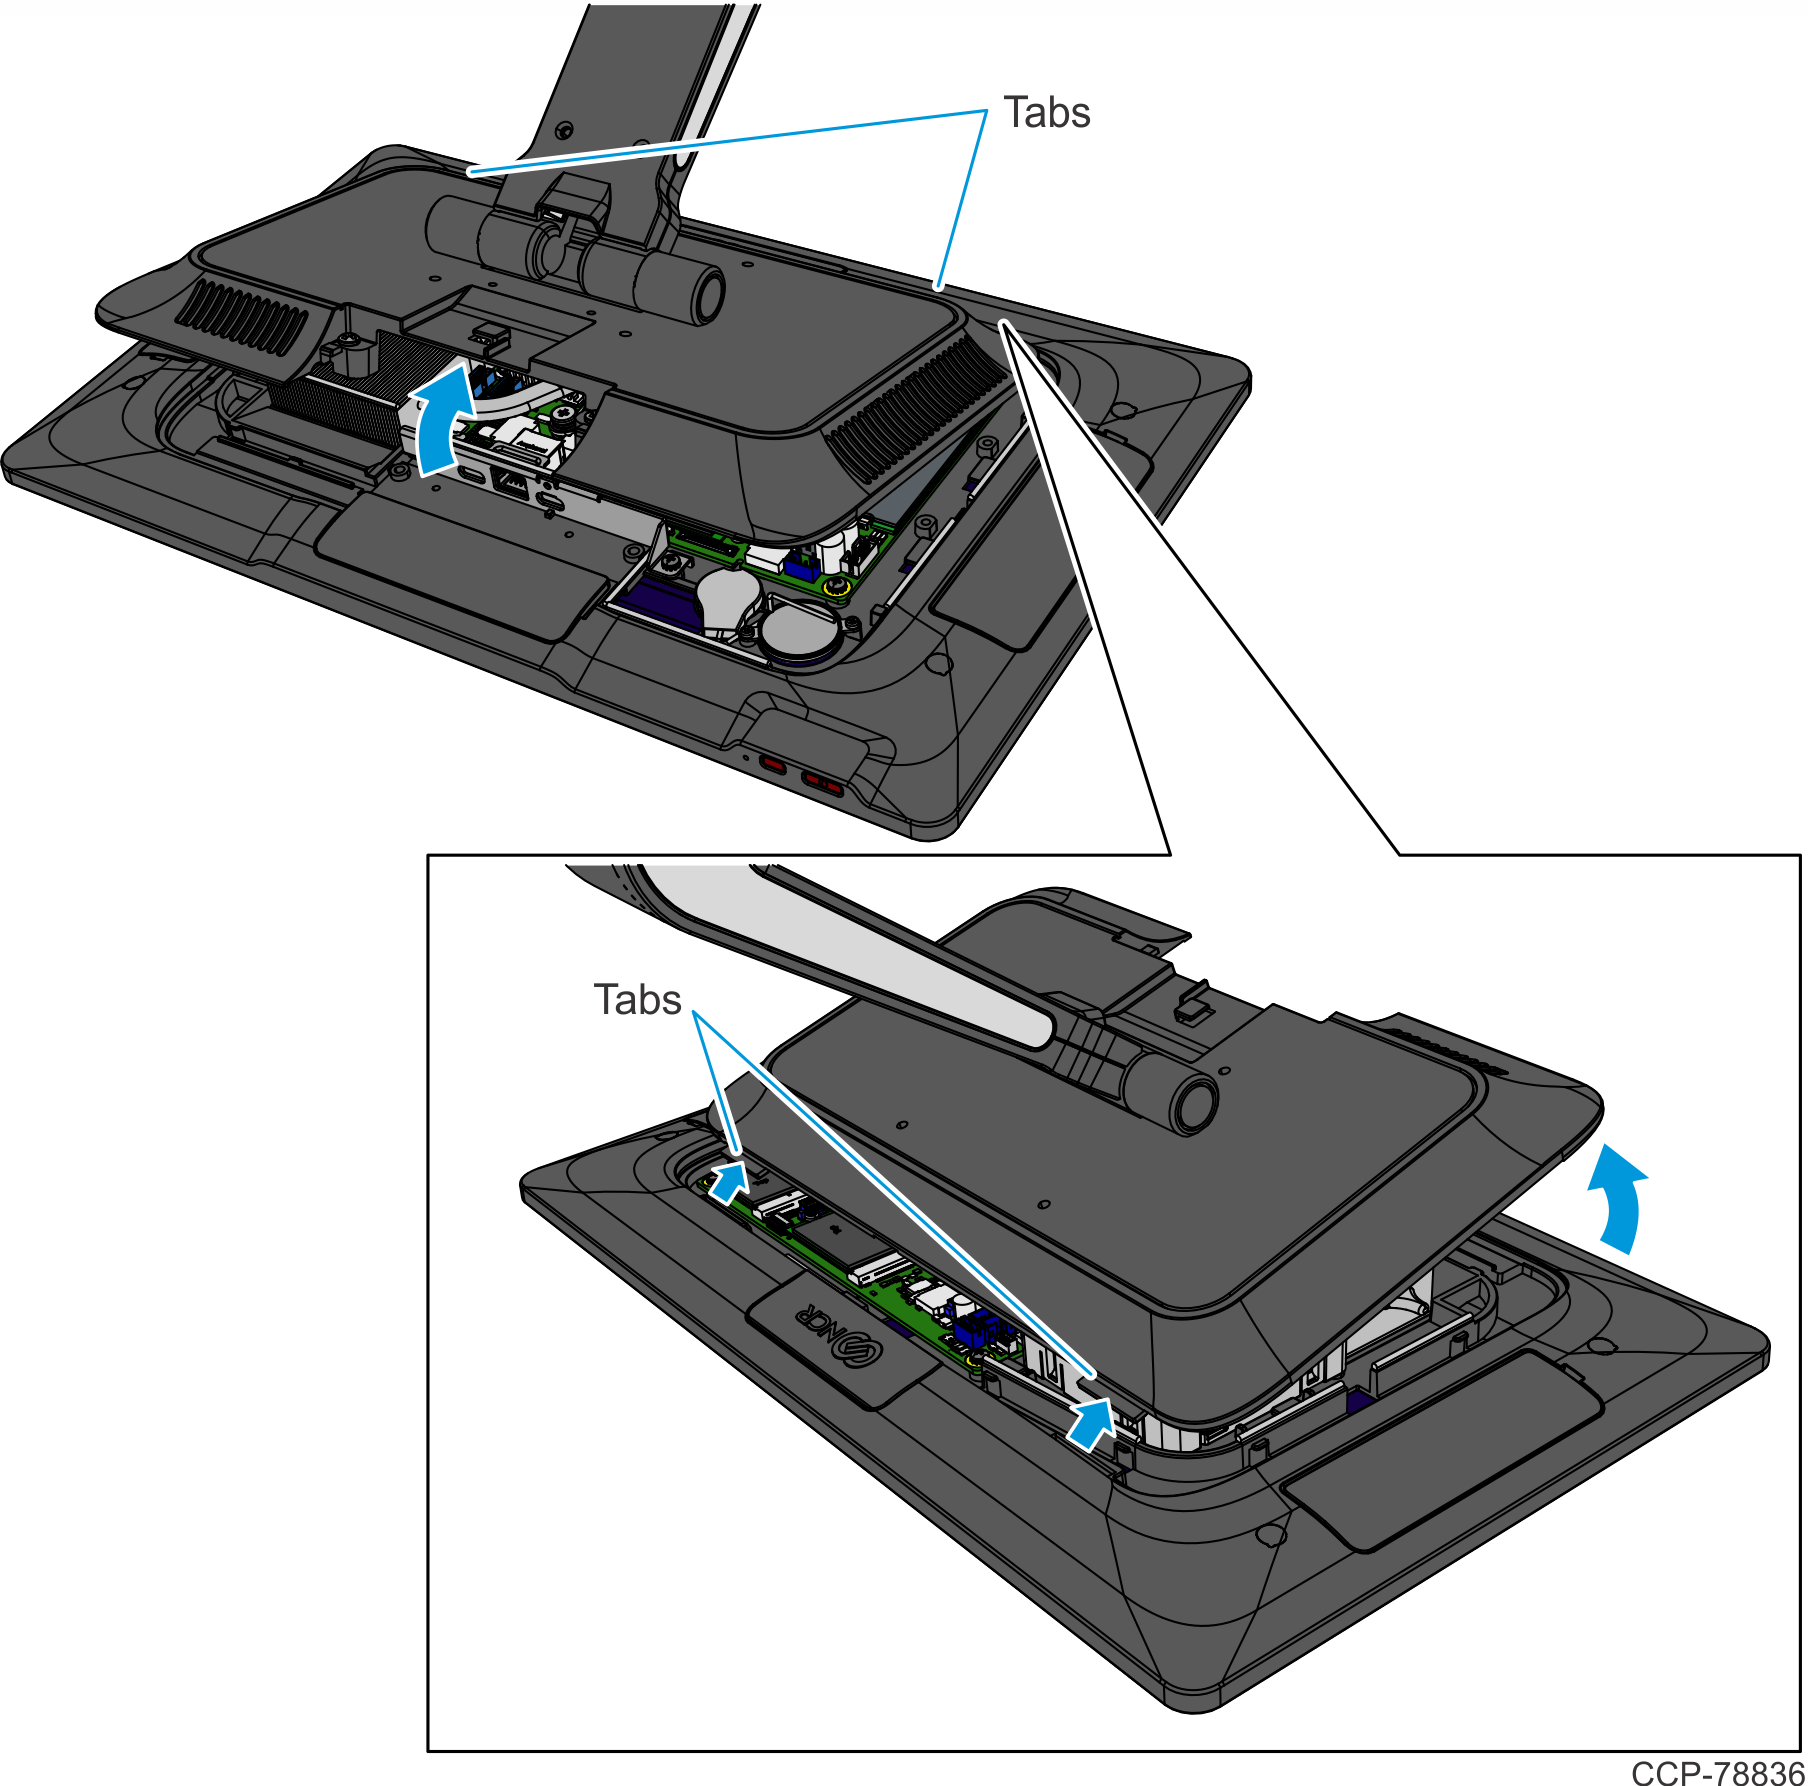
- Loosen the two (2) captive screws that secure the Back Cover to the Display.
- Rotate the Back Cover away from the Display and unhook the Back Cover Tabs.
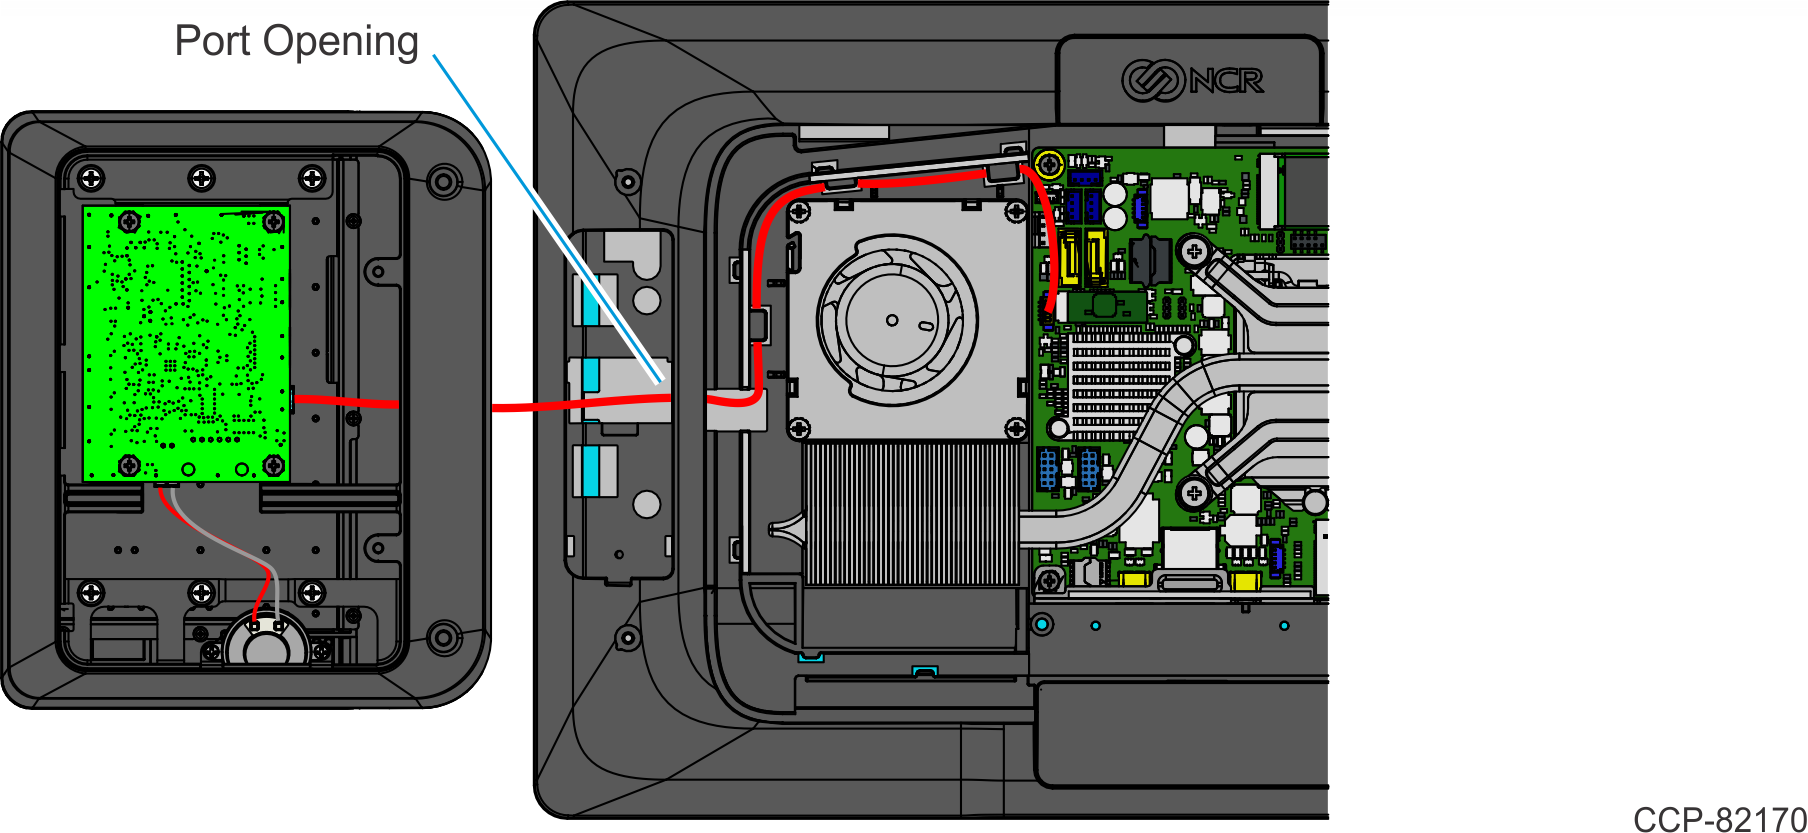
- Route the Keypad Cable through the Port opening.
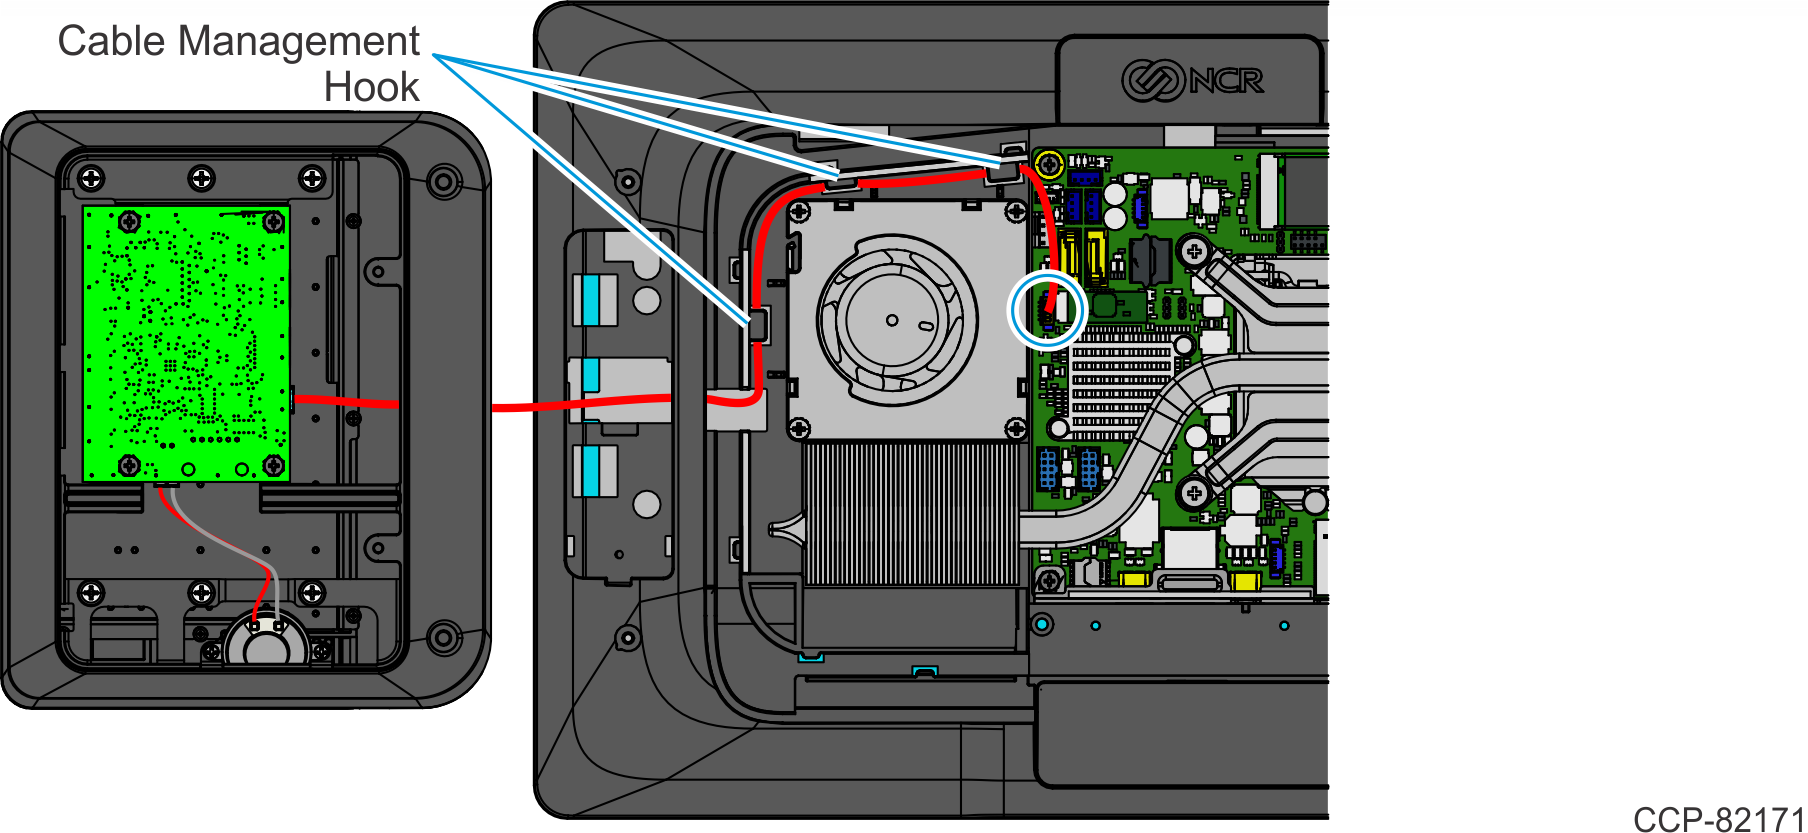
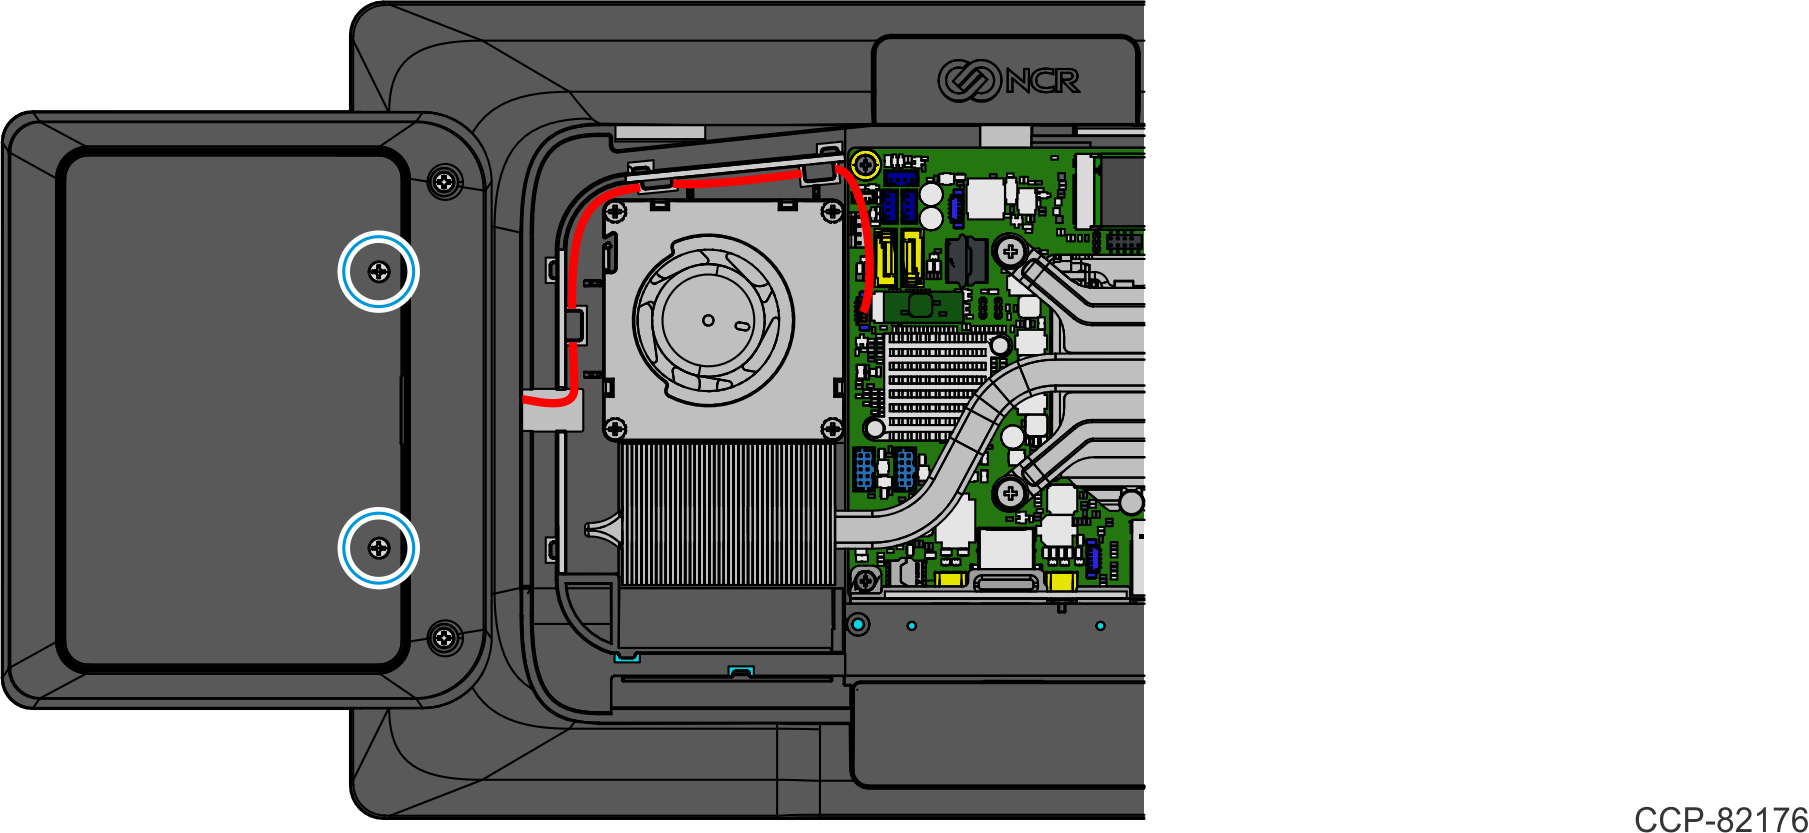
- Route and secure the Cable under the Cable Management Hooks as shown, then connect the Cable to the Motherboard (USB Port A).
- Pull the excess cable through the Port opening and align the Keypad mounting holes with the mounting holes on the display housing.
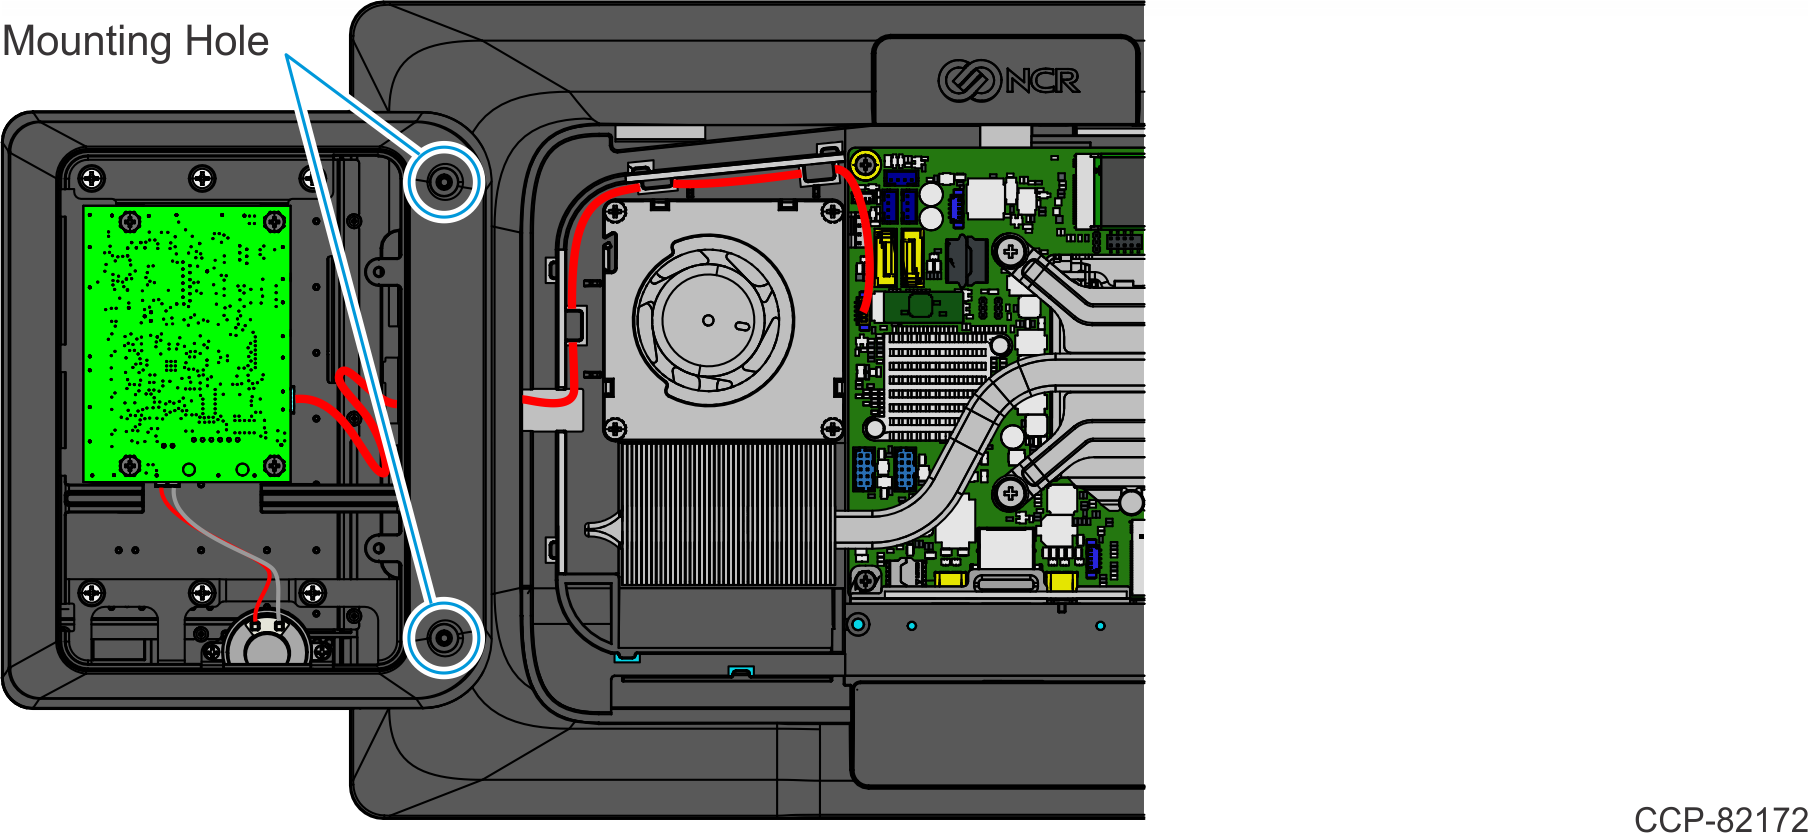
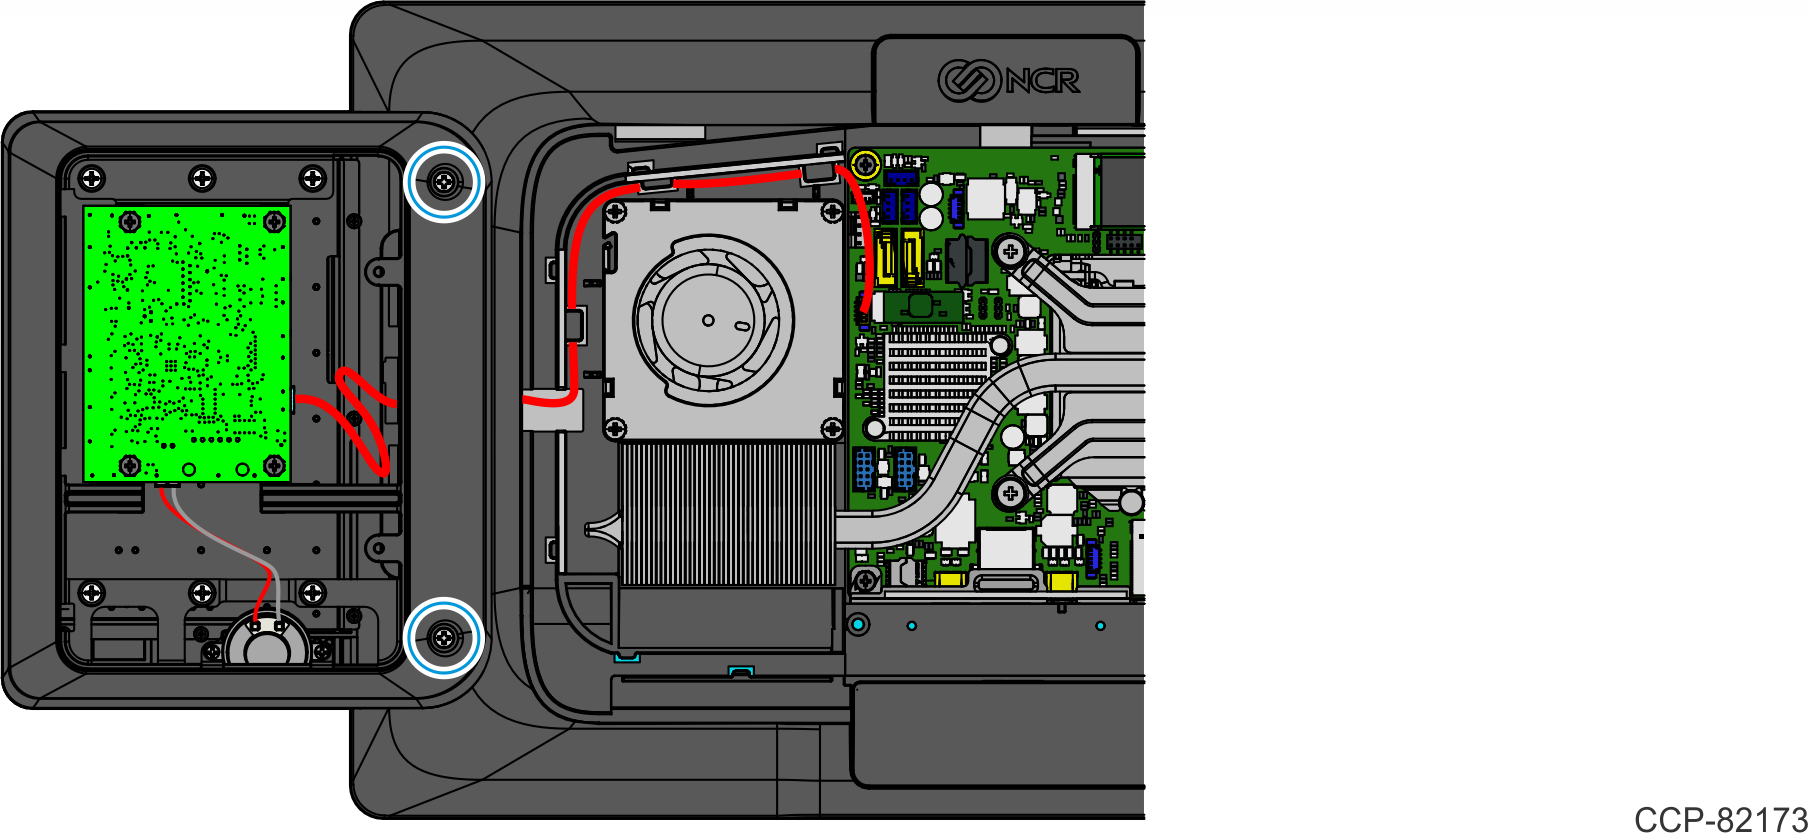
Secure the Keypad with two (2) screws.
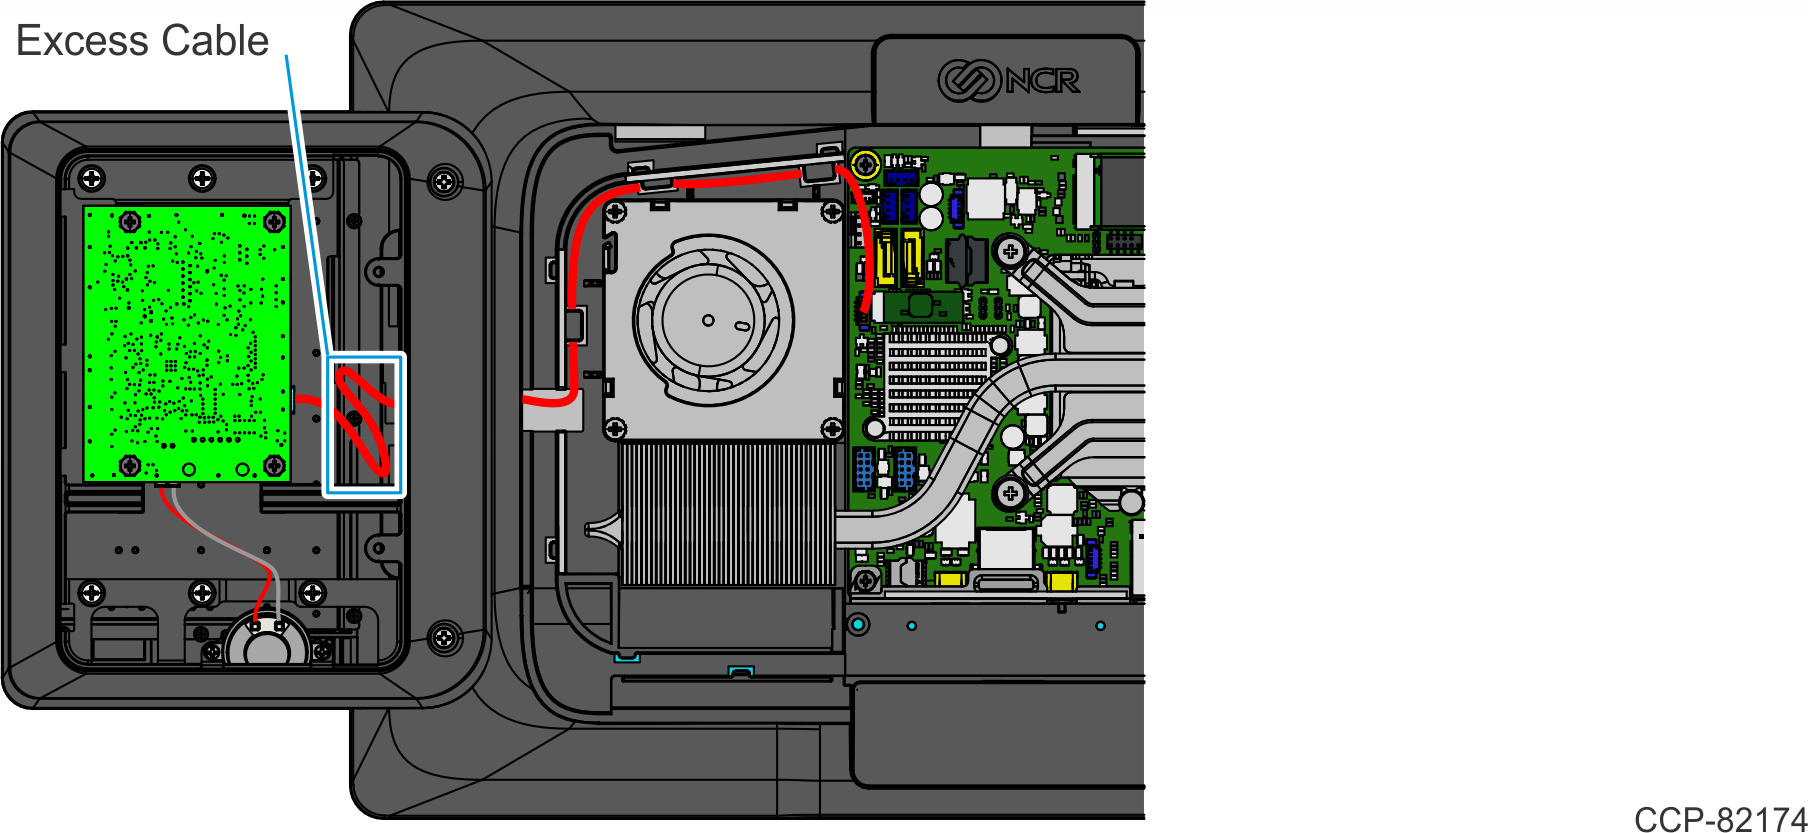
Tuck the excess cable in the location shown.
- Install the Keypad Back Cover.
- Insert the Keypad Back Cover Tabs into the openings in the back of the Keypad and snap into place.
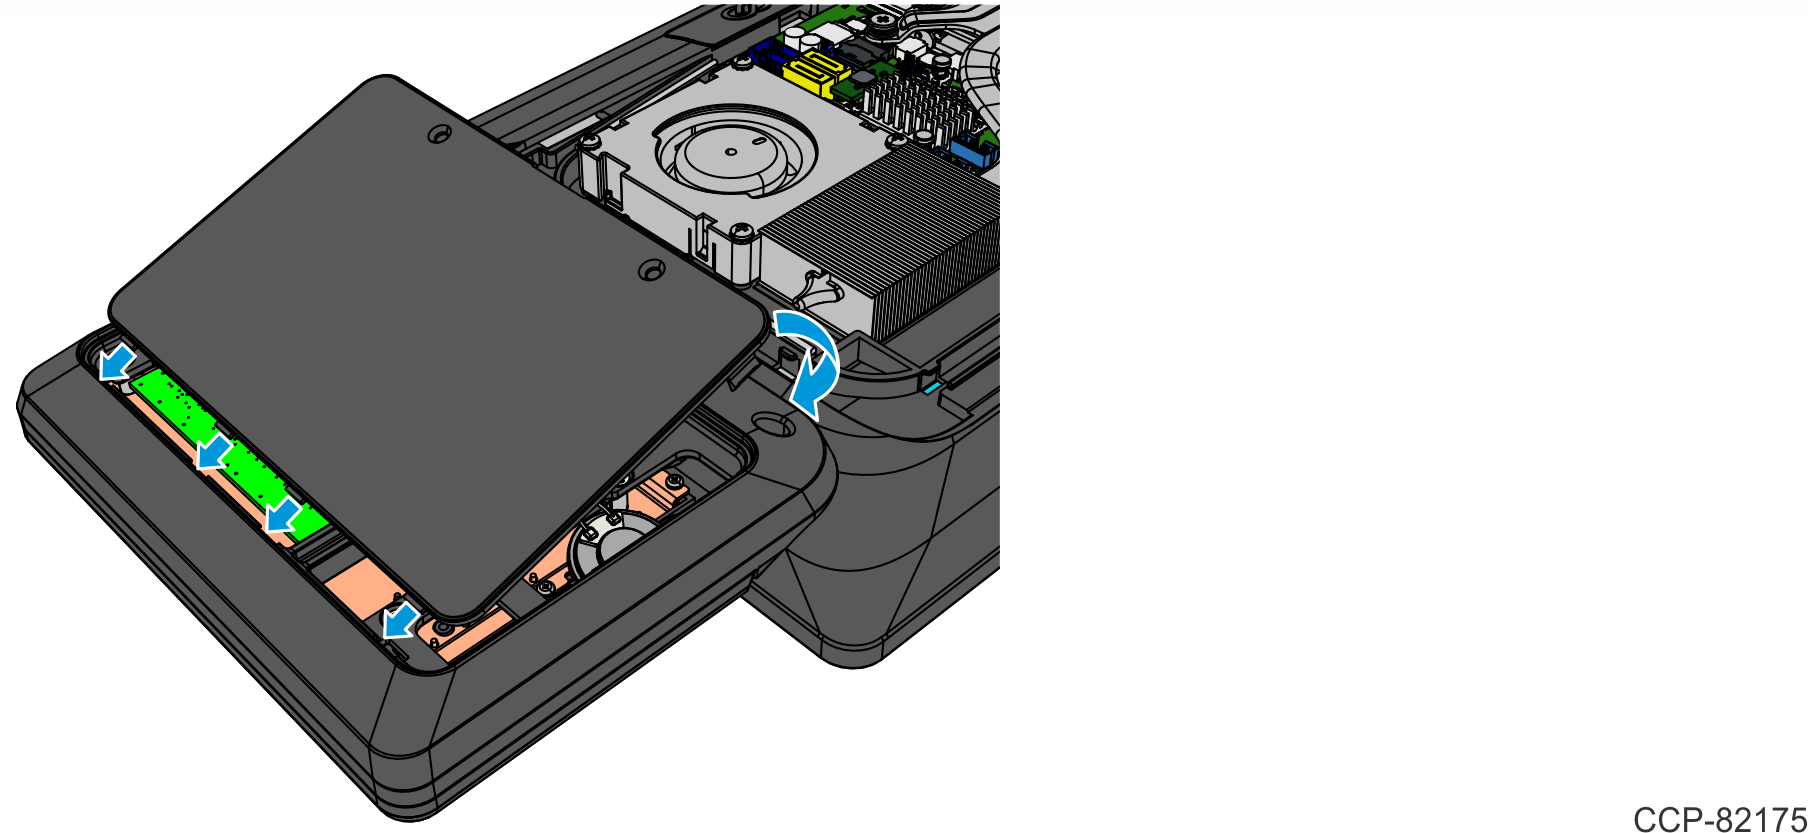
- Secure the Keypad Back Cover with two (2) screws.
- Insert the Keypad Back Cover Tabs into the openings in the back of the Keypad and snap into place.
- Reinstall the Display Back Cover.
- Reconnect the 180-degree USB-C Cable and Ethernet Cable.
- Reinstall the Cable Cover.
