Installing the 7895 Scanner/Scale
To install the 7895 Scanner/Scale in the Self-Checkout unit, follow these steps:
- Check and ensure that the leveling screws of the Scanner/Scale are leveled. If necessary, adjust the four (4) leveling screws located on the bottom of the device.
- Connect the cables to their corresponding ports on the Scanner/Scale.Caution
Check and ensure that the right cables are correctly plugged into the Scanner/Scale Ports.
Cable Scanner/Scale Port Camera cable
Internal Port
Main cable POS Port Scale Display (if applicable) 7895 Single or Dual Head Scale Pole Display
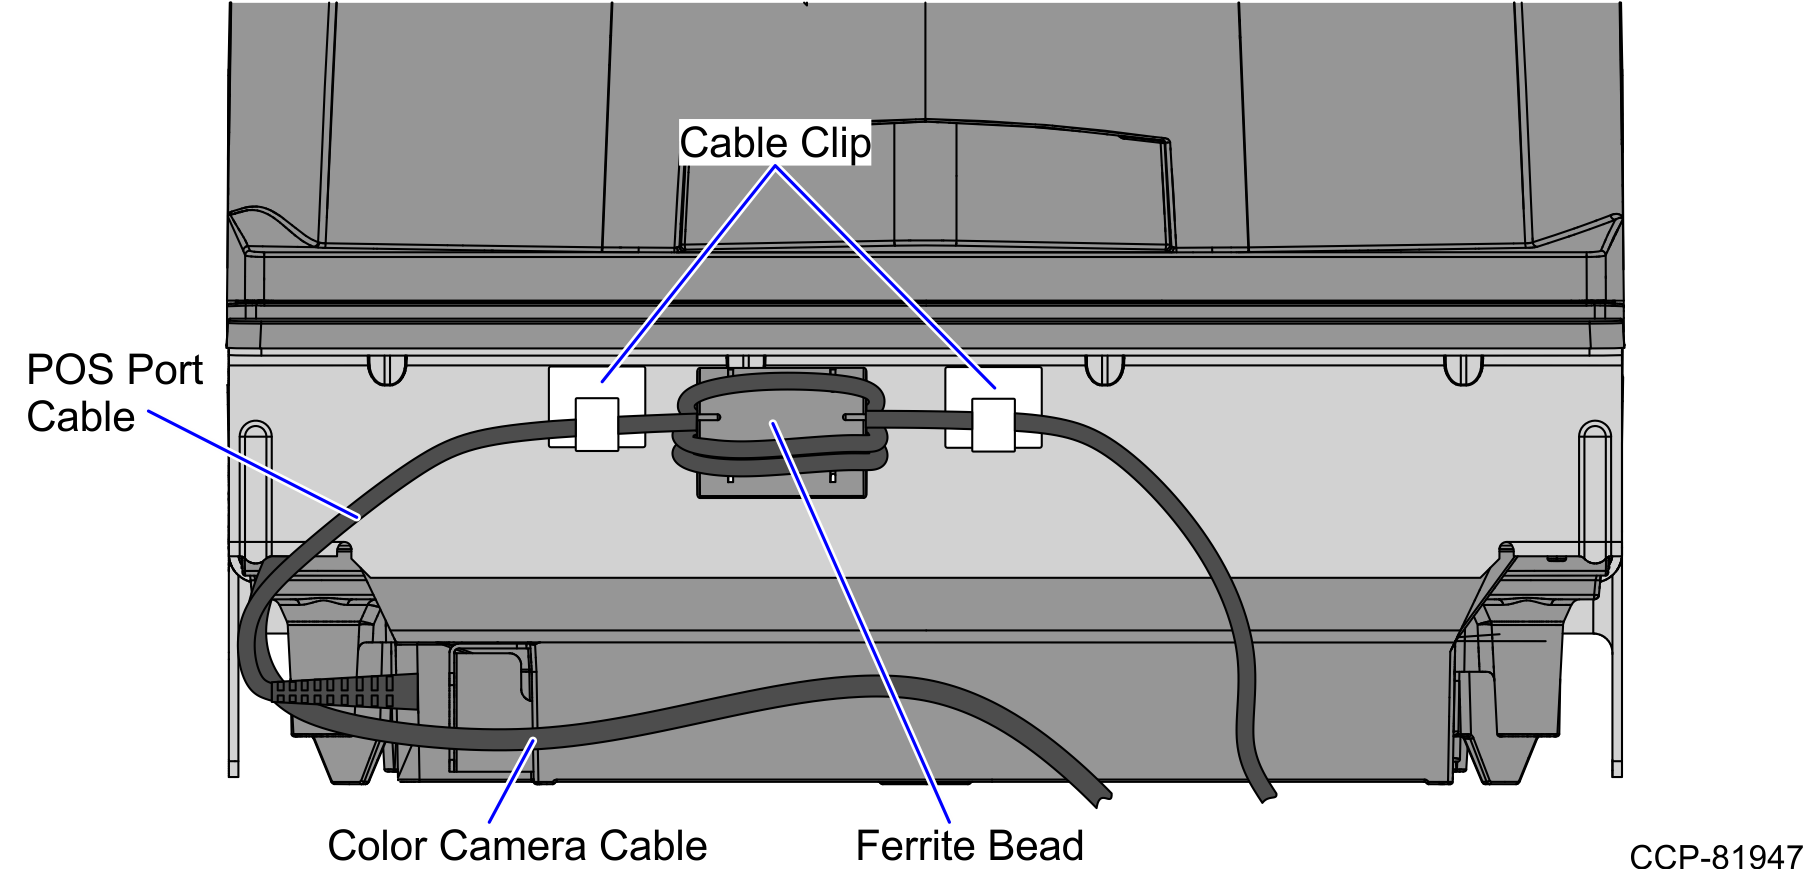
- Route the POS Port cable to the back of the Scanner/Scale and secure the cable at each end of the Ferrite Bead to the corresponding cable clips as shown in the image below.
- Tilt the Scanner/Scale while placing it in the Scanner Bucket, as shown in the image below.

- Install the Scanner/Scale Top Plate. For more information, refer to Installing the 7895 Scanner/Scale Top Plate.Caution
The top of the Top Plate is still part of the weighing surface. Ensure that the cables are not touching the top of the Top Plate.