Installing the 7895 Scanner/Scale
To install the NCR 7895 Scanner/Scale in the Self-Checkout unit, follow these steps:
Remove the existing 7895 Scanner/Scale. To streamline the installation procedure, install the Electronic Article Surveillance (EAS) components before installing the Scanner/Scale in the Self-Checkout unit.
- Check and ensure that the leveling screws of the Scanner/Scale are leveled. If necessary, adjust the four (4) leveling screws located on the bottom of the device.
- Connect the cables to their corresponding ports on the Scanner/Scale.Caution
Check and ensure that the right cables are correctly plugged into the Scanner/Scale Ports.
Cable Scanner/Scale Port Camera cable
NoteThe Color Camera USB Cable is not shipped with the 7895 Scanner/Scale unit. It is purchased separately and needs to be installed during the initial setup of the unit.
Internal Port
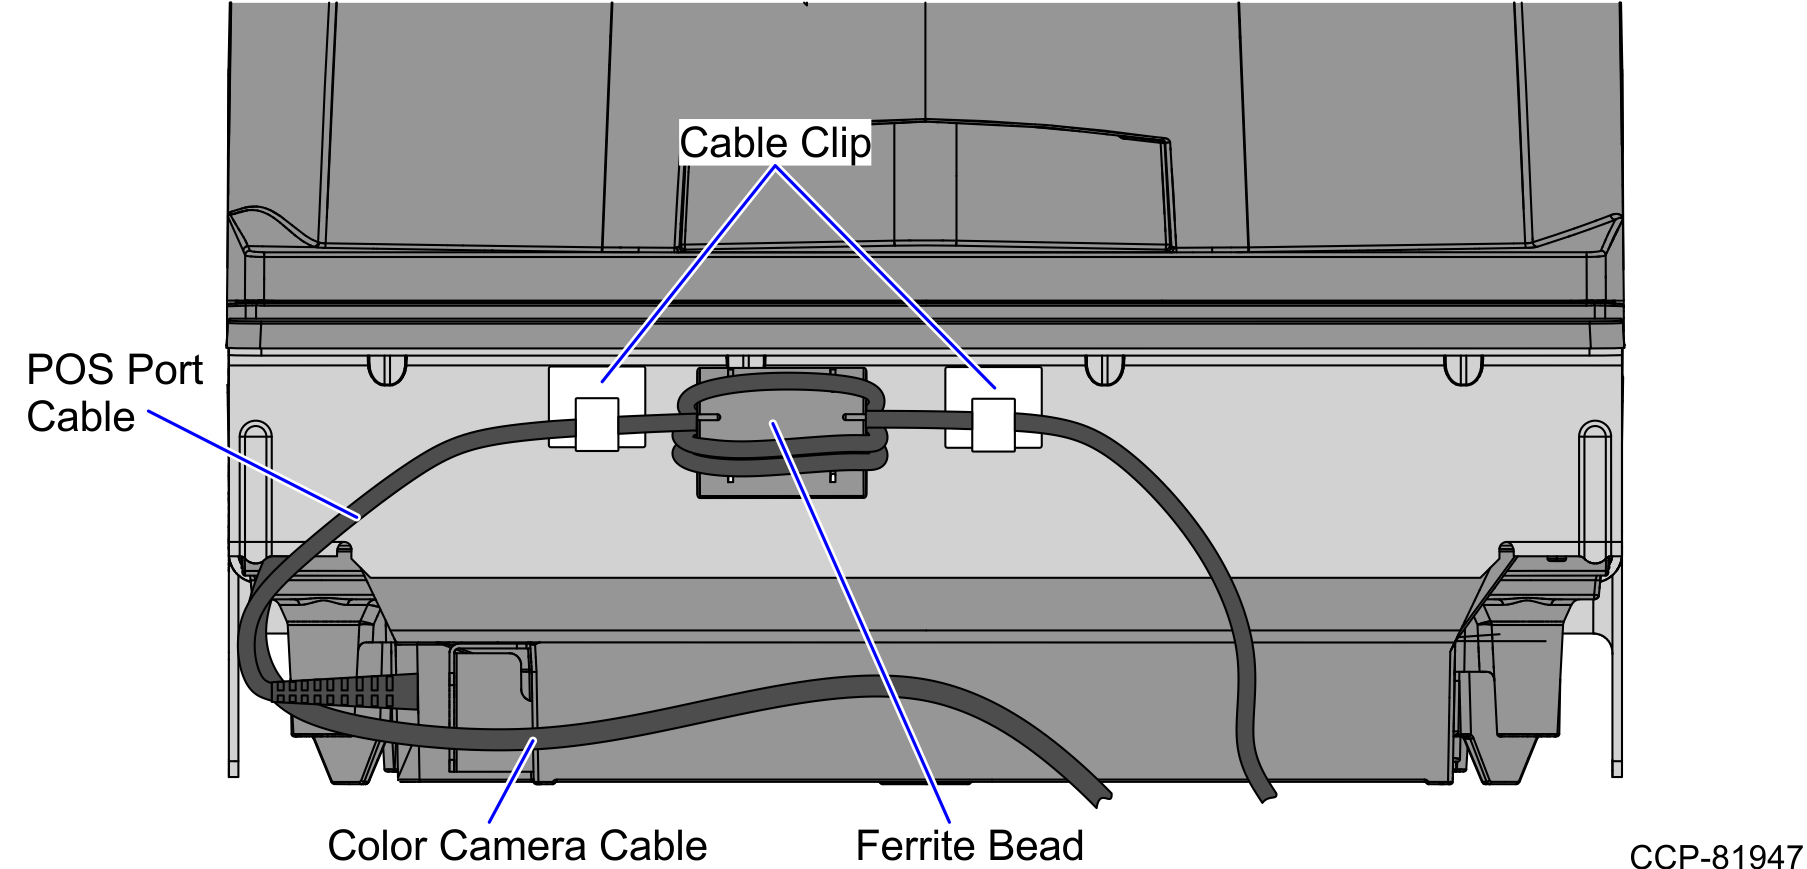
Main cable POS Port Scale Display (if applicable) 7895 Single or Dual Head Scale Pole Display - Route the POS Port cable to the rear of the Scanner/Scale and secure the cable at each end of the Ferrite Bead to the corresponding cable clips, as shown in the image below.
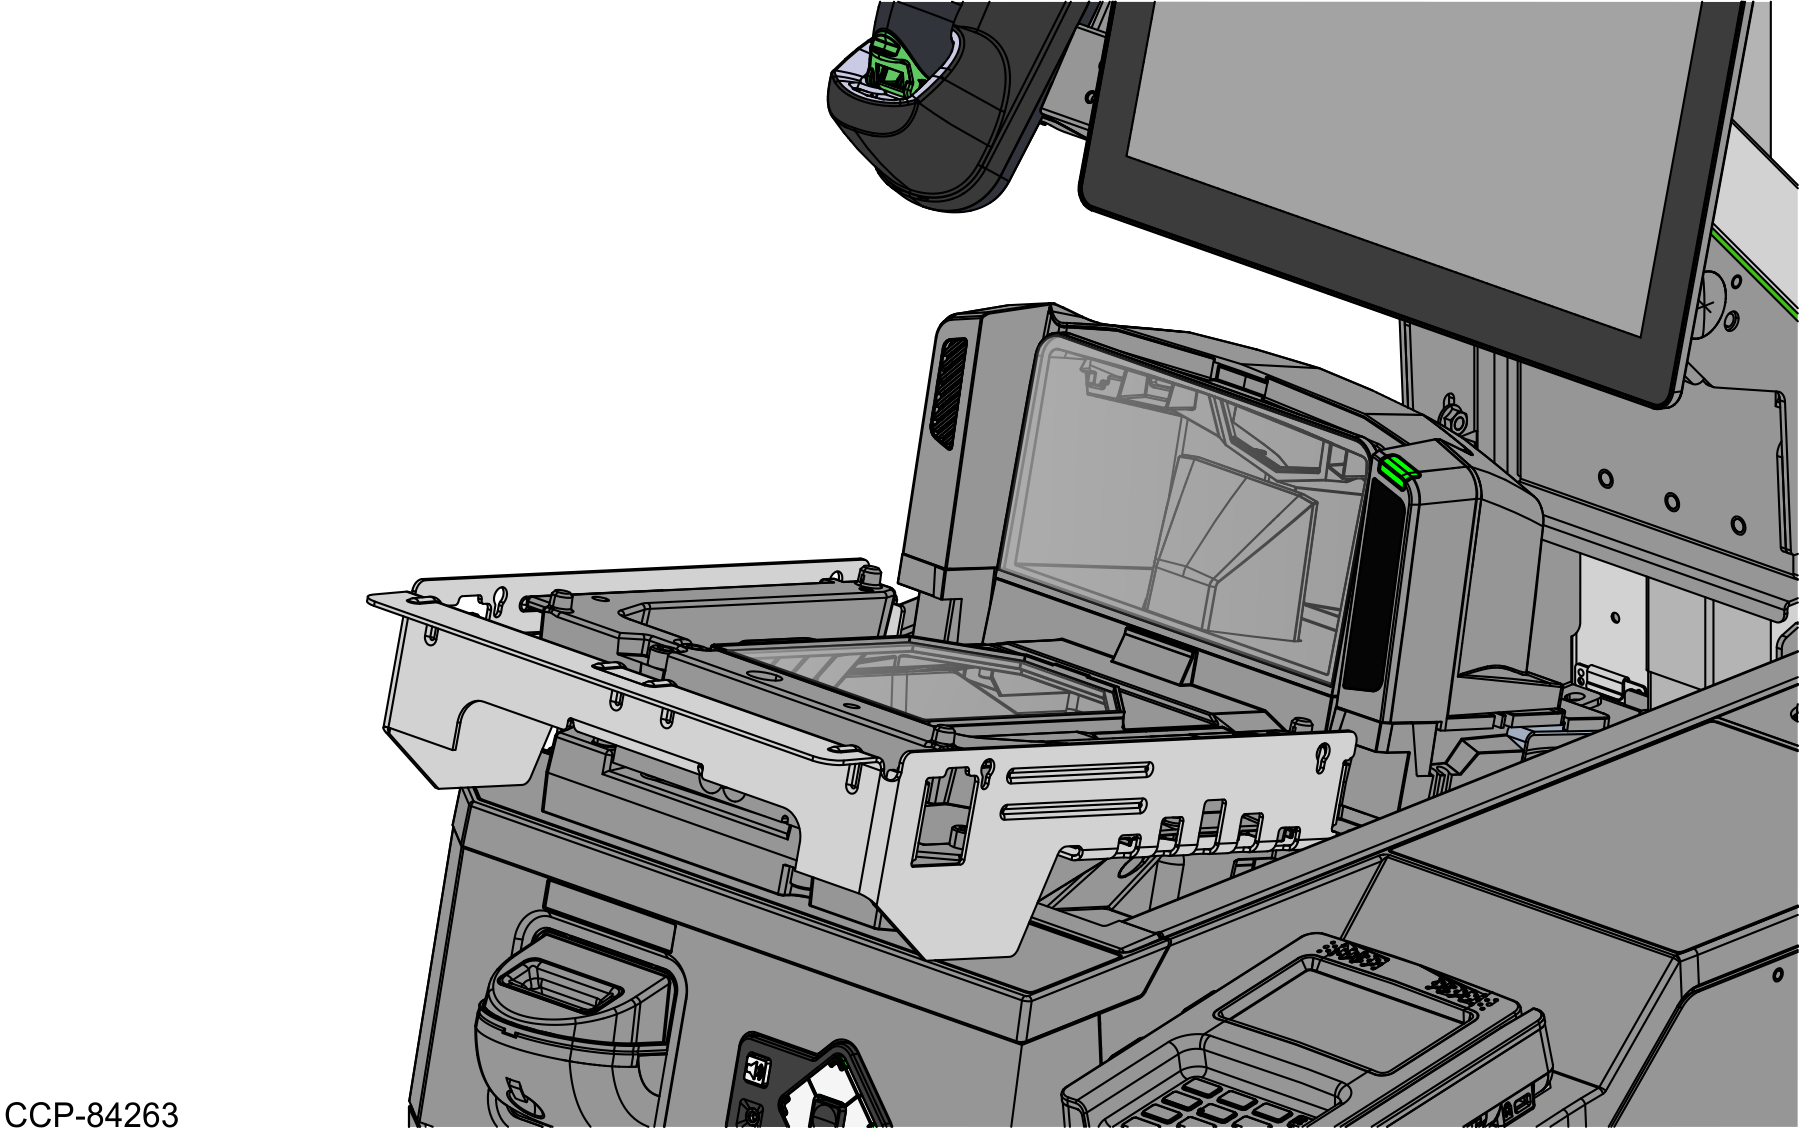
- Tilt the Scanner/Scale while placing it in the Scanner Bucket, as shown in the image below.
- Install the Scanner/Scale Top Plate. For more information, refer to Installing the 7895 Scanner/Scale Top Plate.Caution
The Top of the Top Plate is still part of the weighing surface. Ensure that the cables are not touching the Top of the Top Plate.
The Scanner/Scale must be calibrated before the system goes live. For more information, refer to NCR 7895 Scanner/Scale Calibration Quick Reference Guide (BCC5-0000-5605).