Installing Spill Protection Gasket
To install the Spill Protection Gasket, follow these steps:
- Turn off the SelfServ Checkout software and hardware systems.
- Unlock the Tower Frame from the back panels using a key.
- Lift the Terminal Display from Tower Frame.

- Detach the Scanner Shroud from the Shroud Bracket magnets, as shown in the image below.

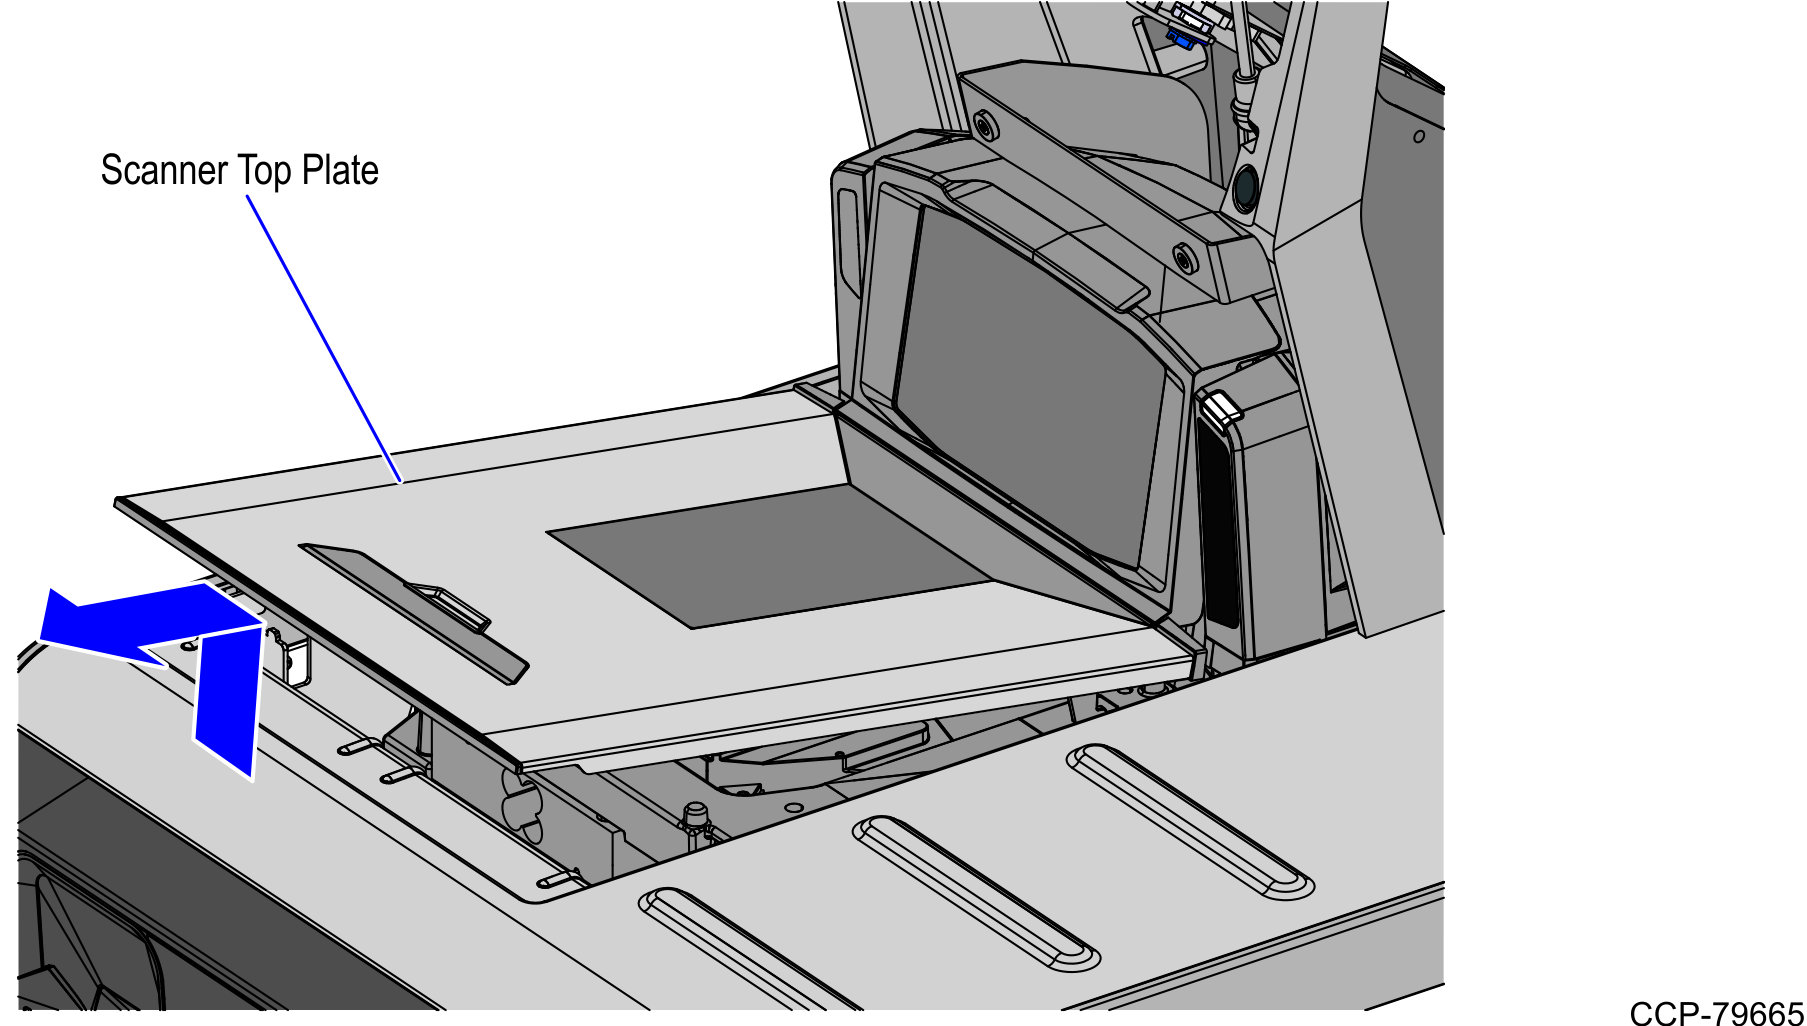
- Remove the Scanner Top Plate from the Scanner.
- From the back of the Spill Protection Gasket, remove only the front adhesive backing, as shown in the image below.

- Align and attach the front edge of the Scanner Top Plate to the inner bottom wall of the Spill Protection Gasket, as shown in the image below.

- Remove the adhesive backing from the rear and sides of the Spill Protection Gasket.
- Do the following:
- Attach the sides and then the rear inner bottom walls of the Spill Protection Gasket to the Scanner Top Plate.
- Press firmly on all sides of the attached Spill Protection Gasket. Ensure that there are no air bubbles.

- Do the following:
- Lower the Scanner Top Plate with the Spill Protection Gasket on the Scanner.
- Tuck the inner bottom walls of the Spill Protection Gasket into the gaps between the Scanner and the SelfServ Checkout Top Plate.

To install the Drip Channel, refer to Installing Drip Channel.
