Installing 7874 Scanner/Scale
To install the 7874 Scanner/Scale, follow these steps:
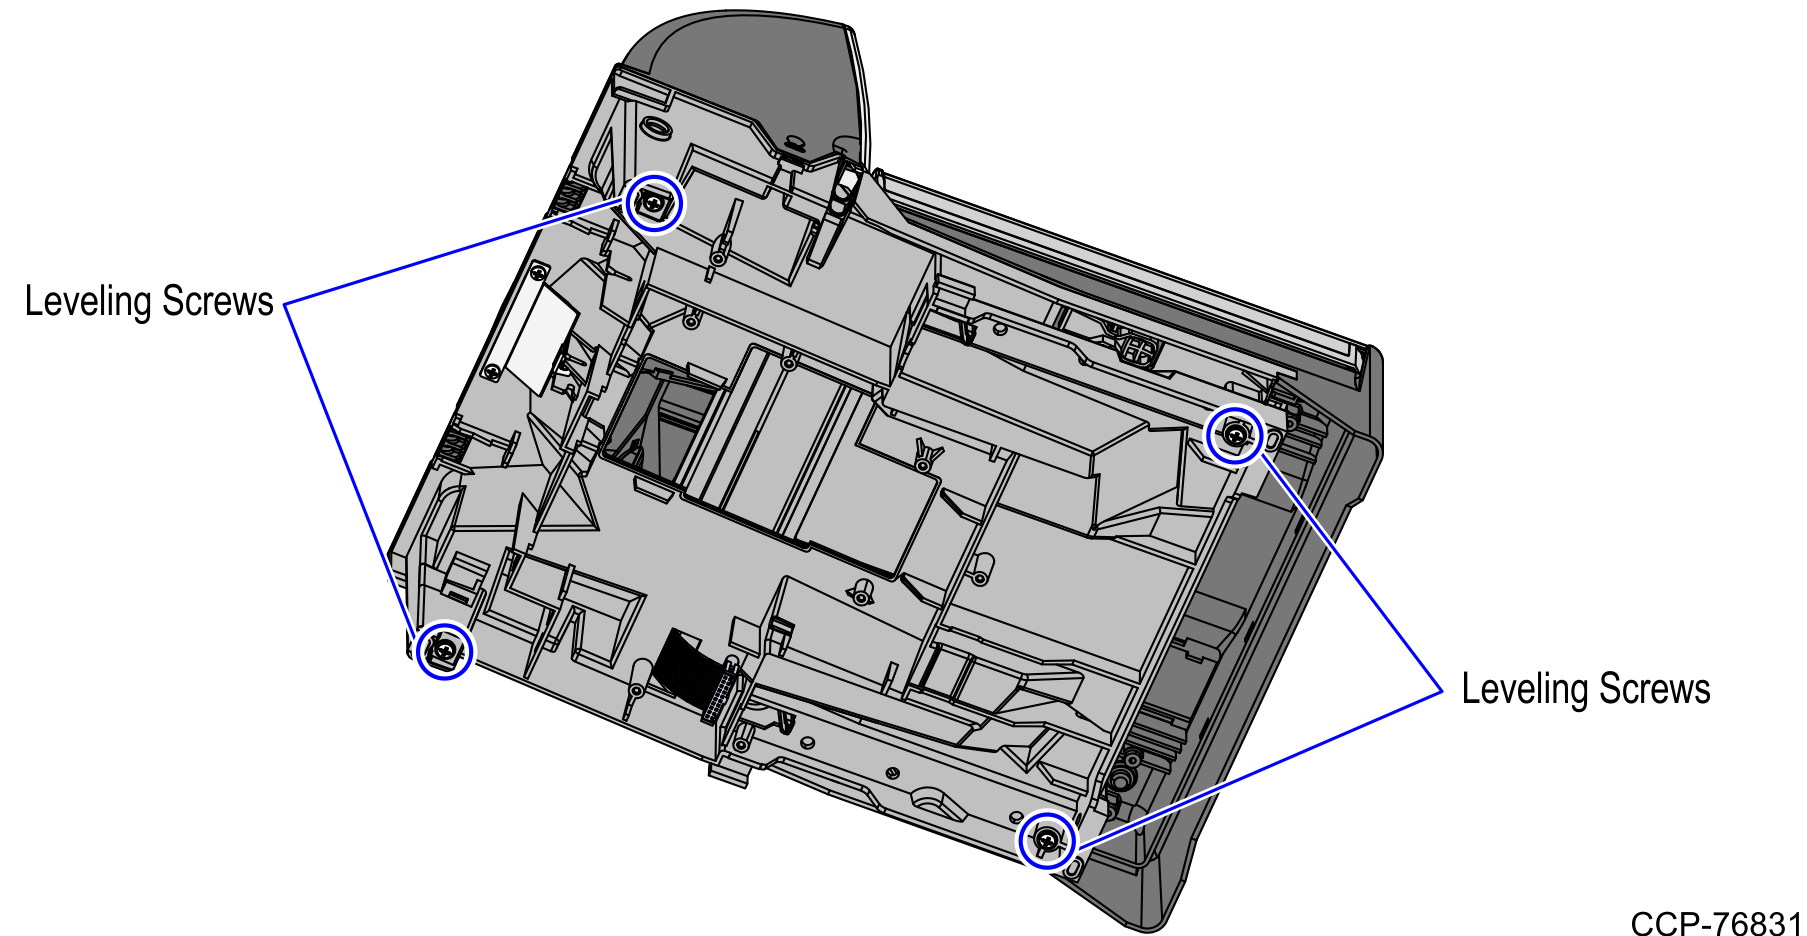
- Ensure that the Scanner/Scale is leveled by adjusting four leveling screws located on the bottom of the unit.
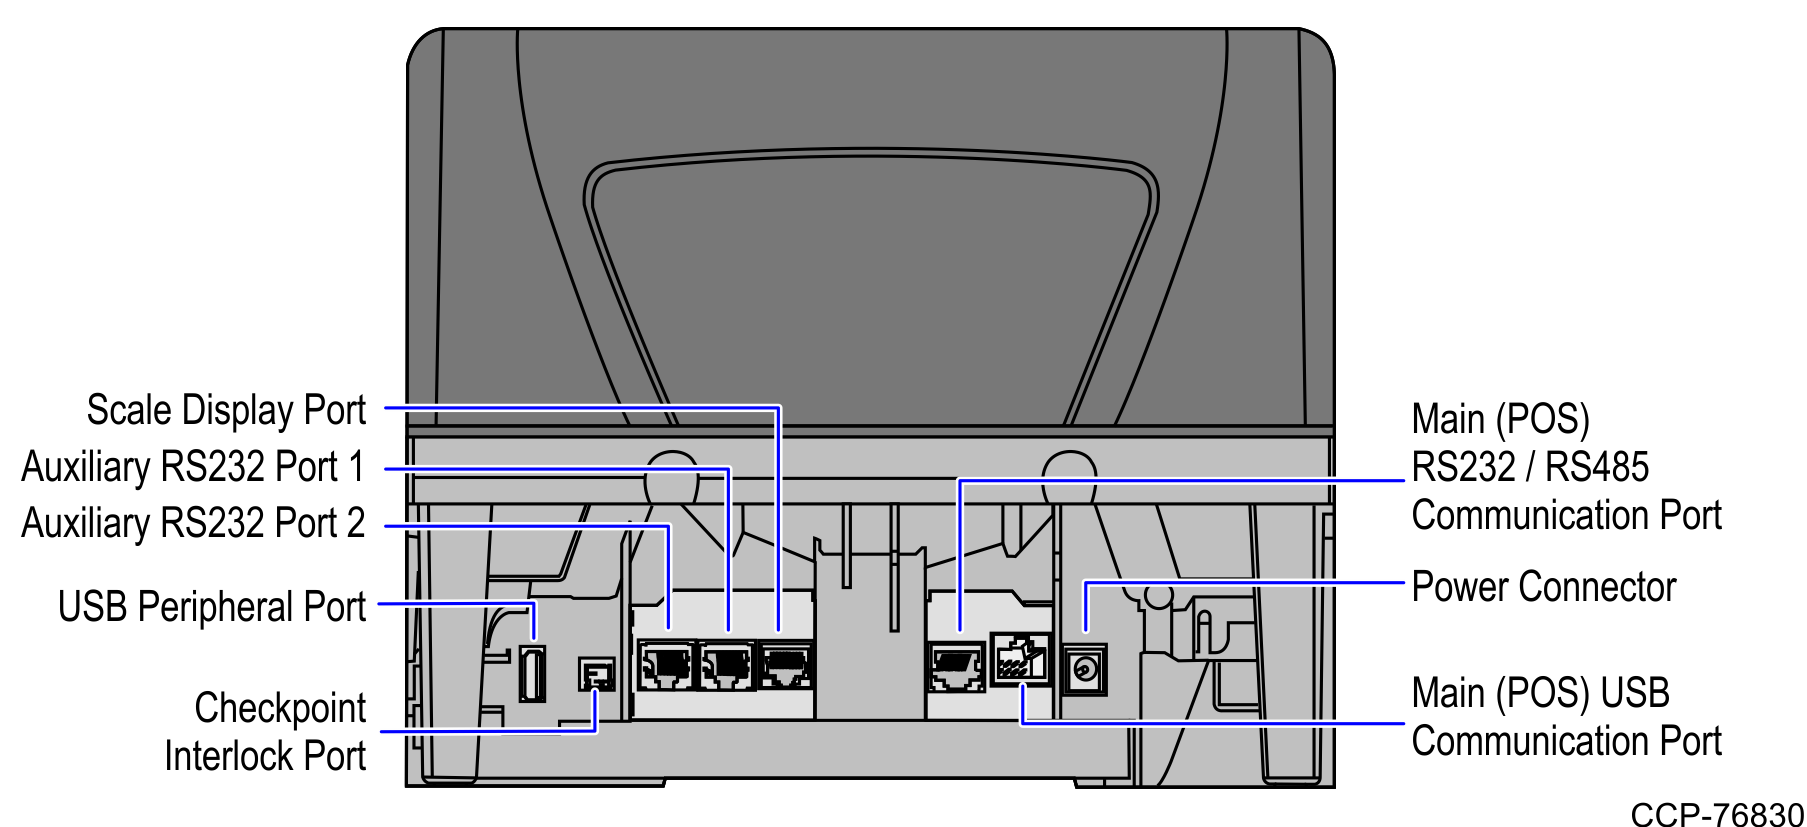
- Connect the Power cable to the Power Connector on the 7874 Scanner/Scale.
 Note
NoteTo streamline the installation procedure, install the Sensormatic® components before installing the Scanner/Scale in the SelfServ Checkout unit.
- Place the Scanner/Scale on the scanner bucket.

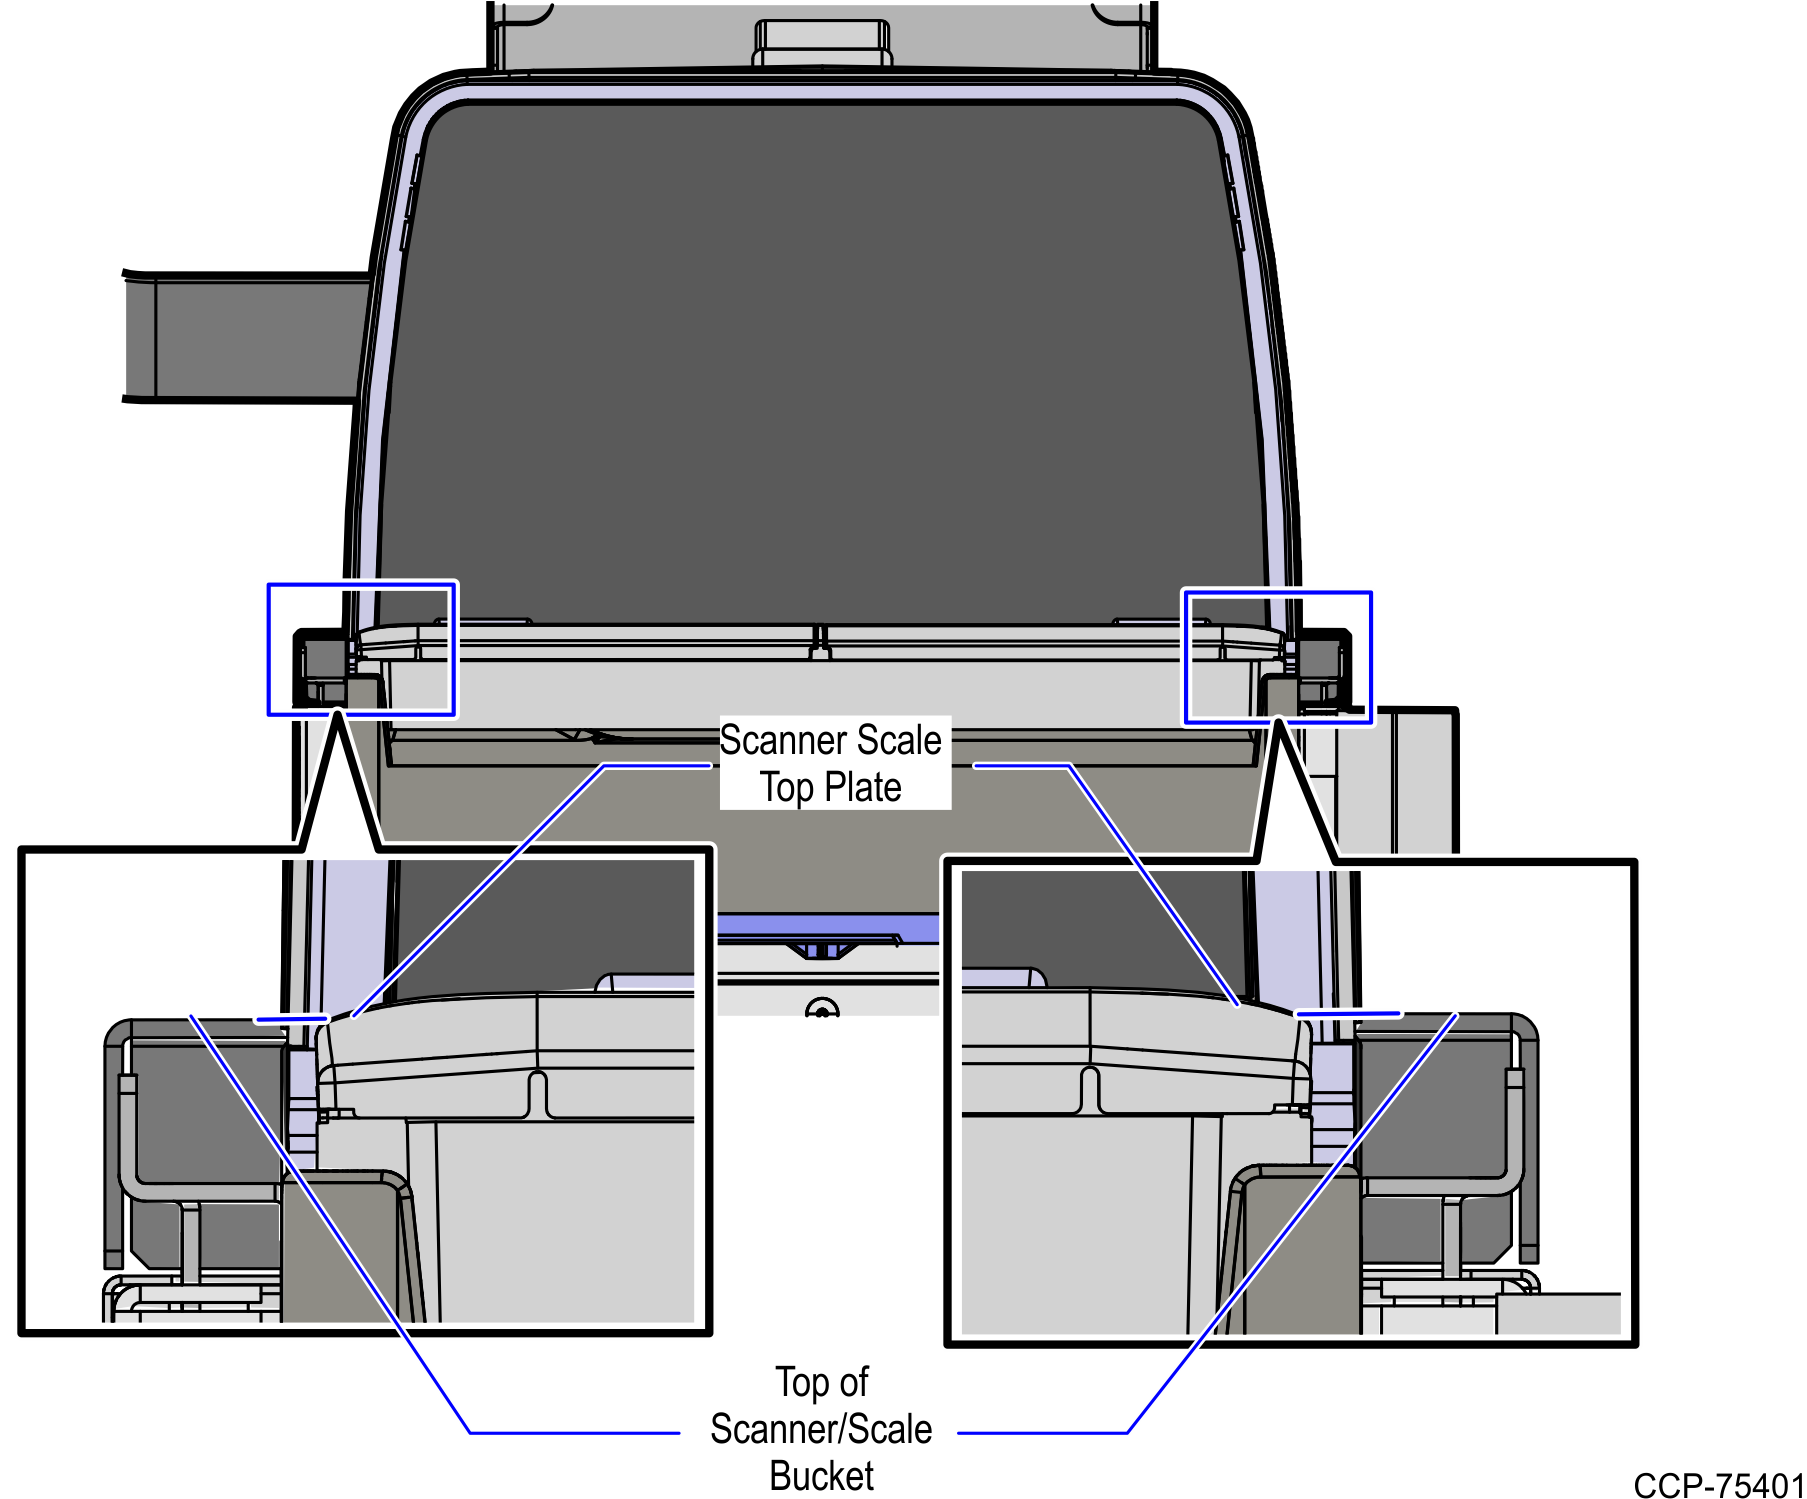
- Verify that the Scanner/Scale Top Plate is correctly aligned with the top of the Scanner/Scale bucket. The sides of the Top Plate must not be higher than the top surface of the SelfServ Checkout unit.Note
If necessary, remove the Scanner/Scale from the unit and adjust the leveling feet.
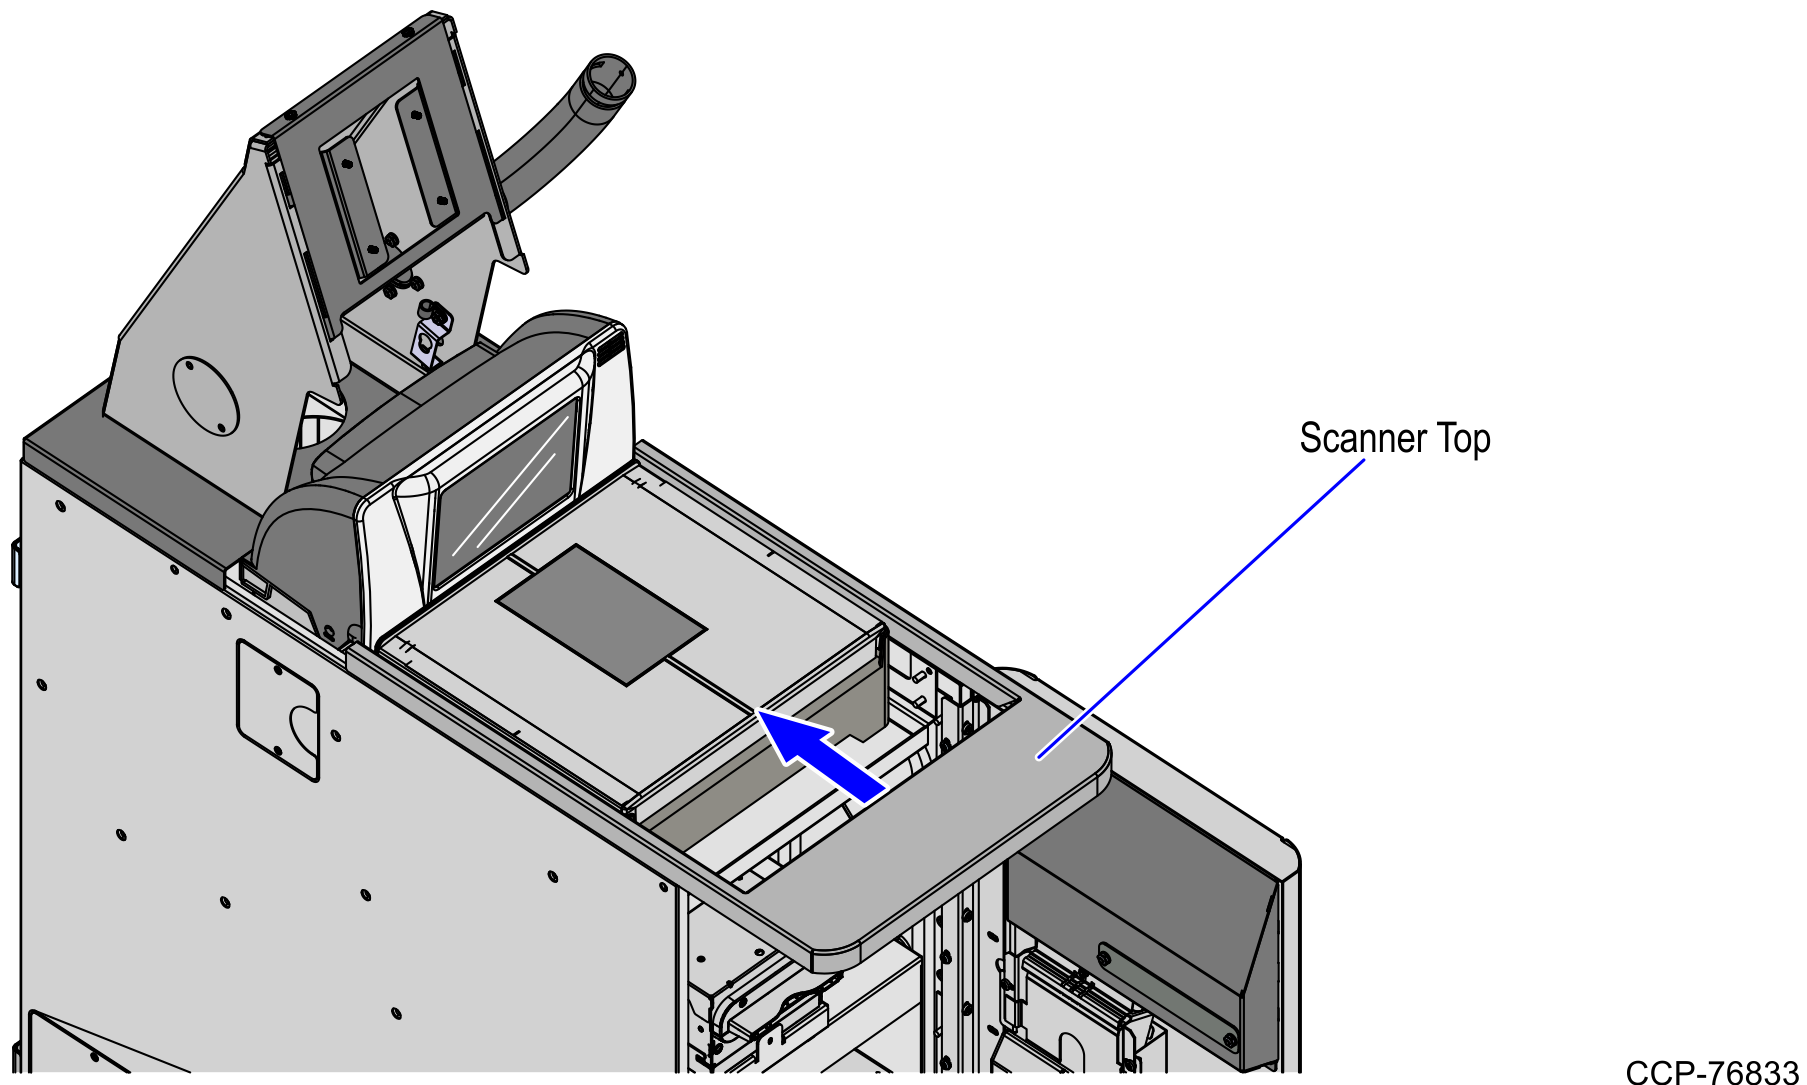
- Slide the Scanner top toward the Scanner/Scale.
 Note
NoteThe Scanner/Scale must be calibrated before the system goes live. For more information, refer to NCR RealScan Low Profile Bi-Optic Scanner/Scale (7874) User Guide (B005‑0000-1822).